springboot,mybatis,mybatisplus,swagger整合
這段時間準備自己搭建一個快速開發的專案,所以選擇用springboot與mybatisplus整合生成基礎的CRUD方法,利用swagger生成程式碼文件。一步一步把搭建過程記錄下來,希望能給初學者提供幫助。
-
搭建springboot
在idea上選擇新建工程

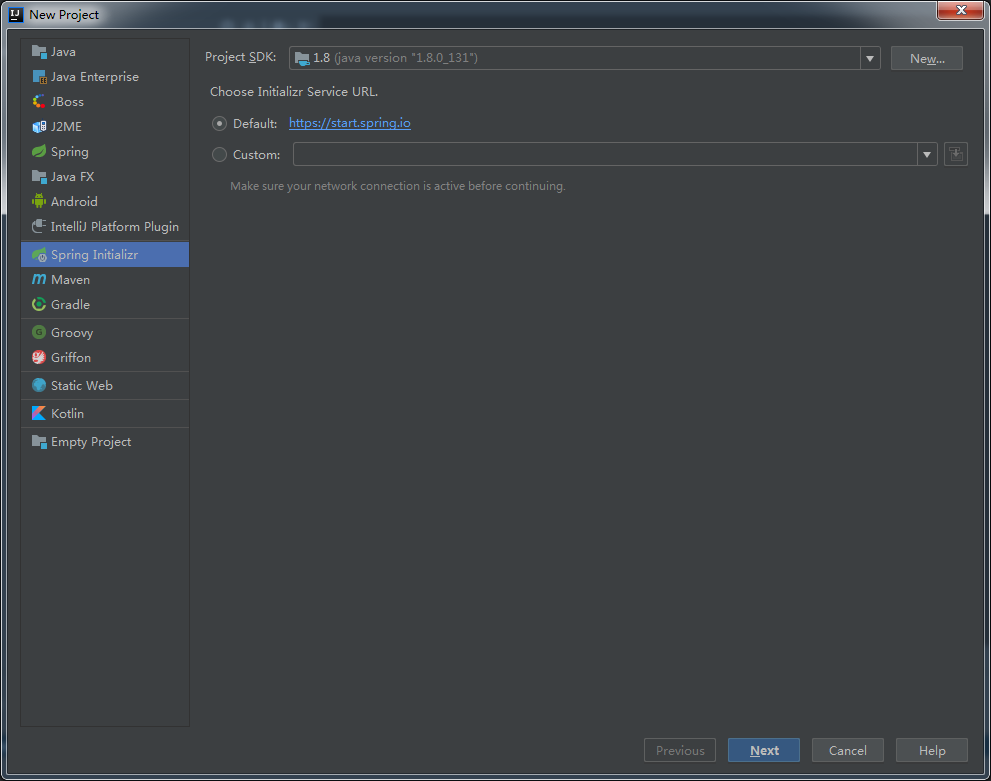
選擇Spring Initializr
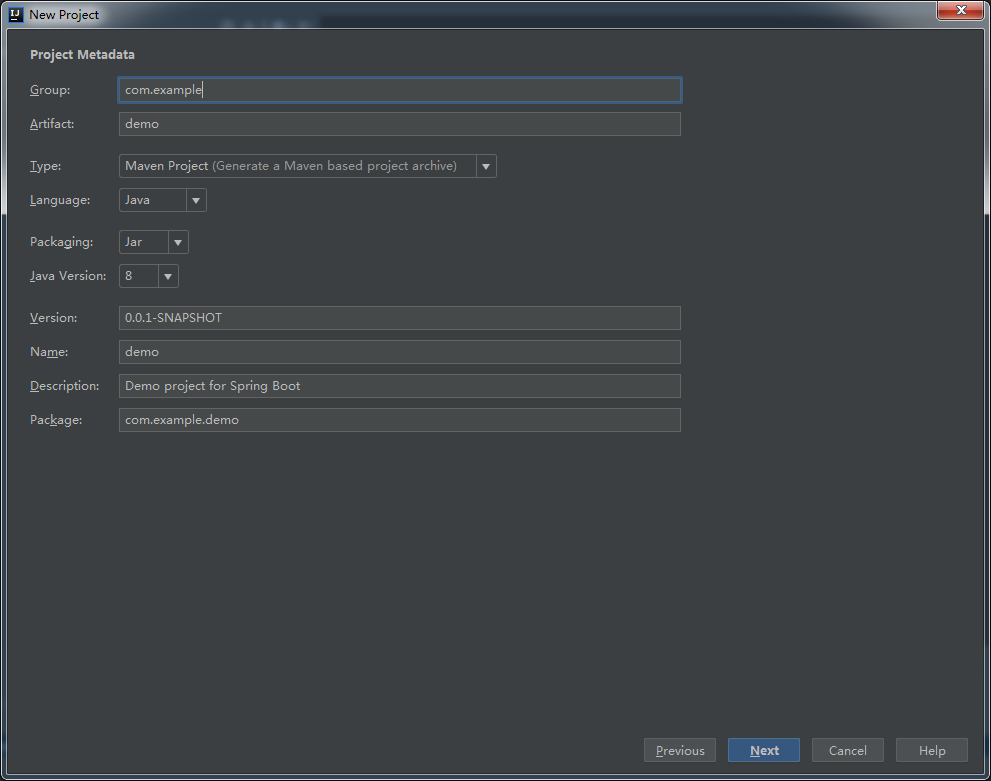
填寫maven的gav.
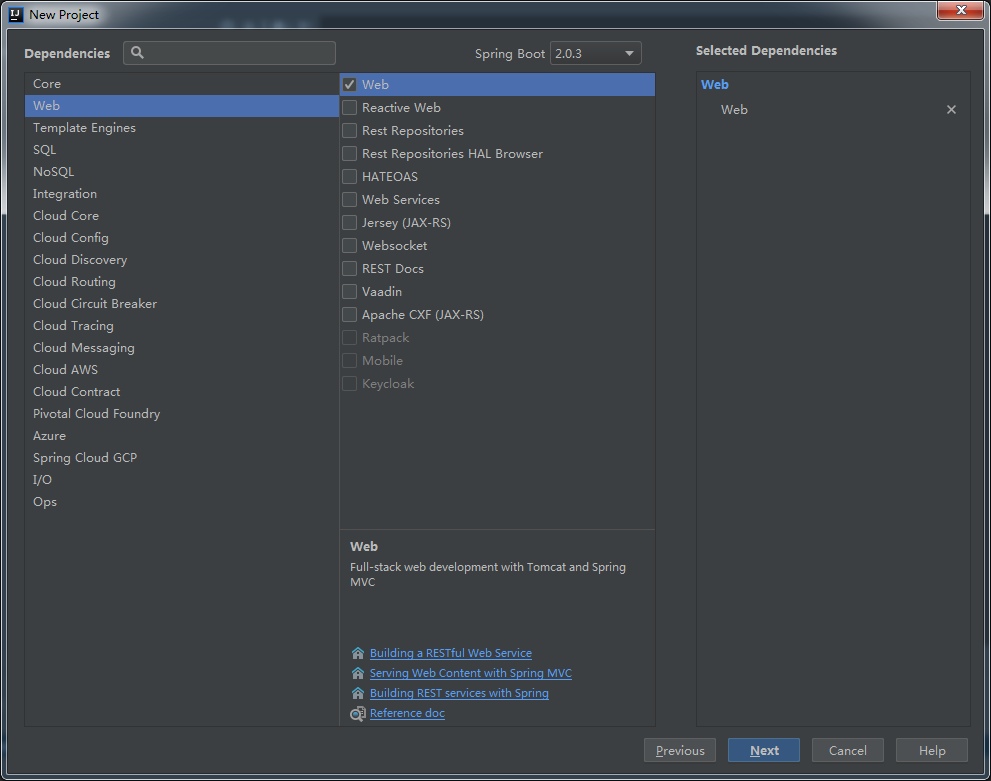
選擇需要的maven依賴
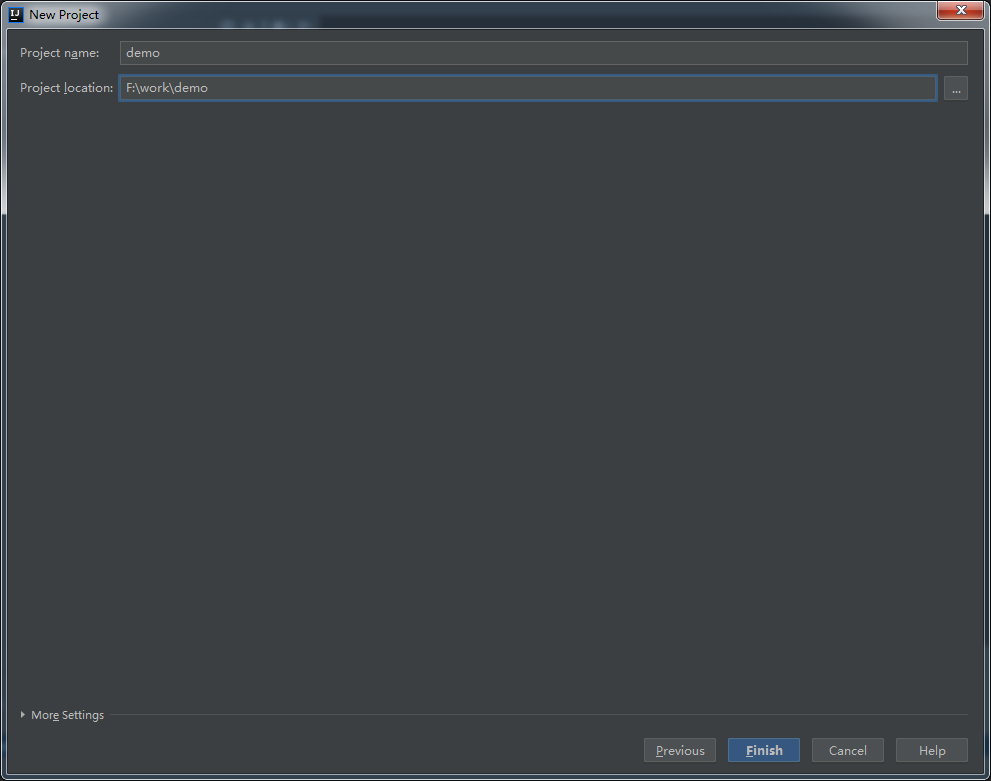
輸入專案名,點選Finish
最後看一下生成的目錄結構,為了方便,我把application.properties檔案改成了application.yml檔案

在applucation.yml檔案中加入專案路徑,埠號等配置
server:
  servlet:
    path: /demo #設定專案ContextPath
  port: 8080 #設定Tomcat埠,預設8080
  tomcat:
    uri-encoding: UTF-8 #設定Tomcat編碼
在springboot啟動類DemoApplication.java中新增掃描包路徑配置
package com.example.demo;

import org.springframework.boot.SpringApplication;
import org.springframework.boot.autoconfigure.SpringBootApplication;

@SpringBootApplication(scanBasePackages = "com.example")
public class DemoApplication {

    public static void main(String[] args) {
        SpringApplication.run(DemoApplication.class, args);
    }
}
建立一個測試用的controller介面,測試springboot專案是否搭建成功
package com.example.demo.controller;

import org.springframework.web.bind.annotation.RequestMapping;
import org.springframework.web.bind.annotation.RestController;

@RestController
@RequestMapping("user")
public class UserController {

    @RequestMapping("/index")
    public String index() {
         return "index";
    }

}
啟動後訪問: http://localhost:8080/demo/user/index
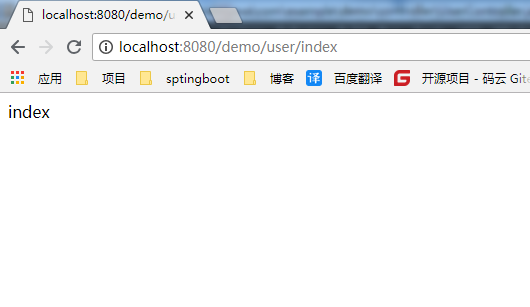
-
與swagger整合,自動生成文件
首先在pom.xml檔案中新增依賴
     <!--swagger-->
        <dependency>
            <groupId>io.springfox</groupId>
            <artifactId>springfox-swagger2</artifactId>
            <version>2.7.0</version>
        </dependency>
        <dependency>
            <groupId>io.springfox</groupId>
            <artifactId>springfox-swagger-ui</artifactId>
            <version>2.7.0</version>
        </dependency>
        <dependency>
            <groupId>net.minidev</groupId>
            <artifactId>json-smart</artifactId>
            <version>RELEASE</version>
            <scope>compile</scope>
        </dependency>
新增swagger配置類Swagger2Config.java
package com.example.demo.config;

import org.springframework.context.annotation.Bean;
import org.springframework.context.annotation.Configuration;
import springfox.documentation.builders.ApiInfoBuilder;
import springfox.documentation.builders.PathSelectors;
import springfox.documentation.builders.RequestHandlerSelectors;
import springfox.documentation.service.ApiInfo;
import springfox.documentation.spi.DocumentationType;
import springfox.documentation.spring.web.plugins.Docket;

@Configuration
public class Swagger2Config {

    @Bean
    public Docket createRestApi() {
        return new Docket(DocumentationType.SWAGGER_2).apiInfo(apiInfo())
                .select()
                .apis(RequestHandlerSelectors.basePackage("com.example.demo.controller"))
                .paths(PathSelectors.any())
                .build();
    }

    private ApiInfo apiInfo() {
        return new ApiInfoBuilder()
                .title("springboot專案api文件")
                .description("簡單優雅的restfun風格,http://www.cnblogs.com/congc/")
                .termsOfServiceUrl("http://www.cnblogs.com/congc/")
                .version("1.0")
                .build();
    }

}
在controller里加入swagger註解,新增文件資訊
package com.example.demo.controller;

import io.swagger.annotations.Api;
import io.swagger.annotations.ApiOperation;
import org.springframework.web.bind.annotation.RequestMapping;
import org.springframework.web.bind.annotation.RestController;

@Api(tags = "使用者Controller")
@RestController
@RequestMapping("user")
public class UserController {

    @RequestMapping("/index")
    @ApiOperation(value = "首頁", notes = "首頁", httpMethod = "GET")
    public String index() {
         return "index";
    }

}
@Api和@ApiOperation是最常用的兩個註解。下面是關於這兩個註解的簡單介紹
@ApiOperation() 用於方法;表示一個http請求的操作,value用於方法描述,notes用於提示內容,tags可以重新分組(視情況而用)

@Api() 用於類;表示標識這個類是swagger的資源,tags–表示說明,value–也是說明,可以使用tags替代
最後在springboot的啟動類上加入swagger的啟動註解
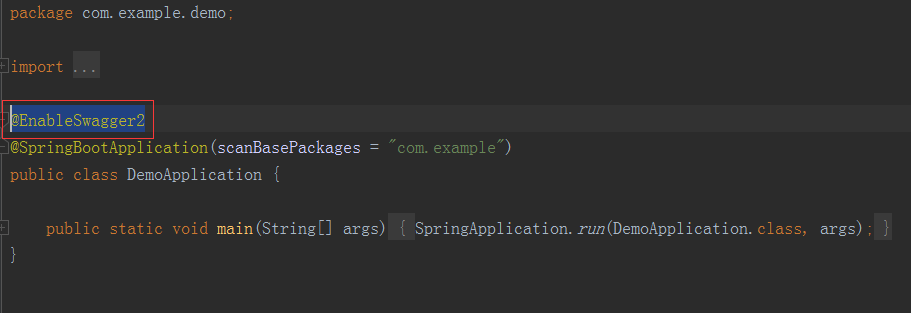
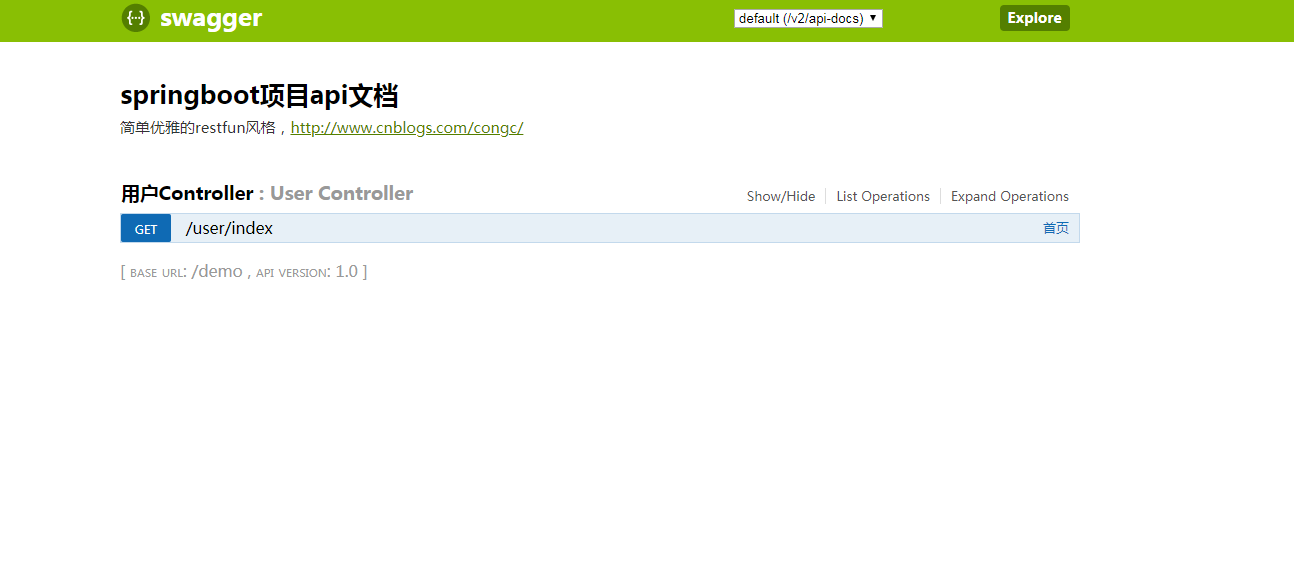
啟動後訪問http://localhost:8080/demo/swagger-ui.html,就可以看到swagger生成的文件地址了。
-
springboot與mybatis整合
首先加入依賴,資料庫選用mysql資料庫,連線池用druid,日誌logback(springboot預設就是logback)
<!-- mysql -->
<dependency>
    <groupId>mysql</groupId>
    <artifactId>mysql-connector-java</artifactId>
    <scope>runtime</scope>
</dependency>
<!-- druid連線池 -->
<dependency>
    <groupId>com.alibaba</groupId>
    <artifactId>druid</artifactId>
    <version>1.1.10</version>
</dependency>
<!-- mybatis -->
<dependency>
    <groupId>org.mybatis.spring.boot</groupId>
    <artifactId>mybatis-spring-boot-starter</artifactId>
    <version>1.3.2</version>
</dependency>
<!-- logging -->
<dependency>
    <groupId>org.springframework.boot</groupId>
    <artifactId>spring-boot-starter-logging</artifactId>
</dependency>
新增日誌配置檔案,檔案命名方式按照配置的日期命名,在配置info日誌和error日誌,區分info和error打出來的日誌檔案
<?xml version="1.0" encoding="UTF-8"?>
<!--
Copyright 2010-2011 The myBatis Team
Licensed under the Apache License, Version 2.0 (the "License");
you may not use this file except in compliance with the License.
You may obtain a copy of the License at
http://www.apache.org/licenses/LICENSE-2.0
Unless required by applicable law or agreed to in writing, software
distributed under the License is distributed on an "AS IS" BASIS,
WITHOUT WARRANTIES OR CONDITIONS OF ANY KIND, either express or implied.
See the License for the specific language governing permissions and
limitations under the License.
檔案命名方式按照配置的日期命名,
日誌列印的內容也按照配置的內容正確的列印了,
在配置info日誌和error日誌,
區分info和error打出來的日誌檔案d7
-->
<configuration>
<!--定義日誌檔案的儲存地址 勿在 LogBack 的配置中使用相對路徑-->
<property name="LOG_HOME" value="./log" />
<!-- 彩色日誌 -->
<!-- 彩色日誌依賴的渲染類 -->
<conversionRule conversionWord="clr" converterClass="org.springframework.boot.logging.logback.ColorConverter" />
<conversionRule conversionWord="wex" converterClass="org.springframework.boot.logging.logback.WhitespaceThrowableProxyConverter" />
<conversionRule conversionWord="wEx" converterClass="org.springframework.boot.logging.logback.ExtendedWhitespaceThrowableProxyConverter" />
<!-- 彩色日誌格式 -->
<property name="CONSOLE_LOG_PATTERN" value="${CONSOLE_LOG_PATTERN:-%clr(%d{yyyy-MM-dd HH:mm:ss.SSS}){faint} %clr(${LOG_LEVEL_PATTERN:-%5p}) %clr(${PID:- }){magenta} %clr(---){faint} %clr([%15.15t]){faint} %clr(%-40.40logger{39}){cyan} %clr(:){faint} %m%n${LOG_EXCEPTION_CONVERSION_WORD:-%wEx}}" />
<!-- Console 輸出設定 -->
<appender name="STDOUT" class="ch.qos.logback.core.ConsoleAppender">
<encoder>
<pattern>${CONSOLE_LOG_PATTERN}</pattern>
<charset>utf8</charset>
</encoder>
</appender>
<!-- 不用彩色控制檯輸出 -->
<!--<appender name="STDOUT" class="ch.qos.logback.core.ConsoleAppender">-->
<!--<encoder class="ch.qos.logback.classic.encoder.PatternLayoutEncoder">-->
<!--<!–格式化輸出:%d表示日期,%thread表示執行緒名,%-5level:級別從左顯示5個字元寬度%msg:日誌訊息,%n是換行符–>-->
<!--<pattern>%d{yyyy-MM-dd HH:mm:ss.SSS} [%thread] %-5level %logger{50} - %msg%n</pattern>-->
<!--</encoder>-->
<!--</appender>-->
<!-- 按照每天生成日誌檔案 -->
<appender name="DAYINFO" class="ch.qos.logback.core.rolling.RollingFileAppender">
<rollingPolicy class="ch.qos.logback.core.rolling.TimeBasedRollingPolicy">
<!--日誌檔案輸出的檔名-->
<FileNamePattern>${LOG_HOME}/info-log-%d{yyyy-MM-dd}.log</FileNamePattern>
<!--日誌檔案保留天數-->
<MaxHistory>30</MaxHistory>
</rollingPolicy>
<filter class="ch.qos.logback.classic.filter.LevelFilter">
<level>info</level>
<onMatch>ACCEPT</onMatch>
<onMismatch>DENY</onMismatch>
</filter>
<encoder class="ch.qos.logback.classic.encoder.PatternLayoutEncoder">
<!--格式化輸出:%d表示日期,%thread表示執行緒名,%-5level:級別從左顯示5個字元寬度%msg:日誌訊息,%n是換行符-->
<pattern>%d{yyyy-MM-dd HH:mm:ss.SSS} [%thread] %-5level %logger{50} - %msg%n</pattern>
</encoder>
<!--日誌檔案最大的大小-->
<triggeringPolicy class="ch.qos.logback.core.rolling.SizeBasedTriggeringPolicy">
<MaxFileSize>10MB</MaxFileSize>
</triggeringPolicy>
</appender>
<appender name="DAYERROR" class="ch.qos.logback.core.rolling.RollingFileAppender">
<rollingPolicy class="ch.qos.logback.core.rolling.TimeBasedRollingPolicy">
<!--日誌檔案輸出的檔名-->
<FileNamePattern>${LOG_HOME}/error-log-%d{yyyy-MM-dd}.log</FileNamePattern>
<!--日誌檔案保留天數-->
<MaxHistory>30</MaxHistory>
</rollingPolicy>
<filter class="ch.qos.logback.classic.filter.LevelFilter">
<level>error</level>
<onMatch>ACCEPT</onMatch>
<onMismatch>DENY</onMismatch>
</filter>
<encoder class="ch.qos.logback.classic.encoder.PatternLayoutEncoder">
<!--格式化輸出:%d表示日期,%thread表示執行緒名,%-5level:級別從左顯示5個字元寬度%msg:日誌訊息,%n是換行符-->
<pattern>%d{yyyy-MM-dd HH:mm:ss.SSS} [%thread] %-5level %logger{50} - %msg%n</pattern>
</encoder>
<!--日誌檔案最大的大小-->
<triggeringPolicy class="ch.qos.logback.core.rolling.SizeBasedTriggeringPolicy">
<MaxFileSize>10MB</MaxFileSize>
</triggeringPolicy>
</appender>
<!-- 日誌輸出級別 -->
<root level="INFO">
<appender-ref ref="STDOUT" />
<appender-ref ref="DAYERROR" />
<appender-ref ref="DAYINFO" />
</root>
</configuration>
在application.yum檔案中加入資料庫連線和mybatis的配置。
spring:
  datasource:
      # 配置資料來源型別
      type: com.alibaba.druid.pool.DruidDataSource
      driver-class-name: com.mysql.jdbc.Driver
      url: jdbc:mysql://localhost:3306/test?useUnicode=true&characterEncoding=UTF-8
      username: root
      password: root
      # 初始化,最小,最大連線數
      initialSize: 3
      minidle: 3
      maxActive: 18
      # 獲取資料庫連線等待的超時時間
      maxWait: 60000
      # 配置多久進行一次檢測,檢測需要關閉的空閒連線 單位毫秒
      timeBetweenEvictionRunsMillis: 60000
      validationQuery: SELECT 1 FROM dual
      # 配置監控統計攔截的filters,去掉後,監控介面的sql無法統計
      filters: stat,wall,log4j
#mybatis配置
mybatis:
  # 配置對映類所在包名
  type-aliases-package: com.example.demo.entity
  # 配置mapper xml檔案所在路徑,這裡是一個數組
  mapper-locations: classpath:mybatis/mapper/*.xml
  #config-location: classpath:mybatis/mybatis-config.xml
建立User實體
package com.example.demo.entity;

public class User {
    private Integer id;

    private String username;

    private String password;

    public Integer getId() {
        return id;
    }

    public void setId(Integer id) {
        this.id = id;
    }

    public String getUsername() {
        return username;
    }

    public void setUsername(String username) {
        this.username = username;
    }

    public String getPassword() {
        return password;
    }

    public void setPassword(String password) {
        this.password = password;
    }
}
建立UserController
package com.example.demo.controller;

import com.example.demo.entity.User;
import com.example.demo.service.UserService;
import io.swagger.annotations.Api;
import io.swagger.annotations.ApiOperation;
import org.springframework.web.bind.annotation.RequestMapping;
import org.springframework.web.bind.annotation.RestController;

import javax.annotation.Resource;

@Api(tags = "使用者Controller")
@RestController
@RequestMapping("user")
public class UserController {

    @Resource
    private UserService userService;

    @RequestMapping("/findById")
    @ApiOperation(value = "查詢使用者", notes = "查詢使用者", httpMethod = "GET")
    public User index(int id) {
        return userService.findById(id);
    }

    @RequestMapping("/index")
    @ApiOperation(value = "首頁", notes = "首頁", httpMethod = "GET")
    public String index() {
         return "index";
    }

}
建立UserServiceImpl與UserSerivice介面
package com.example.demo.service.impl;

import com.example.demo.entity.User;
import com.example.demo.mapper.UserMapper;
import com.example.demo.service.UserService;
import org.springframework.stereotype.Service;

import javax.annotation.Resource;

@Service
public class UserServiceImpl implements UserService {

    @Resource
    private UserMapper userMapper;

    @Override
    public User findById(int id) {
        return userMapper.findById(id);
    }
}
建立UserMapper
package com.example.demo.mapper;

import com.example.demo.entity.User;
import org.apache.ibatis.annotations.Select;
import org.springframework.stereotype.Component;

@Component
public interface UserMapper  {

    @Select("select * from user where id = #{id}")
    User findById(int id);
}
此時看一下目錄結構
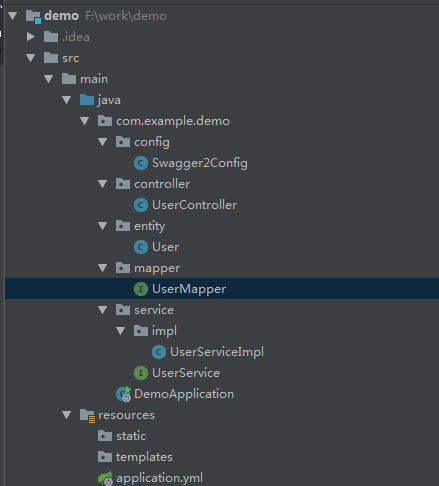
最後在springboot的啟動類中加入Mapper掃描路徑
package com.example.demo;

import org.mybatis.spring.annotation.MapperScan;
import org.springframework.boot.SpringApplication;
import org.springframework.boot.autoconfigure.SpringBootApplication;
import springfox.documentation.swagger2.annotations.EnableSwagger2;

@EnableSwagger2
@MapperScan("com.example.demo.mapper")
@SpringBootApplication(scanBasePackages = "com.example.demo")
public class DemoApplication {

    public static void main(String[] args) {
        SpringApplication.run(DemoApplication.class, args);
    }
}
執行啟動後,訪問http://localhost:8080/demo/user/findById?id=1
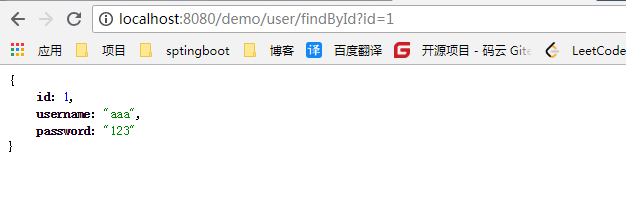
別忘記建立資料庫與資料表!!!
至此與mybatis整合完畢。
-
最後與mybatis-plus整合
還是先在pom.xml檔案中加入需要的依賴,第一個是mybatis-plus的依賴,加入此依賴可以不用加mybatis的依賴及Mybatis-Spring的依賴。後面兩個是mybatis-plus自動生成程式碼所需的依賴,後面會用到。
    <!-- mybatis-plus 不需要新增 Mybatis及Mybatis-Spring依賴,Mybatis-Plus會自動維護-->
        <dependency>
            <groupId>com.baomidou</groupId>
            <artifactId>mybatis-plus-boot-starter</artifactId>
            <version>2.2.0</version>
        </dependency>
        <!-- mybatis-plus 程式碼生成配置-->
        <!-- 模板引擎 -->
        <dependency>
            <groupId>org.apache.velocity</groupId>
            <artifactId>velocity-engine-core</artifactId>
            <version>2.0</version>
        </dependency>
        <!-- 模板引擎,需要指定 mpg.setTemplateEngine(new FreemarkerTemplateEngine()); -->
        <dependency>
            <groupId>org.freemarker</groupId>
            <artifactId>freemarker</artifactId>
            <version>2.3.28</version>
        </dependency>
然後在application.yum檔案中加入mybatis-plus的配置,刪除掉mybatis的配置
# mybatis配置
#mybatis:
#  # 配置對映類所在包名
#  type-aliases-package: com.example.demo.entity
#  # 配置mapper xml檔案所在路徑,這裡是一個數組
#  mapper-locations: classpath:mybatis/mapper/*.xml
#  #config-location: classpath:mybatis/mybatis-config.xml
mybatis-plus:
  # 如果是放在src/main/java目錄下 classpath:/com/yourpackage/*/mapper/*Mapper.xml
  # 如果是放在resource目錄 classpath:/mapper/*Mapper.xml
  mapper-locations: classpath:/mapper/*Mapper.xml
  #實體掃描,多個package用逗號或者分號分隔
  typeAliasesPackage: com.example.demo.entity
  global-config:
    #主鍵型別  0:"資料庫ID自增", 1:"使用者輸入ID",2:"全域性唯一ID (數字型別唯一ID)", 3:"全域性唯一ID UUID";
    id-type: 3
    #欄位策略 0:"忽略判斷",1:"非 NULL 判斷"),2:"非空判斷"
    field-strategy: 2
    #駝峰下劃線轉換
    db-column-underline: true
    #mp2.3+ 全域性表字首 mp_
    #table-prefix: mp_
    #重新整理mapper 除錯神器
    #refresh-mapper: true
    #資料庫大寫下劃線轉換
    #capital-mode: true
    # Sequence序列介面實現類配置
    key-generator: com.baomidou.mybatisplus.incrementer.OracleKeyGenerator
    #邏輯刪除配置(下面3個配置)
    logic-delete-value: 1
    logic-not-delete-value: 0
    sql-injector: com.baomidou.mybatisplus.mapper.LogicSqlInjector
    #自定義填充策略介面實現
#    meta-object-handler: com.baomidou.springboot.MyMetaObjectHandler
  configuration:
    #配置返回資料庫(column下劃線命名&&返回java實體是駝峰命名),自動匹配無需as(沒開啟這個,SQL需要寫as: select user_id as userId)
    map-underscore-to-camel-case: true
    cache-enabled: false
    #配置JdbcTypeForNull, oracle資料庫必須配置
    jdbc-type-for-null: 'null'
加下來讓userMapper繼承BaseMapper<User>類,變可以使用BaseMapper中提供的方法了。
這裡有一個坑,如果繼承的時候沒有新增泛型,執行時就會報錯
org.springframework.beans.factory.UnsatisfiedDependencyException: Error creating bean with name 'documentationPluginsBootstrapper' defined in URL [jar:file:/D:/maven-repository/repository/io/springfox/springfox-spring-web/2.7.0/springfox-spring-web-2.7.0.jar!/springfox/documentation/spring/web/plugins/DocumentationPluginsBootstrapper.class]: Unsatisfied dependency expressed through constructor parameter 1; nested exception is org.springframework.beans.factory.UnsatisfiedDependencyException: Error creating bean with name 'webMvcRequestHandlerProvider' defined in URL [jar:file:/D:/maven-repository/repository/io/springfox/springfox-spring-web/2.7.0/springfox-spring-web-2.7.0.jar!/springfox/documentation/spring/web/plugins/WebMvcRequestHandlerProvider.class]: Unsatisfied dependency expressed through constructor parameter 0; nested exception is org.springframework.beans.factory.BeanCreationException: Error creating bean with name 'requestMappingHandlerMapping' defined in class path resource [org/springframework/boot/autoconfigure/web/servlet/WebMvcAutoConfiguration$EnableWebMvcConfiguration.class]: Invocation of init method failed; nested exception is java.lang.IllegalStateException: Ambiguous mapping. Cannot map 'userController' method
public java.lang.Integer com.example.demo.controller.UserController.insert()
to {[/user/findById]}: There is already 'userController' bean method
public com.example.demo.entity.User com.example.demo.controller.UserController.index(int) mapped.
UserMapper
package com.example.demo.mapper;

import com.baomidou.mybatisplus.mapper.BaseMapper;
import com.example.demo.entity.User;
import org.springframework.stereotype.Component;

@Component
public interface UserMapper extends BaseMapper<User> {

}
UserServiceImpl
package com.example.demo.service.impl;

import com.example.demo.entity.User;
import com.example.demo.mapper.UserMapper;
import com.example.demo.service.UserService;
import org.springframework.stereotype.Service;

import javax.annotation.Resource;

@Service
public class UserServiceImpl implements UserService {

    @Resource
    private UserMapper userMapper;

    @Override
    public User findById(int id) {
        return userMapper.selectById(id);
    }
}
執行成功
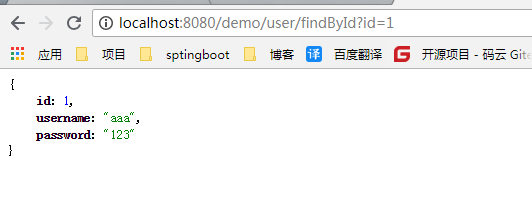
接下來加入程式碼生成器類
MpGenerator類
package com.uinnova.config;

import java.util.ArrayList;
import java.util.HashMap;
import java.util.List;
import java.util.Map;

import com.baomidou.mybatisplus.generator.AutoGenerator;
import com.baomidou.mybatisplus.generator.InjectionConfig;
import com.baomidou.mybatisplus.generator.config.*;
import com.baomidou.mybatisplus.generator.config.converts.MySqlTypeConvert;
import com.baomidou.mybatisplus.generator.config.po.TableInfo;
import com.baomidou.mybatisplus.generator.config.rules.DbColumnType;
import com.baomidou.mybatisplus.generator.config.rules.DbType;
import com.baomidou.mybatisplus.generator.config.rules.NamingStrategy;

/**
 * <p>
 * 程式碼生成器演示
 * </p>
 */
public class MpGenerator {
    /**
     * <p>
     * MySQL 生成演示
     * </p>
     */
    public static void main(String[] args) {
        AutoGenerator mpg = new AutoGenerator();
        // 選擇 freemarker 引擎,預設 Veloctiy
        // mpg.setTemplateEngine(new FreemarkerTemplateEngine());

        // 全域性配置
        GlobalConfig gc = new GlobalConfig();
        gc.setOutputDir("F:\\work\\springboot\\src\\main\\java");
        gc.setFileOverride(true);
        gc.setActiveRecord(true);// 不需要ActiveRecord特性的請改為false
        gc.setEnableCache(false);// XML 二級快取
        gc.setBaseResultMap(true);// XML ResultMap
        gc.setBaseColumnList(true);// XML columList
        // .setKotlin(true) 是否生成 kotlin 程式碼
        gc.setAuthor("LiuCong");

        // 自定義檔案命名,注意 %s 會自動填充表實體屬性!
        gc.setMapperName("%sMapper");
        gc.setXmlName("%sMapper");
        gc.setServiceName("%sService");
        gc.setServiceImplName("%sServiceImpl");
        gc.setControllerName("%sController");
        mpg.setGlobalConfig(gc);

        // 資料來源配置
        DataSourceConfig dsc = new DataSourceConfig();
        dsc.setDbType(DbType.MYSQL);
        dsc.setTypeConvert(new MySqlTypeConvert() {
            // 自定義資料庫表字段型別轉換【可選】
            @Override
            public DbColumnType processTypeConvert(String fieldType) {
                System.out.println("轉換型別:" + fieldType);
                // if ( fieldType.toLowerCase().contains( "tinyint" ) ) {
                //    return DbColumnType.BOOLEAN;
                // }
                // 注意!!processTypeConvert 存在預設型別轉換,如果不是你要的效果請自定義返回、非如下直接返回。
                return super.processTypeConvert(fieldType);
            }
        });
        dsc.setDriverName("com.mysql.jdbc.Driver");
        dsc.setUsername("root");
        dsc.setPassword("root");
        dsc.setUrl("jdbc:mysql://localhost:3306/test?characterEncoding=utf8");
        mpg.setDataSource(dsc);

        // 策略配置
        StrategyConfig strategy = new StrategyConfig();
        // strategy.setCapitalMode(true);// 全域性大寫命名 ORACLE 注意
        // strategy.setTablePrefix(new String[]{"tlog_", "tsys_"});// 此處可以修改為您的表字首
        strategy.setNaming(NamingStrategy.underline_to_camel);// 表名生成策略
        strategy.setInclude(new String[]{"user"}); // 需要生成的表
        // strategy.setExclude(new String[]{"test"}); // 排除生成的表
        // 自定義實體父類
        // strategy.setSuperEntityClass("com.baomidou.demo.TestEntity");
        // 自定義實體,公共欄位
        // strategy.setSuperEntityColumns(new String[] { "test_id", "age" });
        // 自定義 mapper 父類
        // strategy.setSuperMapperClass("com.baomidou.demo.TestMapper");
        // 自定義 service 父類
        // strategy.setSuperServiceClass("com.baomidou.demo.TestService");
        // 自定義 service 實現類父類
        // strategy.setSuperServiceImplClass("com.baomidou.demo.TestServiceImpl");
        // 自定義 controller 父類
        // strategy.setSuperControllerClass("com.baomidou.demo.TestController");
        // 【實體】是否生成欄位常量(預設 false)
        // public static final String ID = "test_id";
        // strategy.setEntityColumnConstant(true);
        // 【實體】是否為構建者模型(預設 false)
        // public User setName(String name) {this.name = name; return this;}
        // strategy.setEntityBuilderModel(true);
        mpg.setStrategy(strategy);

        // 包配置
        PackageConfig pc = new PackageConfig();
        pc.setParent("com.uinnova");
        pc.setController("controller");
        pc.setEntity("entity");
        pc.setXml("mapper");
        pc.setService("service");
        mpg.setPackageInfo(pc);

        // 注入自定義配置,可以在 VM 中使用 cfg.abc 【可無】
        InjectionConfig cfg = new InjectionConfig() {
            @Override
            public void initMap() {
                Map<String, Object> map = new HashMap<String, Object>();
                map.put("abc", this.getConfig().getGlobalConfig().getAuthor() + "-mp");
                this.setMap(map);
            }
        };

        // 自定義 xxList.jsp 生成
        List<FileOutConfig> focList = new ArrayList<FileOutConfig>();
        /*focList.add(new FileOutConfig("/templates/") {
            @Override
            public String outputFile(TableInfo tableInfo) {
                // 自定義輸入檔名稱
                return "F:\\work\\springboot\\" + tableInfo.getEntityName() + ".jsp";
            }
        });
        cfg.setFileOutConfigList(focList);
        mpg.setCfg(cfg);*/

        // 調整 xml 生成目錄演示
        focList = new ArrayList<FileOutConfig>();
        focList.add(new FileOutConfig("/templates/mapper.xml.vm") {
            @Override
            public String outputFile(TableInfo tableInfo) {
                return "F:\\work\\springboot\\src\\main\\resources"+ "/mapper/" + tableInfo.getEntityName() + "Mapper.xml";
            }
        });
        cfg.setFileOutConfigList(focList);
        mpg.setCfg(cfg);

        // 關閉預設 xml 生成,調整生成 至 根目錄
        TemplateConfig tc = new TemplateConfig();
        tc.setXml(null);
        mpg.setTemplate(tc);

        // 自定義模板配置,可以 copy 原始碼 mybatis-plus/src/main/resources/templates 下面內容修改,
        // 放置自己專案的 src/main/resources/templates 目錄下, 預設名稱一下可以不配置,也可以自定義模板名稱
        // TemplateConfig tc = new TemplateConfig();
        // tc.setController("...");
        // tc.setEntity("...");
        // tc.setMapper("...");
        // tc.setXml("...");
        // tc.setService("...");
        // tc.setServiceImpl("...");
        // 如上任何一個模組如果設定 空 OR Null 將不生成該模組。
        // mpg.setTemplate(tc);

        // 執行生成
        mpg.execute();

        // 列印注入設定【可無】
        System.err.println(mpg.getCfg().getMap().get("abc"));
    }

}
執行後就可以生成通用的controller層service層mapper層和entity程式碼了。
=============================end=============================
