關於自動調整內邊距問題的細節
iOS 7 以後 , 蘋果推出了 控制器 automaticallyAdjustsScrollViewInsets 屬性 , 目的在於自動幫我們調整所有繼承於 scrollView控制元件的內邊距 ,比如tableView , collectionView . automaticallyAdjustsScrollViewInsets 預設開啟 .
具體例子1 :
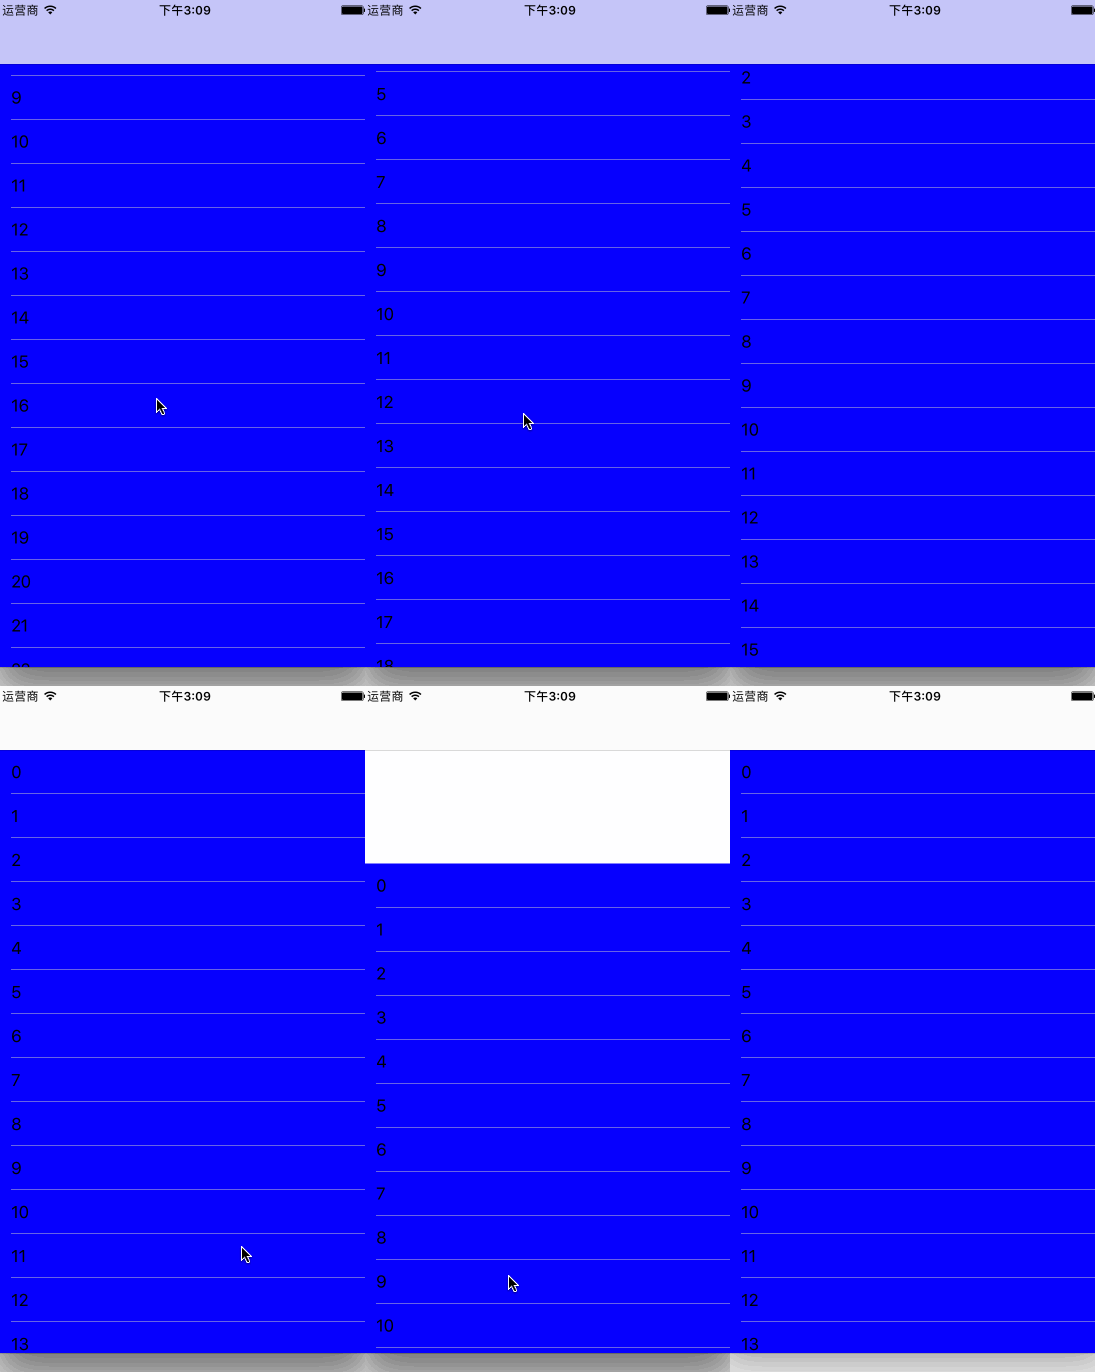
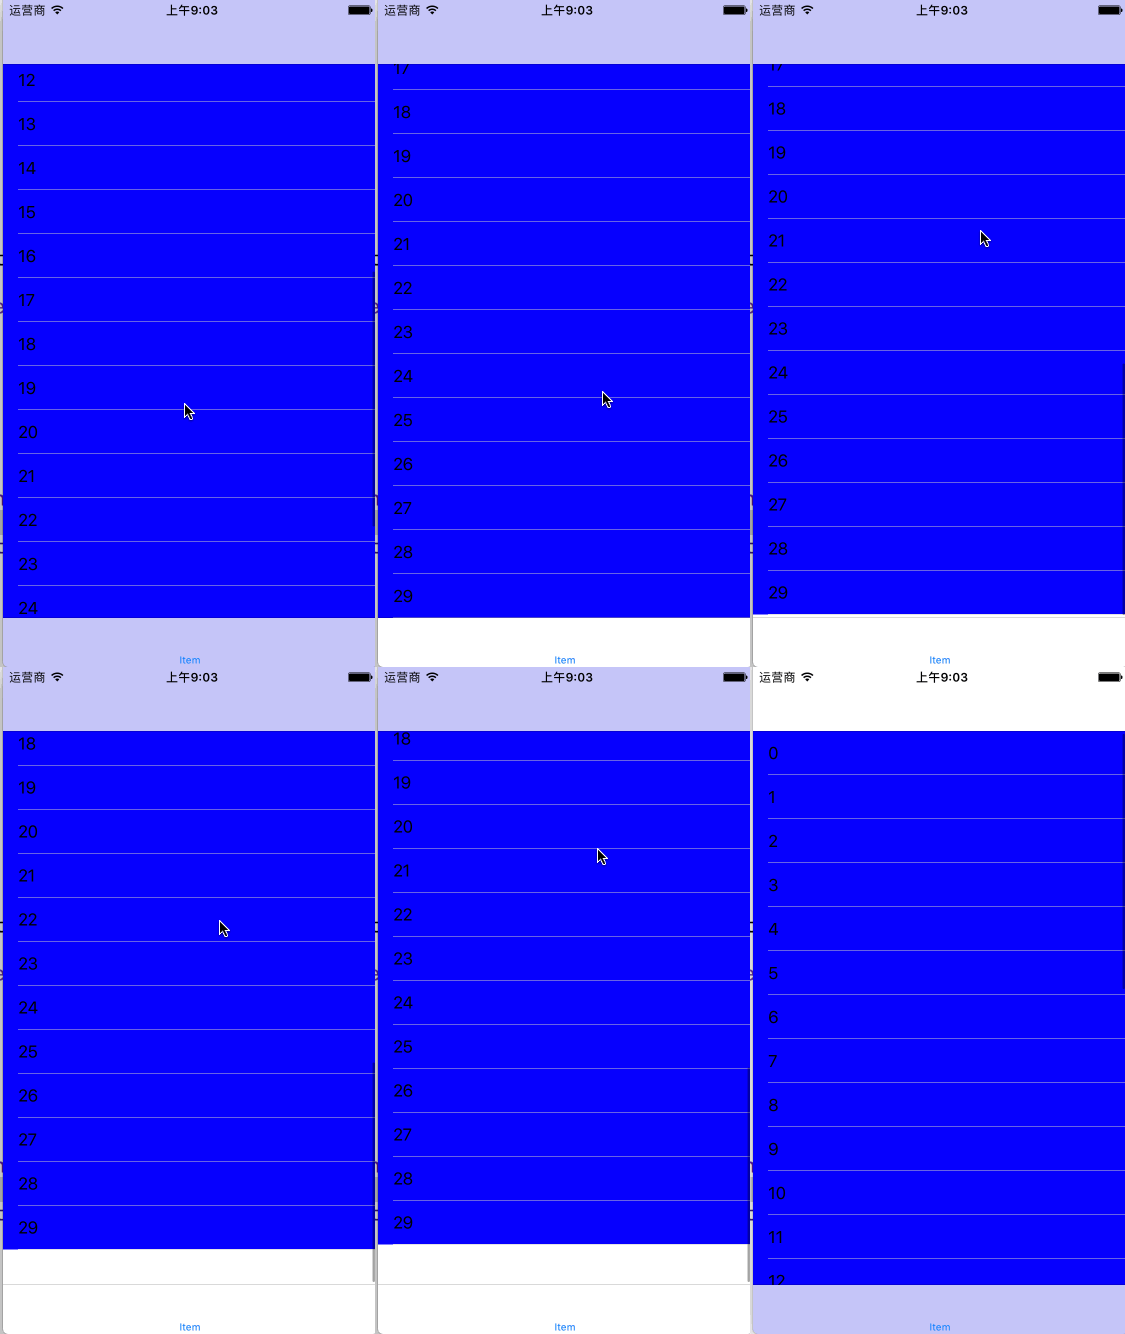
預設情況下 automaticallyAdjustsScrollViewInsets = YES ,蘋果為了使得在scrollView上的子控制元件能夠比較美觀的佈局 , 而不出現一開始展示就出現了導航欄遮蓋控制元件的現象 , 比如你在scrollView上添加了控制元件 , Y值小於64 , 那麼就會被遮擋 . 所以在有導航欄情況下 , 蘋果直接幫我們加了64的內邊距 , 咱們寫的時候從視覺上看就是導航欄底部是 Y = 0
下述tableView的cell本應從頂部開始佈局 , 然後由於自動調整了內邊距 ,導致位置下移 . 而滑動時出現穿透效果 , 說明導航欄下面部分也是屬於tableView的 , 而並不是將tableView整體下移了64
UITableView *tableView = [[UITableView alloc]initWithFrame:[UIScreen mainScreen].bounds style:UITableViewStylePlain];
tableView.delegate = self;
tableView.dataSource = self 列印結果如下: 頂部內邊距為自動調整 64
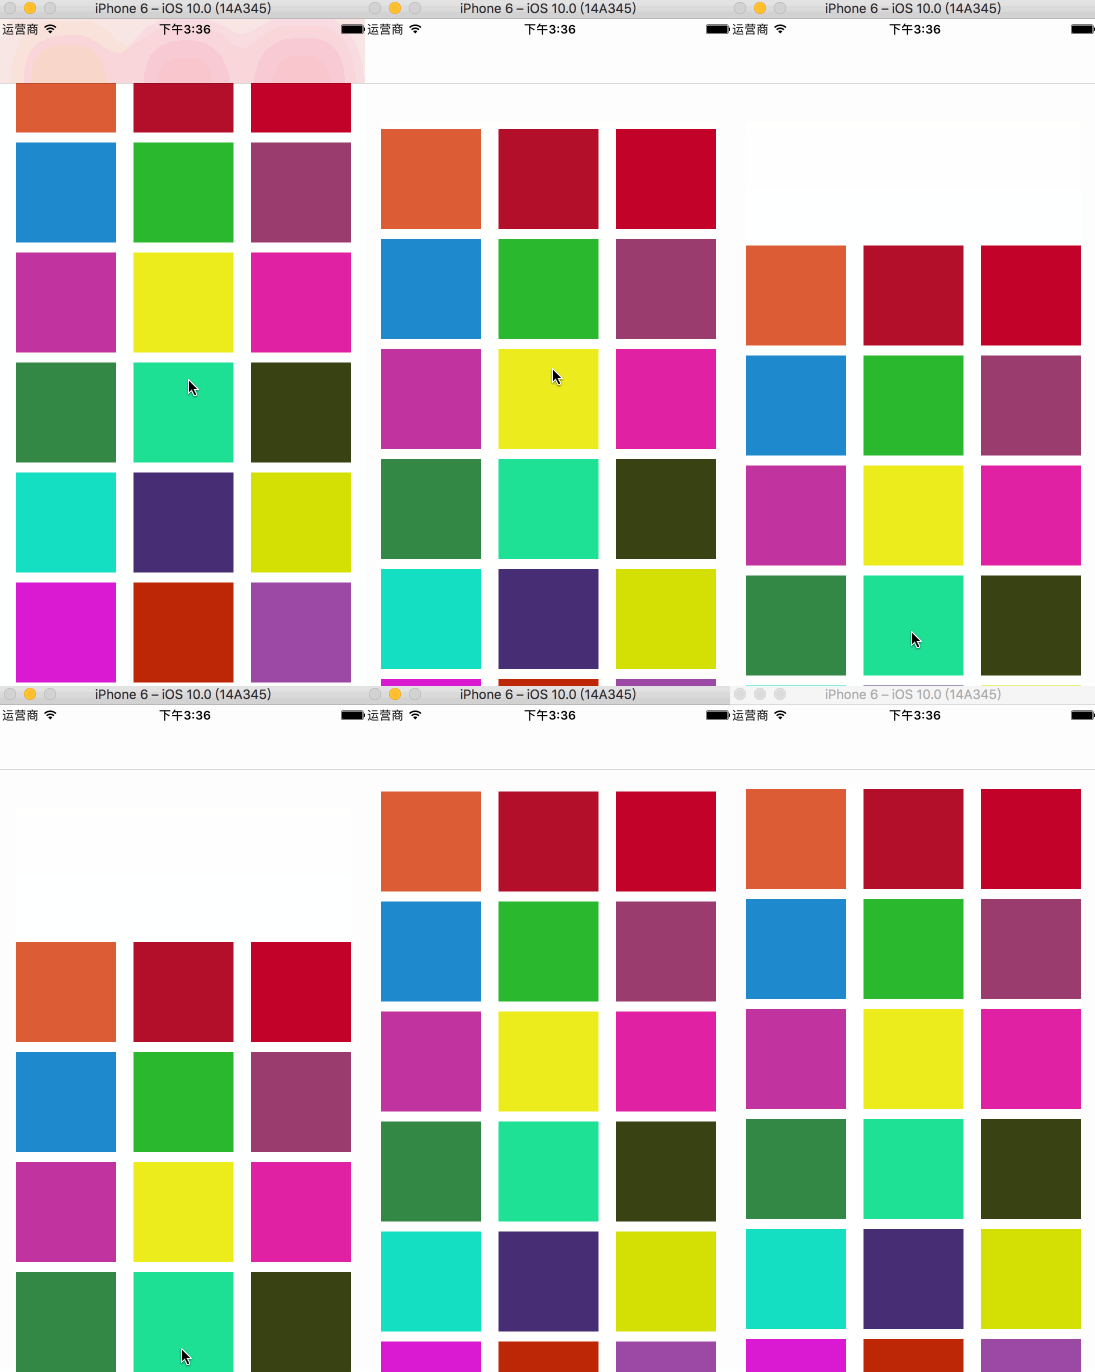
具體例子2: collectionView也是如此 , item本應在頂部 , 由於自動調整了內邊距 , 而整體下移
UICollectionViewFlowLayout *flowLayout = [[UICollectionViewFlowLayout alloc]init];
flowLayout.minimumLineSpacing = 10.0;
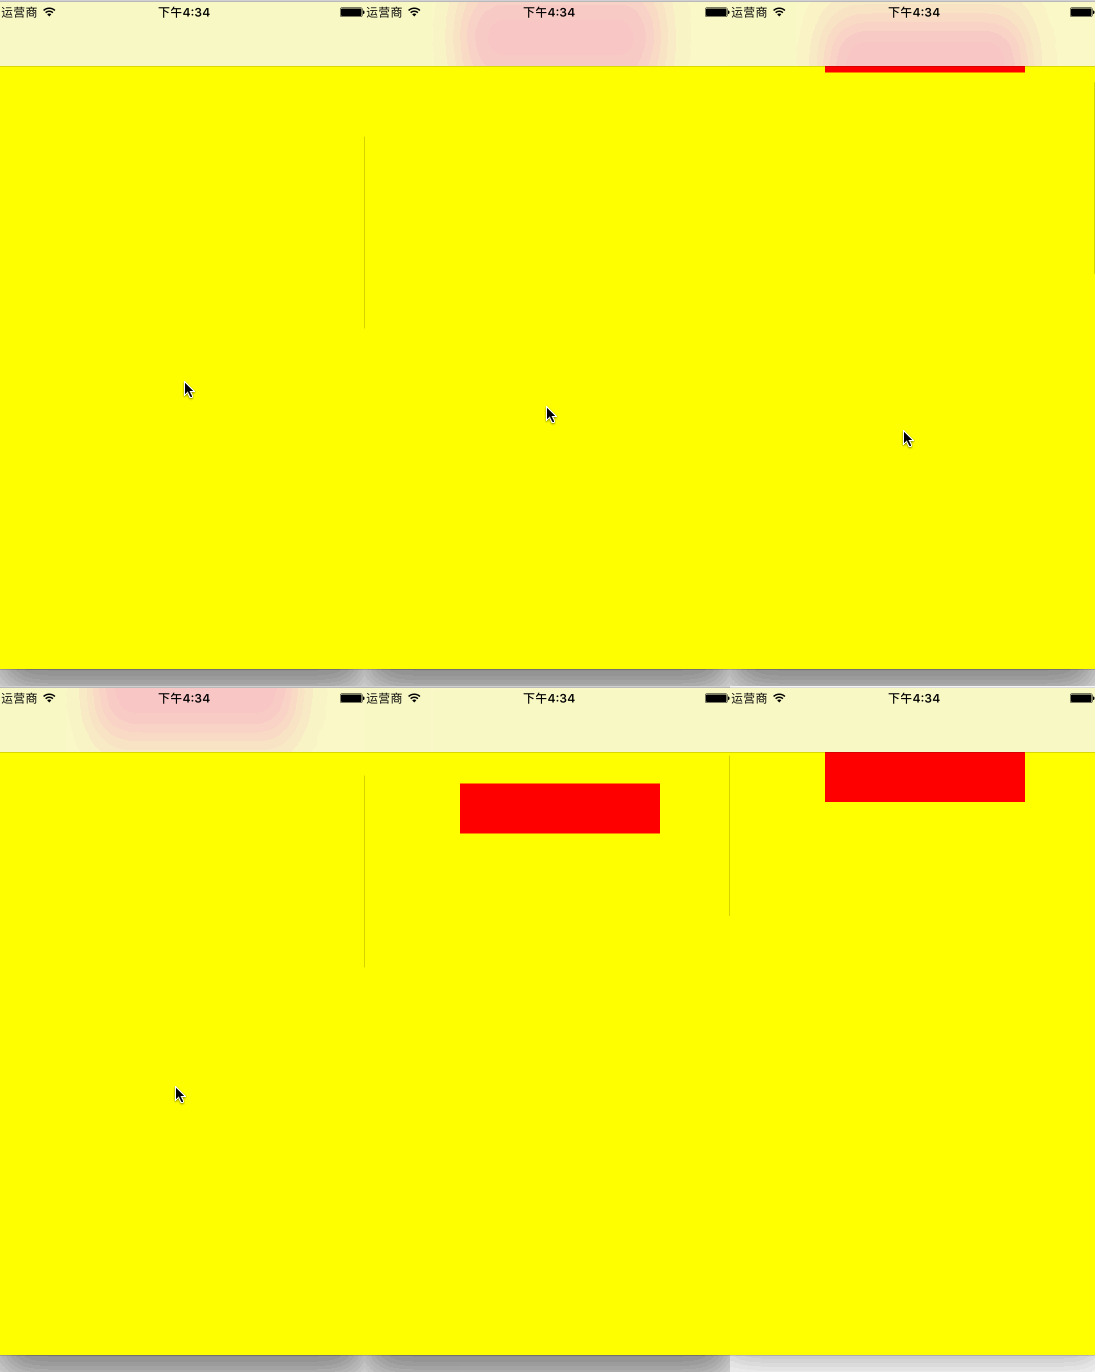
flowLayout.minimumInteritemSpacing 具體例子3: scrollView
    UIScrollView *scrollView = [[UIScrollView alloc]initWithFrame:[UIScreen mainScreen].bounds];
    scrollView.contentSize = CGSizeMake(375, 2000);
    scrollView.backgroundColor = [UIColor yellowColor];

    UILabel *label = [[UILabel alloc]initWithFrame:CGRectMake(100, 0, 200, 50)];
    label.backgroundColor = [UIColor redColor];
    [scrollView addSubview:label];

    [self.view addSubview:scrollView];
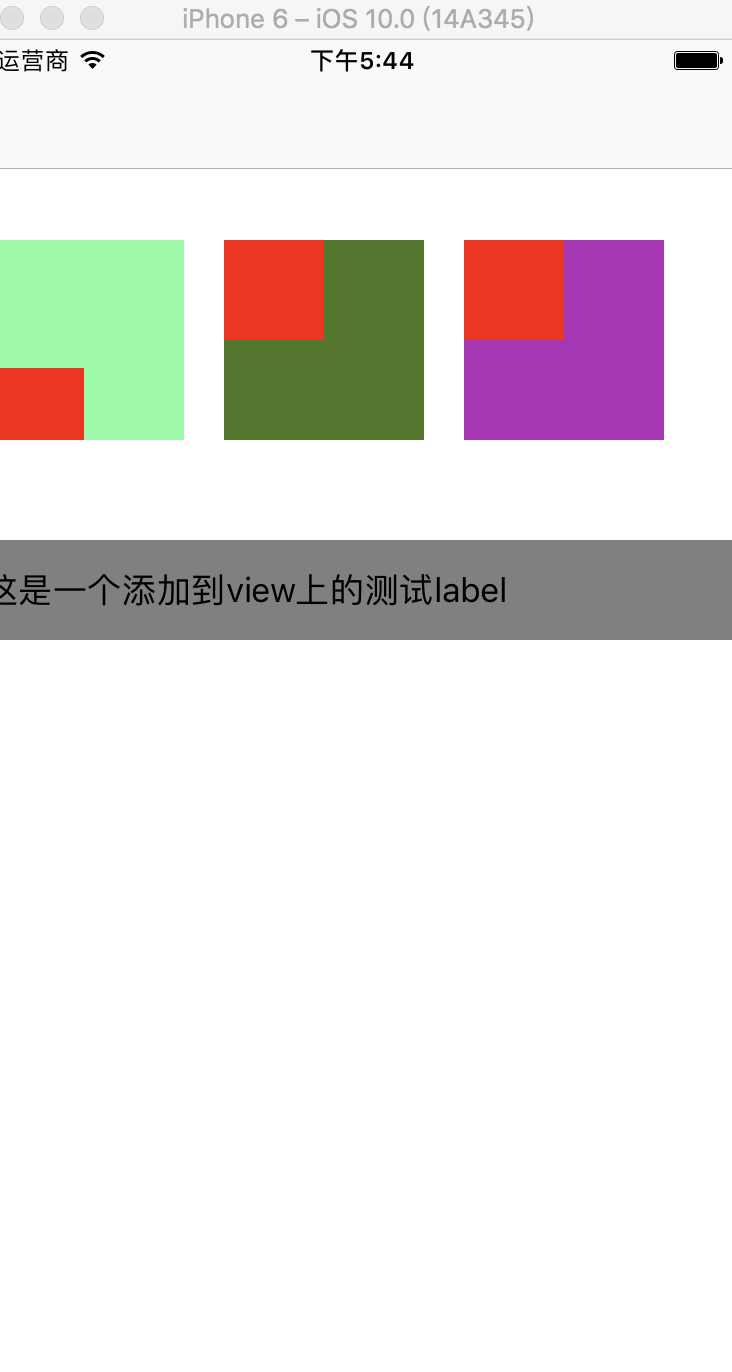
例子4:同時新增多個scrollView , 觀察scrollView子控制元件自動調整狀況
    UIScrollView *scrollView1 = [[UIScrollView alloc]initWithFrame:CGRectMake(0, 100, 100, 100)];
    scrollView1.backgroundColor = [UIColor colorWithRed:arc4random_uniform(255)/255.0 green:arc4random_uniform(255)/255.0 blue:arc4random_uniform(255)/255.0 alpha:1.0];
    [self.view addSubview:scrollView1];


    UIScrollView *scrollView2 = [[UIScrollView alloc]initWithFrame:CGRectMake(120, 100, 100, 100)];
    scrollView2.backgroundColor = [UIColor colorWithRed:arc4random_uniform(255)/255.0 green:arc4random_uniform(255)/255.0 blue:arc4random_uniform(255)/255.0 alpha:1.0];
    [self.view addSubview:scrollView2];


    UIScrollView *scrollView3 = [[UIScrollView alloc]initWithFrame:CGRectMake(240,100, 100, 100)];
    scrollView3.backgroundColor = [UIColor colorWithRed:arc4random_uniform(255)/255.0 green:arc4random_uniform(255)/255.0 blue:arc4random_uniform(255)/255.0 alpha:1.0];
    [self.view addSubview:scrollView3];

    UIView *view1 = [[UIView alloc]initWithFrame:CGRectMake(0,0, 50, 50)];
    view1.backgroundColor = [UIColor redColor];
    [scrollView1 addSubview:view1];

    UIView *view2 = [[UIView alloc]initWithFrame:CGRectMake(0,0, 50, 50)];
    view2.backgroundColor = [UIColor redColor];
    [scrollView2 addSubview:view2];

    UIView *view3 = [[UIView alloc]initWithFrame:CGRectMake(0,0, 50, 50)];
    view3.backgroundColor = [UIColor redColor];
    [scrollView3 addSubview:view3];


    UILabel *label = [[UILabel alloc]initWithFrame:CGRectMake(0, 250, [UIScreen mainScreen].bounds.size.width, 50)];
    label.text = @"這是一個新增到view上的測試label";
    label.textColor = [UIColor blackColor];
    label.backgroundColor = [UIColor grayColor];
    [self.view addSubview:label];
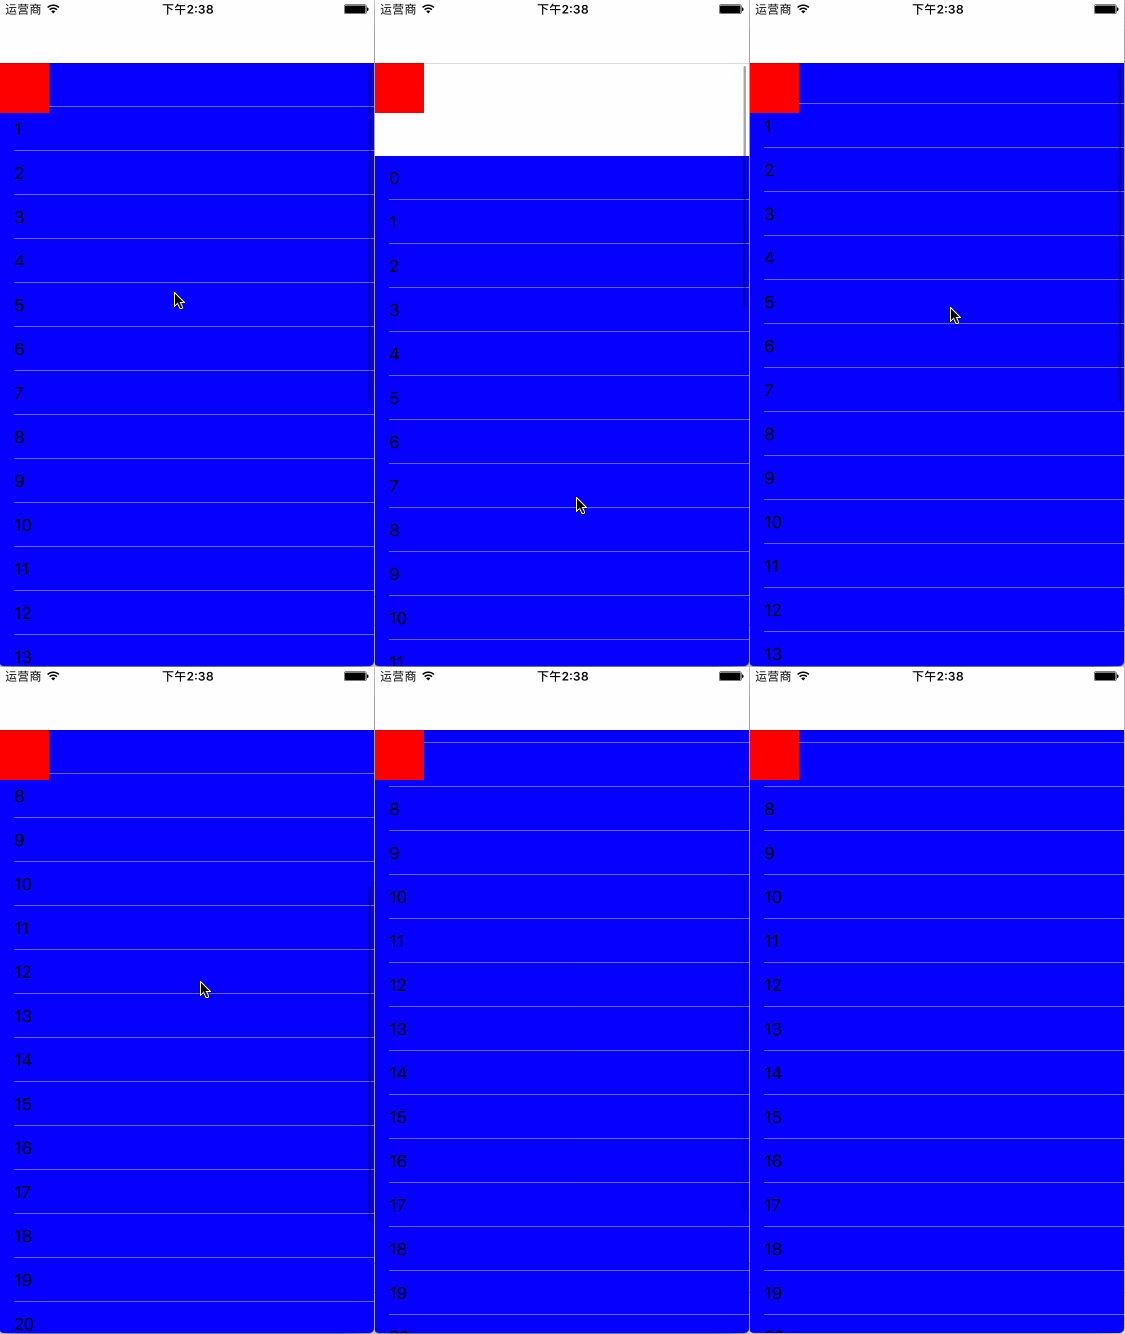
結果如下:
只有第一個新增上去的scrollView上的子控制元件 , 進行了自動調整 , 而其他的scrollView上的子控制元件並未進行自動調整 .
所以 , 如果當搭建一個介面 , 如果出現多個scrollView時 , 儘量把 automaticallyAdjustsScrollViewInsets = NO .方便計算
例子5:
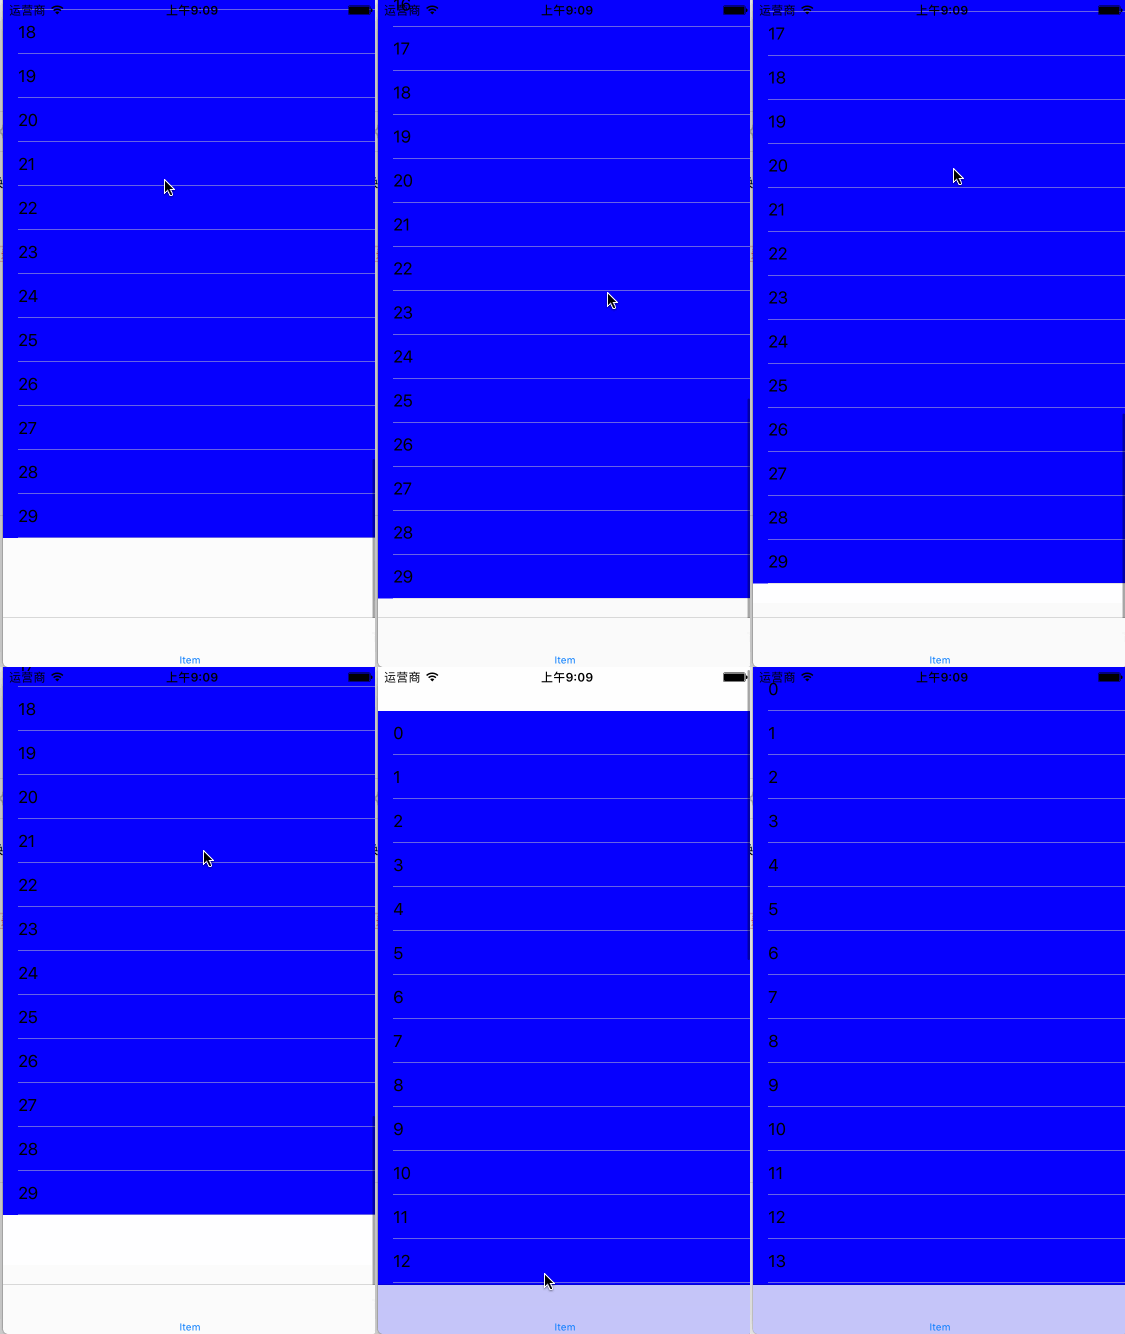
當同時擁有導航控制器和tabbar標籤欄控制器時 , 蘋果會自動將上下的內間距分別調整 64 , 49 .
此時 , tableView上的所有控制元件也不會被底部的tabbar所遮擋 .
例子6:
當只擁有tabbar標籤欄控制器時 , 不會自動調整內間距
例子7:
當設定了導航欄不透明時 , self.view上的所有控制元件 , 均從導航欄下為 0 點開始計算 , 且不再自動調整內邊距 ~!!!
    self.view.backgroundColor = [UIColor whiteColor];

    //設定不透明
    self.navigationController.navigationBar.translucent = NO;

    self.tableView = [[UITableView alloc]initWithFrame:[UIScreen mainScreen].bounds style:UITableViewStylePlain];
    self.tableView.delegate = self;
    self.tableView.dataSource = self;
    [self.view addSubview:self.tableView];

    UIView *view2 = [[UIView alloc]initWithFrame:CGRectMake(0,0, 50, 50)];
    view2.backgroundColor = [UIColor redColor];
    [self.view addSubview:view2];
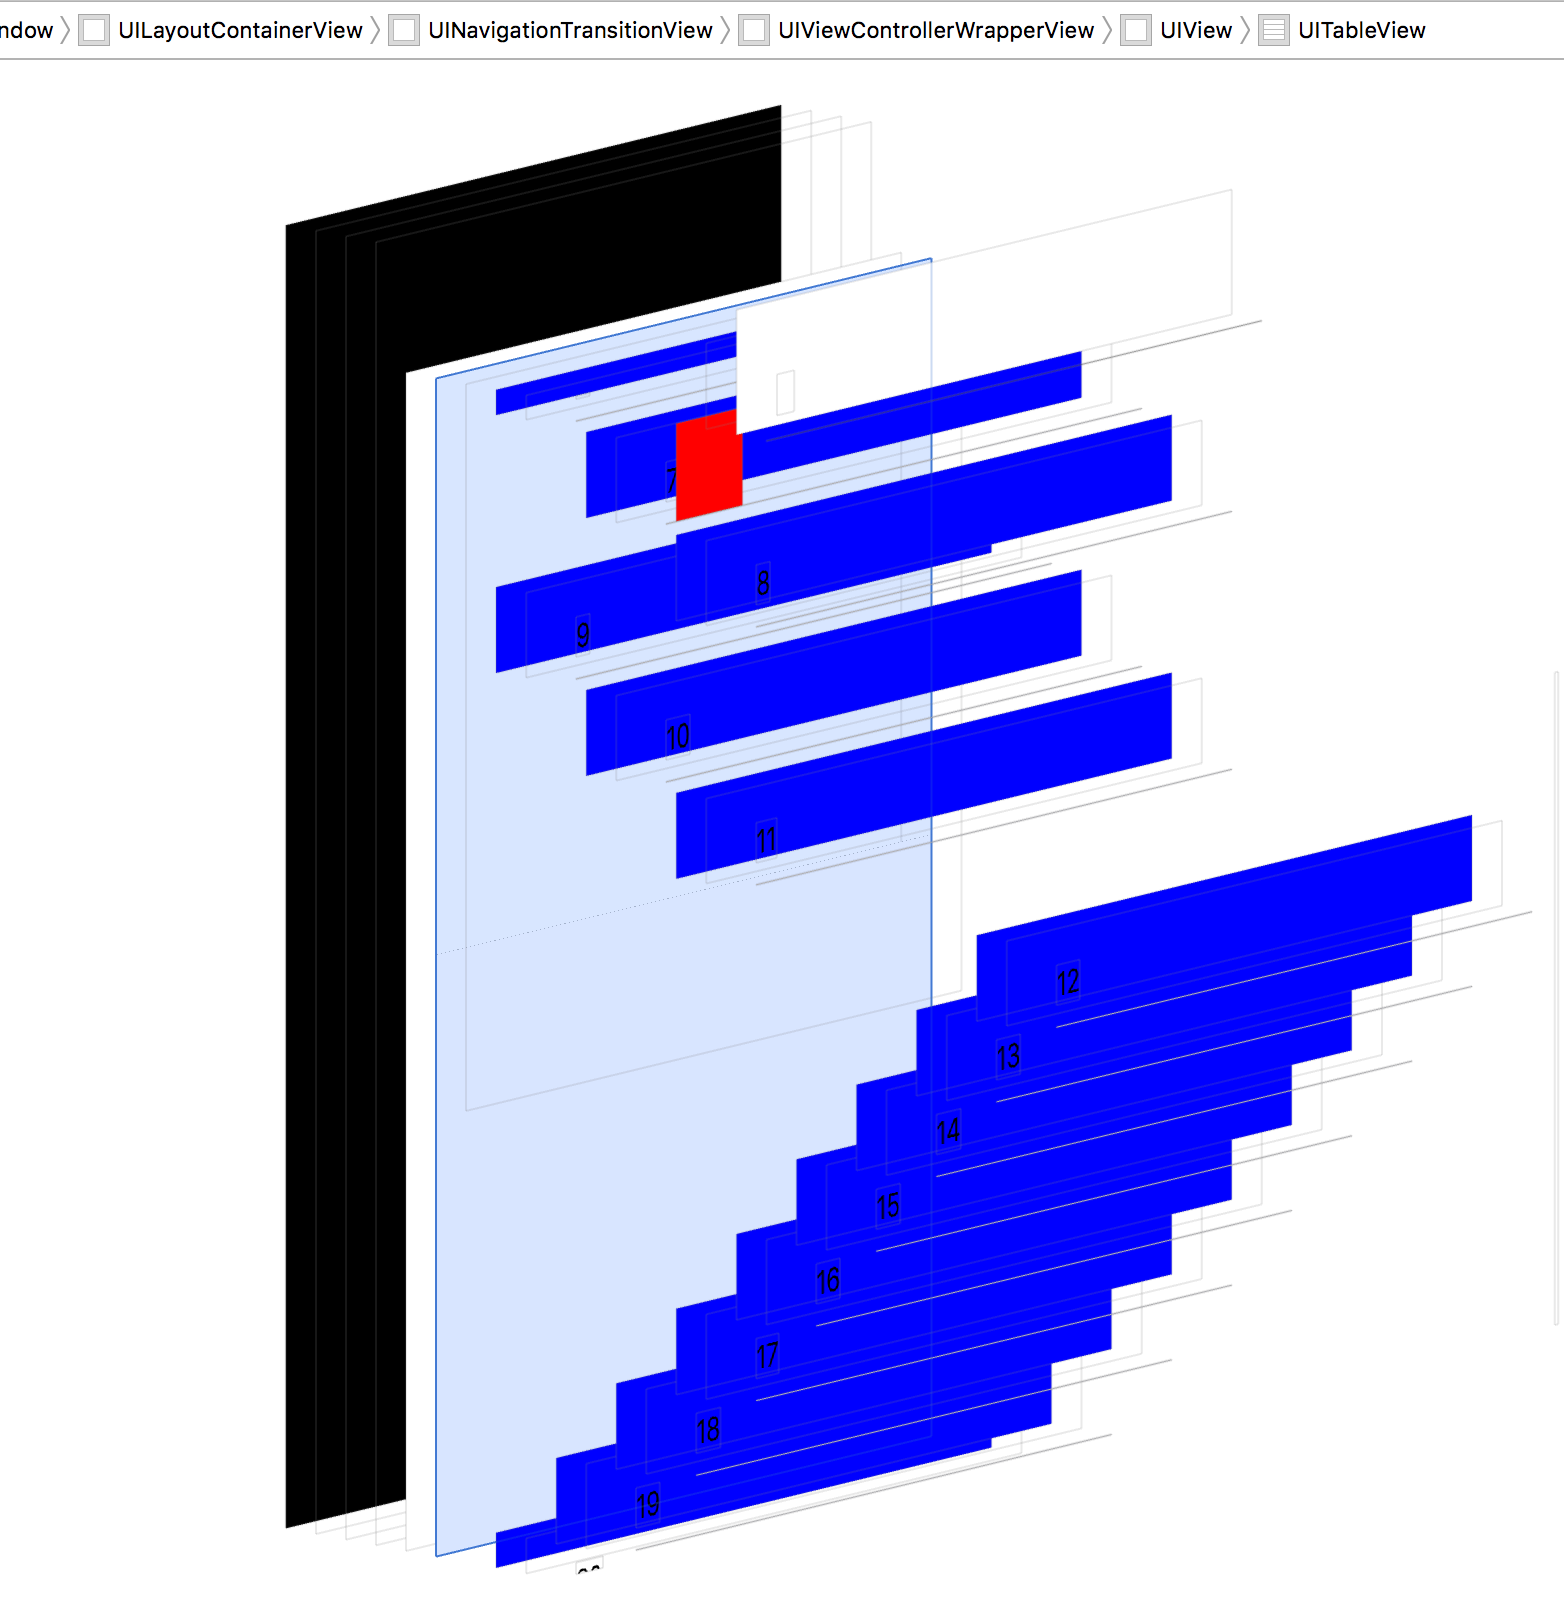
3D圖層如下:
細節問題 , 僅為了以後不再糾結 , 記不住也能寫專案.

