opencv處理不規則多邊形ROI 之二
阿新 • • 發佈:2019-02-03
相對於上一篇部落格的功能擴充:
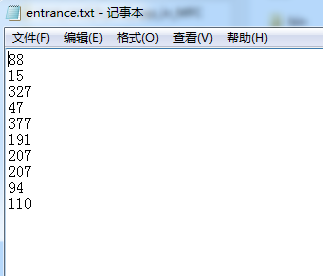
- 【1】從檔案中讀取座標點
- 【2】對座標點的個數沒有限制
- 【3】首先選取區域頂點的第一個和第二個頂點
- 【4】自動對區域的上半部分進行畫素值的變更(全為0或者255),只要我們有區域的座標點集
- 【5】自動對區域的下半部分進行畫素值的變更(全為0或者255),只要我們有區域的座標點集
- 【6】座標點集都放在了vector裡
程式碼展示
#include <opencv2/opencv.hpp>
#include <iostream>
#include <vector>
#include <fstream>
#include <string>
using namespace std;
using namespace cv;
int main()
{
///////得到區域的所有頂點 從txt檔案中讀取
vector<Point>pt_vector;
///////手動測試
//pt_vector.push_back(Point(100,100));
//pt_vector.push_back(Point(200,100));
//pt_vector.push_back(Point(200,200));
//pt_vector.push_back(Point(100,200));
///////**********從檔案中讀取頂點資訊 start
ifstream in_file;
in_file.open("entrance.txt");/////開啟檔案
if(!in_file.is_open())/////判斷檔案是否開啟
{
cout<<"in_file is not opened!"<<endl;
}
Point pt_temp;
string str_temp;
while(!in_file.eof())//////從檔案中獲取頂點資訊,儲存到向量pt_vector中
{
in_file>>pt_temp.x>>pt_temp.y;
cout<<"橫座標:" <<pt_temp.x<<"縱座標:"<<pt_temp.y<<endl;
pt_vector.push_back(pt_temp);
///////為了避免最後一行讀取兩遍
in_file.get();
if(in_file.peek() == '\n')
break;
}
in_file.close();//////關閉檔案
///////**********從檔案中讀取頂點資訊 end
cout<<"有"<<pt_vector.size()<<"個頂點座標"<<endl;
/////讀取一張圖片
Mat img_src = imread("1.png");
Mat img;
resize(img_src,img,Size(432,240));
/////////得到 上部分的左右兩點
Point pt_bl = Point(0,pt_vector[0].y);
Point pt_br = Point(img.cols,pt_vector[1].y);
//cout<<pt_vector.size()<<endl;//////區域頂點集的個數
////////****************所選區域的上部分 start
Point **root_points = new Point* [1];
root_points[0] = new Point[6];
///////對二維陣列賦值 得到上部分割槽域的頂點
root_points[0][0] = pt_vector[0];
root_points[0][1] = pt_vector[1];
root_points[0][2] = pt_br;
root_points[0][3] = Point(img.cols,0);
root_points[0][4] = Point(0,0);
root_points[0][5] = pt_bl;
const Point* ppt[1] = {root_points[0]};
int npt[] = {6};
polylines(img, ppt, npt, 1, 1, Scalar(255),1,8,0);
///////對上部分割槽域的畫素點賦值為0
fillPoly(img, ppt, npt, 1, Scalar(255,255,255));
//imshow("【上部分】",img);/////經測試 上面的程式起到了作用
////////****************所選區域的上部分 end
///////////*********所選區域下部分 start
///////建立下方區域的頂點二維陣列
const int i_size = pt_vector.size();
Point **root_points_1 = new Point* [1];
root_points_1[0] = new Point [i_size+4];
////////得到下方區域的頂點
int i;
for(i = 1; i < i_size;i++)
{
root_points_1[0][i-1] = pt_vector[i];
}
//cout<<"i= "<<i<<endl;
root_points_1[0][i-1] = pt_vector[0];
root_points_1[0][i++] = pt_bl;
root_points_1[0][i++] = Point(0,img.rows);
root_points_1[0][i++] = Point(img.cols,img.rows);
root_points_1[0][i++] = pt_br;
const Point* ppt_1[1] = {root_points_1[0]};
int npt_1[] = {i_size+4};
polylines(img, ppt_1, npt_1, 1, 1, Scalar(255),1,8,0);
////////畫下方的區域
fillPoly(img, ppt_1, npt_1, 1, Scalar(255,255,255));
///////////*********所選區域下部分 end
imshow("Test_img", img);
waitKey();
return 0;
}
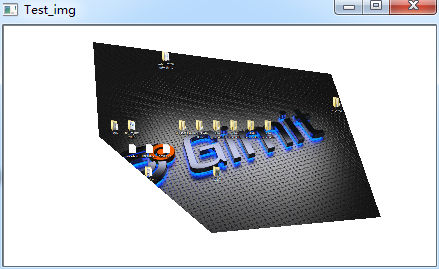
結果展示
結果圖:
原圖: