
如何用Q#完成第一個量子計算程式
這篇文章在我的GitHub上還有一個英文版,歡迎指正。
Q#是微軟開發的專門執行量子演算法的程式語言,需要用C#驅動。這篇文章是基於微軟的Q#Document完成的,我在執行微軟給的demo過程中遇到了一些問題,寫這篇文章記錄一下的的解決過程,和用到的一些知識。
1 檢查CPU是否支援AVX指令
Q#語言的模擬器應用了AVX指令集,如果你的CPU不支援AVX,運算效果會打折扣。
可以通過下載CPU-Z這個軟體檢視自己的CPU是否支援AVX,如下圖所示:

2 安裝Visual Studio,配置環境
Q#需要安裝的是Visual Studio 2017,在官網下載後安裝即可。需要注意的是,安裝前一定要確保選上了Universal Windows Platform development 和 .NET desktop development。
裝好Visual Studio之後,還需要安裝一個Q#的開發工具包,在連結中下載,雙擊安裝即可。
3 新建你的第一個Q#程式(Step1 2 3 4)
在Visual Studio 2017中file-new-project,然後選擇Q# Application。
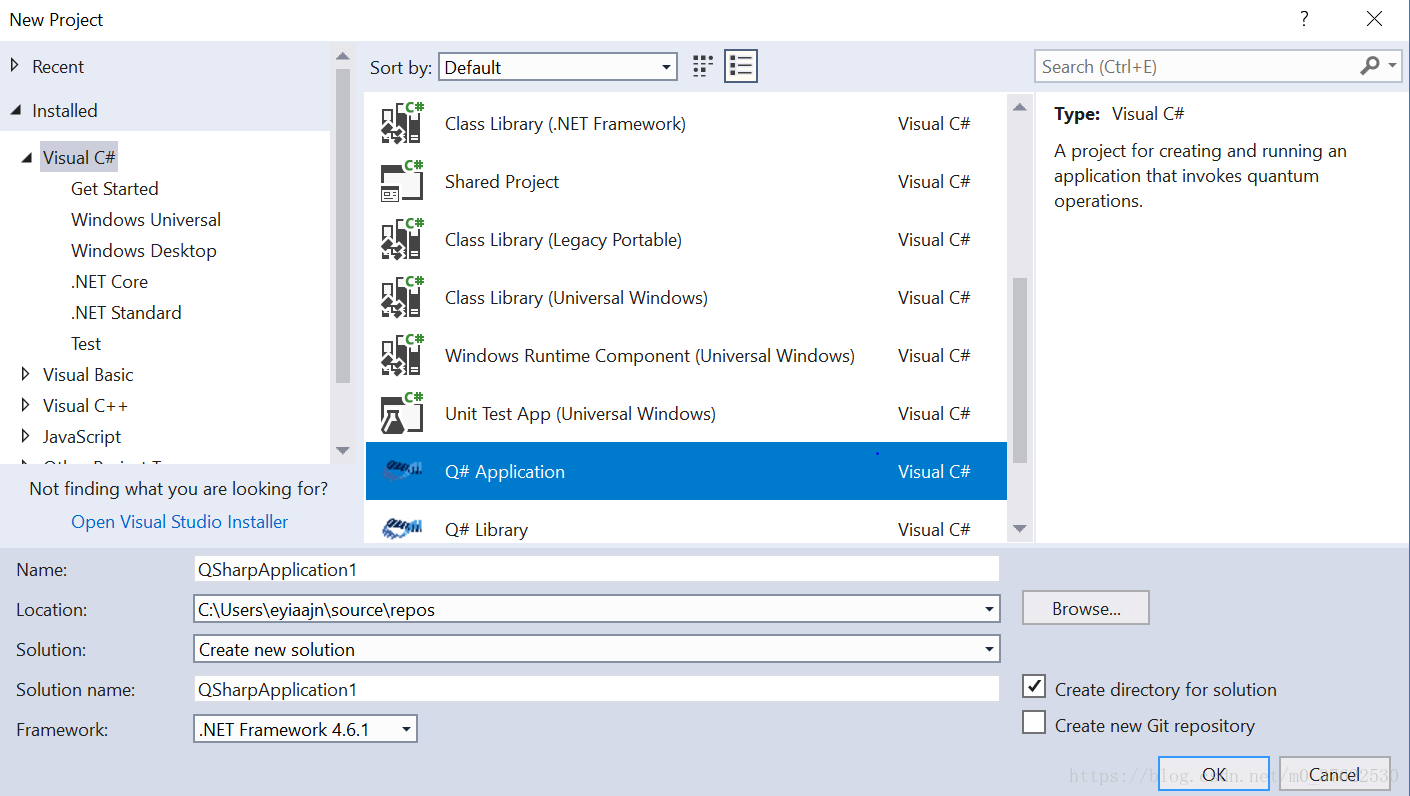
這時候會得到一個qs和一個cs檔案。qs是Q#檔案,cs是用來驅動Q#的C#檔案。
按照微軟給的step1到step4做,會得到兩個檔案的完整程式碼分別如下:
Bell.qs:
namespace Quantum.Bell
{
    open Microsoft.Quantum.Primitive;
    open Microsoft.Quantum.Canon;

    operation Set (desired: Result, q1: Qubit) : ()
    {
        body
        {
            let current = M(q1);            // The 'let' keyword binds mutable variables
            if (desired != current)
            {
              X(q1); // NOT gate
            }
        }
    }

    operation BellTest (count : Int, initial : Result) : (Int, Int)
    {
        body
        {
          mutable numOnes = 0;
      using (qubits = Qubit[1])
      {
          for (test in 1..count)
          {
              Set (initial, qubits[0]);
              let res = M (qubits[0]);
              // Count the number of ones we saw:
              if (res == One)
              {
                  set numOnes = numOnes + 1;
              }
          }
          Set(Zero, qubits[0]);
      }
      // Return number of times we saw a |0> and number of times we saw a |1>
      return (count-numOnes, numOnes);
        }
    }
}
Driver.cs:
using Microsoft.Quantum.Simulation.Core;
using Microsoft.Quantum.Simulation.Simulators;
namespace Quantum.Bell
{
    class Driver
    {
        static void Main(string[] args)
        {
            using (var sim = new QuantumSimulator()) // sim is the Q# quantum similator
            {
                // Try initial values
                Result[] initials = new Result[] { Result.Zero, Result.One };
                foreach (Result initial in initials)
                {
                    var res = BellTest.Run(sim, 1000, initial).Result;  // Run is the method to run the quantum simulation
                    var (numZeros, numOnes) = res;
                    System.Console.WriteLine($"Init:{initial,-4} 0s={numZeros,-4} 1s={numOnes,-4}");
                }
            }
            System.Console.WriteLine("Press any key to continue...");
            System.Console.ReadKey();
        }
    }
}
但是我們在編譯的時候可能會出現問題(the name XX does not exist in the current context unity),即使這些程式碼只是一點copy/paste的工作。我覺得這是因為整個project中的references可能有問題:
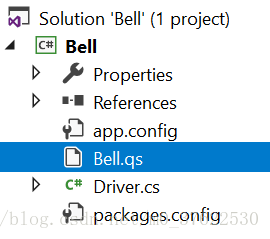
我的建議是在我的GitHub上下載整個工程,然後只對qs和cs兩個檔案做修改。
此時執行正確的結果是:
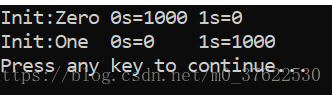
這個結果的意思是當最初的值設為Zero時,最終數一下0的個數為1000,1的個數是0,同理初始值為1時。
這個程式是數|0>和|1>的個數。此時沒有創造疊加狀態,|0>有百分之百的可能性是|0>,|1>有百分之百的可能性是|1>。
4 創造疊加狀態
4.1 X門
在qs檔案的第27和29行之間加入這樣一行:
X(qubits[0]);他在quantum computing裡的作用相當於一個非門。所以我們得到的結果是:
|
與之前的結果剛好相反。 |
4.2 H門
在qs檔案的第27和29行之間加入這樣一行:
H(qubits[0]); // Create superpositions它是一個Hadamard門,一個重要作用就是創造疊加態,

這時整個qs檔案變成了:
namespace Quantum.Bell
{
    open Microsoft.Quantum.Primitive;
    open Microsoft.Quantum.Canon;

    operation Set (desired: Result, q1: Qubit) : ()
    {
        body
        {
            let current = M(q1);            // The 'let' keyword binds mutable variables
            if (desired != current)
            {
              X(q1); // NOT gate
            }
        }
    }

    operation BellTest (count : Int, initial : Result) : (Int, Int)
    {
        body
        {
          mutable numOnes = 0;
      using (qubits = Qubit[1])
      {
          for (test in 1..count)
          {
              Set (initial, qubits[0]);
			  H(qubits[0]); // Create superpositions
              let res = M (qubits[0]);
              // Count the number of ones we saw:
              if (res == One)
              {
                  set numOnes = numOnes + 1;
              }
          }
          Set(Zero, qubits[0]);
      }
      // Return number of times we saw a |0> and number of times we saw a |1>
      return (count-numOnes, numOnes);
        }
    }
}
執行結果為:
|
|
每次執行的結果會有出入,但差別不大。這是因為經過H門之後,|0>有0.5的可能性是|0>,0.5的可能性是|1>; |1>有0.5的可能性是|0>,0.5的可能性是|1>。