
Swift使用極光推送JPush的Demo
JPushDemo
github專案地址
需要匯入JPush框架,可以使用cocoapod匯入,也可以手動匯入
環境配置
配置環境可以參考極光推送的官方文件:
使用說明
待環境配置好了之後,就可以進入極光推送開始推送訊息了
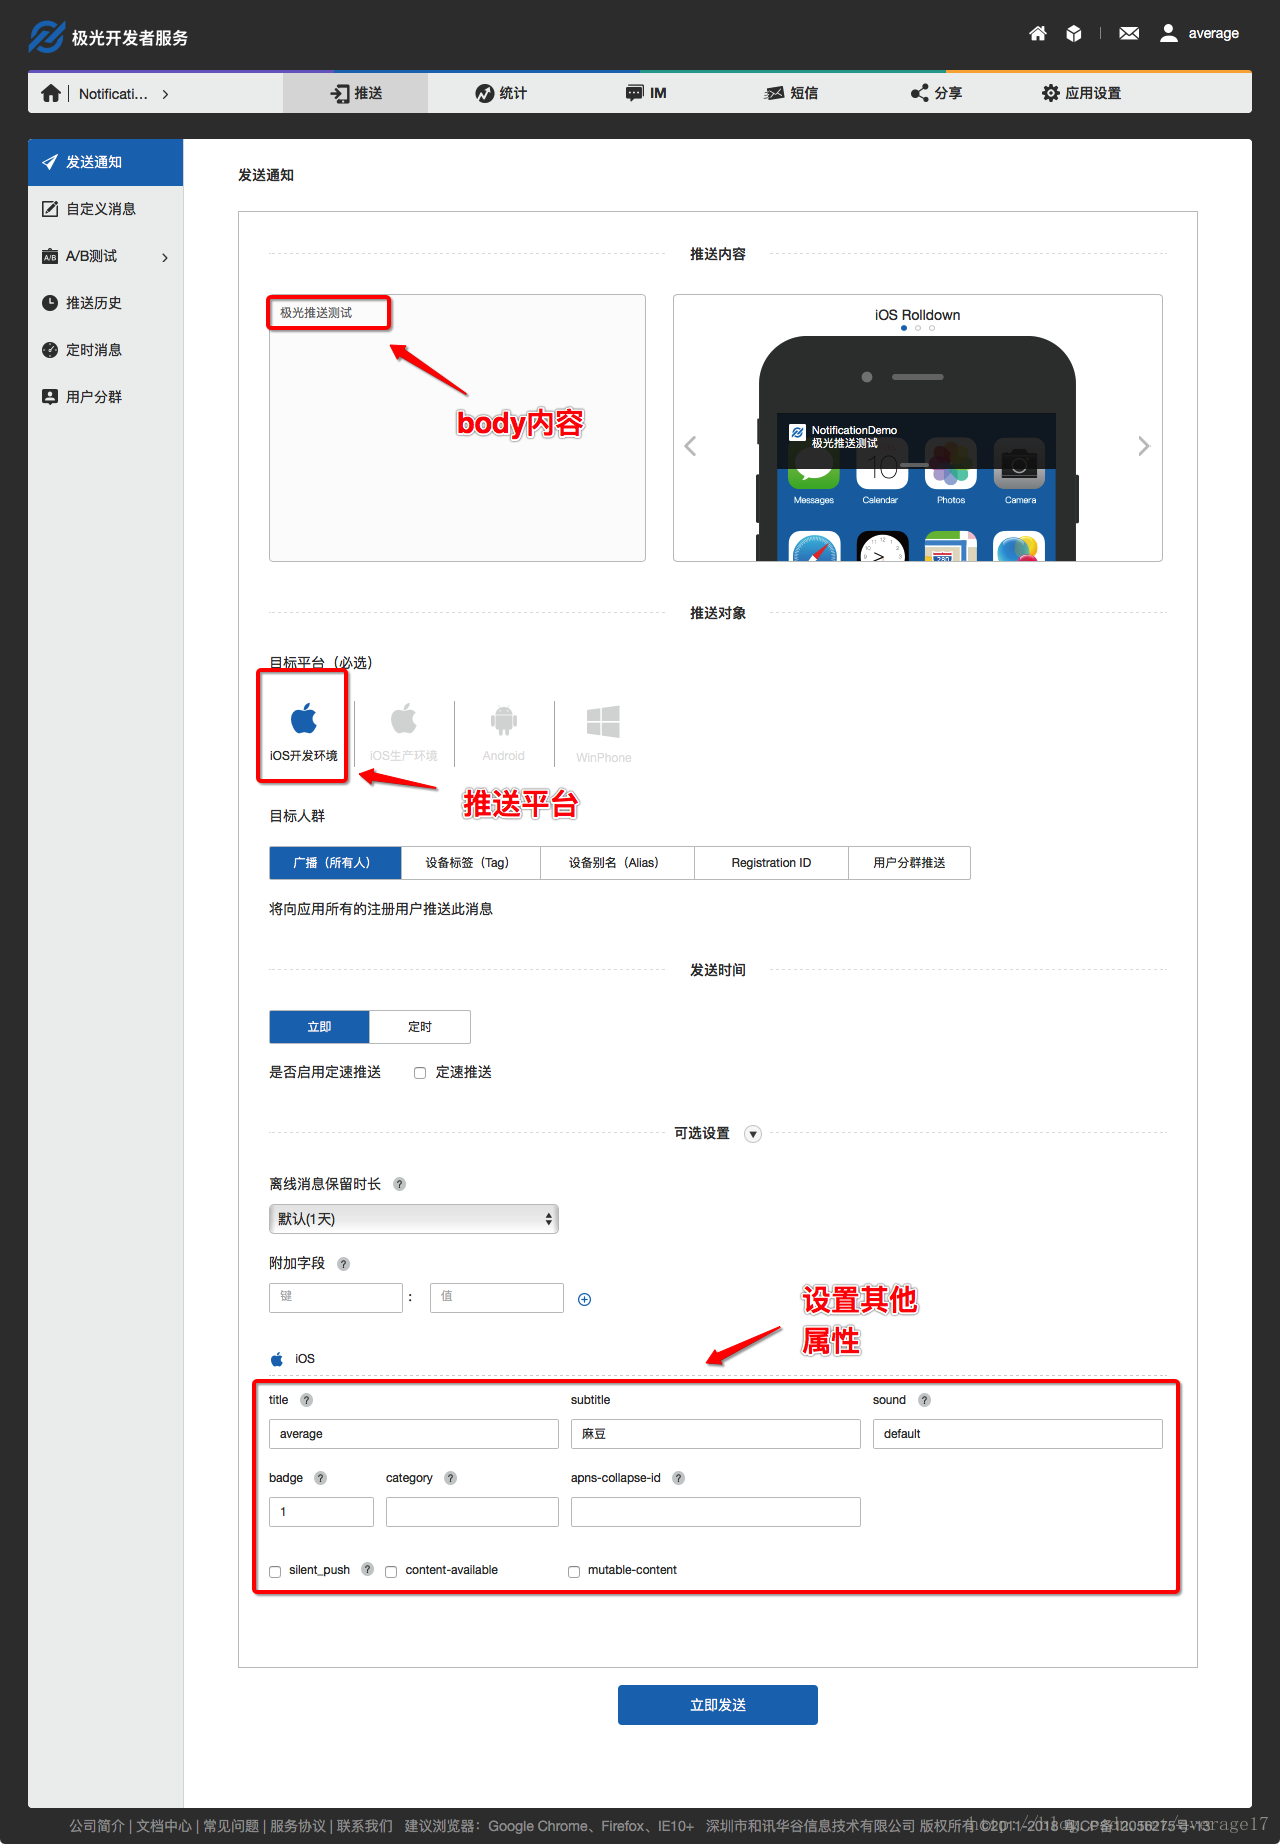
推送使用示例如下:
傳送通知
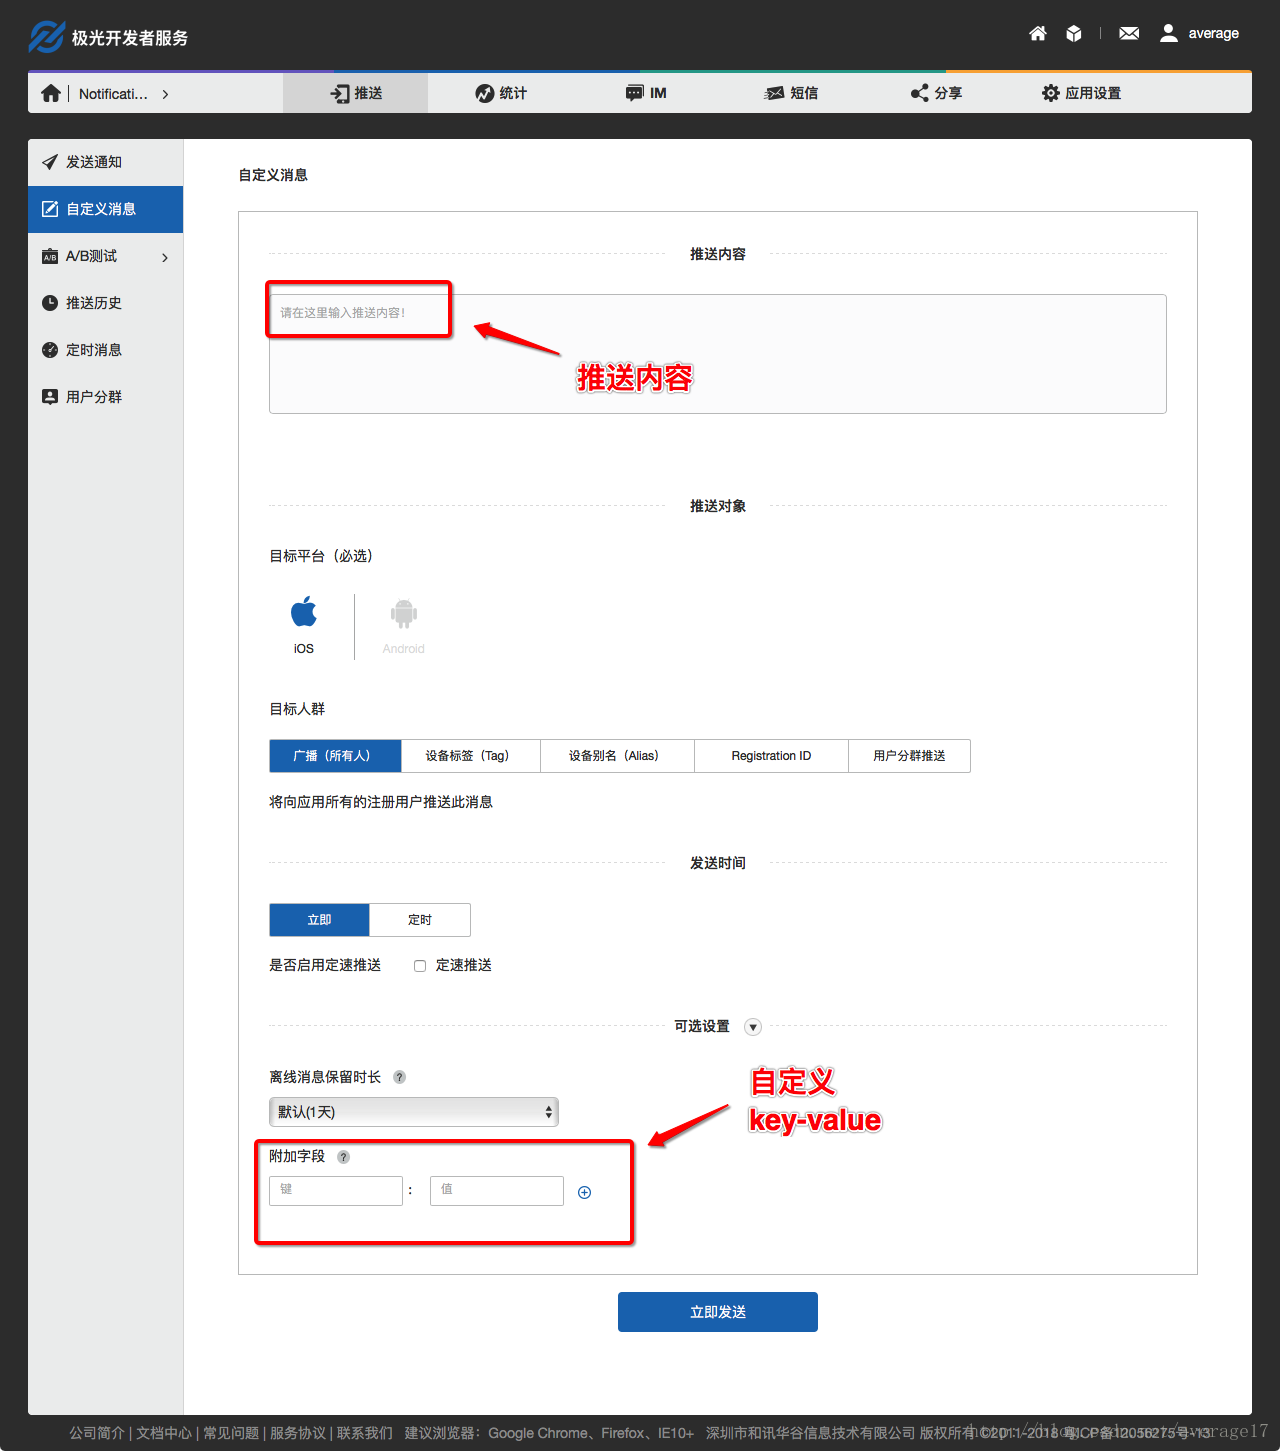
傳送自定義訊息
程式碼轉換
因為極光推送文件裡的環境配置使用的是OC程式碼,如果對OC不熟悉的話,可以參考以下翻譯成Swift的程式碼,如果你是OC大牛,那就忽略這裡
新增標頭檔案
因為極光推送的框架JPush是OC寫的框架,Swift不能直接使用,所以需要建立一個橋接檔案,會建立橋接檔案的直接複製程式碼即可,不會建立橋接檔案的,並且工程下沒有OC檔案(.m檔案的)可以直接File->New->File->Objective-C File,然後任意輸入一個檔名,這時會提示你是否自動建立橋接檔案,選擇是,就會建立一個橋接檔案了,然後我們把下面的程式碼複製到xxx-Bridging-Header.h檔案中
// 引入JPush功能所需標頭檔案
#import "JPUSHService.h"
// iOS10註冊APNs所需標頭檔案
#ifdef NSFoundationVersionNumber_iOS_9_x_Max
#import <UserNotifications/UserNotifications.h>
#endif
// 如果需要使用idfa功能所需要引入的標頭檔案(可選)
#import <AdSupport/AdSupport.h>
新增Delegate
為AppDelegate新增Delegate。
參考程式碼:
@UIApplicationMain 新增初始化程式碼
新增初始化APNs程式碼
請將以下程式碼新增到func application(_ application: UIApplication, didFinishLaunchingWithOptions launchOptions: [UIApplicationLaunchOptionsKey: Any]?) -> Bool
let entity = JPUSHRegisterEntity()
entity 新增初始化JPush程式碼
請將以下程式碼新增到func application(_ application: UIApplication, didFinishLaunchingWithOptions launchOptions: [UIApplicationLaunchOptionsKey: Any]?) -> Bool
let advertisingId = ASIdentifierManager.shared().advertisingIdentifier.uuidString
JPUSHService.setup(withOption: launchOptions, appKey: "a8cc62546a2407102cf484b6", channel: "App Store", apsForProduction: false, advertisingIdentifier: advertisingId)
(引數說明請看文件)
註冊APNs成功並上報DeviceToken
請在AppDelegate.swift實現該回調方法並添加回調方法中的程式碼
func application(_ application: UIApplication, didRegisterForRemoteNotificationsWithDeviceToken deviceToken: Data) {
    //註冊 DeviceToken
    JPUSHService.registerDeviceToken(deviceToken)
}
實現註冊APNs失敗介面(可選)
func application(_ application: UIApplication, didFailToRegisterForRemoteNotificationsWithError error: Error) {
    func application(_ application: UIApplication,
                     didFailToRegisterForRemoteNotificationsWithError error: Error) {
        //可選
        NSLog("did Fail To Register For Remote Notifications With Error: \(error)")
    }
}
新增處理APNs通知回撥方法
請在AppDelegate.swift實現該回調方法並添加回調方法中的程式碼
// MARK: JPUSHRegisterDelegate
// iOS 10 Support
func jpushNotificationCenter(_ center: UNUserNotificationCenter!, willPresent notification: UNNotification!, withCompletionHandler completionHandler: ((Int) -> Void)!) {
    let userInfo = notification.request.content.userInfo
    if notification.request.trigger is UNPushNotificationTrigger {
        JPUSHService.handleRemoteNotification(userInfo)
    }
    // 需要執行這個方法,選擇是否提醒使用者,有Badge、Sound、Alert三種類型可以選擇設定
    completionHandler(Int(UNNotificationPresentationOptions.alert.rawValue))
}

// iOS 10 Support
func jpushNotificationCenter(_ center: UNUserNotificationCenter!, didReceive response: UNNotificationResponse!, withCompletionHandler completionHandler: (() -> Void)!) {
    let userInfo = response.notification.request.content.userInfo
    if response.notification.request.trigger is UNPushNotificationTrigger {
        JPUSHService.handleRemoteNotification(userInfo)
    }
    // 系統要求執行這個方法
    completionHandler()
}

func application(_ application: UIApplication, didReceiveRemoteNotification userInfo: [AnyHashable : Any], fetchCompletionHandler completionHandler: @escaping (UIBackgroundFetchResult) -> Void) {
    JPUSHService.handleRemoteNotification(userInfo)
    completionHandler(UIBackgroundFetchResult.newData)
}
新增處理JPush自定義訊息回撥方法
在iOS SDK整合指南中並沒有直接給出處理JPush自定義訊息的回撥方法,需要你自己到API中去尋找,這裡,我直接把它抽出來寫在下面
功能說明
1、只有在前端執行的時候才能收到自定義訊息的推送。
2、從jpush伺服器獲取使用者推送的自定義訊息內容和標題以及附加欄位等。
實現方法
請將以下程式碼新增到func application(_ application: UIApplication, didFinishLaunchingWithOptions launchOptions: [UIApplicationLaunchOptionsKey: Any]?) -> Bool
NotificationCenter.default.addObserver(self, selector: #selector(networkDidReceiveMessage(notification:)), name: NSNotification.Name.jpfNetworkDidReceiveMessage, object: nil)實現回撥方法 networkDidReceiveMessage
@objc func networkDidReceiveMessage(notification: Notification) {
    let userInfo = notification.userInfo
    if let extras = userInfo?["extras"] as? Dictionary<String, String> {
        NSLog("extras: \(extras)")
    }
    // 將自定義訊息的內容轉換成本地推送
    if let con = userInfo?["content"] as? String {
        //設定推送內容
        let content = UNMutableNotificationContent()
        content.body = con

        //設定通知觸發器
        let trigger = UNTimeIntervalNotificationTrigger(timeInterval: 0.01, repeats: false)

        //設定請求識別符號
        let requestIdentifier = "com.average.Demo"

        //設定一個通知請求
        let request = UNNotificationRequest(identifier: requestIdentifier,
                                            content: content, trigger: trigger)

        //將通知請求新增到傳送中心
        UNUserNotificationCenter.current().add(request) { error in
            if error == nil {
                print("Time Interval Notification scheduled: \(requestIdentifier)")
            }
        }
    }
}
這裡我跟官方的處理方式不同,官方的API中,獲取到content和extras之後直接打印出來,我這裡只輸出extras,而將content作為本地推送的訊息body推送出去,有關本地推送的相關知識,可以參考這篇部落格
還有朋友對AppDelegate.swift中的
UNUserNotificationCenter.current()
    .requestAuthorization(options: [.alert, .sound, .badge]) {
        (accepted, error) in
        if !accepted {
            print("使用者不允許訊息通知。")
        }
}
和ViewController.swift中的
// 判斷許可權
UNUserNotificationCenter.current().getNotificationSettings {
    settings in
    switch settings.authorizationStatus {
    // 已獲取到通知許可權
    case .authorized:
        break
    // 還未獲取許可權
    case .notDetermined:
        //請求授權
        UNUserNotificationCenter.current()
            .requestAuthorization(options: [.alert, .sound, .badge]) {
                (accepted, error) in
                if !accepted {
                    print("使用者不允許訊息通知。")
                }
        }
    // 使用者關閉通知許可權
    case .denied:
        DispatchQueue.main.async(execute: { () -> Void in
            let alertController = UIAlertController(title: "訊息推送已關閉",
                                                    message: "想要及時獲取訊息。點選“設定”,開啟通知。",
                                                    preferredStyle: .alert)

            let cancelAction = UIAlertAction(title:"取消", style: .cancel, handler:nil)

            let settingsAction = UIAlertAction(title:"設定", style: .default, handler: {
                (action) -> Void in
                let url = URL(string: UIApplicationOpenSettingsURLString)
                if let url = url, UIApplication.shared.canOpenURL(url) {
                    if #available(iOS 10, *) {
                        UIApplication.shared.open(url, options: [:],
                                                  completionHandler: {
                                                    (success) in
                        })
                    } else {
                        UIApplication.shared.openURL(url)
                    }
                }
            })

            alertController.addAction(cancelAction)
            alertController.addAction(settingsAction)

            self.present(alertController, animated: true, completion: nil)
        })
    }
}
感興趣,想要仔細瞭解,也可以參考下面這篇部落格