
Java Web登入Demo(SSM+Ajax)
一、前言
這一週在公司接觸到了實際的專案,學到了一些比較實用的Java Web開發技術和框架技巧,公司主要運用的框架是spring、springMVC和MyBatis(SSM),前後臺使用Ajax互動。經過幾天的學習和實踐,我有了一個想法:總結經驗並應用相關的框架技術去做一個小Deme,也希望廣大碼友能不吝賜教,不斷改進,相互提升。
二、專案簡介
1、demo主要運用SSM框架完成使用者的登入功能,專案整合度還是挺大的,要理解起來需要花一些時間,不過當你理解後,你就會發現SSM框是真的好用。demo功能不多,當然,登入功能也是比較簡單的,我寫這個專案的主要目的是展示SSM框架是如何完成功能開發、JSP前臺如何與後臺進行互動。如果要深入體會框架的運作,真的要多多除錯!
2、demo集成了MyBatis反向生成工程(工具類和配置檔案),工程在java目錄下,目錄名稱為generator。我們可以通過反向生成工程來生成實體類和DAO層,大大提高開發效率。
3、demo運用了MVC框架模式的思想,將專案分成三層:Model業務層(Service層)、View層(JSP)、Controller層(控制器層)。將專案分層之後,模組之間的耦合度就會降低,帶來的好處就是專案具有良好的擴充套件性和可維護性,當需要修改功能的時候不用大範圍改動程式碼,從而提高開發效率。
4、demo的後臺運用了spring的自動注入、springMVC的請求驅動、MyBatis面向介面資料庫程式設計技術。
5、在這個demo當中,我想著重介紹一下JSP前臺和後臺互動的響應模式,即伺服器返回給客戶端的響應資料是什麼結構、客戶端如何處理這種資料並把結果反饋給使用者。後面再詳細敘述。
6、開發環境:Intellij IDEA 2017.2.6、Tomcat 7.0、JDK8
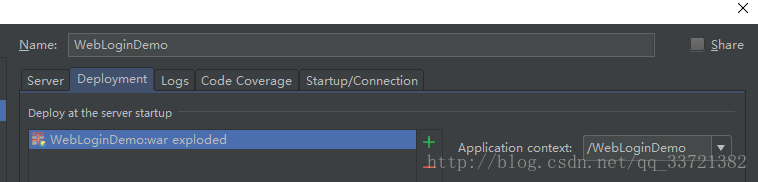
7、注意事項:專案在IDEA釋出不要釋出根目錄下;如圖下發布
三、專案運用的主要技術
1、後臺框架:spring、springMVC、MyBatis。
2、前端框架:Layui。
3、使用Ajax進行資料的傳輸以及處理伺服器返回的響應資料。
四、專案執行演示
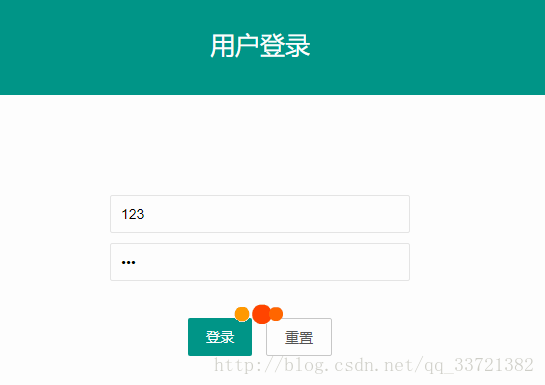
專案功能流程:使用者登入–>登入成功進入主介面–>退出登入。
1、使用者登入
使用者登入成功後,後臺會將使用者資訊存放到Session當中。如果使用者沒有登入成功,將無法進入主介面,因為專案使用了過濾器來過濾沒有登入的使用者請求。當用戶沒有登入的時候想進入主介面,就會觸發過濾器進行工作,將瀏覽器重定向到登入介面。
2、登入成功進入主介面
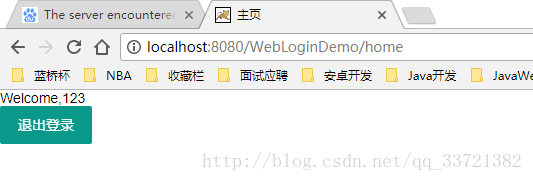
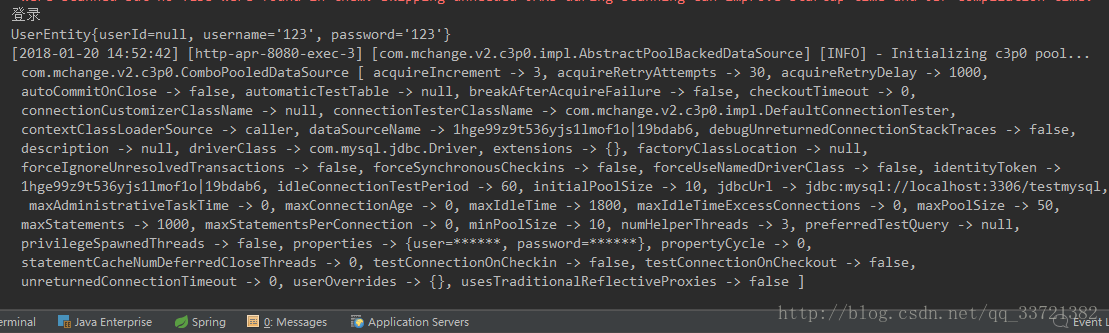
使用者登入之後會顯示其使用者名稱,後臺處理截圖:
3、退出登入
退出登入後,後臺將會清除Session存放的使用者資訊。
五、專案詳解(敘述如何完成登入功能)
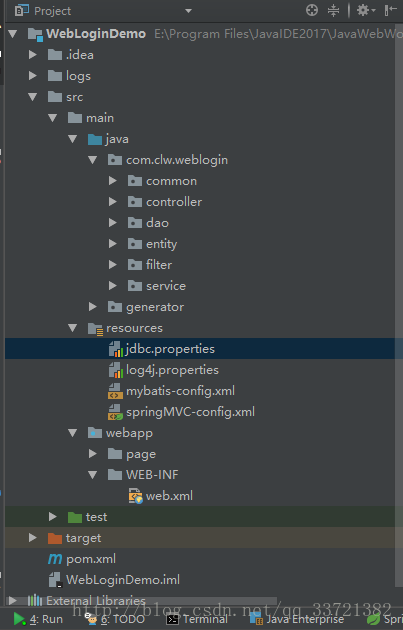
1、專案目錄結構
2、登入介面JSP程式碼(前臺)
<script language="javascript">
//顯示訊息
function showMessage(msg) {
layer.msg(msg);
}
//檢查輸入內容
function checkInput(operCode, operPwd) 3、後臺處理程式碼
(1)Controller層
@Controller
@RequestMapping("/user")
public class UserController {

    /**
     * Session存放登入使用者實體類的屬性名
     */
    public static final String USER_SESSION_NAME="user";

    /**
     * 自動寫入註解,要在對應實現類新增@Service註解
     */
    @Autowired
    private IUserService mUserService;

    /**
     * 使用者登入方法<p></p>
     * springMVC可將HTTP請求的引數封裝到對應實體引數UserEntity物件中,注意請求引數名稱和實體類屬性名稱要相同
     * @param session
     * @param userEntity
     * @return
     */
    @RequestMapping("/login")
    @ResponseBody
    public ResultEntity login(HttpSession session,UserEntity userEntity){
        System.out.println("登入");
        System.out.println(userEntity.toString());
        ResultEntity resultEntity=mUserService.login(userEntity);
        if(200 == resultEntity.getState()){
            //登入成功,儲存使用者資訊到Session
            session.setAttribute(USER_SESSION_NAME,resultEntity.getData());
        }
        return resultEntity;
    }


    /**
     * 模擬登入方法,不連線資料庫
     * @param session
     * @param username
     * @param password
     * @return
     */
    @RequestMapping("/testLogin")   //
    @ResponseBody   //@ResponseBody標籤可將方法的返回值作為響應主體返回給客戶端
    public ResultEntity testLogin(HttpSession session,String username,String password){
        System.out.println("username:"+username);
        System.out.println("password:"+password);
        ResultEntity resultEntity=new ResultEntity();
        if("123".equals(username) && "123".equals(password)){
            //模擬登入成功
            session.setAttribute(USER_SESSION_NAME,"user"); //存放使用者登入的資訊
            resultEntity.setState(200);
            resultEntity.setMessage("登入成功");
        }else{
            resultEntity.setMessage("登入失敗,使用者名稱或密碼錯誤");
        }
        return resultEntity;
    }
}
(2)Service層
/**
 * 使用者服務介面實現類
 *
 * @author clw
 * @create 2018-01-20 10:31
 **/
@Service
public class UserSeiviceImpl implements IUserService {

    @Autowired
    private UserEntityMapper mUserEntityMapper;

    public ResultEntity login(UserEntity userEntity) {
        ResultEntity resultEntity=new ResultEntity();
        //Example類指定如何構建一個動態的where子句.
        UserEntityExample example=new UserEntityExample();
        //建立SQL語句條件物件
        UserEntityExample.Criteria criteria=example.createCriteria();
        //新增SQL語句where子句的條件:相當於 select * from tb_user where username=123 and password=123;
        criteria.andUsernameEqualTo(userEntity.getUsername());
        criteria.andPasswordEqualTo(userEntity.getPassword());
        example.or(criteria);
        //執行查詢,返回結果
        List<UserEntity> list=mUserEntityMapper.selectByExample(example);
        if(list.size()>0){
            resultEntity.setState(200);
            resultEntity.setMessage("登入成功");
            resultEntity.setData(list.get(0));
        }else{
            resultEntity.setMessage("登入失敗");
        }
        return resultEntity;
    }
}
4、前臺處理後臺返回的響應資料ResultEntity
//請求成功後回撥方法
function onSuccess(data) {
layer.close(index);
//在這裡對伺服器返回的JSON資料進行處理,可通過 “物件名.屬性名”獲取對應的屬性
showMessage(data.message);
if (200 == data.state ) {
//登入成功,進入主介面
$(window).attr('location', '${ctx}/home');
} else {
$("#input_username").val("");
$("#input_password").val("");
$("#input_username").focus();
}
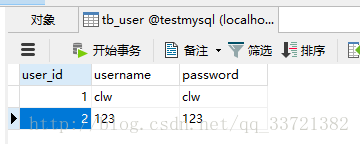
}5、資料庫表設計
專案詳解到這裡就結束了,不過裡面的內容需要花時間好好去理解和運用!雖然簡單,但比較實用!
六、JSP前臺和後臺互動的響應模式
1、基本概念
JSP頁面常常需要通過表單或者Ajax往後臺(伺服器)傳輸使用者輸入的資料,並且要對伺服器返回的響應資料進行處理,實際開發中主要使用Ajax進行資料的傳輸以及處理伺服器返回的響應資料。本章主要講JSP前臺和後臺互動的響應模式,即伺服器返回給客戶端的響應資料是什麼結構、客戶端如何處理這種資料並把結果反饋給使用者。
以使用者登入為例,客戶端使用Ajax把使用者輸入的使用者名稱和密碼傳送到伺服器對應介面,然後伺服器處理客戶端發來的資料進行處理並且返回結,最後客戶端對伺服器返回的資料進行處理、反饋登入結果給使用者。
2、伺服器響應資料實體類設計
/**
 * 介面返回的result類(普通json響應實體)<p>
 * 一般作為響應主體( @ResponseBody)返回給瀏覽器客戶端進行處理,客戶端使用Ajax進行處理<p>
 * <p>客戶使用方法</p>
 * 通過“物件名.屬性名”來獲得相應資料,根據資料進行處理
 */
public class ResultEntity{
    /**
     * 狀態碼,推薦參考http響應碼進行設定,以下是HTTP常見錯誤狀態程式碼<p>
     * 200:響應成功。<p>
     * 400:錯誤的請求。客戶端傳送的HTTP請求不正確。<p>
     * 404:檔案不存在,在伺服器上沒有客戶端請求訪問的文件。<p>
     * 405:伺服器不支援客戶端的請求方式。<p>
     * 500:伺服器內部錯誤。<p>
     */
    private int state;

    /**
     * message為介面返回的個人編的提示訊息;狀態資訊,返回錯誤的時候進行設定以方便除錯。
     */
    private String message;

    /**
     * 具體資料
     */
    private Object data;

    public int getState() {
        return state;
    }

    public void setState(int state) {
        this.state = state;
    }

    public String getMessage() {
        return message;
    }

    public void setMessage(String message) {
        this.message = message;
    }

    public Object getData() {
        return data;
    }

    public void setData(Object data) {
        this.data = data;
    }
}
3、介面返回的result類(普通json響應實體)的使用
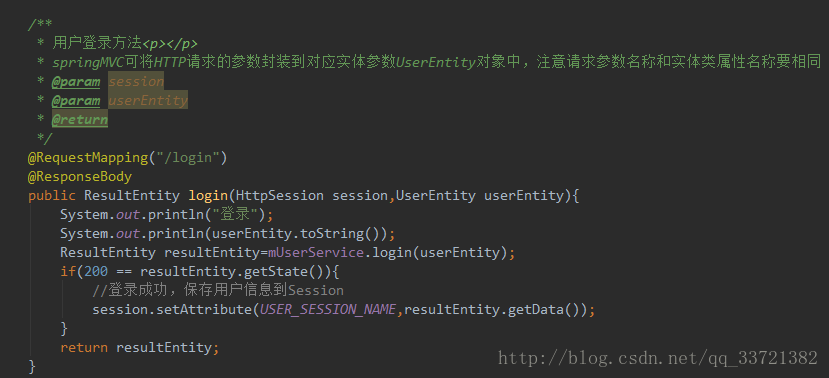
如圖所示,Controller層的login()方法添加了@ResponseBody註解,這個標籤的作用是可將方法的返回值作為響應主體返回給客戶端。當客戶端拿到這個響應資料,實際上就是拿到了上面的ResultEntity實體類物件,在客戶端這是一個JSON物件,可通過 “物件名.屬性名”獲取對應的屬性(注意使用Ajax的時候要設定伺服器返回型別為JSON),這個時候客戶端就可以根據屬性把登入結果反饋給使用者。
本專案在Service層對ResultEntity物件進行了屬性設定:當用戶登入成功的時候,將ResultEntity物件的state屬性設定為200,說明使用者登入成功了,並設定提示資訊,同時把從資料庫查出來的使用者實體類存放到ResultEntity物件內的data屬性。Service層處理完畢後將ResultEntity物件返回給了客戶端,客戶端根據返回的ResultEntity物件的state屬性判斷使用者是否登入成功(只有state=200的時候才表示使用者登入成功)並反饋登入結果給使用者。這個就是我要著重說明的JSP前臺和後臺互動的響應模式。