Android獲取圖片任意一點的RGB值
阿新 • • 發佈:2019-02-05
最近要做一個點選圖片任何一個地方取色值然後傳給藍芽裝置的一個功能。在網上搜索了一番,大部分都是重複,有的功能實現了,但是效果不好,大部分都取色值不準確,偏差有點大,於是決定還是自己動手寫了一個,在這裡分享給大家,有需要的朋友可以下載我寫的這個小demo。
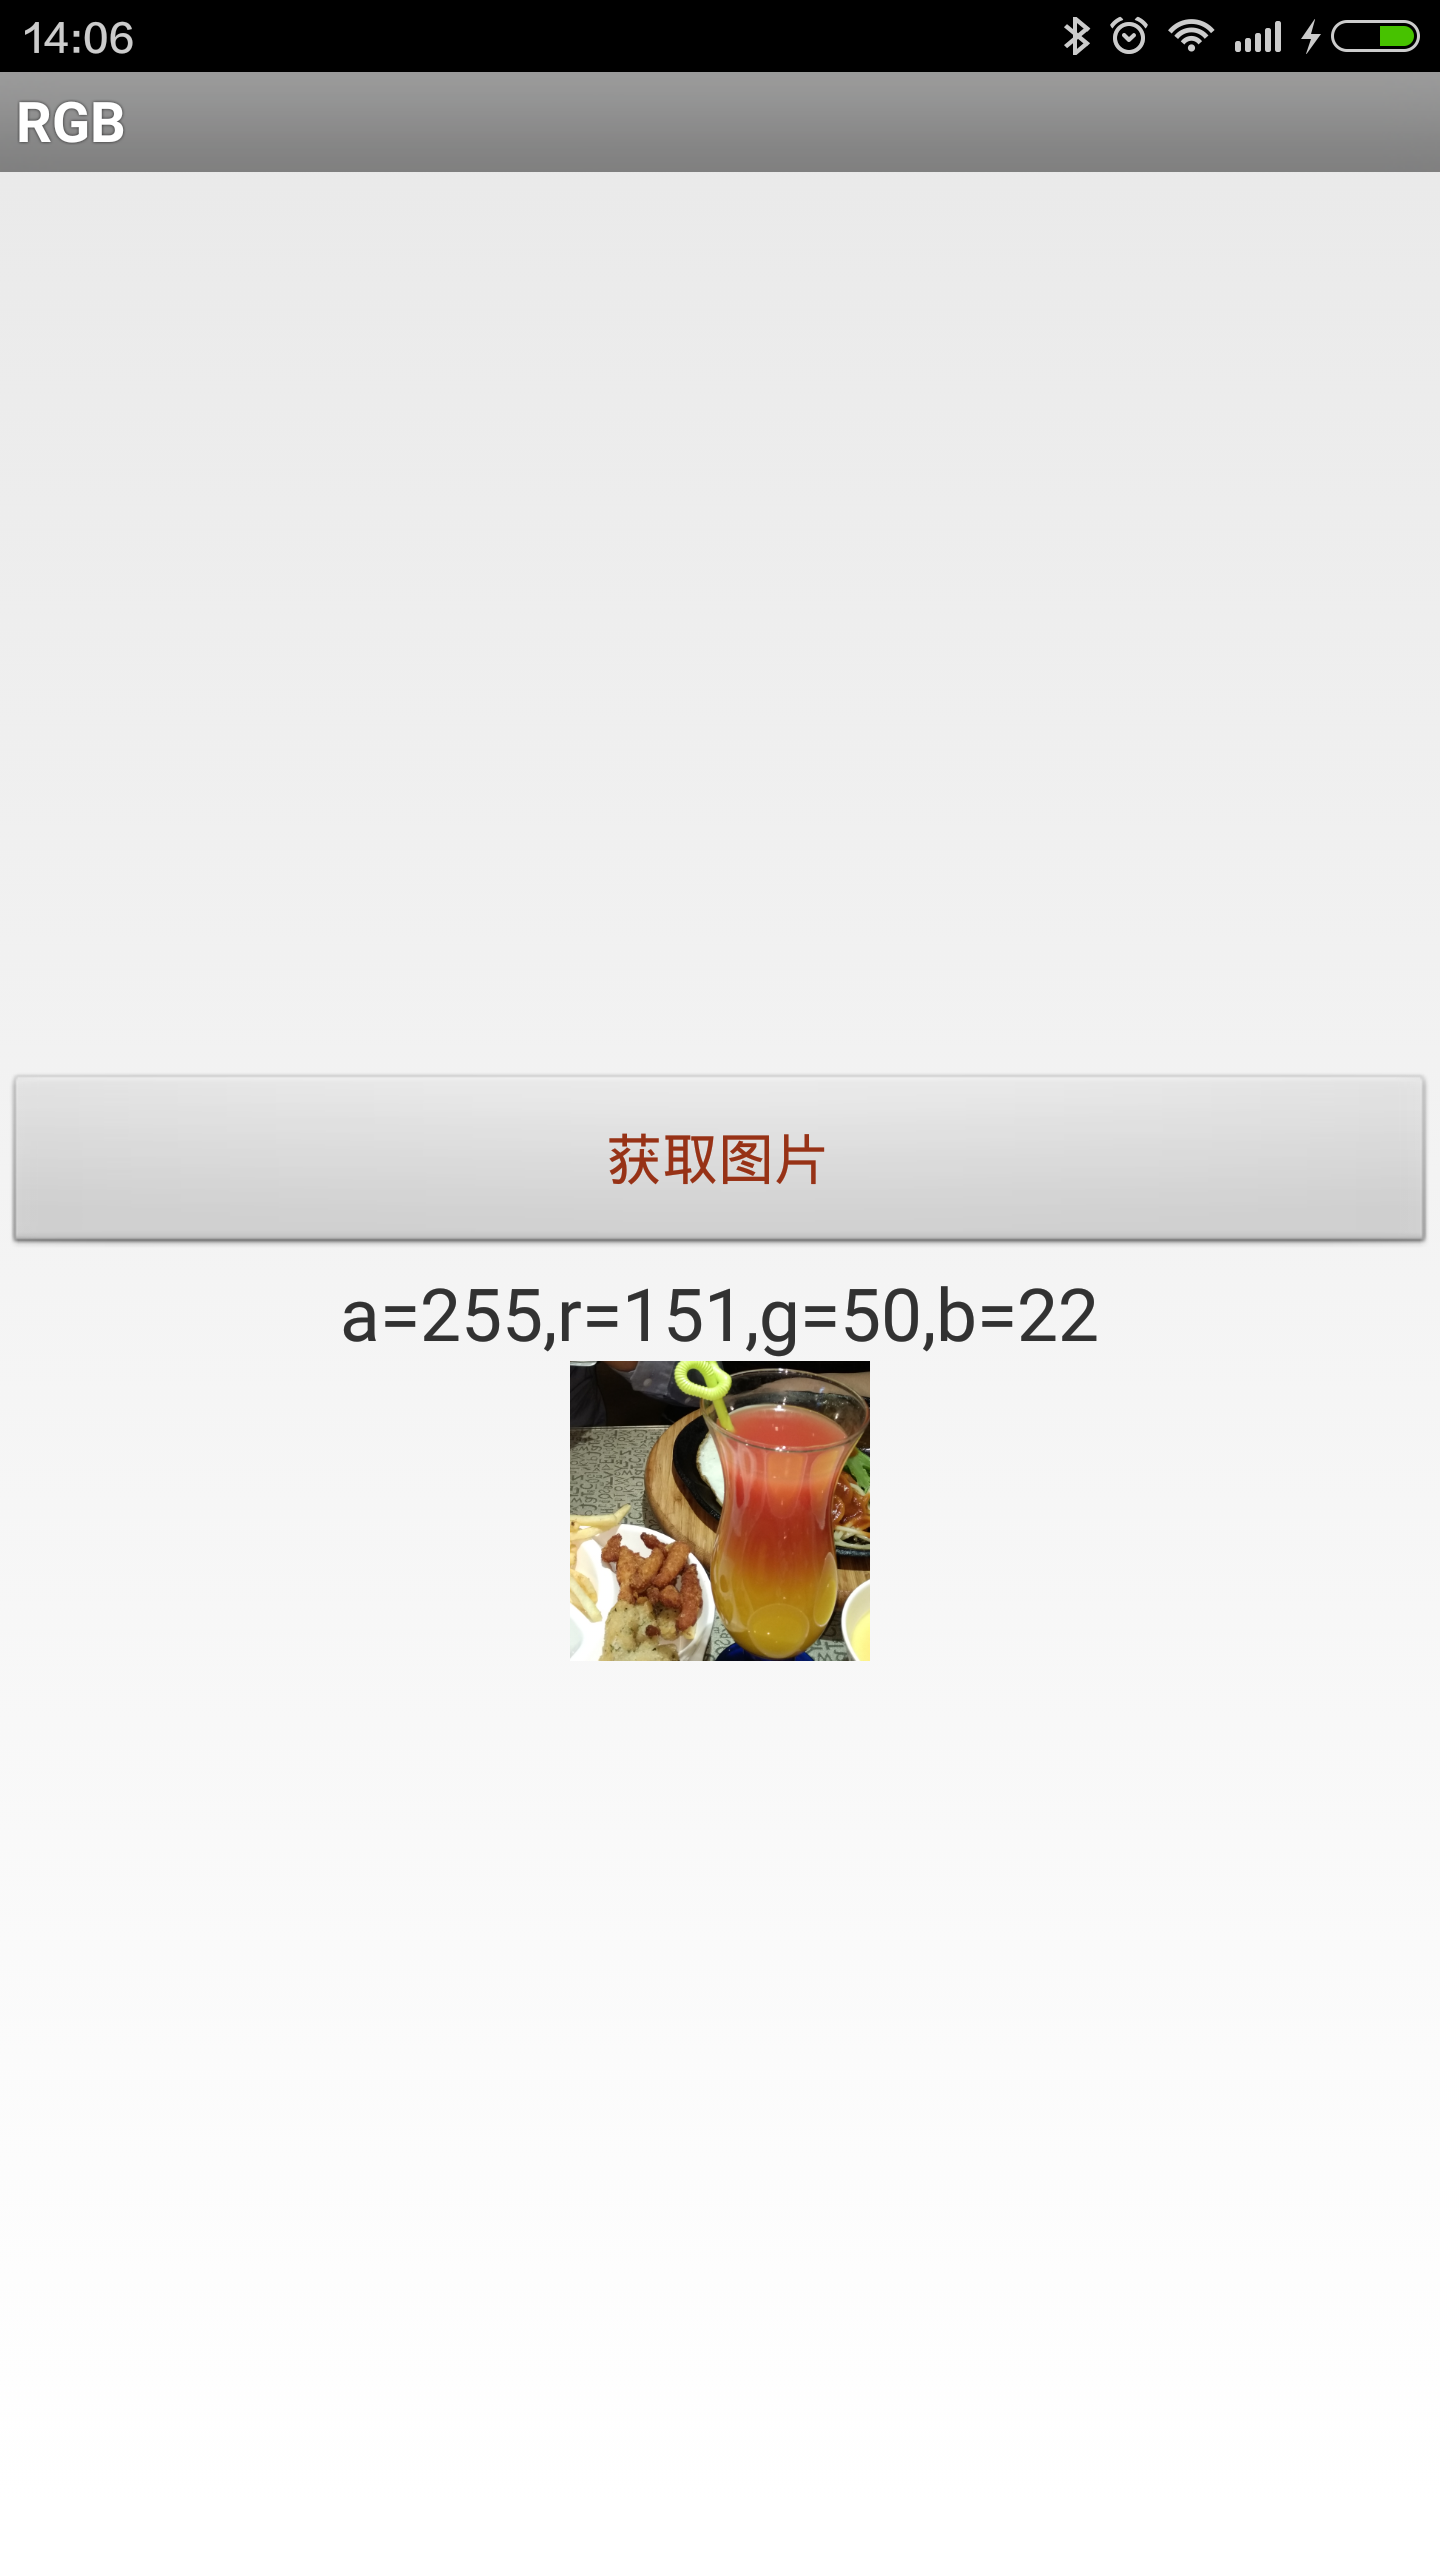
效果:
基本介紹
思路:
一
首先需要一張圖片,這裡由於我的強迫症,我沒有寫死,而是去相簿選擇一張照片。
二
獲取圖片的寬、高,為了精度,這裡一定要設定BitmapFactory.Options,通過座標的形式來獲取RGB值,也就是說把一張圖片通過座標分為若干個小點。
上程式碼:
private 重點:一定要設定BitmapFactory.Options newOpts = new BitmapFactory.Options();否則座標獲取不準確
三
通過getPixel(x, y)方法通過座標拿到我們需要的色值即可,比較簡單。
iv_image.setOnTouchListener(new OnTouchListener() {
@Override
public boolean onTouch(View v, MotionEvent event) {
int x = (int) event.getX();
int y = (int) event.getY();
if (event.getAction() == MotionEvent.ACTION_UP) {
int color = bitmap.getPixel(x, y);
// 如果你想做的更細緻的話 可以把顏色值的R G B 拿到做響應的處理
int r = Color.red(color);
int g = Color.green(color);
int b = Color.blue(color);
int a = Color.alpha(color);
Log.i(TAG, "r=" + r + ",g=" + g + ",b=" + b);
tv_rgb.setText("a=" + a + ",r=" + r + ",g=" + g + ",b="
+ b);
btnColor.setTextColor(Color.rgb(r, g, b));
}
return true;
}
});四、完整程式碼、
RGBActivity
package com.rgb;
import java.io.ByteArrayInputStream;
import java.io.ByteArrayOutputStream;
import android.app.Activity;
import android.content.Intent;
import android.graphics.Bitmap;
import android.graphics.BitmapFactory;
import android.graphics.Color;
import android.net.Uri;
import android.os.Bundle;
import android.provider.MediaStore;
import android.util.Log;
import android.view.MotionEvent;
import android.view.View;
import android.view.View.OnClickListener;
import android.view.View.OnTouchListener;
import android.widget.Button;
import android.widget.ImageView;
import android.widget.TextView;
public class RGBActivity extends Activity {
private TextView tv_rgb;
private ImageView iv_image;
private Bitmap bitmap;
private String TAG = "RGBActivity";
private Button btnColor;
public static final int NONE = 0;
public static final int PHOTOHRAPH = 1;// 拍照
public static final int PHOTOZOOM = 2; // 縮放
public static final int PHOTORESOULT = 3;// 結果
public static final String IMAGE_UNSPECIFIED = "image/*";
public static final String TEMP_JPG_NAME = "temp.jpg";
@Override
protected void onCreate(Bundle savedInstanceState) {
super.onCreate(savedInstanceState);
setContentView(R.layout.activity_rgb);
tv_rgb = (TextView) findViewById(R.id.textview);
btnColor = (Button) findViewById(R.id.btnColor);
iv_image = (ImageView) findViewById(R.id.iv_image);
btnColor.setOnClickListener(new OnClickListener() {
@Override
public void onClick(View v) {
// TODO Auto-generated method stub
openAlbum();
}
});
iv_image.setOnTouchListener(new OnTouchListener() {
@Override
public boolean onTouch(View v, MotionEvent event) {
int x = (int) event.getX();
int y = (int) event.getY();
if (event.getAction() == MotionEvent.ACTION_UP) {
int color = bitmap.getPixel(x, y);
// 如果你想做的更細緻的話 可以把顏色值的R G B 拿到做響應的處理
int r = Color.red(color);
int g = Color.green(color);
int b = Color.blue(color);
int a = Color.alpha(color);
Log.i(TAG, "r=" + r + ",g=" + g + ",b=" + b);
tv_rgb.setText("a=" + a + ",r=" + r + ",g=" + g + ",b="
+ b);
btnColor.setTextColor(Color.rgb(r, g, b));
}
return true;
}
});
}
// 開啟相簿
private void openAlbum() {
/* Intent intent = new Intent(Intent.ACTION_GET_CONTENT);
intent.addCategory(Intent.CATEGORY_OPENABLE);
intent.setType("image*//*");*/
Intent intent = new Intent(Intent.ACTION_PICK, null);
intent.setDataAndType(MediaStore.Images.Media.EXTERNAL_CONTENT_URI,
"image/*");
/*
Intent intent = new Intent(Intent.ACTION_GET_CONTENT, null);
intent.setDataAndType(MediaStore.Images.Media.EXTERNAL_CONTENT_URI, IMAGE_UNSPECIFIED);*/
startActivityForResult(intent, PHOTOZOOM);
}
@Override
protected void onActivityResult(int requestCode, int resultCode, Intent data) {
try {
if (resultCode == NONE)
return;
if (data == null)
return;
// 讀取相簿縮放圖片
if (requestCode == PHOTOZOOM) {
/* Uri image = data.getData();
Toast.makeText(MymessageActivity.this,image+"", Toast.LENGTH_LONG).show();*/
if (data != null) {
startPhotoZoom(data.getData());
}
}
// 處理結果
if (requestCode == PHOTORESOULT) {
Bundle extras = data.getExtras();
if (extras != null) {
bitmap = extras.getParcelable("data");
//ByteArrayOutputStream stream = new ByteArrayOutputStream();
comp(bitmap);
//bitmap.compress(Bitmap.CompressFormat.JPEG, 100, stream);
iv_image.setImageBitmap(bitmap);
/* logoName = FileUtils.getFilename(MainAppUtil.getCustom().getSusername());
FileUtils.writeFile(Constants.LOGO_CACHE_PATH, logoName, photo);*/
}
}
super.onActivityResult(requestCode, resultCode, data);
} catch (Exception e) {
e.printStackTrace();
}
}
private Bitmap compressImage(Bitmap image) {
ByteArrayOutputStream baos = new ByteArrayOutputStream();
image.compress(Bitmap.CompressFormat.JPEG, 100, baos);//質量壓縮方法,這裡100表示不壓縮,把壓縮後的資料存放到baos中
int options = 100;
while (baos.toByteArray().length / 1024 > 100) { //迴圈判斷如果壓縮後圖片是否大於100kb,大於繼續壓縮
baos.reset();//重置baos即清空baos
image.compress(Bitmap.CompressFormat.JPEG, options, baos);//這裡壓縮options%,把壓縮後的資料存放到baos中
options -= 10;//每次都減少10
}
ByteArrayInputStream isBm = new ByteArrayInputStream(baos.toByteArray());//把壓縮後的資料baos存放到ByteArrayInputStream中
Bitmap bitmap = BitmapFactory.decodeStream(isBm, null, null);//把ByteArrayInputStream資料生成圖片
return bitmap;
}
    private  Bitmap comp(Bitmap image) {

        ByteArrayOutputStream baos = new ByteArrayOutputStream();
        image.compress(Bitmap.CompressFormat.JPEG, 100, baos);
        if (baos.toByteArray().length / 1024 > 1024) {
            //判斷如果圖片大於1M,進行壓縮避免在生成圖片(BitmapFactory.decodeStream)時溢位
            baos.reset();//重置baos即清空baos
            image.compress(Bitmap.CompressFormat.JPEG, 50, baos);
            //這裡壓縮50%,把壓縮後的資料存放到baos中
        }
        ByteArrayInputStream isBm = new ByteArrayInputStream(baos.toByteArray());
        BitmapFactory.Options newOpts = new BitmapFactory.Options();
        //開始讀入圖片,此時把options.inJustDecodeBounds 設回true了
        newOpts.inJustDecodeBounds = true;
        Bitmap bitmap = BitmapFactory.decodeStream(isBm, null, newOpts);
        newOpts.inJustDecodeBounds = false;
        int w = newOpts.outWidth;
        int h = newOpts.outHeight;
        //現在主流手機比較多是800*500解析度,所以高和寬我們設定為
        float hh = 800f;//這裡設定高度為800f
        float ww = 500f;//這裡設定寬度為500f
        //縮放比。由於是固定比例縮放,只用高或者寬其中一個數據進行計算即可
        int be = 1;//be=1表示不縮放
        if (w > h && w > ww) {//如果寬度大的話根據寬度固定大小縮放
            be = (int) (newOpts.outWidth / ww);
        } else if (w < h && h > hh) {//如果高度高的話根據寬度固定大小縮放
            be = (int) (newOpts.outHeight / hh);
        }
        if (be <= 0)
            be = 1;
        newOpts.inSampleSize = be;//設定縮放比例
        //重新讀入圖片,注意此時已經把options.inJustDecodeBounds 設回false了
        isBm = new ByteArrayInputStream(baos.toByteArray());
        bitmap = BitmapFactory.decodeStream(isBm, null, newOpts);
        return compressImage(bitmap);//壓縮好比例大小後再進行質量壓縮
    }
private void startPhotoZoom(Uri uri) {
Intent intent = new Intent("com.android.camera.action.CROP");
intent.setDataAndType(uri, IMAGE_UNSPECIFIED);
intent.putExtra("crop", "true");
// aspectX aspectY 是寬高的比例
intent.putExtra("aspectX", 1);
intent.putExtra("aspectY", 1);
// outputX outputY 是裁剪圖片寬高
intent.putExtra("outputX", 300);
intent.putExtra("outputY", 300);
intent.putExtra("return-data", true);
startActivityForResult(intent, PHOTORESOULT);
}
}
activity_rgb.xml
<LinearLayout xmlns:android="http://schemas.android.com/apk/res/android"
    xmlns:tools="http://schemas.android.com/tools"
    android:id="@+id/ll"
    android:layout_width="match_parent"
    android:layout_height="match_parent"
    android:gravity="center"
    android:orientation="vertical" >

    <Button
        android:id="@+id/btnColor"
        android:layout_width="fill_parent"
        android:layout_height="wrap_content"
        android:layout_gravity="top"
        android:text="獲取圖片" />

    <TextView
        android:id="@+id/textview"
        android:layout_width="wrap_content"
        android:layout_height="wrap_content"
        android:textSize="20.0sp" />

    <ImageView
        android:id="@+id/iv_image"
        android:layout_width="wrap_content"
        android:layout_height="wrap_content"
        android:gravity="center"
        android:scaleType="fitCenter" />

</LinearLayout>
專案下載地址:
有問題或好的建議可以給我留言。

