
BLE開發(TI CC254x)之串列埠收發
阿新 • • 發佈:2019-02-06
基於CC254x藍芽協議棧的串列埠收發非常簡單,現總結成5個步驟:
1.修改NPI下npi.c中的初始化函式
只需修改配置UART的兩個引數:波特率和流控制。
使用兩線的串列埠通訊時必須關閉流控制,波特率根據需求選擇。
void NPI_InitTransport( npiCBack_t npiCBack )
{
  halUARTCfg_t uartConfig;

  // configure UART
  uartConfig.configured           = TRUE;
  uartConfig.baudRate             = NPI_UART_BR;
  uartConfig.flowControl          = NPI_UART_FC;
  uartConfig.flowControlThreshold = NPI_UART_FC_THRESHOLD;
  uartConfig.rx.maxBufSize        = NPI_UART_RX_BUF_SIZE;
  uartConfig.tx.maxBufSize        = NPI_UART_TX_BUF_SIZE;
  uartConfig.idleTimeout          = NPI_UART_IDLE_TIMEOUT;
  uartConfig.intEnable            = NPI_UART_INT_ENABLE;
  uartConfig.callBackFunc         = (halUARTCBack_t)npiCBack;

  // start UART
  // Note: Assumes no issue opening UART port.
  (void)HalUARTOpen( NPI_UART_PORT, &uartConfig );

  return;
} 上述程式碼中baudRate和flowControl兩個成員分別為波特率和流控,點進去修改即可,非常方便。
2.修改預編譯選項
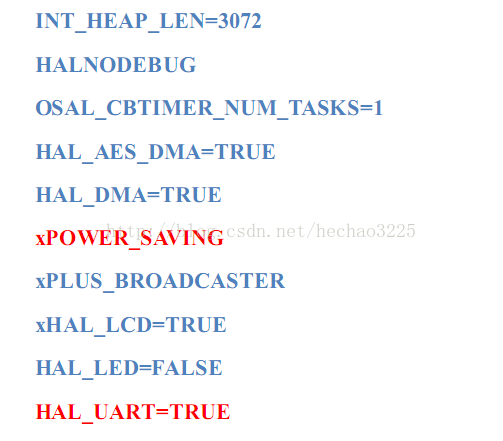
開啟 option——C/C++ 的 CompilerPreprocessor,新增 HAL_UART=TRUE,並將 POWER_SAVING 註釋掉。
3.修改串列埠讀寫函式(可選,npi.c中)
比如封裝其他格式的讀寫函式,以下參考博主甜甜大香瓜的程式碼:
//******************************************************************************
//name:     NPI_PrintString
//introduce:    列印字串
//parameter:    str:字串
//return:   none
//******************************************************************************
void NPI_PrintString(uint8 *str)
{
    NPI_WriteTransport(str, osal_strlen((char*)str));
}

//******************************************************************************
//name:     NPI_PrintValue
//introduce:    列印指定的格式的數值
//parameter:    title:字首字串
//              value:需要顯示的數值
//              format,需要顯示的進位制,10或16
//return:   none
//******************************************************************************
void NPI_PrintValue(char *title, uint16 value, uint8 format)
{
  uint8 tmpLen;
  uint8 buf[128];
  uint32 err;

  tmpLen = (uint8)osal_strlen( (char*)title );
  osal_memcpy( buf, title, tmpLen );
  buf[tmpLen] = ' ';
  err = (uint32)(value);
  _ltoa( err, &buf[tmpLen+1], format );
  NPI_PrintString(buf);
} 4.定義串列埠接收的回撥函式(可選,若需串列埠接收時必須)
//串列埠測試
static void NpiSerialCallback( uint8 port, uint8 events )
{
  (void)port;
  uint8 numBytes = 0;
  uint8 buf[128];

  if (events & HAL_UART_RX_TIMEOUT)   //串列埠有資料
  {
    numBytes = NPI_RxBufLen();       //讀出串列埠緩衝區有多少位元組
    if(numBytes)
    {
      //從串列埠緩衝區讀出numBytes位元組資料
      NPI_ReadTransport(buf,numBytes);
      //把串列埠接收到的資料再打印出來
      //NPI_WriteTransport(buf,numBytes);
      }
   }
} 5.呼叫串列埠初始化,進行串列埠通訊
若只發送,可以在SimpleBLECentral_Init中做如下呼叫:
  NPI_InitTransport(NULL);
NPI_PrintString("Hello World!\n");//測試串列埠傳送 NPI_InitTransport(NpiSerialCallback);//串列埠接收中斷觸發後,接收回調函式中處理串列埠接收到的資料
NPI_PrintString("Hello World!\n");