Qt 之 QPropertyAnimation
簡述
QPropertyAnimation類定義了Qt的屬性動畫。
QPropertyAnimation以Qt屬性做差值,作為屬性值儲存在QVariants中,該類繼承自QVariantAnimation,並支援基類相同的元型別動畫。
宣告屬性的類必須是一個QObject,為了能夠讓屬性可以用做動畫效果,必須提供一個setter(這樣,QPropertyAnimation才可以設定屬性的值)。注意:這能夠使它讓許多Qt控制元件產生動畫效果。
|
詳細描述
來看一個示例:
QPropertyAnimation *animation = new QPropertyAnimation(myWidget, "geometry");
animation->setDuration(10000);
animation->setStartValue(QRect(0, 0, 100, 30));
animation->setEndValue(QRect(250, 250, 100, 30));

animation->start();
- 1
- 2
- 3
- 4
- 5
- 6
首先,我們通過建構函式建立一個QPropertyAnimation物件,其中myWidget表示動畫作用的QObject物件,geometry則表示QObject的屬性。然後,可以指定屬性的開始值和結束值。此過程等於在你自己的類中實現了自定義屬性 - 需要用QVariantAnimation檢測你自定義的QVariant型別是否支援。
QVariantAnimation類詳細的描述瞭如何設定動畫。需要注意的是:如果沒有設定起始值,在QPropertyAnimation例項被建立時,屬性就會設定起始值為它有的值。
QPropertyAnimation就其本身而言非常奏效。對於複雜的動畫,例如:包含多個物件,則可以使用QAnimationGroup,動畫組是一個可以包含其它動畫的動畫,並可以管理動畫的播放。可以參考QParallelAnimationGroup的示例。
公共函式
-
QByteArray propertyName() const
返回動畫的目標屬性名 -
void setPropertyName(const QByteArray & propertyName)
設定動畫的目標屬性名 -
void setTargetObject(QObject * target)
設定動畫作用的QObject物件 -
QObject * targetObject() const
返回動畫作用的QObject物件
示例
原始屬性
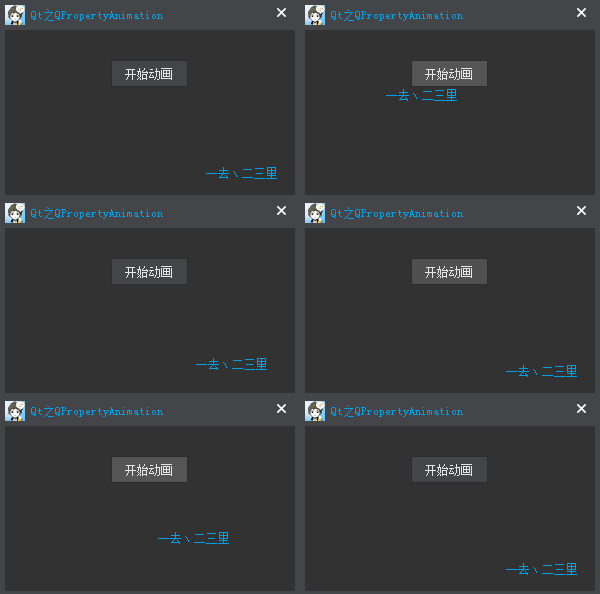
下面,利用上面講解的geometry屬性,來實現一個動畫座標變化。
效果
原始碼
QPropertyAnimation *pAnimation = new QPropertyAnimation(m_pLabel, "geometry");
pAnimation->setDuration(1000);
pAnimation->setStartValue(QRect(0, 0, 75, 25));
pAnimation->setEndValue(QRect(200, 130, 75, 25));
pAnimation->setEasingCurve(QEasingCurve::OutBounce);  // 緩和曲線風格
connect(pStartButton, SIGNAL(clicked(bool)), pAnimation, SLOT(start()));- 1
- 2
- 3
- 4
- 5
- 6
自定義屬性
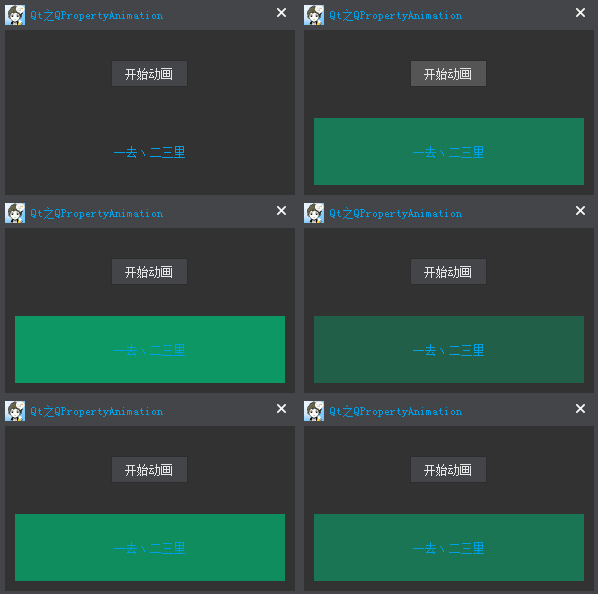
通過自定義屬性alpha,來使用動畫設定標籤的樣式。
效果
原始碼
#ifndef MAIN_WINDOW_H
#define MAIN_WINDOW_H

...

class MainWindow : public CustomWindow
{
    Q_OBJECT
    Q_PROPERTY(int alpha READ alpha WRITE setAlpha)

public:
    explicit MainWindow(QWidget *parent = 0);
    ~MainWindow();

private:
    int alpha() const;
    void setAlpha(const int alpha);

private:
    int m_nAlpha;
    QLabel *m_pLabel;
};

#endif // MAIN_WINDOW_H- 1
- 2
- 3
- 4
- 5
- 6
- 7
- 8
- 9
- 10
- 11
- 12
- 13
- 14
- 15
- 16
- 17
- 18
- 19
- 20
- 21
- 22
- 23
- 24
#include "main_window.h"

MainWindow::MainWindow(QWidget *parent)
    : CustomWindow(parent)
{
    ...

    QPushButton *pStartButton = new QPushButton(this);
    pStartButton->setText(QString::fromLocal8Bit("開始動畫"));

    m_pLabel = new QLabel(this);
    m_pLabel->setText(QString::fromLocal8Bit("一去丶二三裡"));
    m_pLabel->setAlignment(Qt::AlignCenter);
    m_pLabel->setStyleSheet("color: rgb(0, 160, 230);");

    QPropertyAnimation *pAnimation = new QPropertyAnimation();
    pAnimation->setTargetObject(this);
    pAnimation->setPropertyName("alpha");
    pAnimation->setDuration(1000);
    pAnimation->setKeyValueAt(0, 255);
    pAnimation->setKeyValueAt(0.5, 100);
    pAnimation->setKeyValueAt(1, 255);
    pAnimation->setLoopCount(-1);  //永遠執行,直到stop
    connect(pStartButton, SIGNAL(clicked(bool)), pAnimation, SLOT(start()));

    ...
}

int MainWindow::alpha() const
{
    return m_nAlpha;
}

void MainWindow::setAlpha(const int alpha)
{
    m_nAlpha = alpha;
    QString strQSS = QString("color: rgb(0, 160, 230); background-color: rgba(10, 160, 105, %1);").arg(m_nAlpha);
    m_pLabel->setStyleSheet(strQSS);
}- 1
- 2
- 3
- 4
- 5
- 6
- 7
- 8
- 9
- 10
- 11
- 12
- 13
- 14
- 15
- 16
- 17
- 18
- 19
- 20
- 21
- 22
- 23
- 24
- 25
- 26
- 27
- 28
- 29
- 30
- 31
- 32
- 33
- 34
- 35
- 36
- 37
- 38
- 39
O(∩_∩)O~是不是很easy,如果你想要實現更多其它效果,都可以自定義。但一定要注意以下兩點:
- 需要用QVariantAnimation檢測你自定義的QVariant型別是否支援。
- 宣告屬性的類必須是一個QObject,必須為屬性提供一個setter(這樣,QPropertyAnimation才可以設定屬性的值)。
--------------------- 本文來自 一去丶二三裡 的CSDN 部落格 ,全文地址請點選:https://blog.csdn.net/liang19890820/article/details/51882026?utm_source=copy


