
Springboot Enable開頭註解解釋說明
[email protected] 和 @Async一起使用做非同步
首先建立一個類我叫他Jeep
package com.gcx.spring.z_springboot_Enablexxx;

import java.util.concurrent.TimeUnit;

import org.springframework.scheduling.annotation.Async;
import org.springframework.stereotype.Component;

@Component
public class Jeep implements Runnable{

	public void run() {
		for(int i=0;i<10;i++) {
			try {
				System.out.println("=================:"+i);
				TimeUnit.SECONDS.sleep(1);
			} catch (InterruptedException e) {
				// TODO Auto-generated catch block
				e.printStackTrace();
			}
		}
	}

}
然後我們在Maven預設的App.class中呼叫
package com.gcx.spring.z_springboot_Enablexxx;

import org.springframework.boot.SpringApplication;
import org.springframework.boot.autoconfigure.SpringBootApplication;
import org.springframework.context.ConfigurableApplicationContext;
import org.springframework.scheduling.annotation.EnableAsync;

/**
 * Hello world!
 *EnableAsync 和@Async一起使用
 *@Import 匯入一個活著的多個配置類 會被spring容器所託管 ,如果匯入配置類,配置類所有bean都會被spring容器託管
 */
@SpringBootApplication
public class App {
    public static void main( String[] args ){
    	ConfigurableApplicationContext context = SpringApplication.run(App.class, args);
    	context.getBean(Runnable.class).run();
    	System.out.println("===end=====");
    	context.close();

    }
}
現在的情況是沒有非同步的情況,只能等待run方法執行之後再列印 end
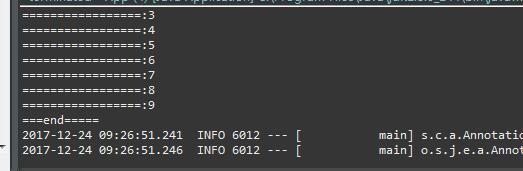
接下來我們使用非同步情況
在App.class加上 @EnableAsync註解。在Jeep.class上的run方法,加上@Async註解,列印結果如下
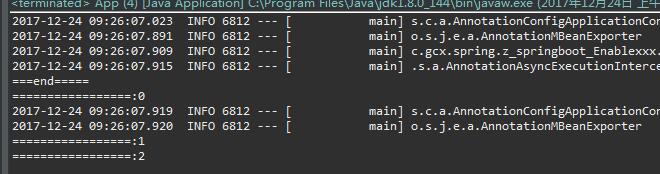
發現結果的確是非同步執行的
2.我們來看看Enable註解內部的原理,發現裡面都有@Import註解,它其實就是匯入一個類,舉例說明
建立一個User.class,Role.class
package com.gcx.spring.z_springboot_Enablexxx;

public class Role {

}
這兩個類現在沒有加上@Componment註解package com.gcx.spring.z_springboot_Enablexxx; public class User { }
我們在App.class呼叫的話 會顯示異常,告訴你Spring容器中並沒有這個bean
System.out.println(context.getBean(User.class));
System.out.println(context.getBean(Role.class));
這時候我們在App.class上加入@Import註解
@Import({User.class,Role.class})@Import既可以裝載一個或者多個類交給spriing容器處理,也可以裝載配置類MyConfig
package com.gcx.spring.z_springboot_Enablexxx;

import org.springframework.context.annotation.Bean;

public class MyConfig {

	@Bean
	public Runnable createRunnble1() {
		return () -> {};
	}

	@Bean
	public Runnable createRunnble2() {
		return () -> {};
	}


}
它還提供ImportSelector類靜態注入Spring容器,我們建立一個MyImportSelector類來實現這個介面
package com.gcx.spring.z_springboot_Enablexxx;

import org.springframework.context.annotation.ImportSelector;
import org.springframework.core.type.AnnotationMetadata;

/**
 * 返回值是一個class 該class必須是全稱 這樣會被spring容器託管
 * @author Administrator
 *
 */
public class MyImportSelector implements ImportSelector{

	@Override
	public String[] selectImports(AnnotationMetadata importingClassMetadata) {
		//可以獲取到註解資訊,然後根據註解資訊動態的返回被spring容器託管的bean
		System.out.println(importingClassMetadata.getAnnotationAttributes(EnableLog.class.getName()));
		return new String[]{User.class.getName(),Role.class.getName(),MyConfig.class.getName()};
	}

}
package com.gcx.spring.z_springboot_Enablexxx;

import java.lang.annotation.Documented;
import java.lang.annotation.ElementType;
import java.lang.annotation.Retention;
import java.lang.annotation.RetentionPolicy;
import java.lang.annotation.Target;

import org.springframework.context.annotation.Import;

@Target(ElementType.TYPE)
@Retention(RetentionPolicy.RUNTIME)
@Documented
@Import(MyImportSelector.class)
public @interface EnableLog {

	String name();
}
結果發現bean被全部注入到Spring容器,還可以列印註解資訊
有靜態的就有動態的注入
我們建立一個新類MyImportBeanDefinitionRegistrar實現ImportBeanDefinitionRegistrar
package com.gcx.spring.z_springboot_Enablexxx;

import org.springframework.beans.factory.config.BeanDefinition;
import org.springframework.beans.factory.support.BeanDefinitionBuilder;
import org.springframework.beans.factory.support.BeanDefinitionRegistry;
import org.springframework.context.annotation.ImportBeanDefinitionRegistrar;
import org.springframework.core.type.AnnotationMetadata;

public class MyImportBeanDefinitionRegistrar implements ImportBeanDefinitionRegistrar {

	@Override
	public void registerBeanDefinitions(AnnotationMetadata importingClassMetadata, BeanDefinitionRegistry registry) {
		BeanDefinitionBuilder  beanDefinitionBuilder=BeanDefinitionBuilder.rootBeanDefinition(User.class);
		BeanDefinition beanDefinition=beanDefinitionBuilder.getBeanDefinition();
		registry.registerBeanDefinition("User", beanDefinition);
	}

}
結果控制檯同樣輸出bean被裝載
靜態的是有返回值的,動態的是沒返回值
相關推薦
Springboot Enable開頭註解解釋說明
[email protected] 和 @Async一起使用做非同步 首先建立一個類我叫他Jeep package com.gcx.spring.z_springboot_Enablexx
springBoot(2)註解解釋
pub pri 允許 rest .class oot tap json格式 col @EnableAutoConfiguration:啟用springboot的自動配置,根據所聲明的依賴對Spring進行自動配置 @ComponentScan 和 @Component在
springBoot @Enable*註解的工作原理
圖解 tor def sys autoconf 屬性註入 erb ota efi 使用註解實現異步 RunnableDemo類 package com.boot.enable.bootenable; import org.springframework.schedu
SpringBoot常用註解解釋
@SpringBootConfiguration:這是SpringBoot專案的配置註解,在Spring Boot專案中推薦使用@SpringBootConfiguration替代@Configuration; @EnableAutoConfiguration:啟用自動配
springboot註解解釋和作用
@Configuration把一個類作為一個IoC容器,它的某個方法頭上如果註冊了@Bean,就會作為這個Spring容器中的Bean。 @Scope註解 作用域 @Lazy(true) 表示延遲初始化 @Service用於標註業務層元件、 @Controller用於標註控制
SpringBoot中@EnableAutoConfiguration註解的作用
springboot enable auto 在這個註解中,最重要的是它導入了一個類EnableAutoConfigurationImportSelector它是一個ImportSelector接口的實現類,而ImportSelector接口中的selectImports方法所返回的類將被Spri
Jersey常用註解解釋 @DET、@PUT、@POST 、@DELETE等
.com method jersey pub pos -1 images 技術分享 .cn uri : ... /resource/{id} public voide method(@PathParam("id") String userId){} uri : ..
SpringBoot中@EnableAutoConfiguration註解用法收集
enable ble using ring get http blog reference o-c 參考: http://blog.csdn.net/xiaoyu411502/article/details/52770723 https://docs.spring
SpringBoot中常見註解含義總結
而不是 com api 生效 boot width VC 而是 static @RestController @RestController被稱為一個構造型(stereotype)註解。它為閱讀代碼的開發人員提供建議。對於Spring,該類扮演了一個特殊角色。它繼承自@Co
Hibernate JPA中@Transient、@JsonIgnoreProperties、@JsonIgnore、@JsonFormat、@JsonSerialize等註解解釋
json 框架 代碼 mat per nbsp str 作用 tran 1、@Transient @Transient表示該屬性並非一個到數據庫表的字段的映射,ORM框架將忽略該屬性;如果一個屬性並非數據庫表的字段映射,就務必將其標示為@Transient,否則ORM框架
SpringBoot中DataSourceAutoConfiguration註解
lse tab 存在 except () reading provide ade 了吧 最近在學習springBoot時,其中有很大的一個核心的只是點:自動配置。 通過 DataSourceAutoConfiguration 學習 自動配置是如何實現的。 自動配置中比較重要
springboot自定義註解校驗時出現的異常
異常資訊: javax.validation.ConstraintDefinitionException: HV000074 原因: 在約束註釋中它是關於groups()和payload()缺失的,只需新增這兩行就可以了: Class<?>[] groups() de
Springboot自定義註解封裝快取操作
通常,我們為了避免頻繁的查詢訪問資料庫或者第三方介面,會把查詢結果快取到redis或者memcached之類的nosql資料庫中,避免資料庫或者網路開銷過大導致程式效率太低或者雪崩效應,但是程式碼中頻繁的操作快取,會讓程式碼過於冗長,可以通過自定義註解的方式封裝快取的操作,使程式碼更簡潔,話
SpringBoot整合Mybatis註解版---update出現org.apache.ibatis.binding.BindingException: Parameter 'XXX' not found. Available parameters are [arg1, arg0,
SpringBoot整合Mybatis註解版---update時出現的問題 問題描述: 1、sql建表語句 DROP TABLE IF EXISTS `department`; CREATE TABLE `department` ( `id` int(11) NOT NULL AUTO_I
SpringBoot | Hibernate @Transient 註解
在預設情況下,持久化類的所有屬性會自動對映到資料表的資料列。如果在實際應用中,不想持久儲存某些屬性,則可以考慮使用 @Transient來修飾它們。 如果一個屬性並非資料庫表的欄位對映,就務必將其標示為 @Transient,否則,ORM框架預設其註解為@Basic 被註解成 @Tra
springboot mybatis 的註解化
spring boot已經自動實現了mybatis所有配置,直接寫dao介面即可。 1.基本sql操作: @Mapper:宣告一個mybatis的dao介面,會被spring boot掃描到 @Select:宣告一個查詢方法,相應的增、刪、改使用:@Insert、 @Delete、 @Upd
springboot攔截器註解方式
WebMvcConfigurerAdapter配置類其實是Spring內部的一種配置方式,採用JavaBean的形式來代替傳統的xml配置檔案形式進行鍼對框架個性化定製,下面我們來看一下該類內的常用方法。 本章目標 繼承WebMvcConfigurerAdapter採用Ja
SpringBoot三種註解啟動方式
1、SpringBoot內建了Tomcat,Jetty等容器,所以可以通過註解方式進行啟動。 2、SpringBoot註解啟動的原理:SpringBoot main方法,是程式入口,啟動SpringBoot專案,建立內建tomcat伺服器,使用tomcat載入springmvc 註解啟動。註解的
SpringBoot自定義註解
我們經常使用自定義註解和AOP實現操作日誌、許可權、統計執行時間等功能,本文記錄使用SpringBoot實現自定義註解 本文在一個ssm專案的基礎上進行的 SpringBoot搭建SSM專案:https://blog.csdn.net/qidasheng2012/article/de
spring boot中的註解解釋
@Controller:用在controller,相當於@[email protected]同時使用,用@Controller,可以任意返回html頁面和jsp頁面,也可以返回物件 @RestController在使用的時候,只能返回html的頁面,不能配置jsp的試圖解析器 @R