
VS2017與CUDA9.2的下載與安裝
1.前言[1]
1.1.為什麼要重新編譯?
OpenCV3封裝了許多可以直接從高層呼叫的基於GPU計算的方法。但是直接用官網下載的編譯好的OpenCV3呼叫GPU命令會發生 No CUDA support 錯誤,如下圖:

錯誤描述中說 The library is compiled without CUDA support.
OpenCV需要和CUDA模組一起編譯,才可以使用GPU介面。
1.2.What is CUDA
The NVIDIA® CUDA® Toolkit provides a comprehensive development environment for C and C++ developers building GPU-accelerated applications. The CUDA Toolkit includes a compiler for NVIDIA GPUs, math libraries, and tools for debugging and optimizing the performance of your applications. You’ll also find programming guides, user manuals, API reference, and other documentation to help you get started quickly accelerating your application with GPUs.
CUDA toolkit是NVIDIA的一個驅動包,封裝了GPU硬體加速功能,遮蔽了硬體,提供方便呼叫的C/C++程式設計介面。[1]
2.CUDA的下載[2]
2.1.到英偉達的官網下載離線或者線上安裝包
到英偉達的CUDA官網https://developer.nvidia.com/cuda-downloads(百度一下就可以找到)下載所需要的CUDA版本。需要注意的是,CUDA版本與VS2017的支援有緊密聯絡。目前CUDA9.2最新的更新支援到了VS2017 15.6,而VS2017已經更新到了15.7.3。因此,請儘量使用較新版本的CUDA。
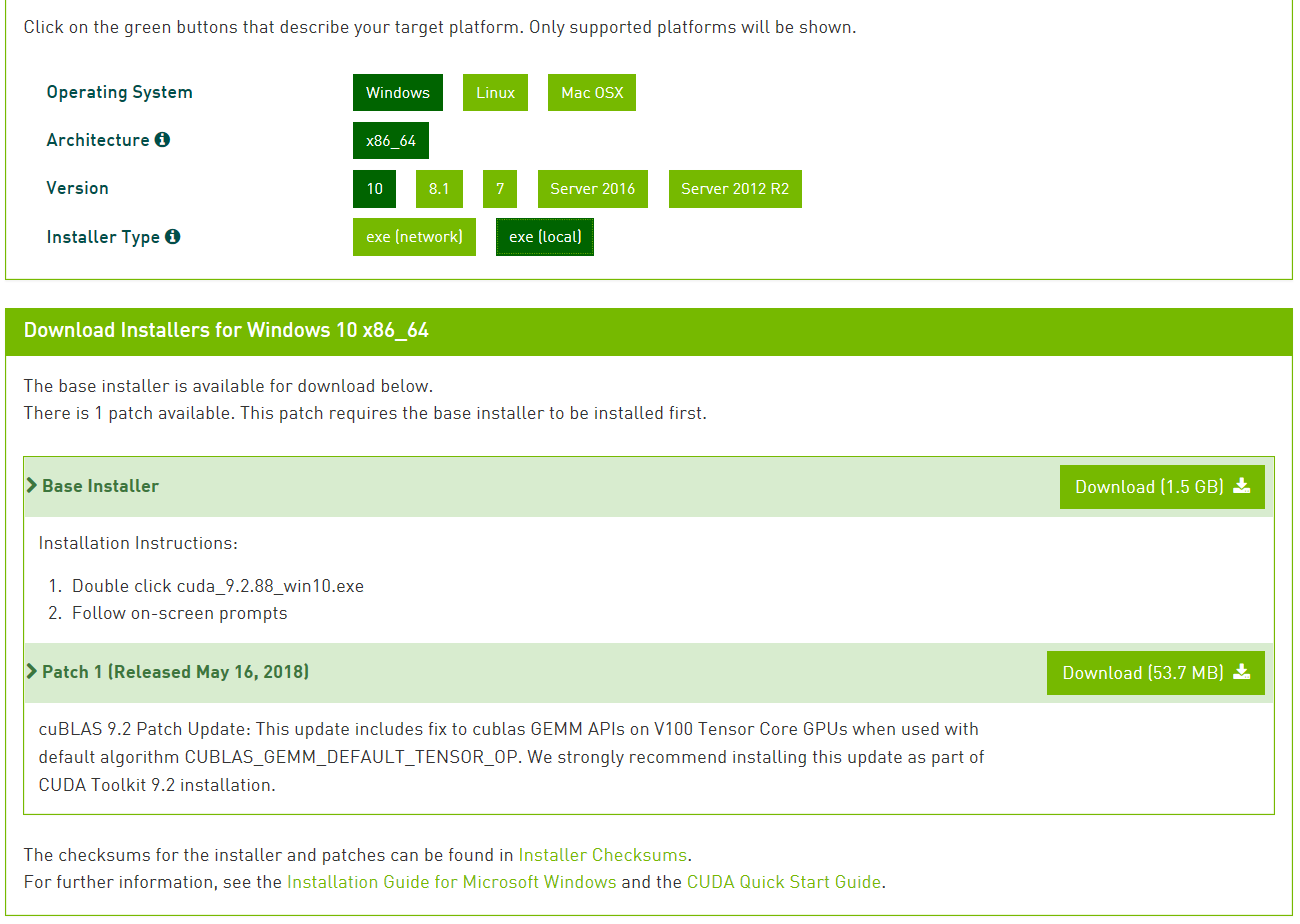
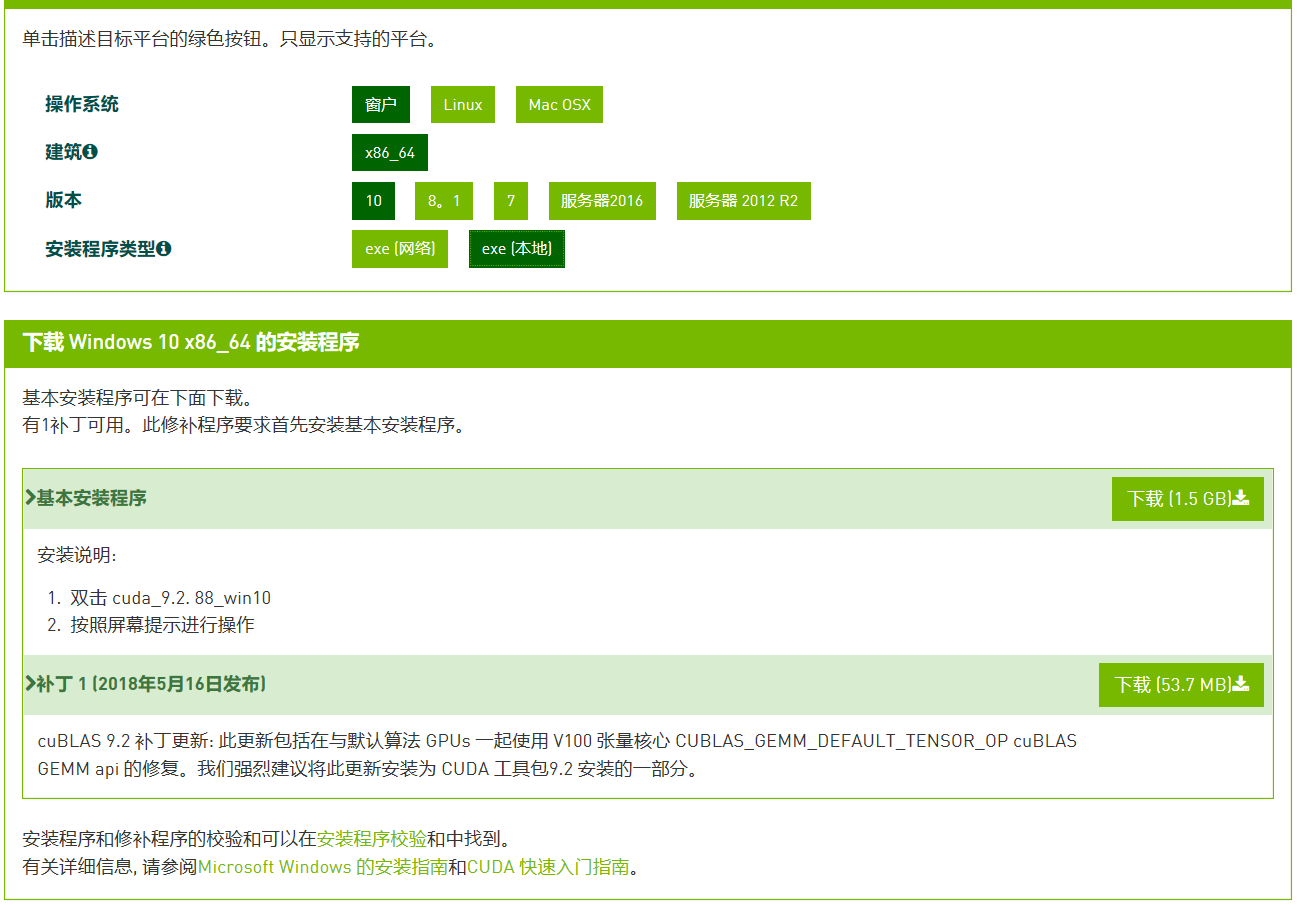
2.2.安裝CUDA
安裝過程中,如果你已經安裝的VS,請選擇自定義,並去除勾選Visual Studio Integration,否則會導致安裝失敗。安裝完成後此項無需單獨安裝(反正單獨安裝也是失敗~)。

官網對此事的相關說明:這不是安裝程式的一部分~

本文暫時爛尾,僅介紹CUDA9.2的安裝,CUDA9.2和opencv3.4以及contrib模組的下載以及編譯見本人另外一篇博文
參考文獻:
[1]https://blog.csdn.net/Goerge_L/article/details/79777989
[2]https://docs.nvidia.com/cuda/cuda-installation-guide-microsoft-windows/index.html
[3]https://cmake.org/download/