
OpenGL ES 紋理
使用前面學過的技術已經可以利用OpenGL ES構建立體圖形,並通過頂點著色器和片元著色器對其進行各種變化呢和光照等效果使得三維效果更加真實,實際上我看看到很多的3D遊戲漂亮多了,那是因為有各種各樣的漂亮的影象帶給人很多視覺盛宴,這篇文章在前面的基礎上,增加物體的表面貼圖,使得物體更加好看。
紋理概念
紋理用來表示影象照片或者說一系列的資料,使用紋理可以使物體用用更多的細節。OpenGL ES 2.0 中有兩種貼圖:二維紋理和立方體紋理。
每個二維紋理都由許多小的紋理元素組成,類似與片元和畫素,使用紋理最簡單的方式就是直接從一個影象載入資料。在OpenGL中規定紋理影象的左下角由
OpenGL ES 2.0不必是正方形,但是每個維度都應該是2的冪
在Android中使用的OpenGL ES的紋理座標系跟官方的紋理座標系統不一樣,在Android中使用官方的紋理座標系統,得到的結果是相反的,而是左上角是
二維紋理對映的原理

使用紋理就是在紋理圖中進行取樣,因此需要將選定的紋理座標穿進頂點著色器,經過插值在片元著色器中從紋理圖中的指定位置取樣即可,紋理圖的資料通過往片元插值器傳遞紋理單元指定的。
紋理物件和紋理載入
建立一個紋理物件,儲存渲染所需的紋理資料,例如影象資料、過濾模式、包裝模式。建立生成紋理物件的函式
public static native void glGenTextures(
        int n,  // 指定要生成的紋理物件的數量
        int[] textures,  // 儲存紋理物件ID的陣列
        int offset
    );
紋理物件在應用程式中不再使用時,需要刪除。
public static native void glDeleteTextures(
int n, // 指定要刪除的紋理數量
int 紋理物件的 ID 必須是 glGenTextures 產生的,一旦生成紋理ID,就必須繫結紋理物件才能繼續進行後續的操作。後續的操作將影響繫結的紋理物件。一旦紋理被繫結到一個特定的紋理目標,再刪除之前就一直保持著繫結狀態。
public static native void glBindTexture(
        int target, // 繫結紋理物件到目標 GL_TEXTURE_2D 或 GL_TEXTURE_CUBE_MAP
        int texture // 要繫結的紋理物件ID
    );
啟用某個紋理單元
public static native void glActiveTexture(
        int texture  // 要啟用的紋理單元
    );
對這兩個函式的理解:顯示卡中有N個紋理單元(GL_TEXTURE0,GL_TEXTURE1,GL_TEXTURE2…),每個紋理單元中儲存著很多紋理目標(targetTexture1D,targetTexture2D,targetTexture3D,targetTextureCube…),OpenGL ES 2.0貌似只支援了targetTexture2D和targetTextureCube。
紋理單元TextureUnit的定義如下
struct TextureUnit
{
    GLuint targetTexture1D;
    GLuint targetTexture2D;
    GLuint targetTexture3D;
    GLuint targetTextureCube;
    ...
};
glActiveTexture函式就是設定當前活動的紋理單元
TextureUnit textureUnits[GL_MAX_TEXTURE_IMAGE_UNITS]
GLuint currentTextureUnit = 0;
// ...
void glActiveTexture(GLenum textureUnit)
{
    currentTextureUnit = textureUnit  - GL_TEXTURE0 ;
}
glBindTexture函式就是將紋理物件ID賦值給當前活動的紋理單元的對應的目標紋理。
void glBindTexture(GLenum textureTarget, GLuint textureObject)
{
    TextureUnit *texUnit = &textureUnits[currentTextureUnit];
    switch(textureTarget)
    {
    case GL_TEXTURE_1D: texUnit->targetTexture1D = textureObject; break;
    case GL_TEXTURE_2D: texUnit->targetTexture2D = textureObject; break;
    case GL_TEXTURE_3D: texUnit->targetTexture3D = textureObject; break;
    case GL_TEXTURE_CUBEMAP: texUnit->targetTextureCube = textureObject; break;
    }
}
獲取一副圖片的紋理資料
public static void texImage2D(int target,  // 常數GL_TEXTURE_2D
                              int level,  // 表示多級解析度的紋理影象的級數,若只有一種解析度,則level設為0。
                              Bitmap bitmap,
                              int border  // 邊框,一般設為0
                             )
其他紋理選項的設定使用glTexParameterf系列函式
public static native void glTexParameterf(
        int target,
        int pname,  // 設定的引數,可以是GL_TEXTURE_MAG_FILTER,GL_TEXTURE_MIN_FILTER,GL_TEXTURE_WRAP_S,GL_TEXTURE_WRAP_T
        float param  // 引數對應的值
    );
應用紋理的例子
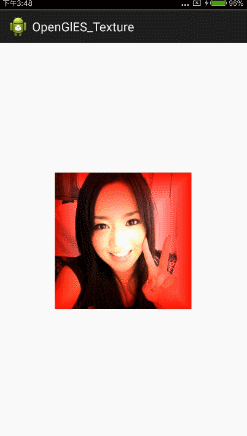
對前面的立方體的每個面應用一張圖片作為紋理貼圖,效果圖(這個紋理圖是哪個老師來著?)
Rectangle.java
public class Rectangle {
    private FloatBuffer mVertexBuffer;
    private int mProgram;
    private int mPositionHandle;
    private int muMVPMatrixHandle;
    private int mColorHandle;
    private int muMMatrixHandle;
    private int muLightLocationHandle;
    private int mTextureCoordHandle;
    private int textureId;
    private int muTextureHandle;

    private Context mContext;
    public Rectangle(Context context) {
        this.mContext = context;
        initVetexData();
    }

    public void initVetexData() {
        float vertices[] = new float[] {
                // 頂點   顏色      紋理座標
                //前面
                0, 0, 1,  1,1,1,0,  0.5f, 0.5f,
                1, 1, 1,  1,0,0,0,  1.0f, 0.0f,
                -1, 1, 1,  1,0,0,0,  0.0f, 0.0f,
                0, 0, 1,  1,1,1,0,  0.5f, 0.5f,
                -1, 1, 1,  1,0,0,0,  0.0f, 0.0f,
                -1,-1, 1,  1,0,0,0,  0.0f, 1.0f,
                0, 0, 1,  1,1,1,0,  0.5f, 0.5f,
                -1,-1, 1,  1,0,0,0,  0.0f, 1.0f,
                1,-1, 1,  1,0,0,0,  1.0f, 1.0f,
                0, 0, 1,  1,1,1,0,  0.5f, 0.5f,
                1,-1, 1,  1,0,0,0,  1.0f, 1.0f,
                1, 1, 1,  1,0,0,0,  1.0f, 0.0f,
                //後面
                0, 0,-1,  1,1,1,0,  0.5f, 0.5f,
                1, 1,-1,  1,0,0,0,  1.0f, 0.0f,
                1,-1,-1,  1,0,0,0,   0.0f, 0.0f,
                0, 0,-1,  1,1,1,0,  0.5f, 0.5f,
                1,-1,-1,  1,0,0,0,   0.0f, 0.0f,
                -1,-1,-1,  1,0,0,0,  0.0f, 1.0f,
                0, 0,-1,  1,1,1,0,  0.5f, 0.5f,
                -1,-1,-1,  1,0,0,0,  0.0f, 1.0f,
                -1, 1,-1,  1,0,0,0, 1.0f, 1.0f,
                0, 0,-1,  1,1,1,0,  0.5f, 0.5f,
                -1, 1,-1,  1,0,0,0, 1.0f, 1.0f,
                1, 1,-1,  1,0,0,0,  1.0f, 0.0f,
                //左面
                -1, 0, 0,  1,1,1,0, 0.5f, 0.5f,
                -1, 1, 1,  1,0,0,0, 1.0f, 0.0f,
                -1, 1,-1,  1,0,0,0,  0.0f, 0.0f,
                -1, 0, 0,  1,1,1,0, 0.5f, 0.5f,
                -1, 1,-1,  1,0,0,0,  0.0f, 0.0f,
                -1,-1,-1,  1,0,0,0,  0.0f, 1.0f,
                -1, 0, 0,  1,1,1,0, 0.5f, 0.5f,
                -1,-1,-1,  1,0,0,0,  0.0f, 1.0f,
                -1,-1, 1,  1,0,0,0, 1.0f, 1.0f,
                -1, 0, 0,  1,1,1,0, 0.5f, 0.5f,
                -1,-1, 1,  1,0,0,0, 1.0f, 1.0f,
                -1, 1, 1,  1,0,0,0, 1.0f, 0.0f,
                //右面
                1, 0, 0,  1,1,1,0, 0.5f, 0.5f,
                1, 1, 1,  1,0,0,0, 1.0f, 0.0f,
                1,-1, 1,  1,0,0,0,  0.0f, 0.0f,
                1, 0, 0,  1,1,1,0, 0.5f, 0.5f,
                1,-1, 1,  1,0,0,0,  0.0f, 0.0f,
                1,-1,-1,  1,0,0,0,  0.0f, 1.0f,
                1, 0, 0,  1,1,1,0, 0.5f, 0.5f,
                1,-1,-1,  1,0,0,0,  0.0f, 1.0f,
                1, 1,-1,  1,0,0,0, 1.0f, 1.0f,
                1, 0, 0,  1,1,1,0, 0.5f, 0.5f,
                1, 1,-1,  1,0,0,0, 1.0f, 1.0f,
                1, 1, 1,  1,0,0,0, 1.0f, 0.0f,
                //上面
                0, 1, 0,  1,1,1,0,  0.5f, 0.5f,
                1, 1, 1,  1,0,0,0,  1.0f, 0.0f,
                1, 1,-1,  1,0,0,0,   0.0f, 0.0f,
                0, 1, 0,  1,1,1,0,  0.5f, 0.5f,
                1, 1,-1,  1,0,0,0,   0.0f, 0.0f,
                -1, 1,-1,  1,0,0,0,  0.0f, 1.0f,
                0, 1, 0,  1,1,1,0,  0.5f, 0.5f,
                -1, 1,-1,  1,0,0,0,  0.0f, 1.0f,
                -1, 1, 1,  1,0,0,0, 1.0f, 1.0f,
                0, 1, 0,  1,1,1,0,  0.5f, 0.5f,
                -1, 1, 1,  1,0,0,0, 1.0f, 1.0f,
                1, 1, 1,  1,0,0,0,  1.0f, 0.0f,
                //下面
                0,-1, 0,  1,1,1,0,  0.5f, 0.5f,
                1,-1, 1,  1,0,0,0,  1.0f, 0.0f,
                -1,-1, 1,  1,0,0,0,  0.0f, 0.0f,
                0,-1, 0,  1,1,1,0,  0.5f, 0.5f,
                -1,-1, 1,  1,0,0,0,  0.0f, 0.0f,
                -1,-1,-1,  1,0,0,0,  0.0f, 1.0f,
                0,-1, 0,  1,1,1,0,  0.5f, 0.5f,
                -1,-1,-1,  1,0,0,0,  0.0f, 1.0f,
                1,-1,-1,  1,0,0,0,  1.0f, 1.0f,
                0,-1, 0,  1,1,1,0,  0.5f, 0.5f,
                1,-1,-1,  1,0,0,0,  1.0f, 1.0f,
                1,-1, 1,  1,0,0,0,  1.0f, 0.0f
            };
        ByteBuffer vbb = ByteBuffer.allocateDirect(vertices.length * 4);
        vbb.order(ByteOrder.nativeOrder());
        mVertexBuffer = vbb.asFloatBuffer();
        mVertexBuffer.put(vertices);
        mVertexBuffer.position(0);

        int vertexShader = loaderShader(GLES20.GL_VERTEX_SHADER, vertexShaderCode);
        int fragmentShader = loaderShader(GLES20.GL_FRAGMENT_SHADER, fragmentShaderCode);

        mProgram = GLES20.glCreateProgram();
        GLES20.glAttachShader(mProgram, vertexShader);
        GLES20.glAttachShader(mProgram, fragmentShader);
        GLES20.glLinkProgram(mProgram);

        mPositionHandle = GLES20.glGetAttribLocation(mProgram, "aPosition");
        mColorHandle = GLES20.glGetAttribLocation(mProgram, "aColor");
        mTextureCoordHandle = GLES20.glGetAttribLocation(mProgram, "aTextureCoord");

        muMVPMatrixHandle = GLES20.glGetUniformLocation(mProgram, "uMVPMatrix");
        muMMatrixHandle = GLES20.glGetUniformLocation(mProgram, "uMMatrix");
        muLightLocationHandle = GLES20.glGetUniformLocation(mProgram, "uLightLocation");
        muTextureHandle = GLES20.glGetUniformLocation(mProgram, "uTexture");
        initTexture();
    }

    // 初始化紋理
    public void initTexture() {
        int [] textures = new int[1];
        GLES20.glGenTextures(1, textures, 0);
        textureId = textures[0];
        // 啟用紋理單元,預設啟用的就是0號紋理單元
        //GLES20.glActiveTexture(GLES20.GL_TEXTURE0);
        // 將紋理物件ID繫結到當前活動的紋理單元0上的GL_TEXTURE_2D目標
        GLES20.glBindTexture(GLES20.GL_TEXTURE_2D, textureId);
        // 後面對紋理的設定都是對綁定了的紋理所生效的
        //縮小取樣使用最近點取樣
        GLES20.glTexParameterf(GLES20.GL_TEXTURE_2D, GLES20.GL_TEXTURE_MIN_FILTER,GLES20.GL_NEAREST);
        //縮小取樣使用最近點取樣
        GLES20.glTexParameterf(GLES20.GL_TEXTURE_2D,GLES20.GL_TEXTURE_MAG_FILTER,GLES20.GL_LINEAR);
        //紋理包裹拉伸方式在st軸採用擷取拉伸方式,這些設定指的是對座標範圍超過1的部分的限制
        GLES20.glTexParameterf(GLES20.GL_TEXTURE_2D, GLES20.GL_TEXTURE_WRAP_S,GLES20.GL_CLAMP_TO_EDGE);
        GLES20.glTexParameterf(GLES20.GL_TEXTURE_2D, GLES20.GL_TEXTURE_WRAP_T,GLES20.GL_CLAMP_TO_EDGE);

        Bitmap bitmap = BitmapFactory.decodeResource(mContext.getResources(), R.drawable.texture);
        GLUtils.texImage2D(GLES20.GL_TEXTURE_2D, 0, bitmap, 0);
        // 圖片已經載入到了視訊記憶體,可以回收
        bitmap.recycle();
    }

    public void draw() {
        GLES20.glDrawArrays(GLES20.GL_TRIANGLES, 0, 12*6);
    }

    public void setValue(float[] mvpMatrix, float[] mMatrix) {
        GLES20.glUseProgram(mProgram);
        mVertexBuffer.position(0);
        GLES20.glVertexAttribPointer(mPositionHandle, 3, GLES20.GL_FLOAT, false, (4+3+2) * 4, mVertexBuffer);
        mVertexBuffer.position(3);
        GLES20.glVertexAttribPointer(mColorHandle, 4, GLES20.GL_FLOAT, false, (4+3+2) * 4, mVertexBuffer);
        mVertexBuffer.position(7);
        GLES20.glVertexAttribPointer(mTextureCoordHandle, 2, GLES20.GL_FLOAT, false, (4+3+2) * 4, mVertexBuffer);
        GLES20.glEnableVertexAttribArray(mPositionHandle);
        GLES20.glEnableVertexAttribArray(mColorHandle);
        GLES20.glEnableVertexAttribArray(mTextureCoordHandle);

        GLES20.glUniform3f(muLightLocationHandle, 0, 0, 20);
        GLES20.glUniformMatrix4fv(muMVPMatrixHandle, 1, false, mvpMatrix, 0);
        GLES20.glUniformMatrix4fv(muMMatrixHandle, 1, false, mMatrix, 0);
        // 將使用的紋理單元0傳遞給片元著色器
        GLES20.glUniform1i(muTextureHandle, 0);
    }

    private int loaderShader(int type, String shaderCode) {
        int shader = GLES20.glCreateShader(type);
        GLES20.glShaderSource(shader, shaderCode);
        GLES20.glCompileShader(shader);
        return shader;
    }

    private String vertexShaderCode = "uniform mat4 uMVPMatrix;"
            + "attribute vec2 aTextureCoord;"
            + "varying vec2 vTextureCoord;"
            + "uniform mat4 uMMatrix;"
            + "uniform vec3 uLightLocation;"
            + "attribute vec4 aColor;"
            + "varying  vec4 vColor;"
            + "varying vec4 vDiffuse;"
            + "attribute vec3 aPosition;"
            + "void main(){"
            + "vec3 normalVectorOrigin = aPosition;"
            + "vec3 normalVector = normalize((uMMatrix*vec4(normalVectorOrigin,1)).xyz);"
            + "vec3 vectorLight = normalize(uLightLocation - (uMMatrix * vec4(aPosition,1)).xyz);"
            + "float factor = max(0.0, dot(normalVector, vectorLight));"
            + "vDiffuse = factor*vec4(1,1,1,1.0);"
            + "gl_Position = uMVPMatrix * vec4(aPosition,1);"
            + "vColor = aColor;"
            + "vTextureCoord = aTextureCoord;"  // 將紋理座標傳到片元著色器,得到更多的插值紋理座標
            + "}";

    private String fragmentShaderCode = "precision mediump float;"
            + "uniform sampler2D uTexture;"  // 這個uniform變量表示了紋理資料,從java中傳過來的是所在的紋理單元編號
            + "varying vec2 vTextureCoord;"
            + "varying  vec4 vColor;"
            + "varying vec4 vDiffuse;"
            + "void main(){"
            + "gl_FragColor = (vColor*vDiffuse + vColor*vec4(0.6,0.6,0.6,1))*texture2D(uTexture, vTextureCoord);"  // 在紋理的基礎上還考慮到光照,texture2D函式用於紋理取樣
            + "}";
}
需要注意的還是傳入的頂點的時候數組裡麵包含了頂點、顏色和紋理座標,因此要用ByteBuffer的position方法定位。
程式碼下載