
Spring Boot 單元測試注入properties檔案的屬性
阿新 • • 發佈:2019-02-08
專案中想自定義一個properties檔案存放支付相關的屬性,並在單元測試中獲取這個屬性進行測試。
發現注入不成功,對此進行研究。
分析過程:
如下圖所示在resources目錄下建立一個pay.properties檔案:
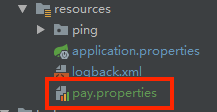
並在其中其中存放需要的key和value

然後開始編寫單元測試類:
package com.pingxx.example;


import org.junit.Test;
import org.junit.runner.RunWith;
import org.slf4j.Logger;
import org.slf4j.LoggerFactory;
import org.springframework.beans.factory.annotation.Value;
import org.springframework.beans.factory.config.PropertyPlaceholderConfigurer;
import org.springframework.context.annotation.Bean;
import org.springframework.context.annotation.Configuration;
import org.springframework.core.io.ClassPathResource;
import org.springframework.test.context.ContextConfiguration;
import org.springframework.test.context.junit4.SpringJUnit4ClassRunner;

@RunWith(SpringJUnit4ClassRunner.class)
public class PayTest {

    static final Logger logger = LoggerFactory.getLogger(PayTest.class);

    @Value("${pay.apiKey}")
    private String apiKey;

    @Value("${pay.appId}")
    private String appId;

    @Value("${pay.privateKeyPath}")
    private String privateKeyPath;

    @Test
    public void valueTest(){
//        Assert.assertNotNull(apiKey);
        logger.debug(apiKey);
    }

}
發現日誌系統打印出來的apiKey對應的值為:"${pay.apiKey}",顯然不對。
估計是此時還沒有載入配置檔案,因此把pay.properties內的內容複製到application.properties試試,發現還不行。
因此對程式碼進行修改:
package com.pingxx.example;


import org.junit.Test;
import org.junit.runner.RunWith;
import org.slf4j.Logger;
import org.slf4j.LoggerFactory;
import org.springframework.beans.factory.annotation.Value;
import org.springframework.context.annotation.Bean;
import org.springframework.context.annotation.Configuration;
import org.springframework.context.annotation.PropertySource;
import org.springframework.context.support.PropertySourcesPlaceholderConfigurer;
import org.springframework.test.context.ContextConfiguration;
import org.springframework.test.context.TestPropertySource;
import org.springframework.test.context.junit4.SpringJUnit4ClassRunner;

@RunWith(SpringJUnit4ClassRunner.class)
public class PayTest {

    static final Logger logger = LoggerFactory.getLogger(PayTest.class);

    @Value("${pay.apiKey}")
    private String apiKey;

    @Value("${pay.appId}")
    private String appId;

    @Value("${pay.privateKeyPath}")
    private String privateKeyPath;

    @Test
    public void valueTest(){
//        Assert.assertNotNull(apiKey);
        logger.debug(apiKey);
    }

    @Configuration
    @PropertySource("classpath:pay.properties")
    static class PropertiesWithJavaConfig {

        @Bean
        public static PropertySourcesPlaceholderConfigurer
        propertySourcesPlaceholderConfigurer() {
            return new PropertySourcesPlaceholderConfigurer();
        }
    }

}
發現apiKe的值被正確輸出。大功告成!
等等,作為追求完美的年輕人我們不能就此滿足,繼續查查官方文件,是否有更好的解決方案呢?
開啟spring boot的官方參考手冊(“spring-boot-reference”,點選可以下載)看看,能否有更好方法呢?
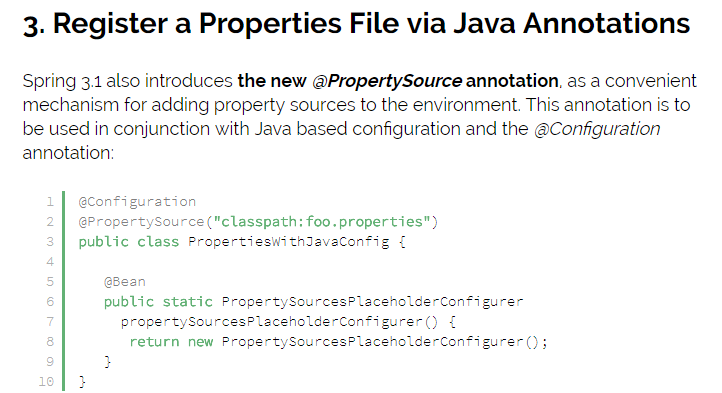
我們通過搜尋“PropertySource”發現瞭如下內容:
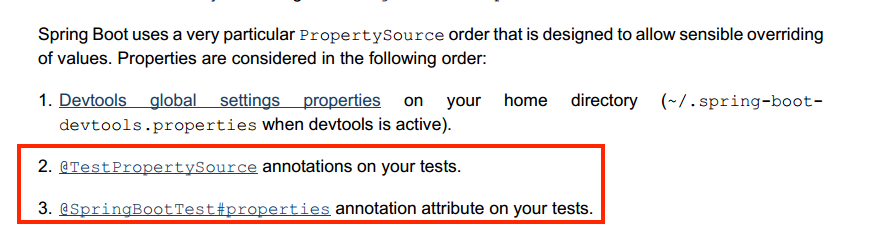
啥?TestPropertySource,看這名字就應該是和測試相關的屬性註解,看看後面的解釋"annotations on your tests",果然!
我們刪除上面的程式碼只新增一個註解看看
package com.pingxx.example;


import org.junit.Test;
import org.junit.runner.RunWith;
import org.slf4j.Logger;
import org.slf4j.LoggerFactory;
import org.springframework.beans.factory.annotation.Value;
import org.springframework.test.context.ContextConfiguration;
import org.springframework.test.context.TestPropertySource;
import org.springframework.test.context.junit4.SpringJUnit4ClassRunner;

@RunWith(SpringJUnit4ClassRunner.class)
@TestPropertySource("classpath:pay.properties")
public class PayTest {

    static final Logger logger = LoggerFactory.getLogger(PayTest.class);

    @Value("${pay.apiKey}")
    private String apiKey;

    @Value("${pay.appId}")
    private String appId;

    @Value("${pay.privateKeyPath}")
    private String privateKeyPath;

    @Test
    public void valueTest(){
//        Assert.assertNotNull(apiKey);
        logger.debug(apiKey);
    }


}
發現果真輸出了我們需要的value.
建議:
最近發現官方的參考手冊和GitHub程式碼和示例是最權威和最全面的參考文件。
建議不管學習什麼技術,都要下載下來,沒事的適合讀讀,遇到問題的適合多查查。