iOS 環信整合(五) 載入會話列表
阿新 • • 發佈:2019-02-10
昨天,去忙別的事情了,今天繼續更新環信整合的教程。
一、載入會話框
1. 新建一個cell
首先,我們自定義一個cell,用來實現會話框的好友暱稱、訊息、傳送時間等。繼承於YCBaseTableViewCell,這個是我自己寫的一個自定義cell的基類,你如果沒有引用我的YCBaseTableViewCell檔案,直接繼承蘋果的UITableViewCell即可。然後,新增一些初始化控制元件的程式碼,如下:
#import "YCBaseTableViewCell.h"
@interface ConversationCell : YCBaseTableViewCell
@property #import "ConversationCell.h"
@implementation ConversationCell
- (id)initWithStyle:(UITableViewCellStyle)style reuseIdentifier:(NSString 2. 獲取所有的會話
1、我們進入ChatListViewController.m檔案中,在類的宣告出遵循一些相關的協議,和新增相關的標頭檔案:
#import "ChatListViewController.h"
#import "ChatViewController.h"
#import "ConversationCell.h"
#import "ConvertToCommonEmoticonsHelper.h"

@interface ChatListViewController ()<IChatManagerDelegate, EMCallManagerDelegate,ChatViewControllerDelegate>
{
    NSArray *arrConversations;

}

@end
2、獲取聊天管理器物件
這個步驟很重要,缺少這個就載入不了會話的資料。
- (void)viewWillAppear:(BOOL)animated {
     [self getAllConversations]; //獲取所有的會話
}

- (void)viewDidLoad {
    [super viewDidLoad];

    self.title = @"會話";

    //聊天管理器, 獲取該物件後, 可以做登入、聊天、加好友等操作
    [[EaseMob sharedInstance].chatManager loadDataFromDatabase];
}
3、獲取所有的會話
//獲取所有的會話
- (void)getAllConversations
{
    arrConversations = [[EaseMob sharedInstance].chatManager conversations];
    [self.tableView reloadData];
}
二、顯示會話資料
1. 顯示好友暱稱和頭像
資料都已經載入好了,定義一個arrConversations陣列接收資料,然後用列表顯示出來。
#pragma mark - UITableView Delegate & DataSource
- (NSInteger)tableView:(UITableView *)tableView numberOfRowsInSection:(NSInteger)section {
    return arrConversations.count;
}

- (UITableViewCell *)tableView:(UITableView *)tableView cellForRowAtIndexPath:(NSIndexPath *)indexPath {
    static NSString *cellIdentifier = @"CELL";
    ConversationCell *cell = [tableView dequeueReusableCellWithIdentifier:cellIdentifier];
    if (cell == nil) {
        cell = [[ConversationCell alloc] initWithStyle:UITableViewCellStyleDefault reuseIdentifier:cellIdentifier];
    }

    EMConversation *conversation = [arrConversations objectAtIndex:indexPath.row];

    switch (conversation.conversationType) {
        //單聊會話
        case eConversationTypeChat:
        {
            cell.labName.text = conversation.chatter;
            cell.imgHeader.image = [UIImage imageNamed:@"chatListCellHead"];
            break;


        }
        //群聊會話
        case eConversationTypeGroupChat:
        {
            NSArray *groupArray = [[EaseMob sharedInstance].chatManager groupList];
                    for (EMGroup *group in groupArray) {
                        if ([group.groupId isEqualToString:conversation.chatter]) {
                            cell.labName.text = group.groupSubject;
                            cell.imgHeader.image = [UIImage imageNamed:group.isPublic ? @"groupPublicHeader" : @"groupPrivateHeader"]  ;
                            break;
                        }
                    }

        }
        //聊天室會話
        case eConversationTypeChatRoom:
        {

        }

        default:
            break;
    }

  //  cell.labMsg.text = [self subTitleMessageByConversation:conversation];

    return cell;
}
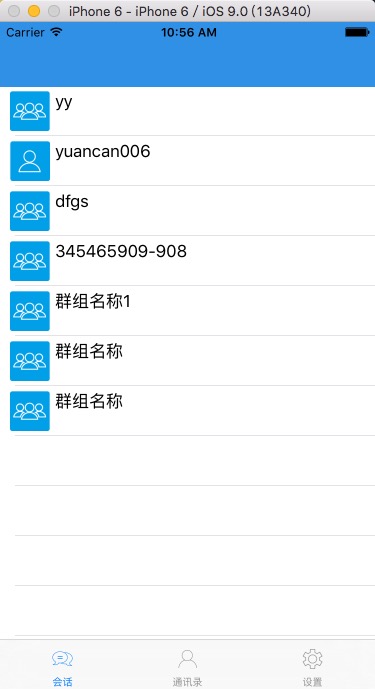
好吧,我們來編譯一下。
哎呦,不錯喔,但是感覺還是少點什麼。我們應該要顯示最後收到的一條訊息,和收到訊息的時間,對吧。
2. 顯示最後收到的訊息
用下面這個方法,記得先引入一個轉換表情的類:
#import "ConvertToCommonEmoticonsHelper.h"//得到最後訊息文字或者型別
-(NSString *)subTitleMessageByConversation:(EMConversation *)conversation
{
NSString *ret = @"";
EMMessage *lastMessage = [conversation latestMessage];
if (lastMessage) {
id<IEMMessageBody> messageBody = lastMessage.messageBodies.lastObject;
switch (messageBody.messageBodyType) {
//影象型別
case eMessageBodyType_Image:
{
ret = NSLocalizedString(@"message.image1", @"[image]");
} break;
//文字型別
case eMessageBodyType_Text:
{
NSString *didReceiveText = [ConvertToCommonEmoticonsHelper
convertToSystemEmoticons:((EMTextMessageBody *)messageBody).text]; //表情對映
ret = didReceiveText;
} break;
//語音型別
case eMessageBodyType_Voice:
{
ret = NSLocalizedString(@"message.voice1", @"[voice]");
} break;
//位置型別
case eMessageBodyType_Location:
{
ret = NSLocalizedString(@"message.location1", @"[location]");
} break;
//視訊型別
case eMessageBodyType_Video:
{
ret = NSLocalizedString(@"message.video1", @"[video]");
} break;
default:
break;
}
}
return ret;
}
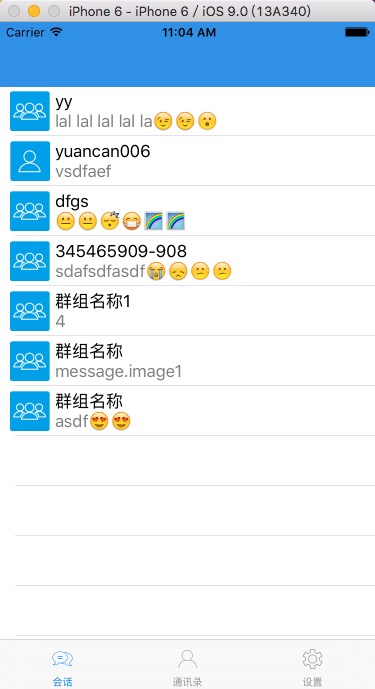
OK ,一步一步來,我們編譯一下,看看效果。
Very Good ! 然後我們在把收到訊息的時間給加上。
3. 顯示收到訊息的時間
1、先引入一個處理時間的標頭檔案:
#import "NSDate+Category.h"
2、新增處理時間的方法:
// 得到最後訊息時間
-(NSString *)lastMessageTimeByConversation:(EMConversation *)conversation
{
    NSString *ret = @"";
    EMMessage *lastMessage = [conversation latestMessage];;
    if (lastMessage) {
        ret = [NSDate formattedTimeFromTimeInterval:lastMessage.timestamp];
    }

    return ret;
}
3、在列表中顯示
在numberOfRowsInSection方法中新增:
cell.labTime.text = [self lastMessageTimeByConversation:conversation]; //顯示收到訊息的時間
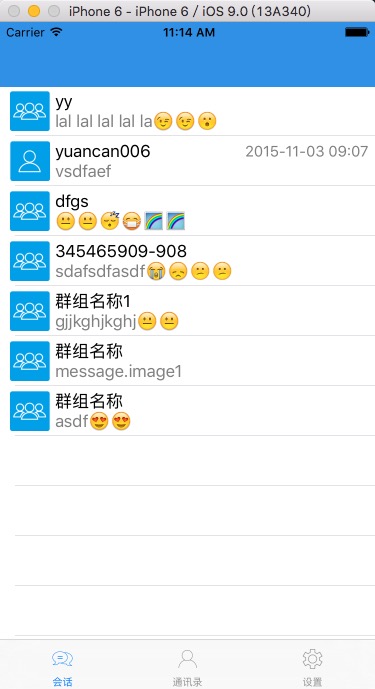
完工,編譯看效果。
補充說明
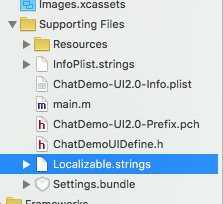
有讀者反饋,傳送訊息不顯示時間,會話列表也不顯示時間。原因是因為沒有新增”Localizable.string”這個檔案。新增進去,重新編譯,即可顯示時間。如下圖:


