
Maven+Nexus安裝和配置及使用
這幾天可能要用到Maven 專案管理,所以一頓窮搜,在網上找了一大堆資料各說各的,沒有一個是能說的清楚明白的,經過一下午的奮戰終於把大致的安裝和配置弄清楚了.如下:
1.安裝Nexus(作用:正常我們在區域網內如果配置好了Maven,他會每次都到maven官方網址去下載Jar包,如果10個人都需要這個jar那麼無疑需要下載10次,所以安裝Nexus,讓Maven每次都從nexus去下載,如果Nexus沒有的話,Nexus就去maven官方去下載並儲存到nexus伺服器中,之後就可以重複利用了)
安裝步驟:
1.下載nexus (我下的是nexus-2.8.1-01)
2.下載後解壓檔案包,
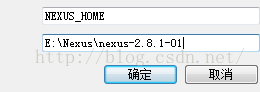
3.配置環境變數(可選):
4.在windows視窗下輸入 nexus 
5.啟動Nexus。兩種方式 1. nexus install 安裝版 在服務力開啟(有可能報錯) 2.nexus console 直接啟動.(肯定會成功 如果不成功可能是你的java 《1.7》版本活環境變數沒有配置)
6.進入頁面 localhost:8081.nexus
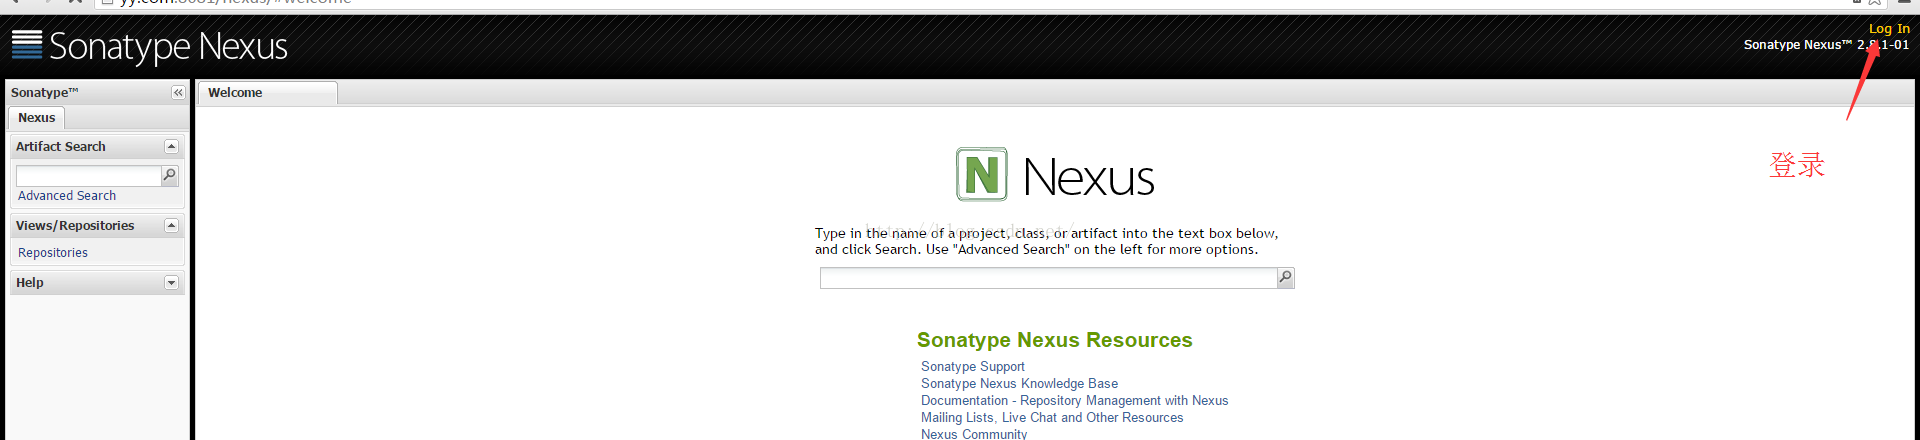
7. admin admin123 帳號密碼
8.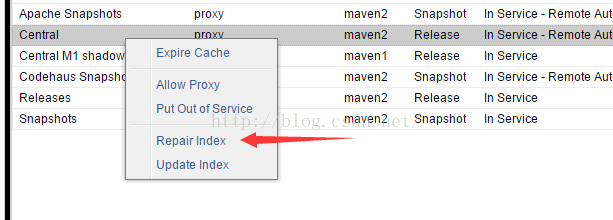
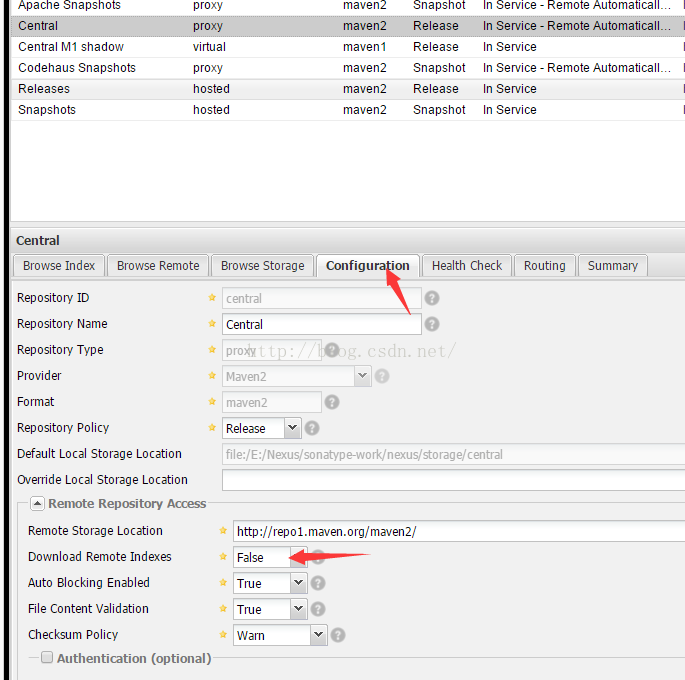
9.設定成true ,選中Central 右鍵選中“Repair Index” 點選 save 等一會 , Apache Snapshots、Codehaus Snapshots 執行相同步驟.
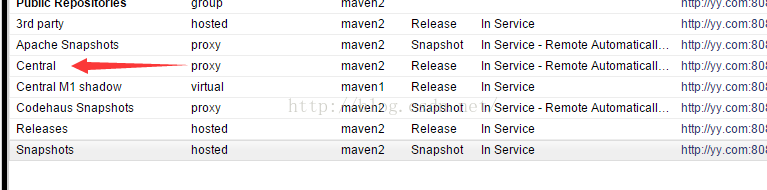
10.Releases、Snapshots 比較特殊除了上訴步驟 還要將Deployment Policy 屬性設定成 Allow Redeploy 儲存
11. Ok 設定成功。檢視這幾個裡面的 會發現什麼都沒有.因為還沒有下載東西
安裝Maven
1. 解壓Maven
2.進入apache-maven-3.3.3\conf 資料夾 找到settings.xml檔案。
3. 編輯settings.xml 看程式碼
<localRepository>D:\repository</localRepository> 指明本地下載的jar存放路徑 ,建立D盤下repository 資料夾
4.在servers 標籤下加入
<server>
<id>releases</id>
<username>admin</username>
<password>admin123</password>
</server>
<server>
<id>snapshots</id>
<username>admin</username>
<password>admin123</password>
</server>
5. 在mirrors標籤下加入 告訴讓你的maven到nexus伺服器去下載jar
<mirror>
<id>nexus</id>
<mirrorOf>*</mirrorOf>
<url>http://127.0.0.1:8081/nexus/content/groups/public</url>
</mirror>
6.在profiles 標籤下 加入 repositories 倉庫下載地址 pluginRepositories外掛倉庫下載jar地址
<profile>
<id>nexus</id>
<!--指定倉庫-->
<repositories>
<repository>
<id>central</id>
<url>http://127.0.0.1:8081/nexus/content/groups/public</url>
<releases><enabled>true</enabled></releases>
<snapshots><enabled>true</enabled></snapshots>
</repository>
</repositories>
<!--指定外掛倉庫-->
<pluginRepositories>
<pluginRepository>
<id>central</id>
<url>http://maven.com:8081/nexus/content/groups/public</url>
<releases><enabled>true</enabled></releases>
<snapshots><enabled>true</enabled></snapshots>
</pluginRepository>
</pluginRepositories>
</profile>
7.啟用profile 讓其有效
<activeProfiles>
<activeProfile>nexus</activeProfile>
</activeProfiles>
8.OK安裝完成.下面帶你們在Myeclipse下去試試啊.
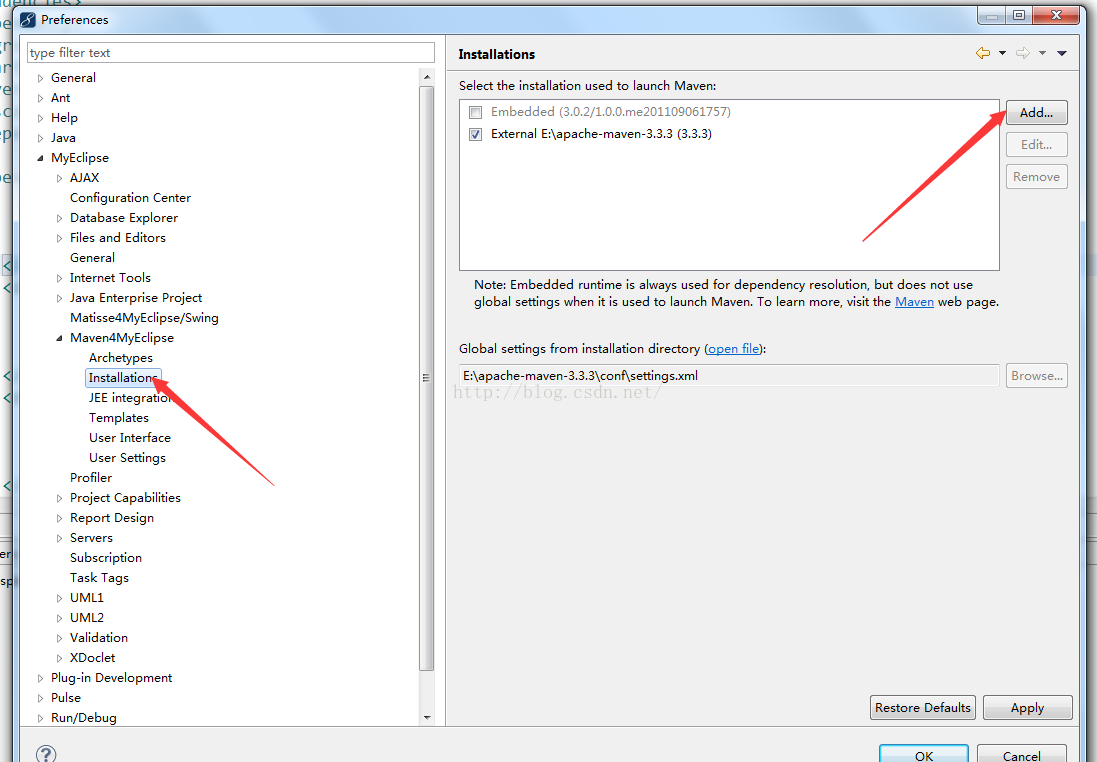
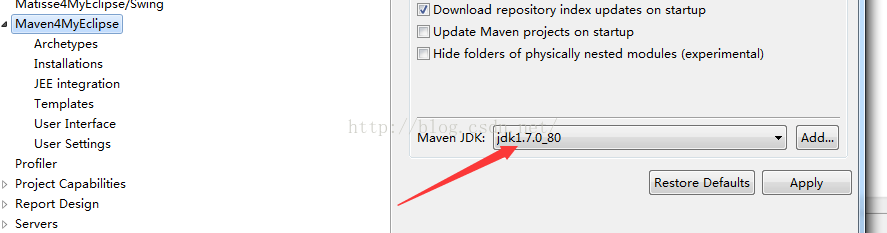
9.windows--preferences--MavenMyeclipse-- installations --新增maven 選中你解壓的那個maven 資料夾 (與新增tomcat類似),記住啊 你的執行環境一定要是1.7啊,否則執行不了
10.將你maven/conf 資料夾下的setting.xml複製到D:\repository 下
設定使用者設定 User-settings 選中你建立的D:\repository 資料夾 點選確定
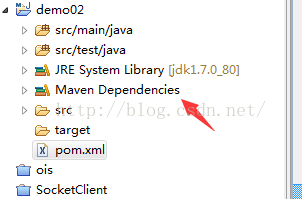
11. 在Myeclipse下建立Maven專案 添加個依賴試試啊
<dependency>
<groupId>org.apache.poi</groupId>
<artifactId>poi-ooxml</artifactId>
<version>3.9</version>
</dependency>
你會發先在你依賴包下會自動出現jar啦 說明你成功了, 第一次時間較長 你可以在
好啦 Maven + Nexus 私服搭建完成 具體裡面的標籤含義自己去理解吧. 一起加油啊! 如果有不對的地方歡迎大家批評指正啊。
圖片有的混了 儘量看吧.