LayoutInflater 填充器填充佈局,佈局屬性失效問題
無意間看到一個帖子,標題:一個難倒 3年 android開發經驗 ” 工程師 ” 的 “bug”,連結地址:http://www.2cto.com/kf/201602/489364.html,所描述的問題就是通過填充器動態新增View物件的時候發現view中的寬高失效,而原帖作者所採用的方式是重新設定佈局引數,方法如下程式碼所示:
ll_container=(LinearLayout) findViewById(R.id.ll_container);
btn=(Button) LayoutInflater.from(this).inflate(R.layout.my_button, null); 看到這個問題之後非常懷疑,覺得非常奇怪,為什麼原來xml中的寬度和高度消失了,也是帶著這個疑問開始各種搜尋,最後通過檢視原始碼得到了答案,在這裡分享給大家。
首先inflate有兩個供使用者呼叫的過載方法,分別是:
1、 public View inflate(int resource, ViewGroup root)
2、public View inflate(int resource, ViewGroup root, boolean attachToRoot)
而我們常用的是第一個,而且習慣將root設定為null;
先看第一個方法的原始碼:
public View inflate(int resource, ViewGroup root) {
return inflate(resource, root, root != null);
}看見了嗎,其實也是呼叫的而第二個過載方法,三個引數分別是:view的資源id,裝載view的父容器,是否依附到父容器的布林標記。
下面我們就要進入inflate(int resource, ViewGroup root, boolean attachToRoot)原始碼中,
public View inflate(int resource, ViewGroup root, boolean attachToRoot) {
if 這個方法其實做的事情就是將view的xml檔案讀取到xml解析器中,然後傳遞到另外一個inflate過載方法中,
最核心的就在這個方法中,下面來看這個方法中的原始碼:
public View inflate(XmlPullParser parser, ViewGroup root, boolean attachToRoot) {
synchronized (mConstructorArgs) {
final AttributeSet attrs = Xml.asAttributeSet(parser);
Context lastContext = (Context)mConstructorArgs[0];
mConstructorArgs[0] = mContext;
View result = root;
try {
// Look for the root node.
int type;
while ((type = parser.next()) != XmlPullParser.START_TAG &&
type != XmlPullParser.END_DOCUMENT) {
// Empty
}
if (type != XmlPullParser.START_TAG) {
throw new InflateException(parser.getPositionDescription()
+ ": No start tag found!");
}
final String name = parser.getName();
if (DEBUG) {
System.out.println("**************************");
System.out.println("Creating root view: "
+ name);
System.out.println("**************************");
}
if (TAG_MERGE.equals(name)) {
if (root == null || !attachToRoot) {
throw new InflateException("<merge /> can be used only with a valid "
+ "ViewGroup root and attachToRoot=true");
}
rInflate(parser, root, attrs, false);
} else {
// Temp is the root view that was found in the xml
View temp;
if (TAG_1995.equals(name)) {
temp = new BlinkLayout(mContext, attrs);
} else {
temp = createViewFromTag(root, name, attrs);
}
ViewGroup.LayoutParams params = null;
if (root != null) {
if (DEBUG) {
System.out.println("Creating params from root: " +
root);
}
// Create layout params that match root, if supplied
params = root.generateLayoutParams(attrs);
if (!attachToRoot) {
// Set the layout params for temp if we are not
// attaching. (If we are, we use addView, below)
temp.setLayoutParams(params);
}
}
if (DEBUG) {
System.out.println("-----> start inflating children");
}
// Inflate all children under temp
rInflate(parser, temp, attrs, true);
if (DEBUG) {
System.out.println("-----> done inflating children");
}
// We are supposed to attach all the views we found (int temp)
// to root. Do that now.
if (root != null && attachToRoot) {
root.addView(temp, params);
}
// Decide whether to return the root that was passed in or the
// top view found in xml.
if (root == null || !attachToRoot) {
result = temp;
}
}
} catch (XmlPullParserException e) {
InflateException ex = new InflateException(e.getMessage());
ex.initCause(e);
throw ex;
} catch (IOException e) {
InflateException ex = new InflateException(
parser.getPositionDescription()
+ ": " + e.getMessage());
ex.initCause(e);
throw ex;
} finally {
// Don't retain static reference on context.
mConstructorArgs[0] = lastContext;
mConstructorArgs[1] = null;
}
return result;
}
}原始碼非常長,因此我們挑重點分塊看:
if (root != null) {
if (DEBUG) {
System.out.println("Creating params from root: " +
root);
}
// Create layout params that match root, if supplied
params = root.generateLayoutParams(attrs);
if (!attachToRoot) {
// Set the layout params for temp if we are not
// attaching. (If we are, we use addView, below)
temp.setLayoutParams(params);
}
}這段程式碼是首先判斷傳入的父容器是否為null,如果不為null,根據view 的xml檔案中設定的屬性生成佈局引數,然後判斷是否需要依附到父容器上,如果不需要則將佈局引數設定給view物件,有些人會好奇為什麼時不需要依附才設定佈局引數,彆著急,後面會講到。
下面看這段程式碼:
// We are supposed to attach all the views we found (int temp)
// to root. Do that now.
if (root != null && attachToRoot) {
root.addView(temp, params);
}
// Decide whether to return the root that was passed in or the
// top view found in xml.
if (root == null || !attachToRoot) {
result = temp;
}第一個if是當傳入的父容器不為空,並且標記位為true的時候,則直接將將view新增到root上面,並將root返回,注意此處傳入了佈局引數,這就是為什麼上面那段程式碼只對false情況setLayoutParams(params)。
第二個if是當root為null或者不需要依附,則直接將view作為返回值返回,這裡要強調一下,此處的if有兩種情況 :
1、第一種是root==null,則不需要考慮標記位,直接將view返回;
2、第二種是root!=null ,標記位為false 雖然也是直接將view返回,但是此時的view由於root!=null已經setLayoutParams(params)因此是有區別的。
下面進行總結:
1、public View inflate(int resource, ViewGroup root)
該方法是如果root為null,則返回的是不帶layoutparams的view物件;如果不為空則是直接將帶有layoutparams的view新增到root上,並將root返回。
2、public View inflate(int resource, ViewGroup root, boolean attachToRoot)
此處考慮root!=null的情況,因為如果為null則跟上一個方法一樣,細分如下兩個方法,
①inflate(int resource, ViewGroup root, false)
這個方法是將帶有layoutparams的view返回
②inflate(int resource, ViewGroup root, true)
這個方法是將帶有view和layoutparams新增到root上,並將root返回。
下面進行驗證:
首先貼出activity_main.xml
<RelativeLayout xmlns:android="http://schemas.android.com/apk/res/android"
xmlns:tools="http://schemas.android.com/tools"
android:layout_width="match_parent"
android:layout_height="match_parent"
android:paddingBottom="@dimen/activity_vertical_margin"
android:paddingLeft="@dimen/activity_horizontal_margin"
android:paddingRight="@dimen/activity_horizontal_margin"
android:paddingTop="@dimen/activity_vertical_margin"
tools:context="com.example.inflatertest.MainActivity" >
<LinearLayout
android:id="@+id/ll_container"
android:layout_width="match_parent"
android:layout_height="wrap_content"
android:orientation="vertical"></LinearLayout>
</RelativeLayout>
然後貼出my_button.xml(view佈局)
<?xml version="1.0" encoding="utf-8"?>
<Button xmlns:android="http://schemas.android.com/apk/res/android"
android:id="@+id/btn"
android:text="按鈕"
android:layout_width="80dp"
android:layout_height="80dp" >
</Button>下面貼出MainActivity程式碼:
第一種情況:
ll_container=(LinearLayout) findViewById(R.id.ll_container);
btn=(Button) LayoutInflater.from(this).inflate(R.layout.my_button, null);
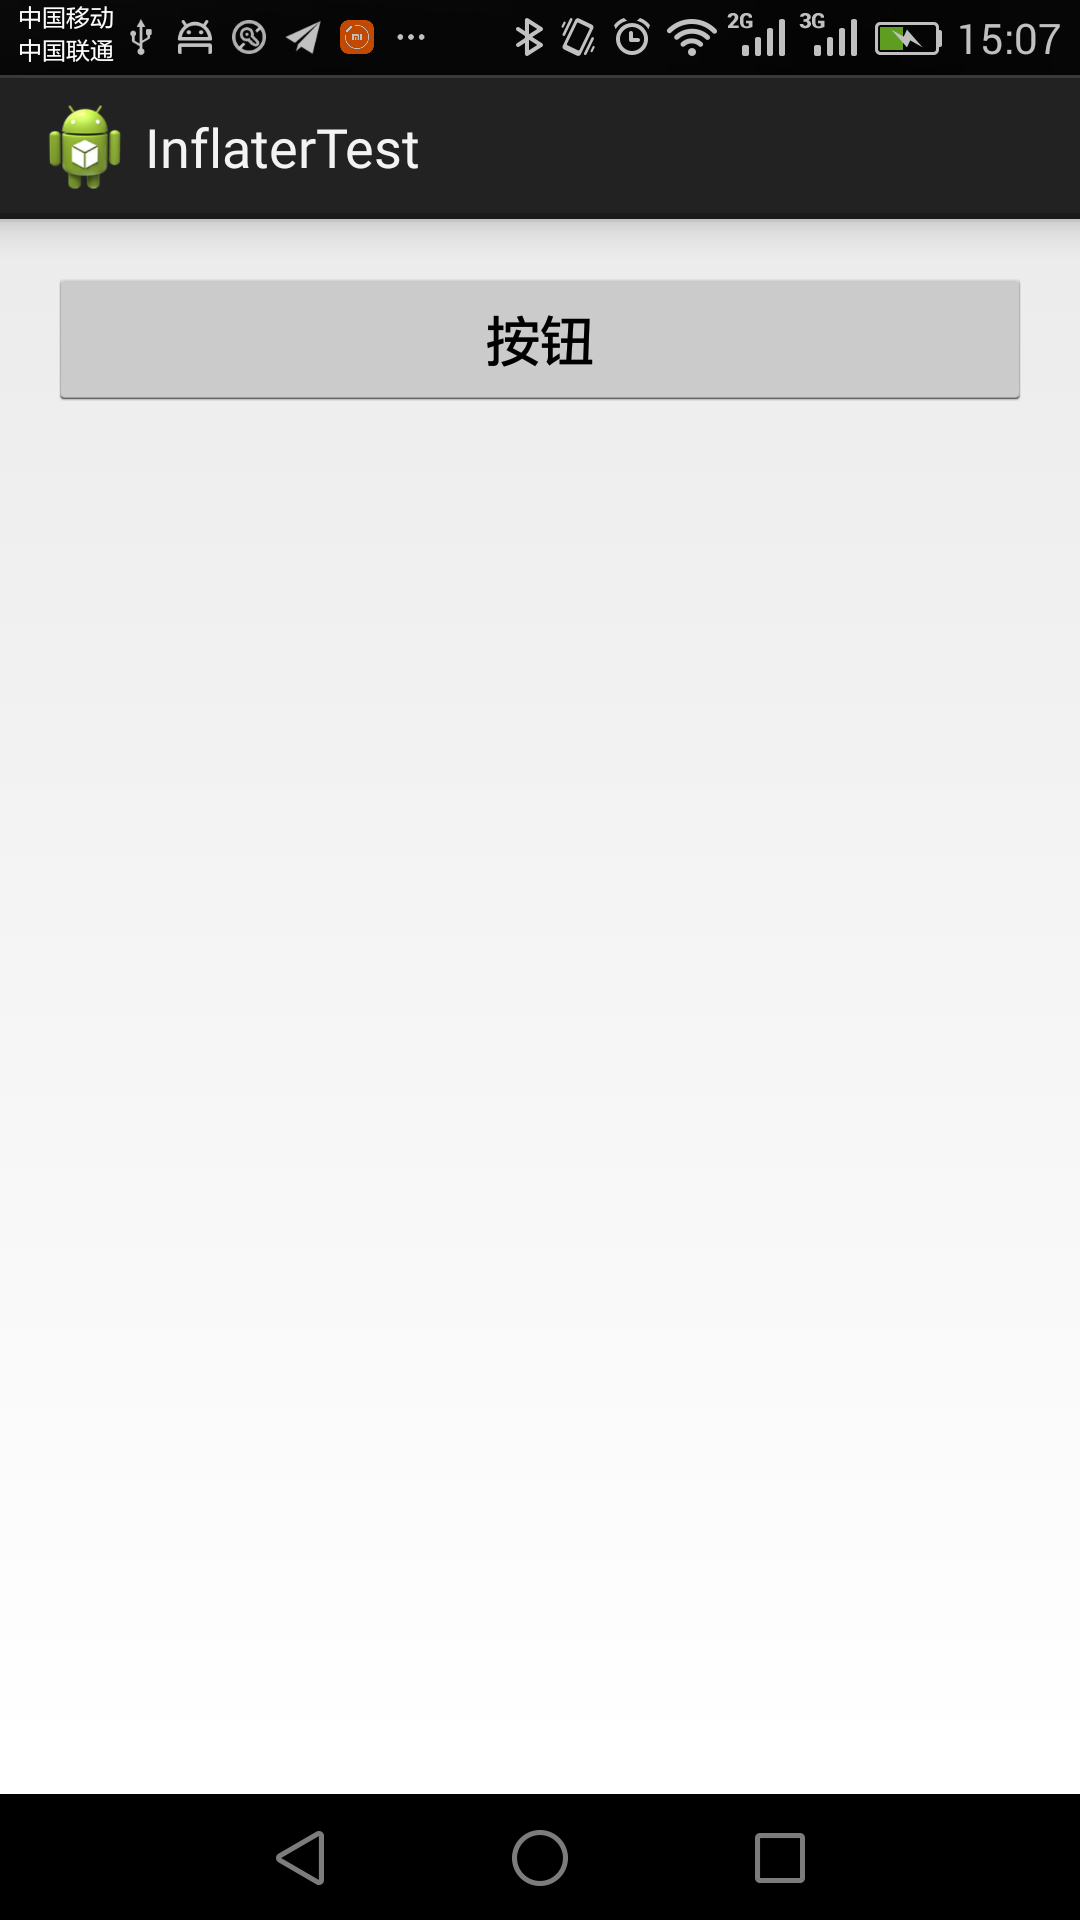
ll_container.addView(btn);效果圖:

可以看出確實寬高失效
第二種情況,按照原帖作者的改進方式:
        ll_container=(LinearLayout) findViewById(R.id.ll_container);
        btn=(Button) LayoutInflater.from(this).inflate(R.layout.my_button, null);
        LinearLayout.LayoutParams lp=new LinearLayout.LayoutParams(200,200);
        btn.setLayoutParams(lp);
        ll_container.addView(btn);
重新設定了寬高,此種方式如果需要設定原始寬高則需要dp與px轉換
另一種改進方式:
    ll_container=(LinearLayout) findViewById(R.id.ll_container);
    btn=(Button) LayoutInflater.from(this).inflate(R.layout.my_button,ll_container,false);
    ll_container.addView(btn);
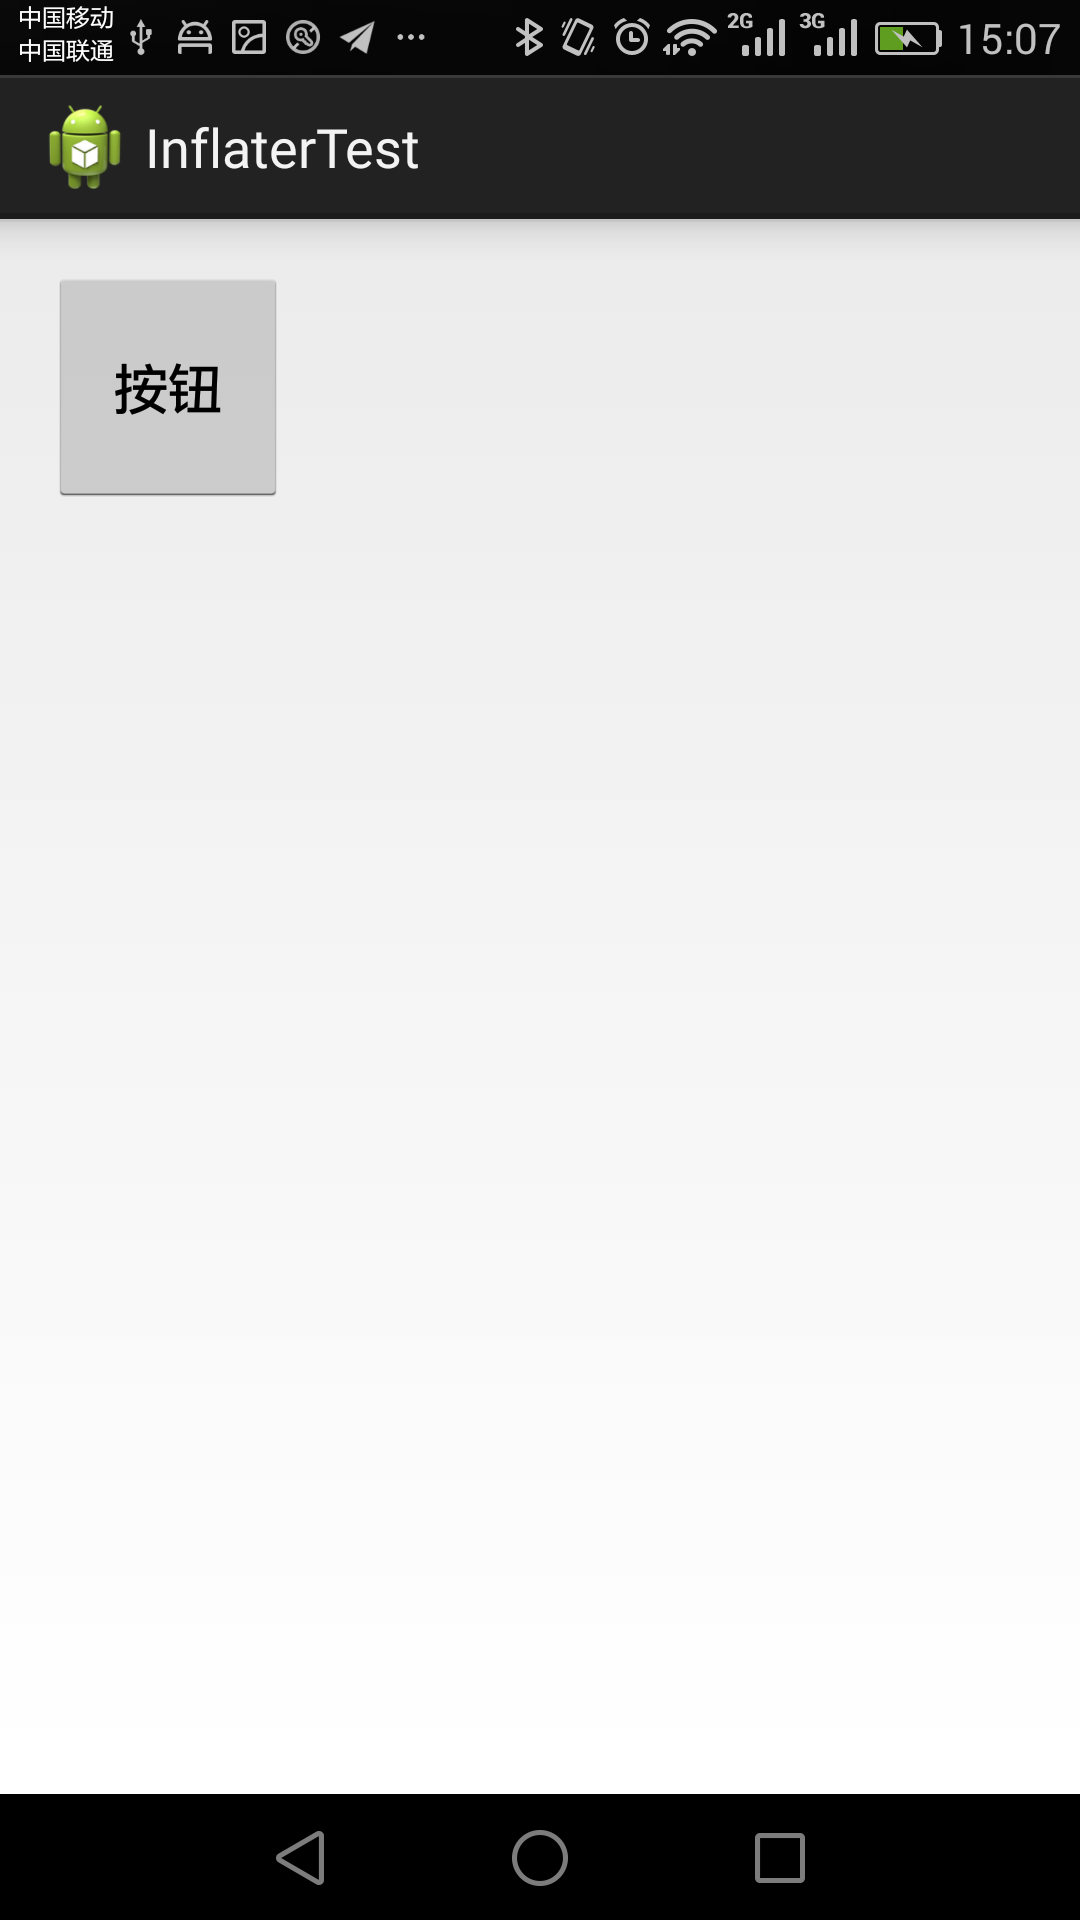
效果圖:

此種方法按照xml寬高進行佈局
還有一種改進方式:
ll_container=(LinearLayout) findViewById(R.id.ll_container);
btn=(Button) LayoutInflater.from(this).inflate(R.layout.my_button, null);
LayoutInflater.from(this).inflate(R.layout.my_button,ll_container,true);
此種方式和上一種效果一樣,此處不需要進行addview操作,程式碼更加簡潔。
