swift詳解之二十三------------UICollectionView基礎用法和簡單自定義
UICollectionView基礎用法和簡單自定義
注:本文通過幾個例項來講講UICollectionView基本用法
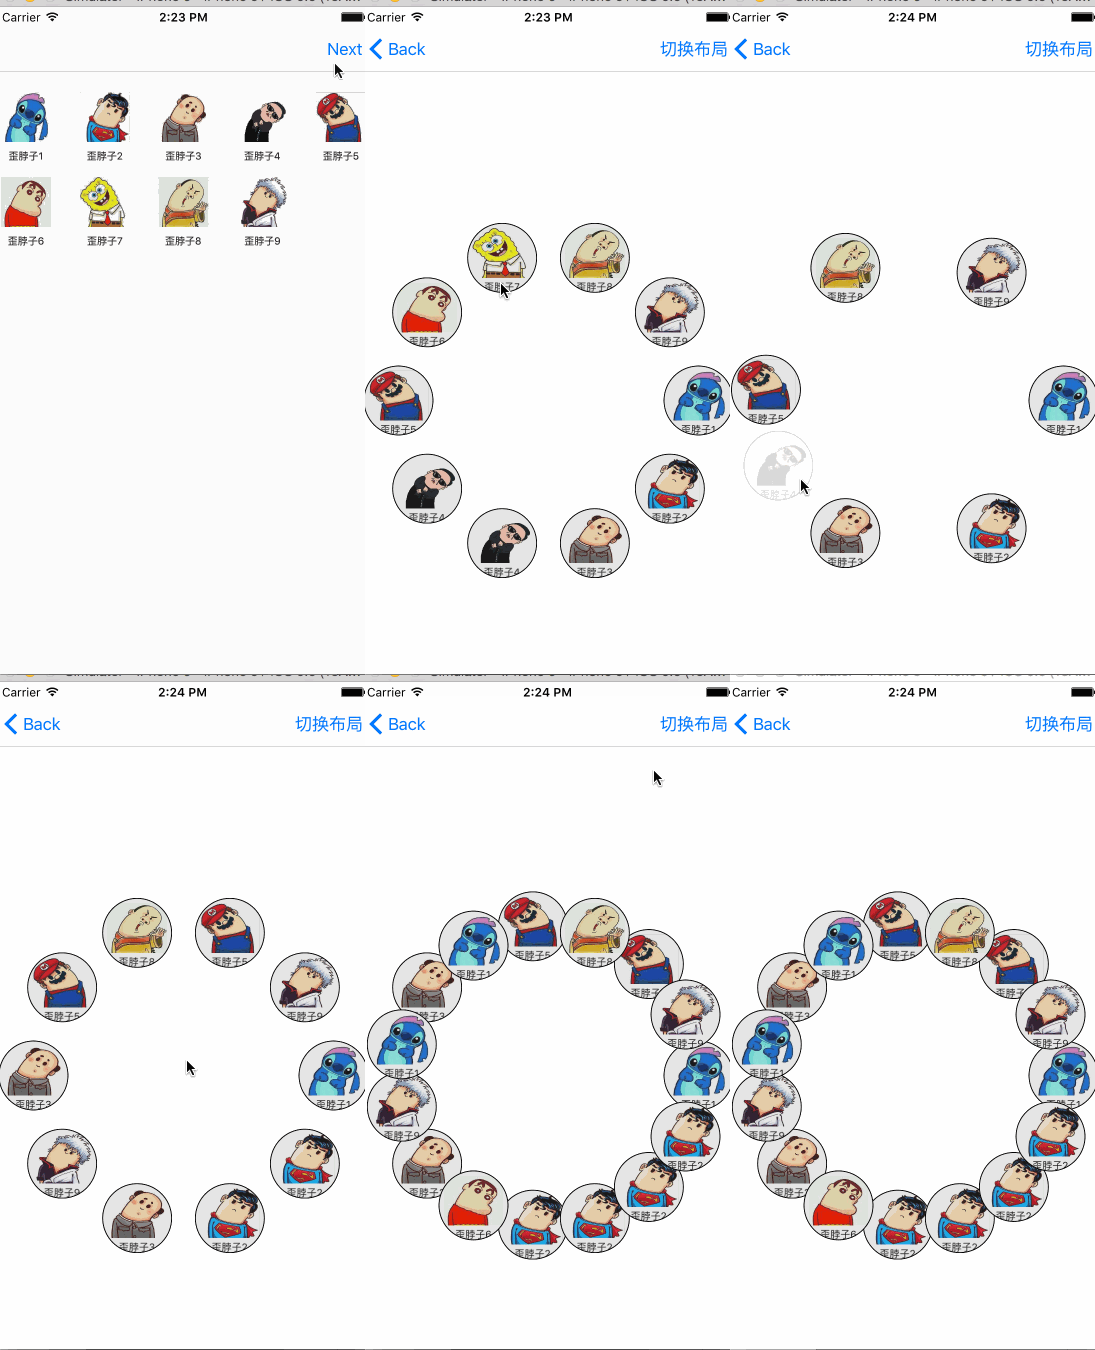
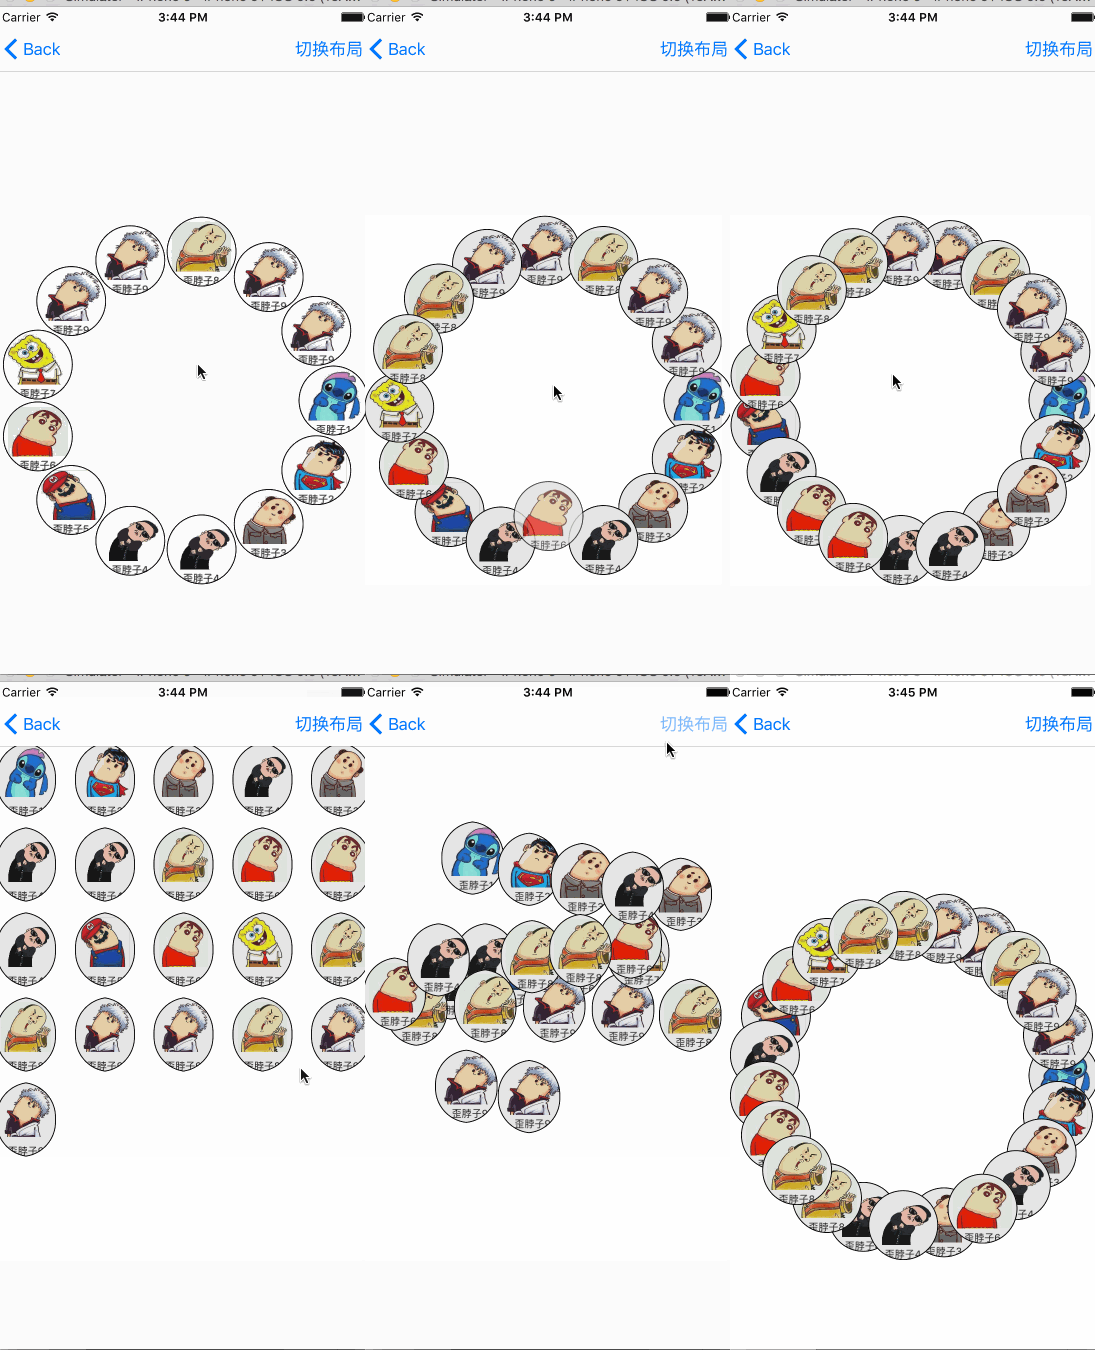
本次要實現的兩個效果。感謝貓神提供的教程 OneV’s Den
第一個介面是一個普通的流佈局 UICollectionViewFlowLayout, 第二個介面是自定義的一個圓形佈局。加了點手勢操作和動畫。老規矩。後面會附上原始碼
首先來看下基本用法 。
1、UICollectionView基礎用法
簡單的UICollectionView 相當於GridView ,一個多列的UItableView ,然而UICollectionView 跟UItableView
DataSource 和一個delegate 標準的UICollectionView包含三個部分,它們都是UIView的子類:
cells 單元格用來展示內容的,可以設定所有的大小 也可以指定不同尺寸和不同的內容
Supplementary Views 追加檢視 如果你對UITableView比較熟悉的話,可以理解為每個Section的Header或者Footer,用來標記每個section的view
Decoration Views 裝飾檢視 這是每個section的背景
UICollectionView和UITableView最大的不同就是UICollectionViewLayout,UICollectionViewLayout可以說是UICollectionView的大腦和中樞,它負責了將各個cell、Supplementary View和Decoration Views進行組織,為它們設定各自的屬性。包括位置、尺寸、層級、形狀等等 。。
Layout決定了UICollectionView是如何顯示在介面上的。在展示之前,一般需要生成合適的UICollectionViewLayout子類物件,並將其賦予CollectionView的collectionViewLayout屬性
下面我們實現一個最簡單的Demo
let layout = UICollectionViewFlowLayout()
layout.scrollDirection = UICollectionViewScrollDirection.Vertical //滾動方向
layout.itemSize = CGSizeMake(60, 75) //設定所有cell的size 太重要了 找了半天。(自學就是辛苦呀!!) 這裡建立了基本的流佈局 設定了一些基本屬性。
然後其他的設定和UITableView差不多
let collect:UICollectionView = UICollectionView(frame: self.view.frame,collectionViewLayout:layout)
collect.backgroundColor = UIColor.whiteColor()
collect.delegate = self
collect.dataSource = self
self.view.addSubview(collect)
因為初始的背景色是黑色的,這裡指定了背景色
然後實現下面三個基本的方法,就能正常跑了 。最要是cell的顯示方法
//設定分割槽個數
func numberOfSectionsInCollectionView(collectionView: UICollectionView) -> Int {
        return 1
    }
//設定每個分割槽元素個數
func collectionView(collectionView: UICollectionView, numberOfItemsInSection section: Int) -> Int {
        return  10
    }

//設定元素內容
func collectionView(collectionView: UICollectionView, cellForItemAtIndexPath indexPath: NSIndexPath) -> UICollectionViewCell {
        //這裡建立cell
        return cell
 }
為了得到高效的View,對於cell的重用是必須的,避免了不斷生成和銷燬物件的操作,在UICollectionView中使用以下方法進行註冊:
registerClass:forCellWithReuseIdentifier:
registerClass:forSupplementaryViewOfKind:withReuseIdentifier:
registerNib:forCellWithReuseIdentifier:
registerNib:forSupplementaryViewOfKind:withReuseIdentifier:
先註冊 ,使用一個Identifier ,加入重用佇列。要是在重用佇列裡沒有可用的cell的話,runtime將自動幫我們生成並初始化一個可用的cell。
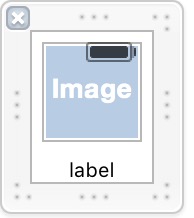
我們這裡是自己用xib 畫了個cell
一個很簡單的cell ,把它的class 設定成我們自定義的MyCellContent,MyCellContent 繼承自UICollectionViewCell ,把這兩個拖成它的成員屬性
import UIKit
class MyCellContent: UICollectionViewCell {
    @IBOutlet  var contentImage: UIImageView!
    @IBOutlet  var contentLabel: UILabel!
}然後,在我們的檢視控制器中的viewDidLoad進行註冊
let nib = UINib(nibName: "MyCollectionCell", bundle: NSBundle.mainBundle())
collect.registerNib(nib, forCellWithReuseIdentifier: "DesignViewCell")然後在cellForItemAtIndexPath 裡面就能這樣取了
 let identify:String = "DesignViewCell"
 let cell =collectionView.dequeueReusableCellWithReuseIdentifier(identify, forIndexPath: indexPath) as! MyCellContent
我們事先建立了個結構體,用來存放cell的img和name
struct CellContent{
    var img:String
    var name:String
}然後在控制器中聲明瞭一個var dic = Array<CellContent>()
在viewDidLoad中初始化。
for i in 1...9{
            dic.append(CellContent(img: "f"+String(i), name: "歪脖子"+String(i)))
}我圖片存放的名字就是f1-----f9
func collectionView(collectionView: UICollectionView, numberOfItemsInSection section: Int) -> Int {
        return  self.dic.count
}
這裡返回元素個數就可以這麼寫了
//設定元素內容
func collectionView(collectionView: UICollectionView, cellForItemAtIndexPath indexPath: NSIndexPath) -> UICollectionViewCell {
    let identify:String = "DesignViewCell"
    let cell = collectionView.dequeueReusableCellWithReuseIdentifier(identify, forIndexPath: indexPath) as! MyCellContent
    cell.contentView.backgroundColor = UIColor.grayColor()
    cell.contentView.alpha = 0.2
    let img = UIImage(named: (self.dic[indexPath.row] as CellContent).img)
    cell.contentImage.image = img
    cell.contentLabel.text = (self.dic[indexPath.row] as CellContent).name

    return cell
}
這個就可以很簡單的設定了 。現在執行,第一個頁面的效果就有了
但讓還有向UITableView中樣很多的方法去設定別的,比如單個cell的大小
 func collectionView(collectionView: UICollectionView!,
        layout collectionViewLayout: UICollectionViewLayout!,
        sizeForItemAtIndexPath indexPath: NSIndexPath!) -> CGSize {
            return CGSizeMake(150, 150)
    }
點選cell
 //點選元素
    func collectionView(collectionView: UICollectionView, didSelectItemAtIndexPath indexPath: NSIndexPath){
      print("點選了第\(indexPath.section) 分割槽 ,第\(indexPath.row) 個元素")
    }
還有很多,自己慢慢玩吧 。下面看看自定義的
2、自定義UICollectionViewLayout
UICollectionViewLayoutAttributes是一個非常重要的類,先來看看property列表:
@property (nonatomic) CGRect frame
@property (nonatomic) CGPoint center
@property (nonatomic) CGSize size
@property (nonatomic) CATransform3D transform3D
@property (nonatomic) CGFloat alpha
@property (nonatomic) NSInteger zIndex
@property (nonatomic, getter=isHidden) BOOL hidden可以看到,UICollectionViewLayoutAttributes的例項中包含了諸如邊框,中心點,大小,形狀,透明度,層次關係和是否隱藏等資訊。和DataSource的行為十分類似,當UICollectionView在獲取佈局時將針對每一個indexPath的部件(包括cell,追加檢視和裝飾檢視),向其上的UICollectionViewLayout例項詢問該部件的佈局資訊,這個佈局資訊,就以UICollectionViewLayoutAttributes的例項的方式給出。
UICollectionViewLayout的功能為向UICollectionView提供佈局資訊,不僅包括cell的佈局資訊,也包括追加檢視和裝飾檢視的佈局資訊。實現一個自定義layout的常規做法是繼承UICollectionViewLayout類,然後過載下列方法:
-(CGSize)collectionViewContentSize //返回collectionView的內容的尺寸

-(NSArray *)layoutAttributesForElementsInRect:(CGRect)rect
//返回rect中的所有的元素的佈局屬性

-(UICollectionViewLayoutAttributes )layoutAttributesForItemAtIndexPath:(NSIndexPath )indexPath
//返回對應於indexPath的位置的cell的佈局屬性

-(UICollectionViewLayoutAttributes )layoutAttributesForSupplementaryViewOfKind:(NSString )kind atIndexPath:(NSIndexPath *)indexPath
//返回對應於indexPath的位置的追加檢視的佈局屬性,如果沒有追加檢視可不過載

-(UICollectionViewLayoutAttributes * )layoutAttributesForDecorationViewOfKind:(NSString)decorationViewKind atIndexPath:(NSIndexPath )indexPath
//返回對應於indexPath的位置的裝飾檢視的佈局屬性,如果沒有裝飾檢視可不過載

-(BOOL)shouldInvalidateLayoutForBoundsChange:(CGRect)newBounds
//當邊界發生改變時,是否應該重新整理佈局。如果YES則在邊界變化(一般是scroll到其他地方)時,將重新計算需要的佈局資訊。在初始化一個UICollectionViewLayout例項後,會有一系列準備方法被自動呼叫,以保證layout例項的正確。
首先,-(void)prepareLayout將被呼叫,預設下該方法什麼沒做,但是在自己的子類實現中,一般在該方法中設定一些必要的layout的結構和初始需要的引數等。
之後,-(CGSize) collectionViewContentSize將被呼叫,以確定collection應該佔據的尺寸。注意這裡的尺寸不是指可視部分的尺寸,而應該是所有內容所佔的尺寸。collectionView的本質是一個scrollView,因此需要這個尺寸來配置滾動行為。
接下來-(NSArray *)layoutAttributesForElementsInRect:(CGRect)rect被呼叫,這個沒什麼值得多說的。初始的layout的外觀將由該方法返回的UICollectionViewLayoutAttributes來決定。
另外,在需要更新
layout時,需要給當前layout傳送 -invalidateLayout,該訊息會立即返回,並且預約在下一個loop的時候重新整理當前layout,這一點和UIView的setNeedsLayout方法十分類似。在-invalidateLayout後的下一個collectionView的重新整理loop中,又會從prepareLayout開始,依次再呼叫-collectionViewContentSize和-layoutAttributesForElementsInRect來生成更新後的佈局。
以上都是貓神的鉅作,他寫的很好直接拿來用了
下面看下demo
首先建立一個類繼承自UICollectionViewLayou 然後宣告一些基本的屬性
    private var _cellCount:Int?
    private var _collectSize:CGSize?
    private var _center:CGPoint?
    private var _radius:CGFloat?
按照上面的步驟
//一般在該方法中設定一些必要的layout的結構和初始需要的引數等
override func prepareLayout() {
    super.prepareLayout()
    _collectSize = self.collectionView?.frame.size
    _cellCount = self.collectionView?.numberOfItemsInSection(0)
    _center = CGPointMake(_collectSize!.width / 2.0, _collectSize!.height / 2.0);
    _radius = min(_collectSize!.width, _collectSize!.height)/2.5
}
這個方法初始化了一些基本資訊
 //內容區域的總大小 (不是可見區域)
    override func collectionViewContentSize() -> CGSize {
        return _collectSize!  //這裡不用可見區域吧
    }
可見區域
override func layoutAttributesForElementsInRect(rect: CGRect) -> [UICollectionViewLayoutAttributes]? {

        var attributesArray = [UICollectionViewLayoutAttributes]()
        if let count = self._cellCount {
            for i in 0 ..< count{
                //這裡利用了-layoutAttributesForItemAtIndexPath:來獲取attributes
                let indexPath = NSIndexPath(forItem: i, inSection: 0)
                let attributes =  self.layoutAttributesForItemAtIndexPath(indexPath)
                attributesArray.append(attributes!)
            }
        }
        return attributesArray
    }

override func layoutAttributesForItemAtIndexPath(indexPath: NSIndexPath) -> UICollectionViewLayoutAttributes? {
        let attrs = UICollectionViewLayoutAttributes(forCellWithIndexPath: indexPath)
        attrs.size = CGSizeMake(ITEM_SIZE, ITEM_SIZE)
        let x = Double(_center!.x) + Double(_radius!) * cos(Double(2 * indexPath.item) * M_PI/Double(_cellCount!))
        let y = Double(_center!.y) + Double(_radius!) * sin(Double(2 * indexPath.item) * M_PI/Double(_cellCount!))
        attrs.center = CGPointMake( CGFloat(x) , CGFloat(y));
        return attrs
    }
這個方法layoutAttributesForItemAtIndexPath 對UICollectionViewLayoutAttributes 的一些屬性進行設定 ,前面列出過 ,然後layoutAttributesForElementsInRect 方法返回所有UICollectionViewLayoutAttributes , 以陣列的方式
然後再使用的時候把基本用法裡的layout換掉
  layout = MyCollectionViewLayout()

  collect = UICollectionView(frame: self.view.frame,collectionViewLayout:layout)
  collect.backgroundColor = UIColor.whiteColor()
  collect.delegate = self
  collect.dataSource = self
這樣執行 , 圓就出現了
  if(layout is MyCollectionViewLayout){
            layout = UICollectionViewFlowLayout()
            (layout as! UICollectionViewFlowLayout).scrollDirection = UICollectionViewScrollDirection.Vertical  //滾動方向
            (layout as! UICollectionViewFlowLayout).itemSize = CGSizeMake(60, 75)
        }else{
            layout = MyCollectionViewLayout()
        }
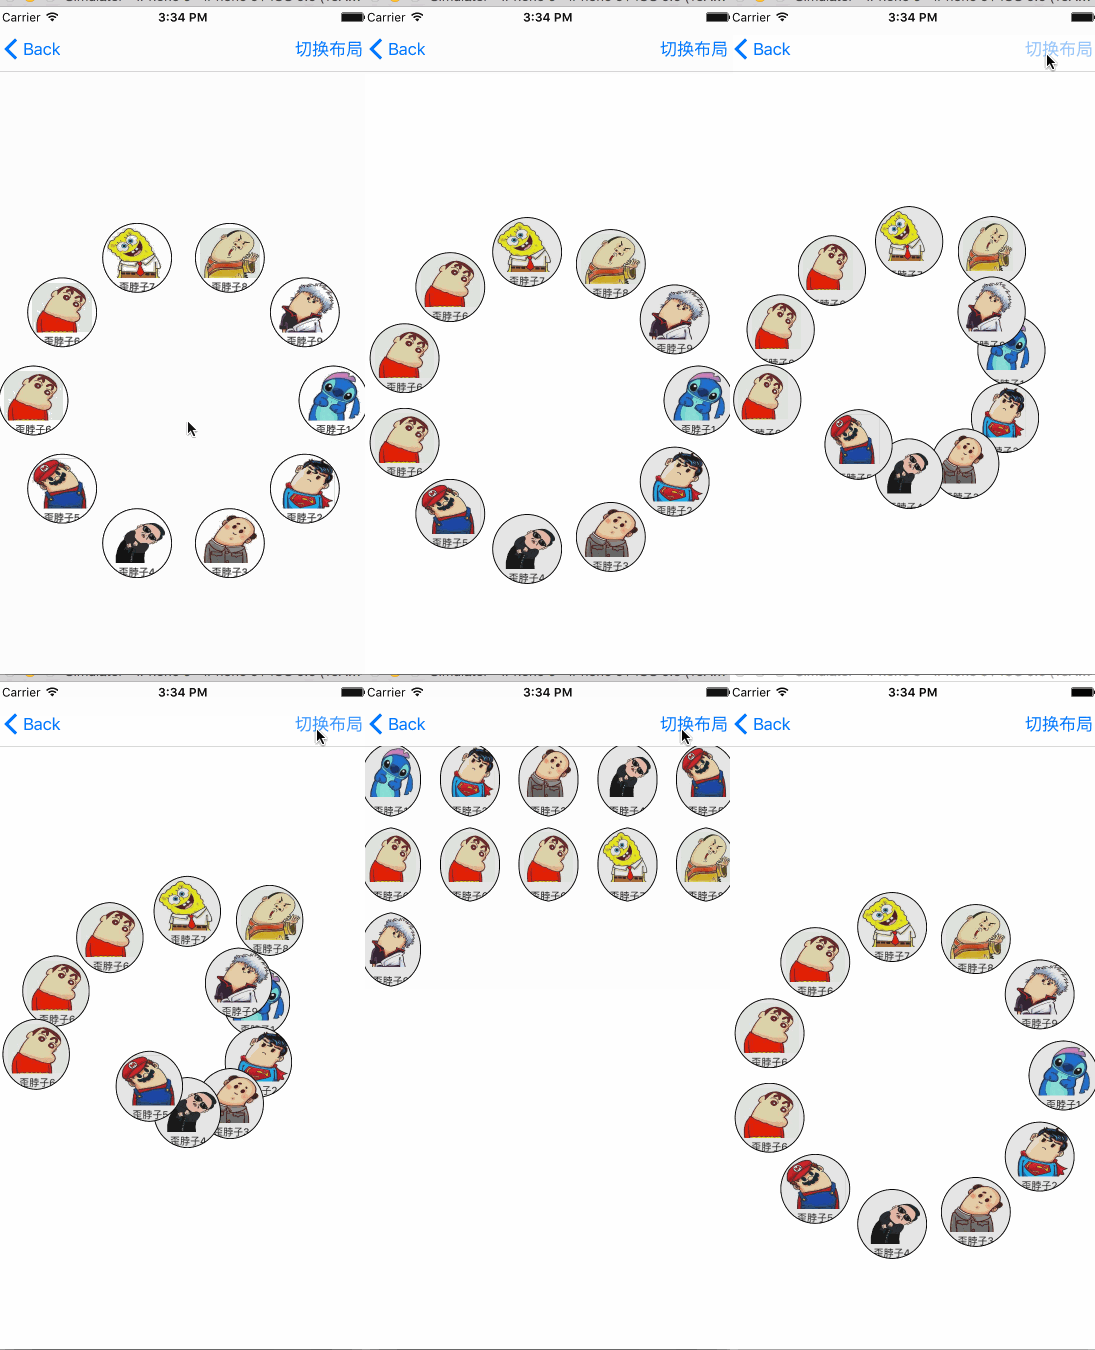
self.collect.setCollectionViewLayout(layout, animated: true)可以通過setCollectionViewLayout 方法來切換layout
然後給這個介面新增手勢
//註冊tap手勢事件
let tapRecognizer = UITapGestureRecognizer(target: self, action: "handleTap:")
collect.addGestureRecognizer(tapRecognizer)
    func handleTap(sender:UITapGestureRecognizer){
        if sender.state == UIGestureRecognizerState.Ended{
            let tapPoint = sender.locationInView(self.collect)
            if let  indexPath = self.collect.indexPathForItemAtPoint(tapPoint)
            {
                //點選了cell
                //這個方法可以用來對collectionView中的元素進行批量的插入,刪除,移動等操作,同時將觸發collectionView所對應的layout的對應的動畫。
                print("------")
                self.collect.performBatchUpdates({ () -> Void in
                    self.collect.deleteItemsAtIndexPaths([indexPath])
                    self.dic.removeAtIndex(indexPath.row)
                }, completion: nil)

            }else{


                let val =  arc4random_uniform(8)+1
                self.dic.append(CellContent(img: "f"+String(val), name: "歪脖子"+String(val)))

                self.collect.insertItemsAtIndexPaths([NSIndexPath(forItem: Int(val) , inSection: 0)])
//                dispatch_async(dispatch_get_global_queue(0, 0), { () -> Void in
//                     let val =  arc4random_uniform(9)
//                    self.dic.append(CellContent(img: "f"+String(val), name: "歪脖子"+String(val)))
//                    dispatch_async(dispatch_get_main_queue()) {
//                            self.collect.reloadData()
//
//                    }
//                })
                //點選了不是cell的區域
                print("+++++++")

            }
        }
    }
我註釋掉這段GCD的程式碼也是可以執行的 ,就是沒有動畫 。
這個方法performBatchUpdates:completion 可以用來對collectionView中的元素進行批量的插入,刪除,移動等操作,同時將觸發collectionView所對應的layout的對應的動畫。相應的動畫由layout中的下列四個方法來定義:
initialLayoutAttributesForAppearingItemAtIndexPath:
initialLayoutAttributesForAppearingDecorationElementOfKind:atIndexPath:
finalLayoutAttributesForDisappearingItemAtIndexPath:
finalLayoutAttributesForDisappearingDecorationElementOfKind:atIndexPath:
預設的動畫是這樣的
我們可以自定義動畫
每次重新給出layout時都會呼叫prepareLayout,這樣在以後如果有collectionView大小變化的需求時也可以自動適應變化。
 override func initialLayoutAttributesForAppearingItemAtIndexPath(itemIndexPath: NSIndexPath) -> UICollectionViewLayoutAttributes? {

        // Must call super
        var attributes = super.initialLayoutAttributesForAppearingItemAtIndexPath(itemIndexPath)

        if self.insertIndexPaths.contains(itemIndexPath) {

            if let _ = attributes{
                attributes = self.layoutAttributesForItemAtIndexPath(itemIndexPath)
            }

            // Configure attributes ...
            attributes!.alpha = 0.0;
            attributes!.center =  CGPointMake(_center!.x, _center!.y);
            //attributes?.size = CGSizeMake(1000, 1000)
        }

        return attributes;
    }

    override func prepareForCollectionViewUpdates(updateItems: [UICollectionViewUpdateItem]) {
        super.prepareForCollectionViewUpdates(updateItems)
        self.insertIndexPaths = [NSIndexPath]()
        for update in updateItems{
            if update.updateAction == UICollectionUpdateAction.Insert{
                self.insertIndexPaths.append(update.indexPathAfterUpdate)
            }
}首先會呼叫prepareForCollectionViewUpdates,我們在這裡拿到那個新增的NSIndexPath ,然後initialLayoutAttributesForAppearingItemAtIndexPath 在這個方法中設定一些初始位置。
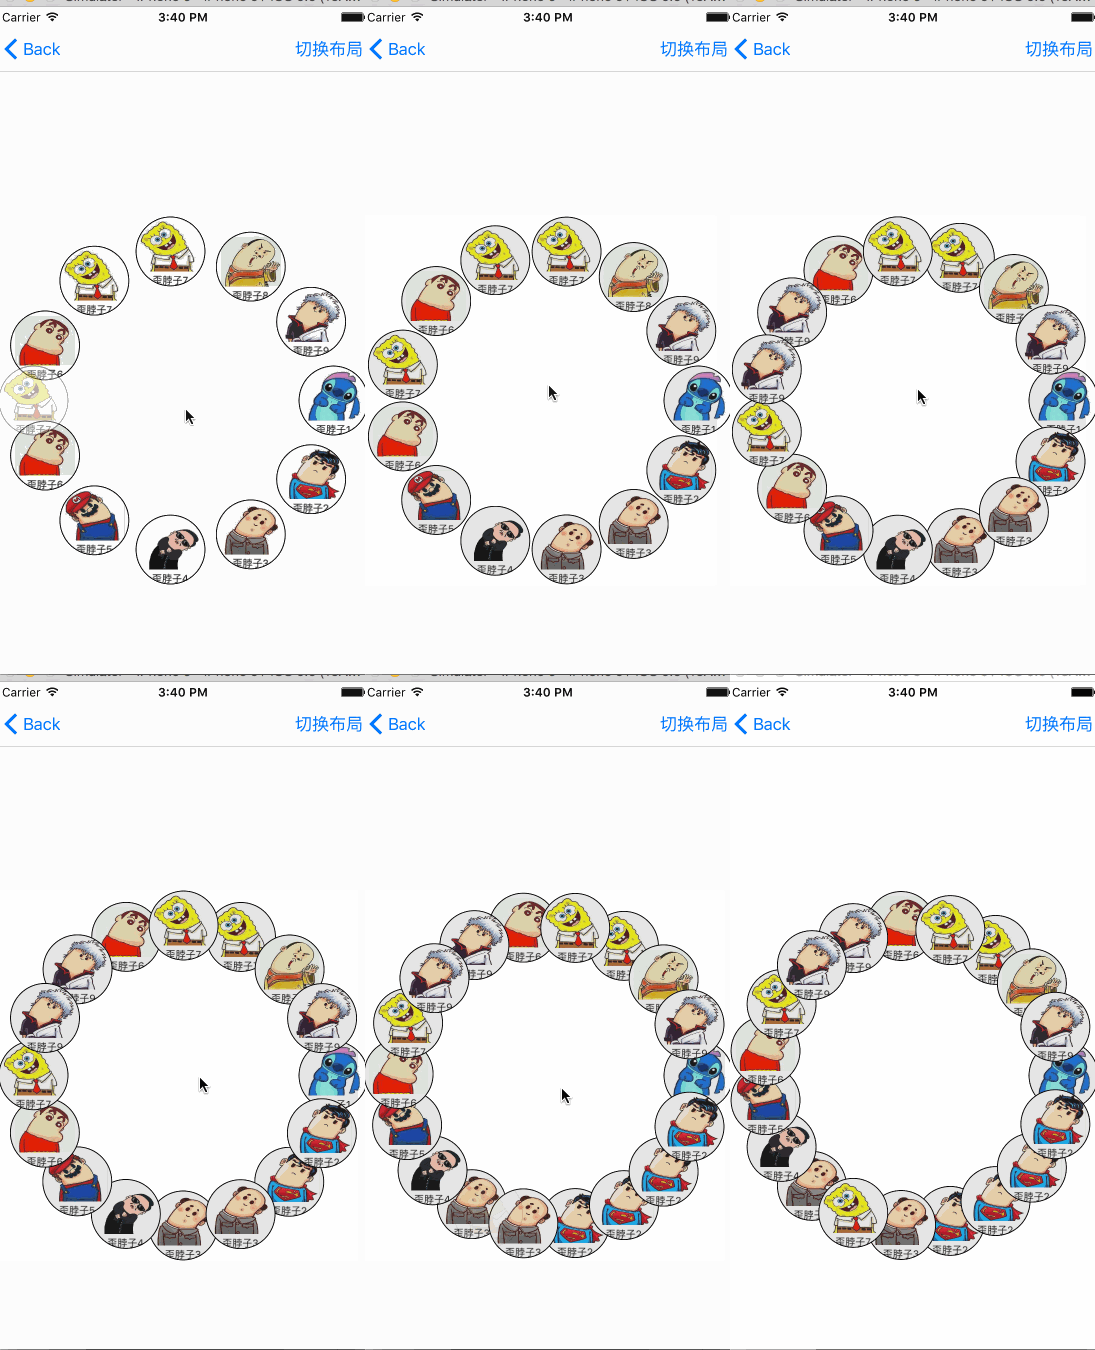
看下效果
這個是從中間散出去的 ,同理也可以搞一些別的效果 。大概就這些吧。當然UICollectionView可以玩的還很多,期待大家一起探索。多分享哦!
(本例項使用xcode 7 bate , swift 2.0)
最後附上原始碼:https://github.com/smalldu/SwiftStudy

