Install Oracle 11G Release 2 on Centos Linux 7
This article presents how to install Oracle 11G on Centos Linux 7.
Read following article how to install Centos Linux 7:Install Centos Linux 7 (for comfort set 2G memory for your virtual machine before proceeding with Oracle software installation).
Database software
linux.x64_11gR2_database_1of2.zip
linux.x64_11gR2_database_2of2.zip
OS configuration and preparation
Change hostname
####forever change
[[email protected] ~]#vi /etc/sysconfig/network
NETWORKING=yes
HOSTNAME= localhost
[[email protected] ~]# hostname
localhost###required groups su - root /usr/sbin/groupadd -g 501 oinstall /usr/sbin/groupadd -g 502 dba /usr/sbin/groupadd -g 503 oper
Add user Oracle
/usr/sbin/useradd -u 502 -g oinstall -G dba,oper oracleChange password for user
passwd oracle
su - root
vim /etc/sysctl.conf

kernel.shmmni = 4096
kernel.shmmax = 4398046511104
kernel.shmall = 1073741824
kernel.sem = 250 32000 100 128

fs.aio-max-nr = 1048576
fs.file-max = 6815744
net.ipv4.ip_local_port_range = 9000 65500
net.core.rmem_default = 262144
net.core.rmem_max = 4194304
net.core.wmem_default = 262144
net.core.wmem_max = 1048586
Apply kernel parameters
/sbin/sysctl -pAdd following lines to set shell limits for user oracle in file /etc/security/limits.conf
su - root
vim /etc/security/limits.conf

oracle   soft   nproc    131072
oracle   hard   nproc    131072
oracle   soft   nofile   131072
oracle   hard   nofile   131072
oracle   soft   core     unlimited
oracle   hard   core     unlimited
oracle   soft   memlock  50000000
oracle   hard   memlock  50000000
The “/etc/hosts” file must contain a fully qualified name for the server.
<IP-address> <fully-qualified-machine-name> <machine-name>For example
vim /etc/hosts
127.0.0.1 localhost localhost.macrocurtain
Verify your network settings
[[email protected] ~]# ping -c 3 localhost
PING localhost (127.0.0.1) 56(84) bytes of data.
64 bytes from localhost (127.0.0.1): icmp_seq=1 ttl=64 time=0.135 ms
64 bytes from localhost (127.0.0.1): icmp_seq=2 ttl=64 time=0.041 ms
64 bytes from localhost (127.0.0.1): icmp_seq=3 ttl=64 time=0.062 ms

--- localhost ping statistics ---
3 packets transmitted, 3 received, 0% packet loss, time 2000ms
rtt min/avg/max/mdev = 0.041/0.079/0.135/0.040 ms
Modify .bash_profile for user oracle in his home directory
su - oracle

vim .bash_profile

export TMP=/tmp
export ORACLE_HOSTNAME=localhost.macrocurtain
export ORACLE_UNQNAME=ORA11G
export ORACLE_BASE=/ora01/app/oracle # oracle資料庫根目錄
export ORACLE_HOME=$ORACLE_BASE/product/11.2.0/db_1 # 資料庫檔案目錄
export ORACLE_SID=ORA11G # oracle資料庫例項名

PATH=/usr/sbin:$PATH:$ORACLE_HOME/bin # 命令宣告的目錄,例如sqlplus命令在此變數宣告的目錄中尋找

export LD_LIBRARY_PATH=$ORACLE_HOME/lib:/lib:/usr/lib; # 宣告共享庫目錄
export CLASSPATH=$ORACLE_HOME/jlib:$ORACLE_HOME/rdbms/jlib;

alias cdob='cd $ORACLE_BASE'
alias cdoh='cd $ORACLE_HOME'
alias tns='cd $ORACLE_HOME/network/admin'
alias envo='env | grep ORACLE'
umask 022
source .bash_profileCheck which packages are installed and which are missing
su - root
rpm -q --qf '%{NAME}-%{VERSION}-%{RELEASE}(%{ARCH})\n' binutils \
elfutils-libelf \
elfutils-libelf-devel \
gcc \
gcc-c++ \
glibc \
glibc-common \
glibc-devel \
glibc-headers \
ksh \
libaio \
libaio-devel \
libgcc \
libstdc++ \
libstdc++-devel \
make \
sysstat \
unixODBC \
unixODBC-devel
In my case it returns following
binutils-2.25.1-31.base.el7(x86_64)
elfutils-libelf-0.168-8.el7(x86_64)
package elfutils-libelf-devel is not installed
package gcc is not installed
package gcc-c++ is not installed
glibc-2.17-196.el7(x86_64)
glibc-common-2.17-196.el7(x86_64)
package glibc-devel is not installed
package glibc-headers is not installed
package ksh is not installed
libaio-0.3.109-13.el7(x86_64)
package libaio-devel is not installed
libgcc-4.8.5-16.el7(x86_64)
libstdc++-4.8.5-16.el7(x86_64)
package libstdc++-devel is not installed
make-3.82-23.el7(x86_64)
sysstat-10.1.5-12.el7(x86_64)
package unixODBC is not installed
package unixODBC-devel is not installed
Missing packages are on Centos 7 installation dvd. Other option if you are connected to internet is just use yum install command.
- First option – use yum install command
yum -y install elfutils-libelf-devel
yum -y install gcc
yum -y install gcc-c++
yum -y install glibc-devel
yum -y install glibc-headers
yum -y install ksh
yum -y install libstdc++-devel
yum -y install unixODBC
yum -y install unixODBC-devel
or
yum -y install elfutils-libelf-devel gcc gcc-c++ glibc-devel glibc-headers ksh libaio-devel libstdc++-devel unixODBC unixODBC-devel
Installed:
  elfutils-libelf-devel.x86_64 0:0.168-8.el7
  gcc.x86_64 0:4.8.5-16.el7_4.2
  gcc-c++.x86_64 0:4.8.5-16.el7_4.2
  glibc-devel.x86_64 0:2.17-196.el7_4.2
  glibc-headers.x86_64 0:2.17-196.el7_4.2
  ksh.x86_64 0:20120801-35.el7_4
  libaio-devel.x86_64 0:0.3.109-13.el7
  libstdc++-devel.x86_64 0:4.8.5-16.el7_4.2
  unixODBC.x86_64 0:2.3.1-11.el7
  unixODBC-devel.x86_64 0:2.3.1-11.el7

Dependency Installed:
  cpp.x86_64 0:4.8.5-16.el7_4.2         libmpc.x86_64 0:1.0.1-3.el7
  zlib-devel.x86_64 0:1.2.7-17.el7

Dependency Updated:
  glibc.x86_64 0:2.17-196.el7_4.2
  glibc-common.x86_64 0:2.17-196.el7_4.2
  libgcc.x86_64 0:4.8.5-16.el7_4.2
  libgomp.x86_64 0:4.8.5-16.el7_4.2
  libstdc++.x86_64 0:4.8.5-16.el7_4.2

Complete!
- Second option – just mount dvd and install missing packages using rpm -Uvh command from directory <mount dvd>/Packages.
NOTE – I’m using x86_64 version of packages
rpm -Uvh elfutils-libelf-devel*.x86_64.rpm
rpm -Uvh libaio-devel*.x86_64.rpm
rpm -Uvh unixODBC*.x86_64.rpm
rpm -Uvh ksh*.x86_64.rpm
Create directory structure
mkdir -p /ora01/app
chown oracle:oinstall /ora01/app
chmod 775 /ora01/app
create ORACLE_BASE directory for oracle
mkdir -p /ora01/app/oracle
chown oracle:oinstall /ora01/app/oracle
chmod 775 /ora01/app/oracle
Create ORACLE_HOME directory for oracle
mkdir -p /ora01/app/oracle/product/11.2.0/db_1
chown oracle:oinstall -R /ora01/app/oracle
Disable secure linux by editing the “/etc/selinux/config” file, making sure the SELINUX flag is set as follows. It requires REBOOT to be effective(rebooting after next step) !!!
vim /etc/selinux/configSELINUX=permissiveIn Centos Linux 7 /tmp data is stored on tmpfs which consumes memory and is too small. To revert it back to storage just run following command and REBOOT machine to be effective.
systemctl mask tmp.mountreboot nowInstall database software
Let’s start with database software installation as oracle user.
su - root
cd
rz linux.x64_11gR2_database_1of2.zip
rz linux.x64_11gR2_database_1of2.zip
mv linux.x64_11gR2_database_* /home/oracle

su - oracle

###unzip software
unzip linux.x64_11gR2_database_1of2.zip
unzip linux.x64_11gR2_database_2of2.zip

###I defined 4 aliases in .bash_profile of user oracle to make
[[email protected] ~]$ alias envo cdob cdoh tns
  alias envo='env | grep ORACLE'
  alias cdob='cd $ORACLE_BASE'
  alias cdoh='cd $ORACLE_HOME'
  alias tns='cd $ORACLE_HOME/network/admin'

###run alias command envo to display environment settings
envo
ORACLE_UNQNAME=ORA11G
ORACLE_SID=ORA11G
ORACLE_BASE=/ora01/app/oracle
ORACLE_HOSTNAME=localhost.macrocurtain
ORACLE_HOME=/ora01/app/oracle/product/11.2.0/db_1

###run alias command cdob and cdoh to check ORACLE_BASE, ORACLE_HOME
[[email protected] ~]$ cdob
[[email protected] oracle]$ pwd
/ora01/app/oracle

[[email protected] db_1]$ cdoh
[[email protected] db_1]$ pwd
/ora01/app/oracle/product/11.2.0/db_1

###run installation from install directory
cd
./database/runInstall
Checking monitor: must be configured to display at least 256 colors
>>> Could not execute auto check for display colors using command /usr/bin/xdpyinfo. Check if the DISPLAY variable is set. Failed <<<<su – root
DISPLAY=:0.0; export DISPLAY # 允許使用圖形介面
echo $DISPLAY
cd /usr/bin
./xhost
access control enabled, only authorized clients can connect
./xhost +
access control disabled, clients can connect from any host
to your physical host
su - oracle

DISPLAY=:0.0; export DISPLAY
echo $DISPLAY

cd /home/oracle/database
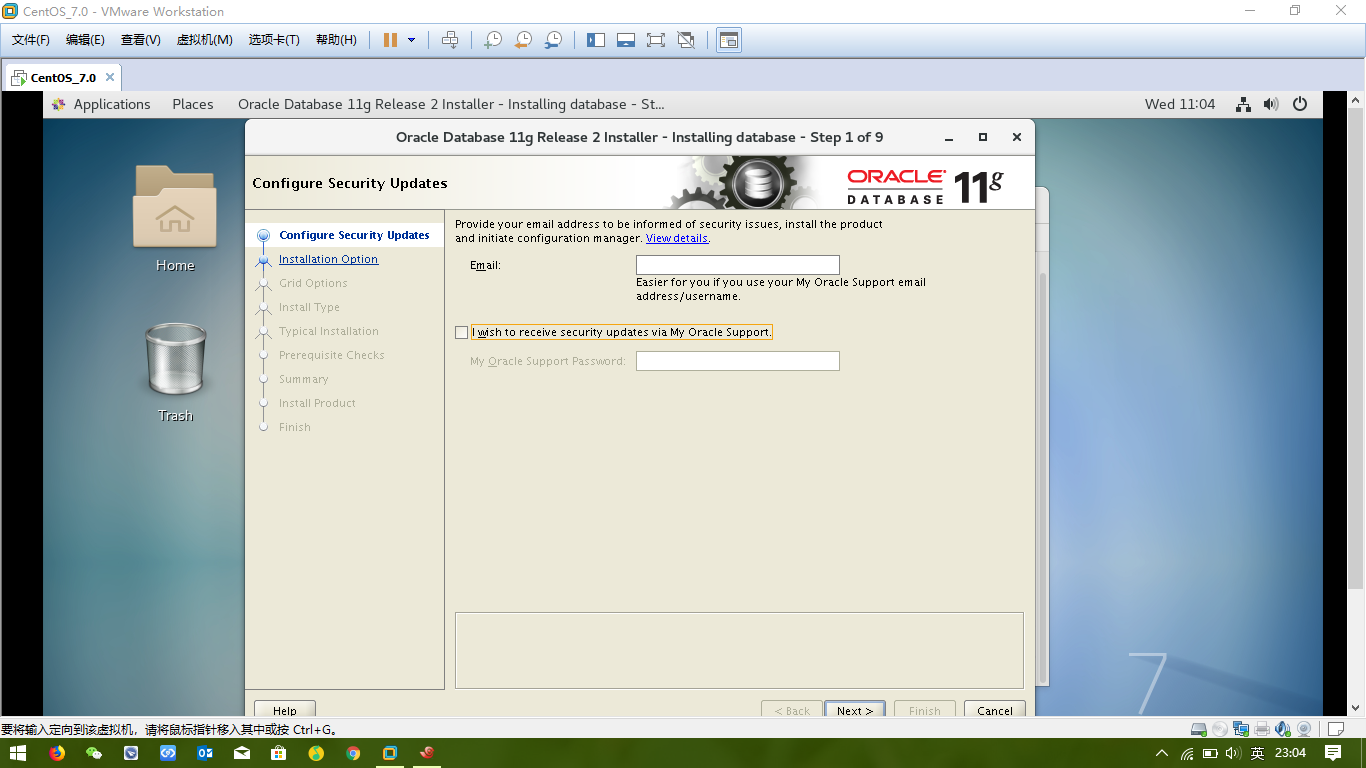
./runInstaller1. Uncheck checkbox “I wish to receive security updates via My Oracle Support” and then click “Next” button.
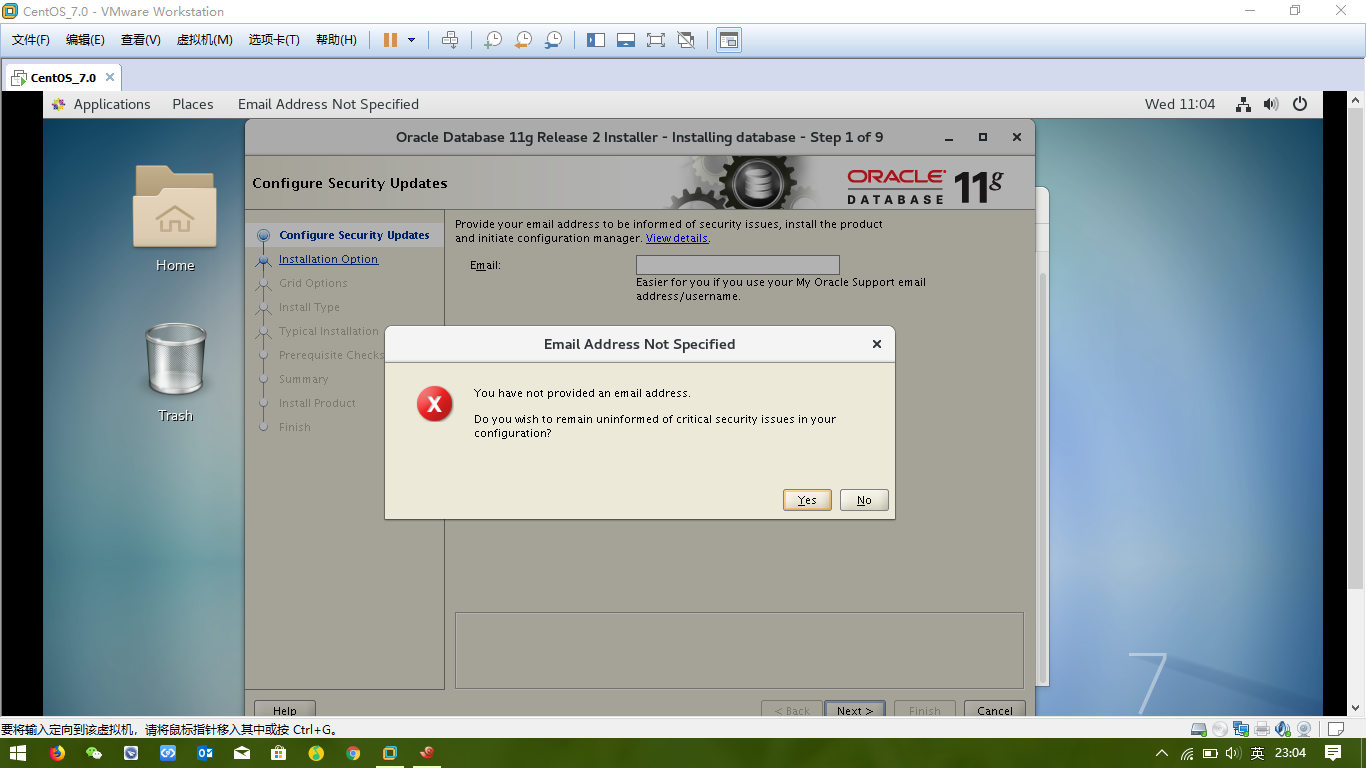
2. Ignore following message and click “Yes” button.
3. Select “Skip software updates” and click “Next” button.
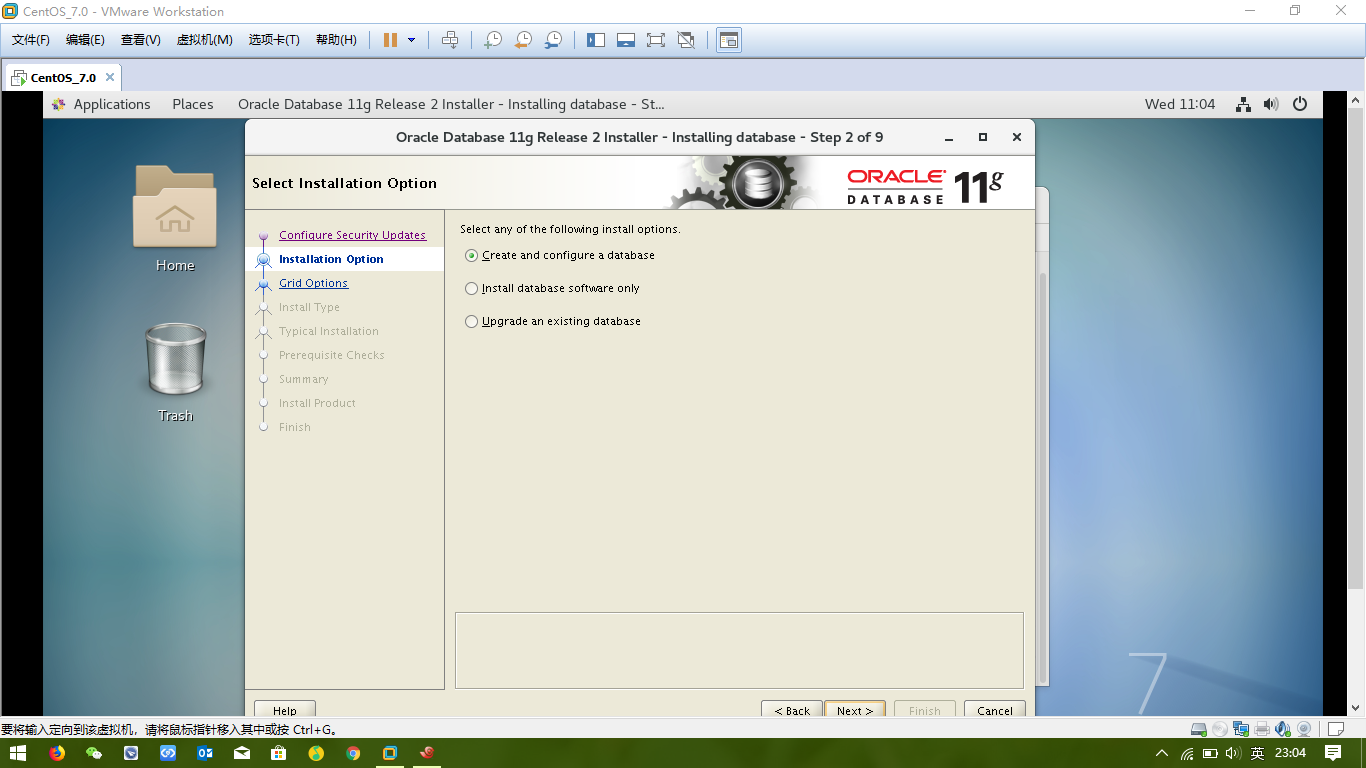
4. Select “Create and configure a database” then click “Next” button.
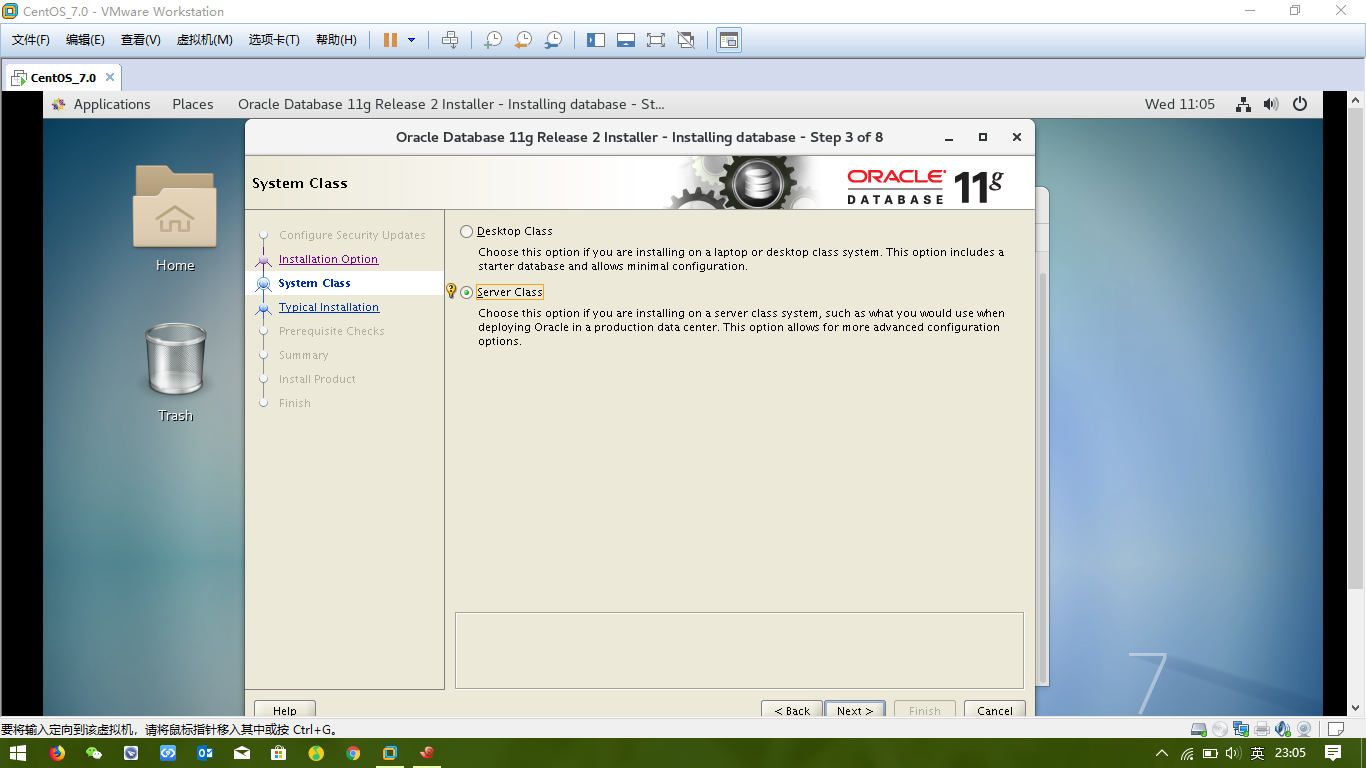
5. Select “Server Class” then click “Next” button.
6. Select “Single instance database installation” and click “Next” button.
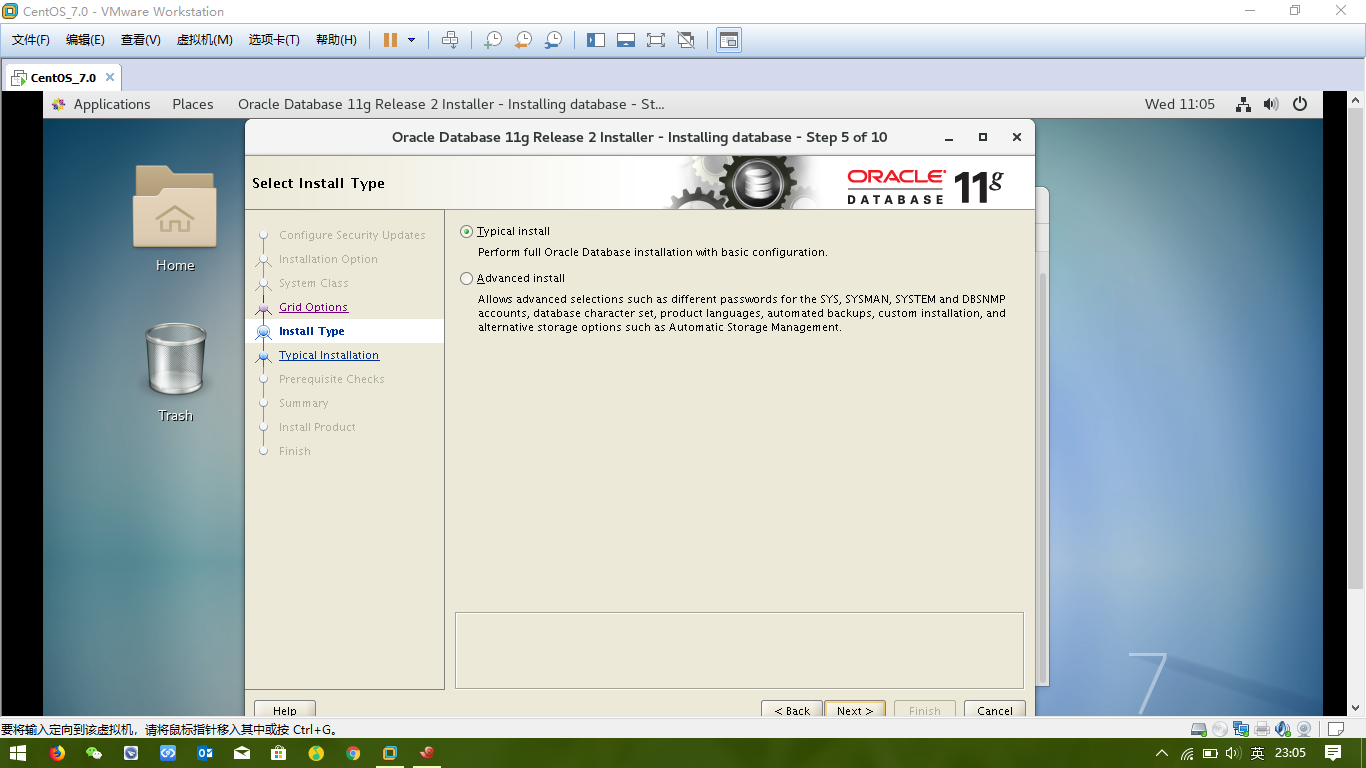
7. Select “Typical Install” and click “Next” button.
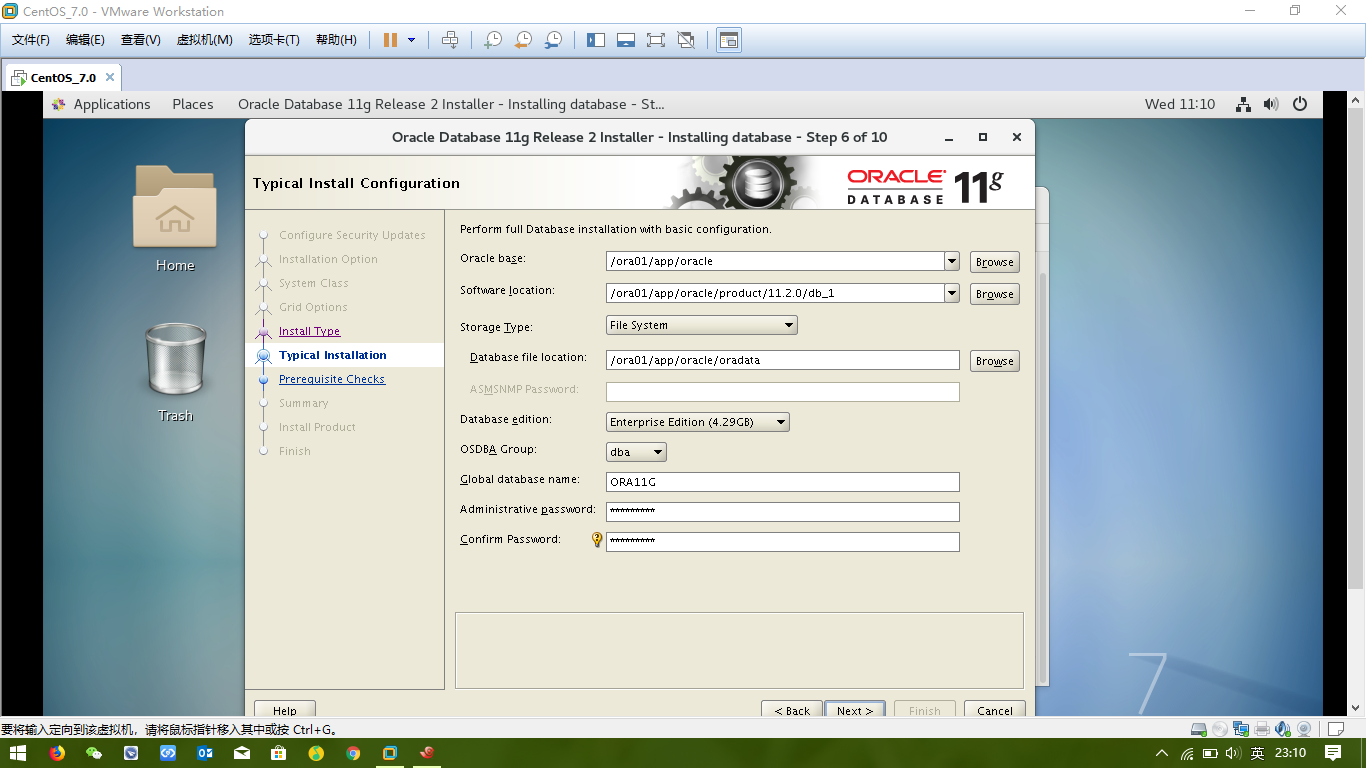
8. Enter database name, administration password for user and click “Next” button.
NOTE:please look at .bash_profile with user oracle,keep same with it
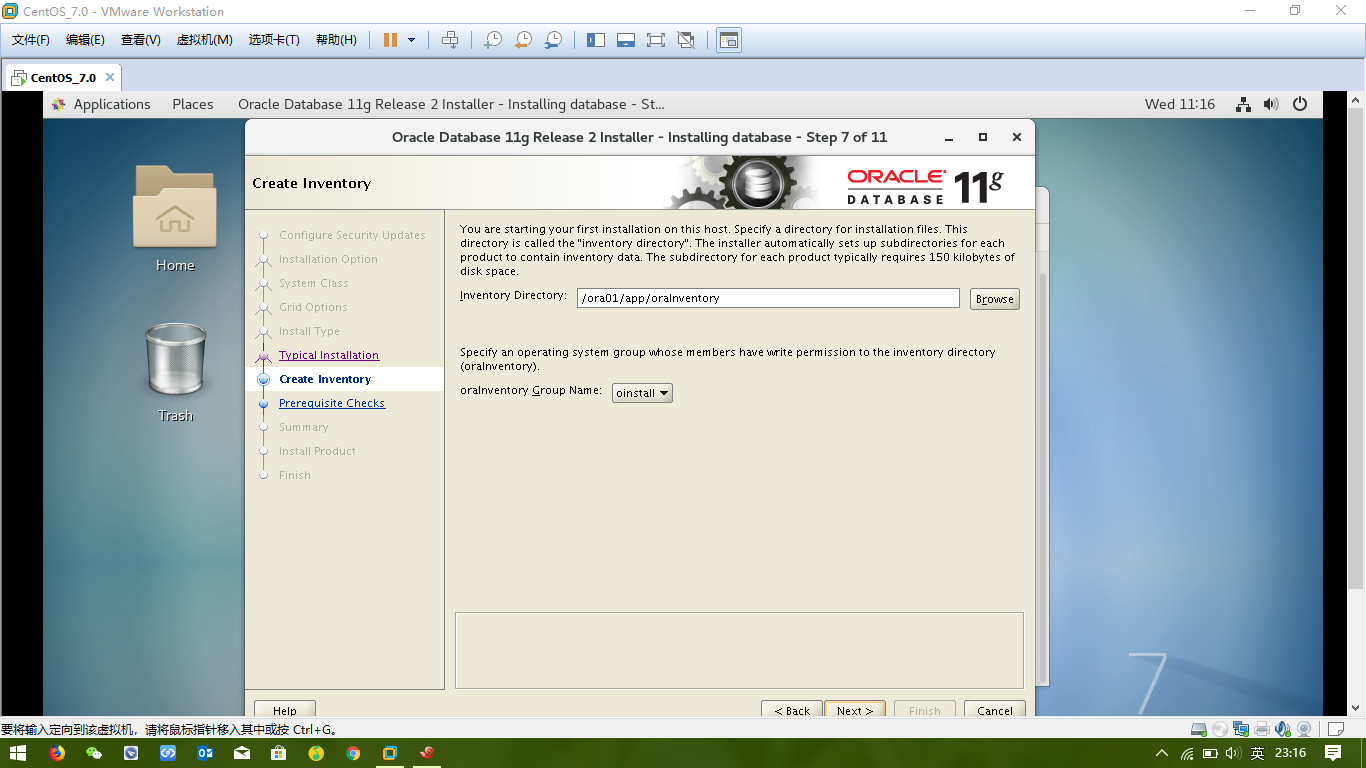
9. Just click “Next” button.
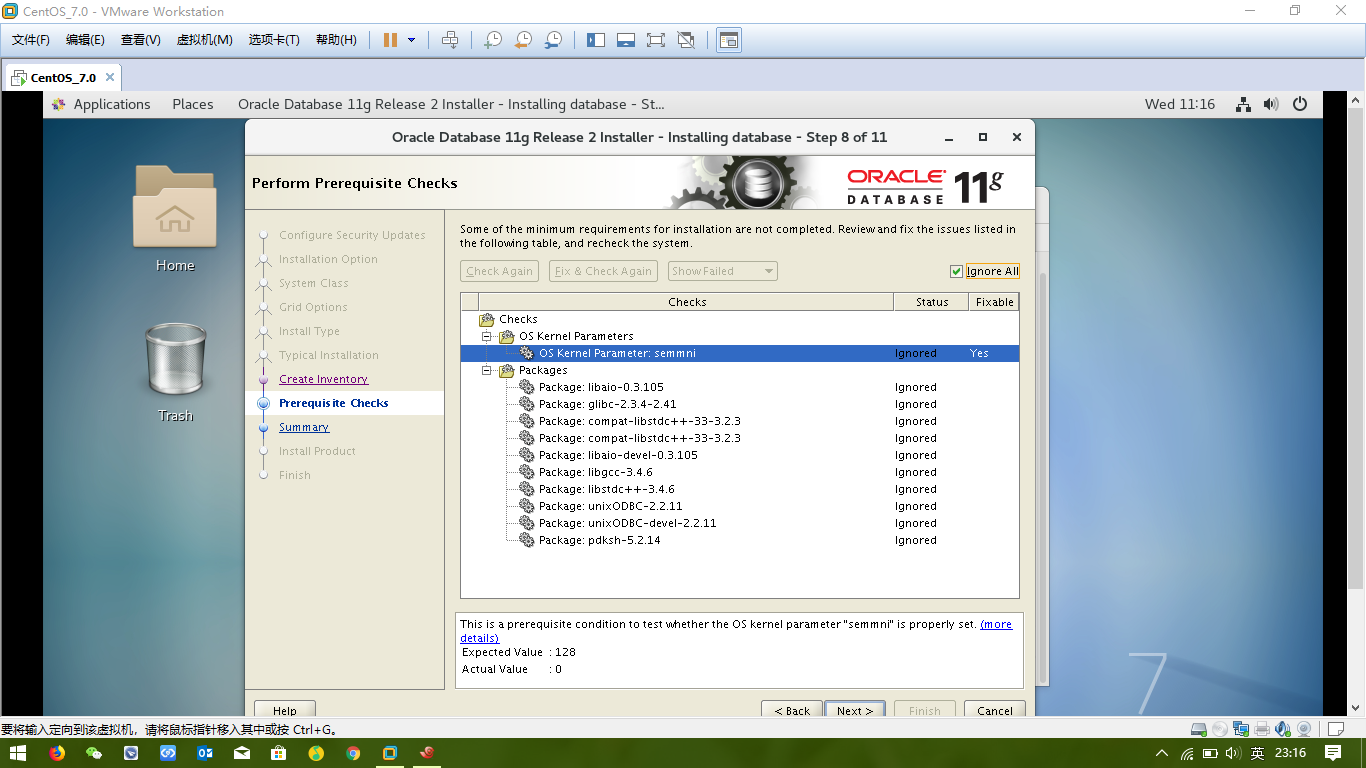
10. Check checkbox “Ignore All” to ignore this error.
11.Then click “Next” button.
12. Summary screen just before installation. Click “Finish” button.
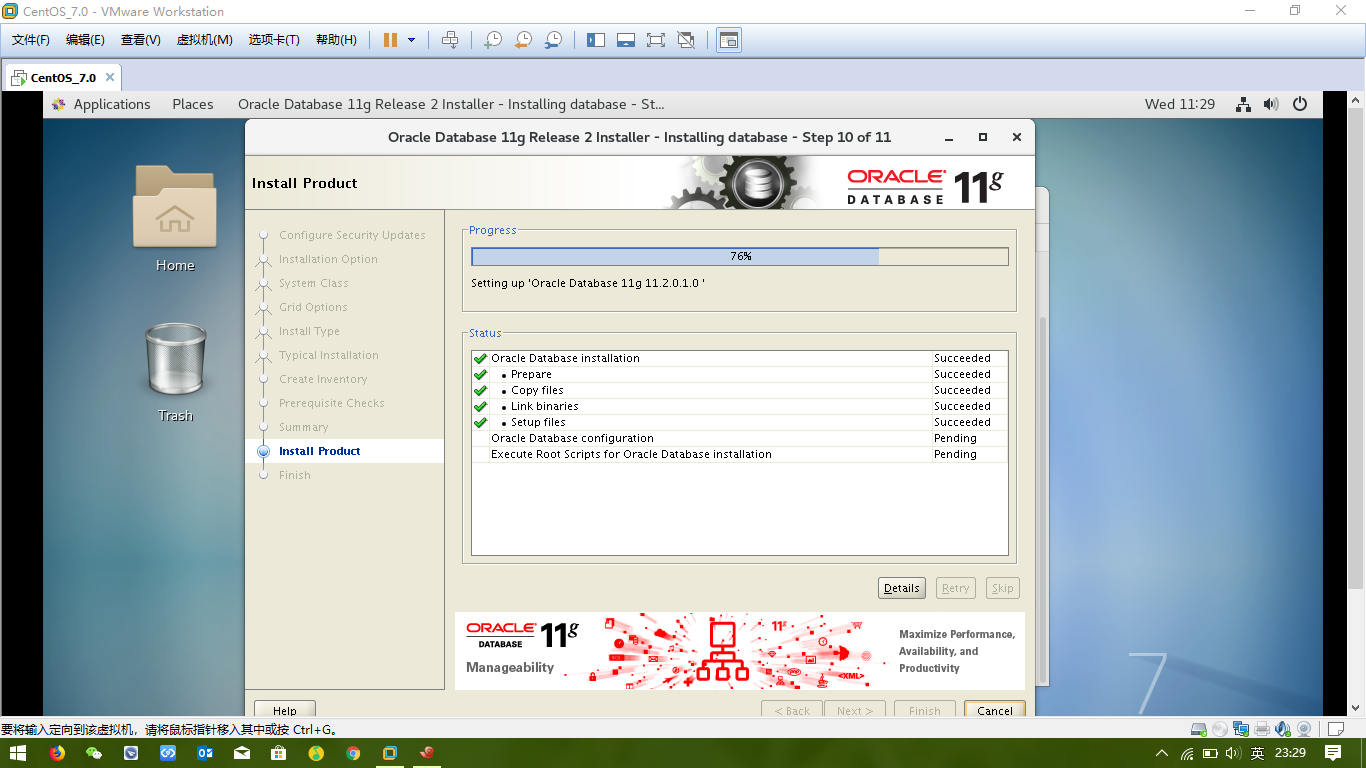
13. Boring installation …
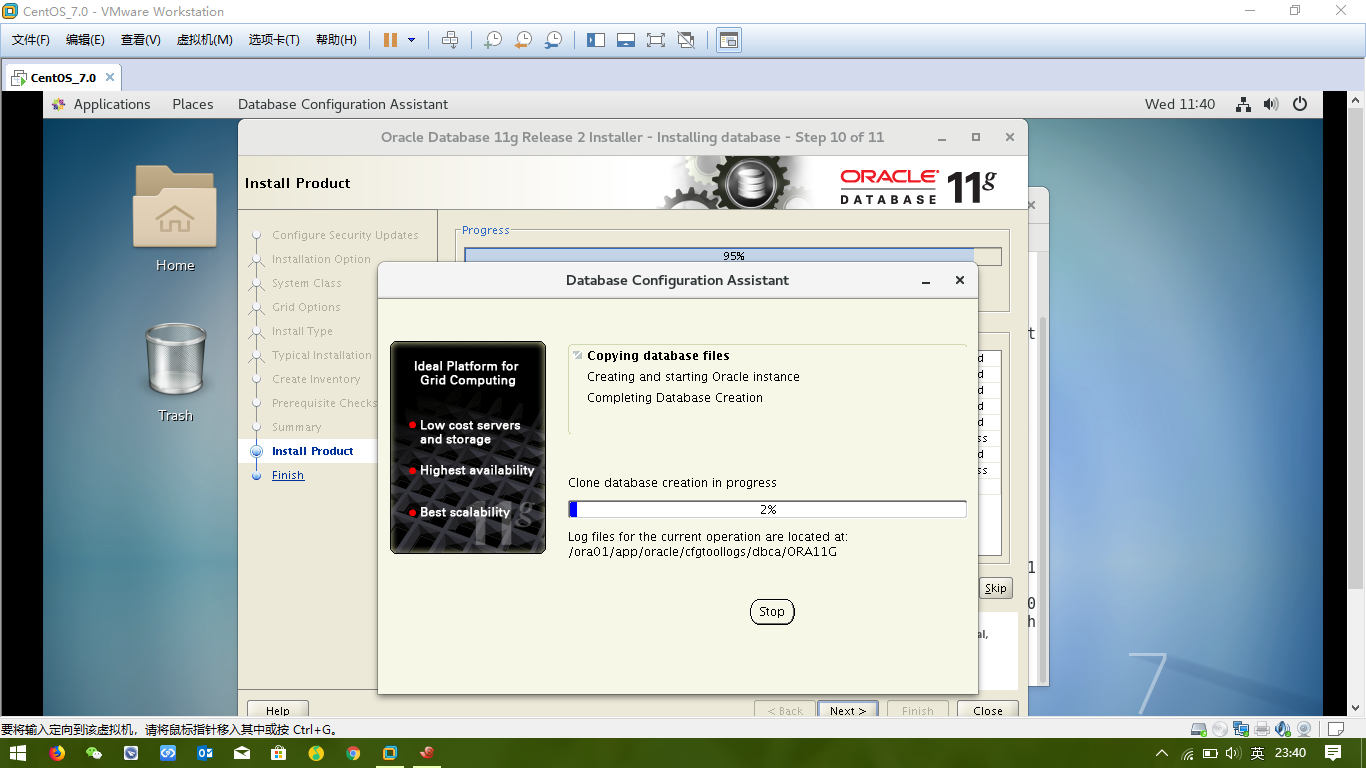
14. Database Configuration will start and create database for you,so slowly.
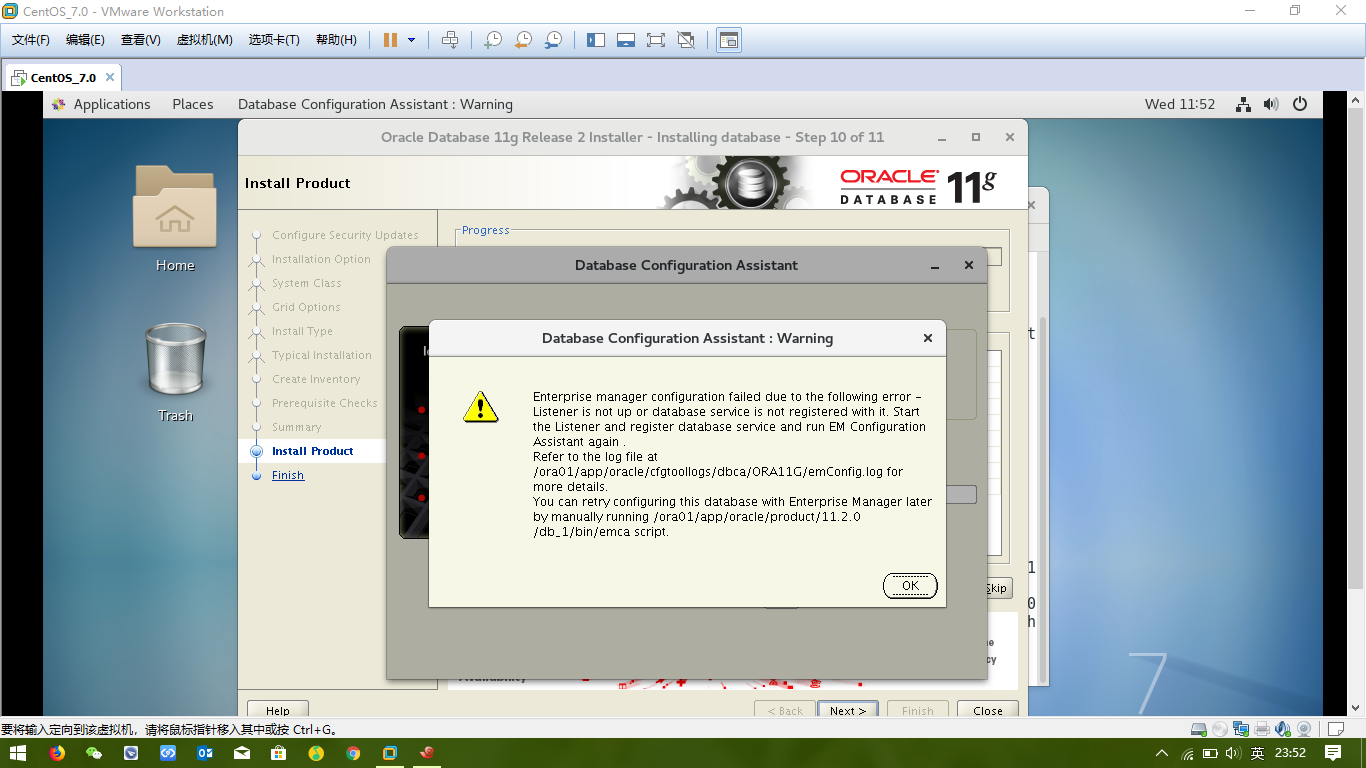
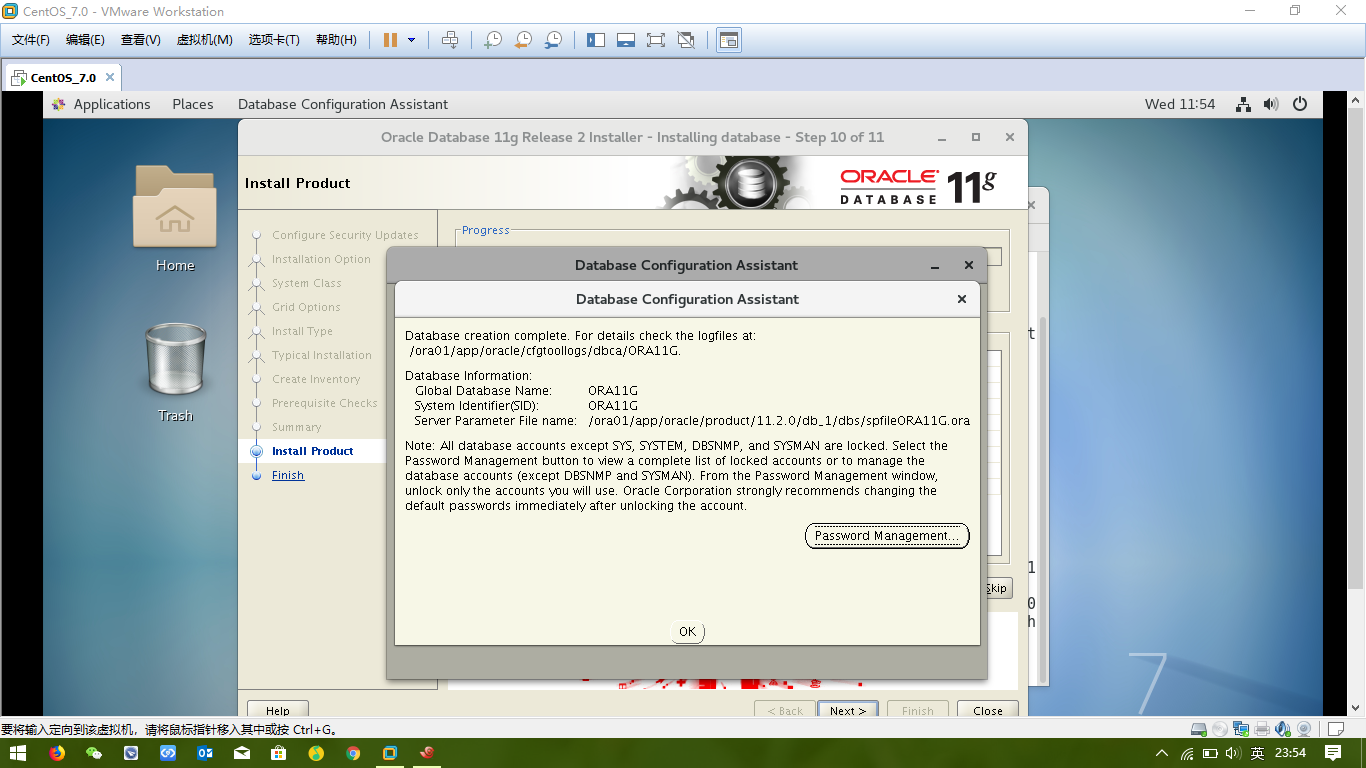
15. Click"OK" when Database Configuration Assistant:Warning and You should see summary screen for your new database. Click “OK” button to continue with installation.
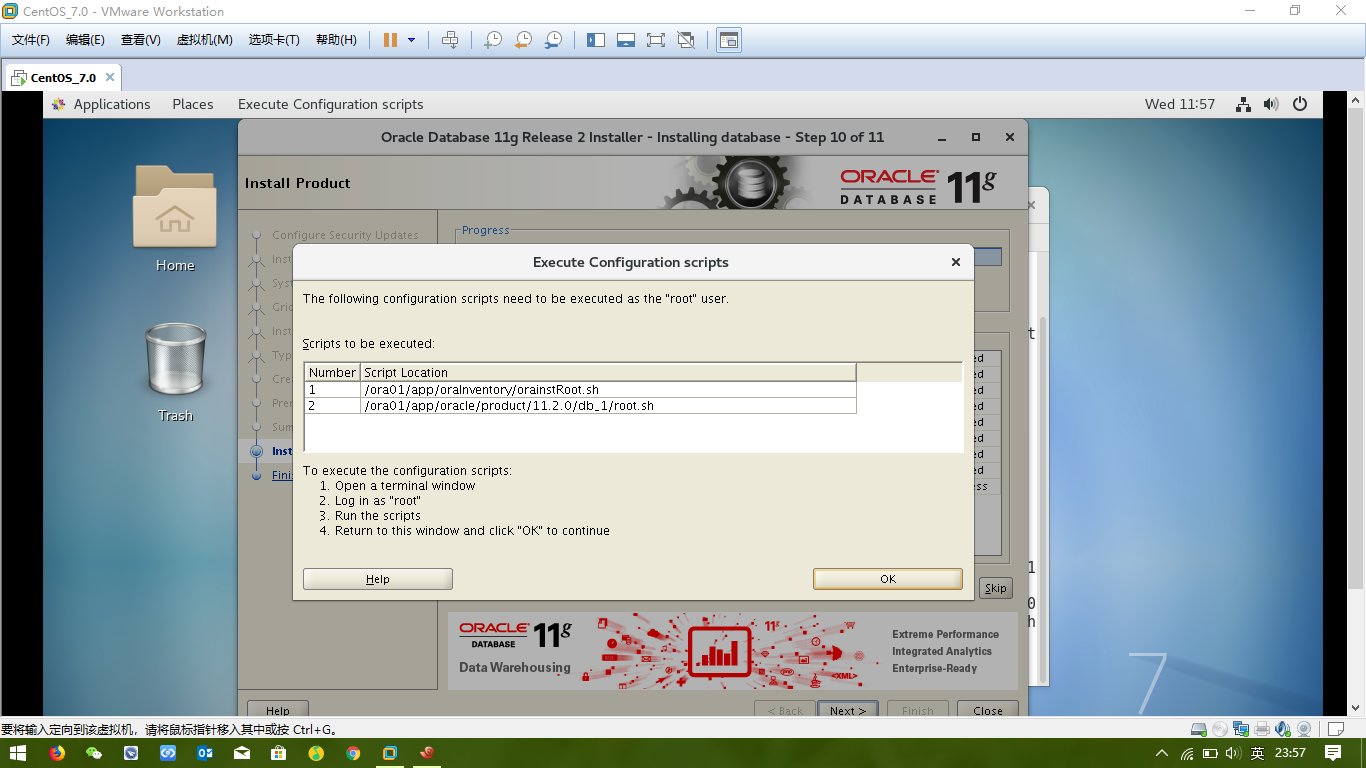
16. In the “middle” of installation you will be asked to run 2 scripts as user root. when scripts are executed just click “OK” button. Installation will proceed.
###execute scripts
su - root
[[email protected] ~]# sh /ora01/app/oraInventory/orainstRoot.sh
Changing permissions of /ora01/app/oraInventory.
Adding read,write permissions for group.
Removing read,write,execute permissions for world.

Changing groupname of /ora01/app/oraInventory to oinstall.
The execution of the script is complete.
[[email protected] ~]# sh /ora01/app/oracle/product/11.2.0/db_1/root.sh
Running Oracle 11g root.sh script...

The following environment variables are set as:
    ORACLE_OWNER= oracle
    ORACLE_HOME=  /ora01/app/oracle/product/11.2.0/db_1

Enter the full pathname of the local bin directory: [/usr/local/bin]: /usr/local/bin
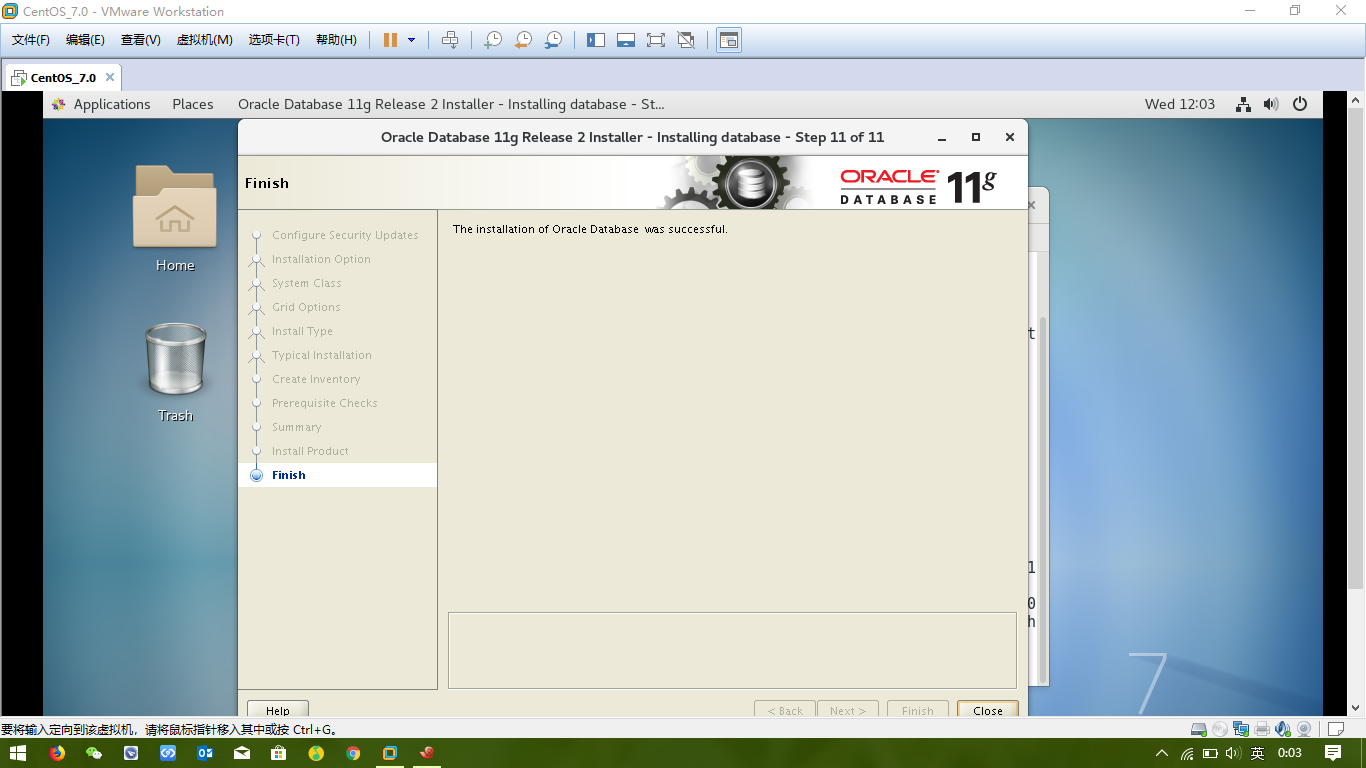
17. Installation completed. Just click “Close” button.
18.You should see all details about new database in database console
http://localhost.macrocurtain:1158/emPost installation steps
Edit the “/etc/oratab” file to set restart flag for ORA11G to ‘Y’.
su - root
vim /etc/oratabORA11G:/ora01/app/oracle/product/11.2.0/db_1:Ylisten program
su - oracle
lsnrctl start
start oracle instance
sqlplus /nolog
conn as sysdba-->system
startup
stop oracle instance
shutdown
exitlsnrctl stopOK,FINE!!!
for 3 hours...
相關推薦
Install Oracle 11G Release 2 on Centos Linux 7
This article presents how to install Oracle 11G on Centos Linux 7.Read following article how to install Centos Linux 7:Install Centos Linu
How To Install Zabbix Server 3.0 on CentOS/RHEL 7/6/5
轉載自:https://tecadmin.net/install-zabbix-network-monitoring-on-centos-rhel-and-fedora/# Zabbix is an open source software for networks and applic
centos 7 安裝Oracle Database 11g Release 2 (11.2.0.4)
network 永久 oinstall ima play arc glibc lpad tails 參考文章: http://www.cnblogs.com/lightnear/archive/2012/10/07/2714247.html http://www.cnblo
rhel7.4安裝oracle 11G 11.2.0.4.0 RAC
mes sid unit 下一步 路徑和 vim pen submenu shadow 一、操作系統 red hat 7.4oracle數據庫版本11.2.0.4oracle grid版本11.2.0.4對應的文件p13390677_112040_Linux-x86-64_
How to Install Apache Tomcat 8.5 on CentOS 7.3
How to Install Apache Tomcat 8.5 on CentOS 7.3 From: https://www.howtoforge.com/tutorial/how-to-install-tomcat-on-centos/ This tutorial e
Installing FusionPBX 3.2 on CentOS 6.5 and Mysql
Install Basic CentOS Server Installation Dev SVN Branch can also be installed this way, the only difference is fusionpbx**Hi there, it seems this guide
VMware搭建Oracle 11g RAC測試環境 For Linux
環境如下: Linux作業系統:Centos 6.5 64bit (這個版本的redhat 6核心等OS在安裝grid最後執行root.sh時會出現crs-4124,是oracle11.2.0.1的bug) VMware version:Workstation 8.0.3
單機 Oracle 11g(11.2.0.4)手動打補丁PSU(11.2.0.4.8)
環境說明: database : 11.2.0.4 x64 os: centos6.7 x64 準備內容: OPatch : p6880880_112000_Linux-x86-64.zip DB PSU : p21352635_112040_Linux-x86-64
oracle 11g (11.2.0.1.0) OCCI 查詢自動退出的問題
今天,同事說使用vs2010 occi 連線oracle 11g (11.2.0.1.0) 在進行查詢操作時,程式自動退出。 經查發生在執行ResultSet的next()函式時,程式退出的。 經查發現 oracle 11g 的版本是11.2.0.1.0,需要對oracle
【Linux】CentOS Linux 7.4系統上傳檔案失敗:sftp put: failed to upload d:/0data/test.txt Failure
CentOS Linux 7.4系統上傳檔案失敗 場景: 使用SecureCRT軟體下sftp長傳一個幾十M的檔案上傳失敗,報錯如下:sftp put: failed to upload d:/0data/test.txt Failure 解決: 一開始以為是CRT軟體的問題,但使用Xs
Centos7 安裝完畢後,重啟提示 Initial setup of CentOS Linux 7 (core) 的解決方法
問題: Centos7 安裝完畢後,重新開機啟動後顯示 Initial setup of CentOS Linux 7 (core) 1)[x] Creat user 2)[!]License information (no user will be created)(license
CentOS Linux 7 安裝
啟動 建立 技術 安裝 技術分享 虛擬機設置 點擊 編輯 配置 新建虛擬機,編輯虛擬機設置 啟動虛擬機 選擇Install CentOS Linux 7 最小化安裝就包含操作系統內核和基本的驅動程序,沒有桌面環境。 測試用的話,可以裝一個桌面程序。
解決Centos7初次開機提示Initial setup of CentOS Linux 7
開機後提示以下資訊 Initial setup of CentOS Linux 7 (core) 1) [x] Creat user 2) [!] License information (no
RHEL / Centos Linux 7:更改和設定Hostname命令
你可以使用以下的任何工具來管理CentOS Linux7的hostnames: hostnamectl command : 控制系統的hostname,推薦使用這個。 nmtui command : 使用文字使用者介面(text user interface
虛擬機器裝完Centos7提示Initial setup of CentOS Linux 7 (core)
Initial setup of CentOS Linux 7 (core) 1) [x] Creat user 2) [!] License information (no user will be created) (license not accepted)Plea
阿里雲CentOS Linux 7安全基線檢查
參考... 高設定使用者許可權配置檔案的許可權 | 檔案許可權 執行以下5條命令 chown root:root
silent install oracle 11.2.0.1 x86_64 for linux
nbsp clas pad hostname $path req bash -a uninstall su - root #groupadd oinstall #useradd -g oinstall oracle #passwd oracle #mkdir -p /u
How to install Hadoop 2.7.3 cluster on CentOS 7.3
大數據############################# #ENV #spark01 192.168.51.6 #spark02 192.168.51.18 #spark03 192.168.51.19 #spark04 192.168.51.21 #spark05 192.168.51.24 ###
Oracle linux 6.3 安裝11g R2 RAC on vbox
1 安裝系統 Virtual box 4.3 Oracle linux 6.3 Oracle 11g r2 Make sure "Adapter 1" is enabled, set to "Bridged Adapt
Centos 6.5 安裝Oracle 11g R2 on vbox
由於上一篇的rac安裝,截圖較多,這一篇選擇以txt的方式敘述,另外上一篇的時間比較久遠,這裡最近從新安裝 --2018-10-29 1 os環境初始化 [[email protected] yum.repos.d]# lsb_release -aLSB Version: :base-4.0-

