
spring配置檔案載入
Spring配置檔案是集成了Spring框架的專案的核心,引擎從哪裡開始,中間都執行了哪些操作,小談一下它的執行流程。
容器先是載入web.xml
接著是applicationContext.xml在web.xml裡的註冊
一種方法是加入ContextLoaderServlet這個servlet
 1 <context-param> 2 <param-name>contextConfigLocation</param-name> 3 <param-value>/WEB-INF/applicationContext.xml</param-value
9 </servlet-class>10 <load-on-startup>0</load-on-startup>11 </servlet>
還有一種是新增ContextLoaderListener這個監聽器
1 <context-param>2 <param-name>contextConfigLocation</param-name>3 <param-value>/WEB-INF/applicationContext.xml</param-value>4 </context-param>5 6 <listener>7 <listener-class>org.springframework.web.context.ContextLoaderListener</listener-class>8 </
ContextLoaderServlet和ContextLoaderListener都是先建立ContextLoader的一個物件,然後呼叫它的initWebApplicationContex方法初始化WebApplicationContext獲得一個物件;
spring載入多個配置檔案,在web.xml中
1 <context-param> 2 <param-name>contextConfigLocation</param-name> 3 <param-value>classpath*:spring/*.xml</param-value> 4 </context-param> 5 6 <servlet> 7 <servlet-name>SpringContextServlet</servlet-name> 8 <servlet-class> 9 org.springframework.web.context.ContextLoaderServlet10 </servlet-class>11 <load-on-startup>3</load-on-startup>12 </servlet>
Spring配置檔案是集成了Spring框架的專案的核心,引擎從哪裡開始,中間都執行了哪些操作,小談一下它的執行流程。
容器先是載入web.xml
接著是applicationContext.xml在web.xml裡的註冊
一種方法是加入ContextLoaderServlet這個servlet
1 <context-param> 2 <param-name>contextConfigLocation</param-name> 3 <param-value>/WEB-INF/applicationContext.xml</param-value> 4 </context-param> 5 <servlet> 6 <servlet-name>context</servlet-name> 7 <servlet-class> 8 org.springframework.web.context.ContextLoaderServlet 9 </servlet-class>10 <load-on-startup>0</load-on-startup>11 </servlet>
還有一種是新增ContextLoaderListener這個監聽器
1 <context-param>2 <param-name>contextConfigLocation</param-name>3 <param-value>/WEB-INF/applicationContext.xml</param-value>4 </context-param>5 6 <listener>7 <listener-class>org.springframework.web.context.ContextLoaderListener</listener-class>8 </listener>
ContextLoaderServlet和ContextLoaderListener都是先建立ContextLoader的一個物件,然後呼叫它的initWebApplicationContex方法初始化WebApplicationContext獲得一個物件;
spring載入多個配置檔案,在web.xml中
1 <context-param> 2 <param-name>contextConfigLocation</param-name> 3 <param-value>classpath*:spring/*.xml</param-value> 4 </context-param> 5 6 <servlet> 7 <servlet-name>SpringContextServlet</servlet-name> 8 <servlet-class> 9 org.springframework.web.context.ContextLoaderServlet10 </servlet-class>11 <load-on-startup>3</load-on-startup>12 </servlet>
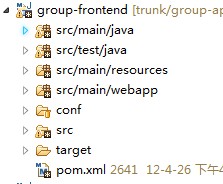
一、Spring配置檔案在類路徑下面
在Spring的java應用程式中,一般我們的Spring的配置檔案都是放在放在類路徑下面(也即編譯後會進入到classes目錄下)。
以下是我的專案,因為是用maven管理的,所以配置檔案都放在“src/main/resources”目錄下
這時候,在程式碼中可以通過
- ApplicationContext applicationContext = new ClassPathXmlApplicationContext("applicationContext.xml");
如果程式碼想用Junit測試框架來測試,則Spring提供了對Junit支援,還可以使用註解的方式:
- @RunWith(SpringJUnit4ClassRunner.class)
- @ContextConfiguration(locations={"classpath:applicationContext.xml"})
只需要在相應的Test類前面加上此兩個註解(第二個註解用來指明Spring的配置檔案位置),就可以在Junit Test類使用中Spring提供的依賴注入功能。
二、Spring配置檔案在WEB-INF下面
當然在做J2EE開發時,有些人習慣把Spring檔案放在WEB-INF目錄(雖然更多人習慣放在類路徑下面)下面;或者有些Spring配置檔案是放在類路徑下面,而有些又放在
WEB-INF目錄下面,如下圖。
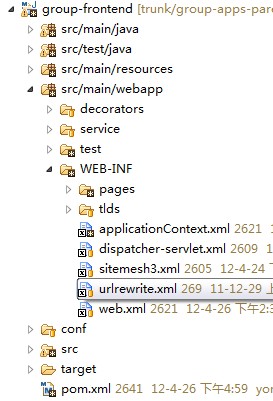
這時候,在程式碼中就不可以使用ClassPathXmlApplicationContext來載入配置檔案了,而應使用FileSystemXmlApplicationContext。
- ApplicationContext applicationContext = new FileSystemXmlApplicationContext("src/main/webapp/WEB-INF/applicationContext.xml");
然後獲取相應的bean。
如果程式碼想用Junit測試框架來測試,則Spring提供了對Junit支援,還可以使用註解的方式:
- @RunWith(SpringJUnit4ClassRunner.class)
- @ContextConfiguration(locations={"file:src/main/webapp/WEB-INF/applicationContext.xml"})
下面是我的一個Spring管理下的Junit測試類:
- package com.sohu.group.service.external;
- import java.util.List;
- import org.junit.Test;
- import org.junit.runner.RunWith;
- import org.springframework.beans.factory.annotation.Autowired;
- import org.springframework.test.context.ContextConfiguration;
- import org.springframework.test.context.junit4.SpringJUnit4ClassRunner;
- @RunWith(SpringJUnit4ClassRunner.class)
- @ContextConfiguration({"file:src/main/webapp/WEB-INF/applicationContext.xml"})
- publicclass SuFriendServiceImplOverRMITest {
- @Autowired
- private SuFriendService suFriendService;
- @Test
- publicvoid getUserFollowerListTest(){
- List list = suFriendService.getUserFollowerList("[email protected]");
- System.out.println("------"+list);
- }
- }
原文地址:http://blog.csdn.net/hbccgg/article/details/6358591
Spring配置檔案是集成了Spring框架的專案的核心,引擎從哪裡開始,中間都執行了哪些操作,小談一下它的執行流程。
容器先是載入web.xml
接著是applicationContext.xml在web.xml裡的註冊
一種方法是加入ContextLoaderServlet這個servlet
1 <context-param> 2 <param-name>contextConfigLocation</param-name> 3 <param-value>/WEB-INF/applicationContext.xml</param-value> 4 </context-param> 5 <servlet> 6 <servlet-name>context</servlet-name> 7 <servlet-class> 8 org.springframework.web.context.ContextLoaderServlet 9 </servlet-class>10 <load-on-startup>0</load-on-startup>11 </servlet>
還有一種是新增ContextLoaderListener這個監聽器
1 <context-param>2 <param-name>contextConfigLocation</param-name>3 <param-value>/WEB-INF/applicationContext.xml</param-value>4 </context-param>5 6 <listener>7 <listener-class>org.springframework.web.context.ContextLoaderListener</listener-class>8 </listener>
ContextLoaderServlet和ContextLoaderListener都是先建立ContextLoader的一個物件,然後呼叫它的initWebApplicationContex方法初始化WebApplicationContext獲得一個物件;
spring載入多個配置檔案,在web.xml中
1 <context-param> 2 <param-name>contextConfigLocation</param-name> 3 <param-value>classpath*:spring/*.xml</param-value> 4 </context-param> 5 6 <servlet> 7 <servlet-name>SpringContextServlet</servlet-name> 8 <servlet-class> 9 org.springframework.web.context.ContextLoaderServlet10 </servlet-class>11 <load-on-startup>3
相關推薦
spring配置檔案載入
Spring配置檔案是集成了Spring框架的專案的核心,引擎從哪裡開始,中間都執行了哪些操作,小談一下它的執行流程。 容器先是載入web.xml 接著是applicationContext.xml在web.xml裡的註冊 一種方法是加入ContextLoad
Spring框架整合WEB解決配置檔案載入多次的問題
1. 建立JavaWEB專案,引入Spring的開發包。編寫具體的類和方法。 * 環境搭建好後,啟動伺服器來測試專案,傳送每訪問一次都會載入一次配置檔案,這樣效率會非常非常慢!! 2. 解決上面的問題 * 將工廠建立好了以後放入到ServletContext域中.使用工廠的時候,從Servl
Spring Boot 配置檔案載入順序
有這麼一種情況,在application.properties有以下配置: spring.profiles.active=dev 然後在logback-spring.xml中有以下配置: <springProfile name="test"> <pr
Spring原始碼解析和配置檔案載入
Spring類的繼承結構圖: Spring運用了大量的模板方法模式和策略模式,所以各位看原始碼的時候,務必留意,每一個繼承的層次都有不同的作用,然後將相同的地方抽取出來,依賴抽象將不同的處理按照不同的策略去處理。 步驟A. 讀取 Resource 檔案形成 Documen
解決Tomcat反覆載入Spring配置檔案
解決Tomcat重複載入Spring配置檔案當我們為自己的Web應用而改動Tomcat中conf/server.xml,可以不錄入專案路徑就可以訪問應用. 但是更改完畢後,啟動Tomcat會發現一種現象就是重複載入Spring配置檔案。 現象: 控制檯端會輸出日誌: 資訊
【Spring Boot】(7)、配置檔案載入位置
Spring Boot啟動會掃描以下位置的application.properties/yml檔案作為Spring Boot預設配置檔案:外接,在相對於應用程式執行目錄的/config子目錄裡外接,在應
Spring中核心配置檔案載入頭部資訊的兩種方式
1、沒有外掛的情況下:官網拷貝程式碼複製<beans xmlns="http://www.springframework.org/schema/beans" xmlns:xsi="http://www.w3.org/2001/XMLSchema-instance"
Spring配置檔案的載入,及裝載多個beans.xml檔案
public void testAutoWire() throws Exception {ApplicationContext ctx = new ClassPathXmlApplicationContext("ioc/autoWire/beanAutoWire.xml");//載入包ioc.autoWire
Tomcat啟動專案時載入了兩遍Spring配置檔案
解決方式,將Tomcat下的釋出路徑不直接放到webapps目錄下,而是在Tomcat的webapps目錄下建一個子目錄,並將war釋出到改子目錄下,就解決了重複載入spring配置的問題了。當然也可以將服務釋出到與w
maven+spring 報 不能載入spring配置檔案
Maven+spring 報錯:Error configuring application listener of class org.springframework.web.cont 錯誤資訊: SEVERE: Error configuring application
junit進行測試載入多個spring配置檔案
配置方式如下: @RunWith(SpringJUnit4ClassRunner.class) @ContextConfiguration(locations = { "classpath*:/a
SqlMapConfig.xml --- 在spring配置檔案中自動載入的mybatis檔案
<?xml version="1.0" encoding="UTF-8"?> <!DOCTYPE configuration PUBLIC "-//mybatis.org//DTD Config 3.0//EN" "http://mybatis.org/d
Tomcat反覆載入Spring配置檔案
Tomcat有時候會重複載入配置檔案,這是由於server.xml配置不當造成的。現象:quartz定時執行了兩遍(其它配置檔案其實也載入了兩遍)server.xml配置:<Host name="localhost" appBase="webapps" unpackWA
三、Spring Boot專案中MyBatis配置檔案載入深入解析
開發十年,就只剩下這套架構體系了! >>>
Spring Boot 2.4.0正式釋出,全新的配置檔案載入機制(不向下相容)
> 千里之行,始於足下。關注公眾號【**BAT的烏托邦**】,有Spring技術棧、MyBatis、JVM、中介軟體等小而美的**原創專欄**供以免費學習。分享、成長,拒絕淺嘗輒止。本文已被 [**https://www.yourbatman.cn**](https://www.yourbatman.cn)
spring配置檔案最全約束
<?xml version="1.0" encoding="utf-8"?> <beans xmlns="http://www.springframework.org/schema/beans" xmlns:xsi="http://www.w3.org/2001/XMLSchema
Spring配置檔案中如何使用外部配置檔案配置資料庫連線
版權宣告:本文為博主原創文章,歡迎指正或者轉載。 https://blog.csdn.net/qq_38663729/article/details/78821258 直接在spring的配置檔案中applicationContext.xml檔案中配置資料庫連線也可以,但是有個問題,需要在url
Spring配置檔案中配置資料庫連線(mysql,sqlserver,oracle)
xml配置檔案中配置如下: <bean id="dataSource" class="org.springframework.jdbc.datasource.DriverManagerDataSource"> <property name="driverClassName"
SpringMVC 學習 九 SSM環境搭建 (二) Spring配置檔案的編寫
spring配置檔案中需要乾的事情 (一)開啟 Service與pojo包的註解掃描 注意:spring 掃描與表對應的實體類,以及service層的類,不能用來掃描Controller層的類,因為Controller層的類需要由SpringMVC容器來管理,如果採用了Spring容器管理,就
spring配置檔案詳解--真的蠻詳細
spring配置檔案詳解--真的蠻詳細 轉自: http://book.51cto.com/art/201004/193743.htm 此處詳細的為我們講解了spring2.5的實現原理,感覺非常有用