
MySQL多資料來源 二(基於spring+aop實現讀寫分離)
一、為什麼要進行讀寫分離呢?
因為資料庫的“寫操作”操作是比較耗時的(寫上萬條條資料到Mysql可能要1分鐘分鐘)。但是資料庫的“讀操作”卻比“寫操作”耗時要少的多(從Mysql讀幾萬條資料條資料可能只要十秒鐘),而我們在開發過程中大多數也是查詢操作比較多。所以讀寫分離解決的是,資料庫的“寫操作”影響了查詢的效率問題。
二、那麼怎麼來進行讀寫分離呢?
首先,基於上一篇主從複製
那麼我們現在開始基於sping+aop來實現讀寫分離
1:配置多資料來源
jdbc.properties檔案如下:
jdbc.driverClassName=com.mysql.jdbc.Driver
jdbc.url_master=jdbc:mysql://localhost:3306/longlong_bike?useUnicode=true&characterEncoding=utf-8&zeroDateTimeBehavior=convertToNull
jdbc.url_slaver1=jdbc:mysql://localhost:3306/longlong_bike?useUnicode=true&characterEncoding=utf-8&zeroDateTimeBehavior=convertToNull
jdbc.url_slaver2=jdbc:mysql://localhost:3306/longlong_bike?useUnicode=true&characterEncoding=utf-8&zeroDateTimeBehavior=convertToNull

jdbc.username=root
jdbc.password=admin
2:applicationContext檔案如下:
<?xml version="1.0" encoding="UTF-8"?>
<beans xmlns="http://www.springframework.org/schema/beans"
       xmlns:xsi="http://www.w3.org/2001/XMLSchema-instance"
       xmlns:context="http://www.springframework.org/schema/context"
       xmlns:aop="http://www.springframework.org/schema/aop"
       xmlns:tx="http://www.springframework.org/schema/tx"
       xsi:schemaLocation="http://www.springframework.org/schema/beans
       http://www.springframework.org/schema/beans/spring-beans.xsd
       http://www.springframework.org/schema/context
       http://www.springframework.org/schema/context/spring-context-4.0.xsd
       http://www.springframework.org/schema/aop
       http://www.springframework.org/schema/aop/spring-aop.xsd
       http://www.springframework.org/schema/tx
       http://www.springframework.org/schema/tx/spring-tx-4.0.xsd">

    <!--開啟註解-->
    <context:annotation-config/>

    <!--開啟包掃描-->
    <context:component-scan base-package="com.coder520"/>

    <context:property-placeholder location="classpath:jdbc.properties"/>
    <!--主資料庫-->
    <bean id="dataSource_master" class="com.alibaba.druid.pool.DruidDataSource">
        <property name="driverClassName" value="${jdbc.driverClassName}"/>
        <property name="url" value="${jdbc.url_master}"/>
        <property name="username" value="${jdbc.username}"/>
        <property name="password" value="${jdbc.password}"/>
    </bean>
    <!--配置從資料庫-->
    <bean id="dataSource_slaver1" class="com.alibaba.druid.pool.DruidDataSource">
        <property name="driverClassName" value="${jdbc.driverClassName}"/>
        <property name="url" value="${jdbc.url_slaver1}"/>
        <property name="username" value="${jdbc.username}"/>
        <property name="password" value="${jdbc.password}"/>
    </bean>
    <bean id="dataSource_slaver2" class="com.alibaba.druid.pool.DruidDataSource">
        <property name="driverClassName" value="${jdbc.driverClassName}"/>
        <property name="url" value="${jdbc.url_slaver2}"/>
        <property name="username" value="${jdbc.username}"/>
        <property name="password" value="${jdbc.password}"/>
    </bean>

    <!--自定義一個切換資料來源的類DynamicDataSource(spring提供的有切換動態資料庫的類AbstractRoutingDataSource)-->
    <bean id="dataSource" class="com.coder520.common.DynamicDataSource">
        <!--定義目標資料來源物件,對應AbstractRoutingDataSource類中的map物件-->
        <property name="targetDataSources">
            <map>
                <entry key="master" value-ref="dataSource_master"/>
                <entry key="slaver1" value-ref="dataSource_slaver1"/>
                <entry key="slaver2" value-ref="dataSource_slaver2"/>
            </map>
        </property>
        <!--定義預設的資料來源物件-->
        <property name="defaultTargetDataSource" ref="dataSource_master"/>
    </bean>


    <!--配置mybatis sqlSessionFactory-->
    <bean id="sqlSessionFactory" class="org.mybatis.spring.SqlSessionFactoryBean">
        <!--配置資料庫路徑-->
        <property name="dataSource" ref="dataSource"/>
        <!--配置sql-mapper路徑-->
        <property name="mapperLocations" value="classpath:com/coder520/**/**.xml"/>
    </bean>
    <!--配置mapper-->
    <bean class="org.mybatis.spring.mapper.MapperScannerConfigurer">
        <property name="basePackage" value="com.coder520"/>
        <property name="sqlSessionFactoryBeanName" value="sqlSessionFactory"/>
    </bean>

    <!--配置事務-->
    <tx:annotation-driven transaction-manager="transactionManager"/>
    <bean id="transactionManager" class="org.springframework.jdbc.datasource.DataSourceTransactionManager">
        <property name="dataSource" ref="dataSource"/>
    </bean>
</beans>
配置了一主兩從三個資料來源,在spring中,給我們提供了可以切換資料來源的類(AbstractRoutingDataSource)。它是一個抽象類,我們需要實現它的抽象方法。
3: 自定義一個動態切換資料來源的類DynamicDataSource, 實現AbstractRoutingDataSource的抽象方法。程式碼如下:
import org.springframework.jdbc.datasource.lookup.AbstractRoutingDataSource;

public class DynamicDataSource extends AbstractRoutingDataSource {

    // 獲取當前map物件的key,這裡我們在定義一個類(DynamicDataSourceHolder)來實現,當然你也可以寫在本類中
    @Override
    protected Object determineCurrentLookupKey() {
        return DynamicDataSourceHolder.getDataSource();
    }
}
DynamicDataSourceHolder.getDataSource()是獲取資料來源。但是呢,spring中的資料來源是唯一,每一個使用者過來都是共用這個資料來源的。我們知道高併發的情況下,多個使用者共享一個資源,這是有執行緒問題的,這樣獲取資料來源是不安全的,容易混亂。

因此我們要用到併發程式設計問題呢,我們要用到併發程式設計裡面的一個類ThreadLocal這個類,這個類用來ThreadLocal類用來提供執行緒內部的區域性變數。這種變數在多執行緒環境下訪問(通過get或set方法訪問)時能保證各個執行緒裡的變數相對獨立於其他執行緒內的變數。


那麼我們在兩個從庫中進行讀操作如何公平的分配來讀操作呢?我們自然想到要有輪詢的思維。通過一個計時器來自增求模運算。這個計時器的只從-1開始,這樣得到的結果就只有0和1了,根據0 和 1來分配兩個從庫進行讀操作。
注意這個計時器如果用Inter型別的話,必然會出現執行緒安全問題的,因為這是共享的資料型別。因此我們可以用併發程式設計裡面的AtomicInterger原子屬性的類。解決執行緒安全問題。我們知道Integer是有範圍的,我們不能讓
這個計數器一直自增,這樣下去會去問題的。因此還需要來一個計數器重置。
程式碼如下:
package com.coder520.common;
import java.util.concurrent.atomic.AtomicInteger;
public class DynamicDataSourceHolder {
/**
* 頻換的切換資料來源,在多執行緒下是非常可怕的,容易造成資料混亂,所以自然而然的就想到了併發程式設計的ThreadLocal類
*/
// 定義一個ThreadLocal類來捆綁當前map的key
private static final ThreadLocal<String> holder = new ThreadLocal<>();
// 定義資料來源的Key(主)
private static final String MASTER = "master";
// 定義資料來源的Key(從)
private static final String SLAVER_1 = "slaver1";
private static final String SLAVER_2 = "slaver2";
/**
* 由於我們設定了兩個從庫,從庫之前的切換我們很容易就想到了輪訓演算法,為了讓輪訓輪換的徹底,定義一個累加數
* 在多執行緒情況下,這個累加數可能會出現問題,所以我就想到了用Atomic包的下類
*/
// 定義一個從-1開始的計數器
private static final AtomicInteger count = new AtomicInteger(-1);
/**
* 為了讓程式碼變得更加美觀,可以使用列舉來定義主庫從庫常量
*/
// 01:設定資料來源
public static void setDataSource(DataSourceType dataSource){
if(DataSourceType.MASTER == dataSource){
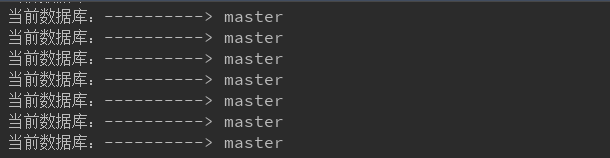
// 輸出一下,判斷當前的資料庫
System.out.println("當前資料庫:----------> master");
holder.set(MASTER);
}else if(DataSourceType.SLAVER == dataSource){
// 輪訓從資料庫
holder.set(roundRobin());
}
}
private static String roundRobin() {
int index = count.incrementAndGet();
if(Integer.MAX_VALUE < index){
index = -1;
}
if(index%2 == 0){
System.out.println("當前資料庫:----------> slaver_1");
return SLAVER_1;
}else{
System.out.println("當前資料庫:----------> slaver_2");
return SLAVER_2;
}
}
// 02:獲取資料來源
public static String getDataSource(){
return holder.get();
}
}
這樣,一個基本的基於spring的讀寫分離就完成了,不過需要在每一個service方法中加上
DynamicDataSourceHolder.setDataSource(DataSourceType.SLAVER);

DynamicDataSourceHolder.setDataSource(DataSourceType.MASTER);
這樣的方法,但我們為了避免寫重複的程式碼,可以申請一個切面,讓切面程式設計幫我們完成動態資料來源的切換。
這裡是controller和service的程式碼和執行結果:
controller層:
@Controller
@RequestMapping("user")
public class UserController {

    @Autowired
    @Qualifier("userServiceImp")
    private UserService userService;

    @RequestMapping("/getUser")
    @ResponseBody
    public User getUser(){
        return userService.getUser(1l);
    }


    @RequestMapping("/addUser")
    @ResponseBody
    public User addUser(){
        User user = new User();
        user.setNickname("子龍");
        user.setMobile("18637685918");
        userService.addUser(user);
        return user;
    }
}
service層:
@Service("userServiceImp")
public class UserServiceImp implements UserService {

    @Autowired
    private UserMapper userMapper;


    @Override
//    @DataSource(DataSourceType.SLAVE)
    public User getUser(Long id) {
        DynamicDataSourceHolder.setDataSource(DataSourceType.SLAVER);
        return userMapper.selectByPrimaryKey(id);
    }

    @Override
    @Transactional
//    @DataSource(DataSourceType.MASTER)
    public void addUser(User user) {
        DynamicDataSourceHolder.setDataSource(DataSourceType.MASTER);

        userMapper.insertSelective(user);

        User u = new User();
        user.setId(1l);
        userMapper.insertSelective(u);
    }
}
執行結果:
訪問getUser方法:

訪問addUser方法:

這裡,可以看出來我們的動態資料來源切換已經完成了。
我們發現在每一個方法上都加上這句程式碼,太難受了。怎麼辦呢?
下面改程序序,用切面加註解的方法來完成:
建立一個註解
//在執行時生效
@Retention(RetentionPolicy.RUNTIME)
//註解的作用範圍(作用在方法上)
@Target({ElementType.METHOD})
public @interface DataSource {

    DataSourceType value() default DataSourceType.MASTER;
}
定義一個切面
首先在applicationContext檔案下,開啟切面。

定義切面
@Aspect
@Component
public class DataSourceAspect {

    @Pointcut(value = "execution(* com.coder520.service.*.*(..))")
    public void pointCut(){}

    @Before(value = "pointCut()")
    public void before(JoinPoint joinPoint) throws NoSuchMethodException {
        // 01:通過連線點獲取切點物件
        Object target = joinPoint.getTarget();

        // 02:通過連線點獲取切點名稱
        String name = joinPoint.getSignature().getName();

        // 03:獲取切點的位元組碼物件,為了通過反射獲取到切點切的方法
        Class clazz = target.getClass();

        // 04:獲取引數型別
        Class<?>[] parameterTypes = ((MethodSignature) joinPoint.getSignature()).getMethod().getParameterTypes();

        // 05:獲取當前切點所切的方法
        Method method = clazz.getMethod(name,parameterTypes);

        // 06: 判斷是否含有DataSource註解
        if(method != null && method.isAnnotationPresent(DataSource.class)){
            // 07:獲取註解的值
            DataSource annotation = method.getAnnotation(DataSource.class);

            // 08:設定資料來源
            DynamicDataSourceHolder.setDataSource(annotation.value());
        }
    }
}
在通知方法上出現這個標記就說明切面配置成功

service層程式碼:
@Service("userServiceImp")
public class UserServiceImp implements UserService {

    @Autowired
    private UserMapper userMapper;


    @Override
    @DataSource(DataSourceType.SLAVER)
    public User getUser(Long id) {
//        DynamicDataSourceHolder.setDataSource(DataSourceType.SLAVER);
        return userMapper.selectByPrimaryKey(id);
    }

    @Override
    @Transactional
    @DataSource(DataSourceType.MASTER)
    public void addUser(User user) {
//        DynamicDataSourceHolder.setDataSource(DataSourceType.MASTER);

        userMapper.insertSelective(user);

        User u = new User();
        user.setId(1l);
        userMapper.insertSelective(u);
    }
}
直接打上註解就可以了
執行結果:

讀寫分離可能導致的問題:
一:資料不一致
在高併發的情況下,可能會導致資料不同步,具體原因是:我剛插入了一條資料就開始檢視該資料,在這種情況下,從庫可能還在載入二進位制日誌,沒能同步到從庫上,這個時候查詢就會導致了資料不同步。
處理方法:
1:強一致性:任何一次讀都能讀取到某個資料最近的一次修改
在表中新增一個標記,如果主從同步還沒能完成,就強行讓它訪問主資料庫。不推薦,我們主從同步,讀寫分離的目的就是為了減輕主資料庫的壓力,這樣做的話,還會加重主資料庫的壓力。
2:弱一致性:資料更新後,能容忍後續的訪問,但是隻能訪問部分資料或訪問不到資料。
推薦使用弱一致性,我們可以先把資料寫在快取中,設定一個過期時間,當快取過期後,主資料庫從資料庫也已經同步完成。但是在特大併發的情況下,快取也兜不住的。這樣我們也沒辦法,只能犧牲使用者的體驗,讓他更新資料後,延遲幾秒才能訪問。
二:修改查詢一起操作時
這種情況下,我們只能放棄讀寫分離了。