
Centos 7上安裝WordPress
1. 前言
LAMP環境就是Linux+Apache+Mysql+PHP。甲骨文公司收購了MySQL後,有將MySQL閉源的潛在風險。MariaDB資料庫管理系統是MySQL的一個分支,主要由開源社群在維護,採用GPL授權許可。因此目前Mysql被MariaDB所代替。MariaDB的目的是完全相容MySQL,包括API和命令列,使之能輕鬆成為MySQL的代替品。
Linux系統我選擇Centos 7,Centos 7是比較穩定的。
2. 安裝Apache Web伺服器
Apache伺服器是目前最流行的Web伺服器。執行以下命令安裝:
sudo yum install httpd 安裝完成之後我們就可以執行以下命令啟動Apache伺服器了:
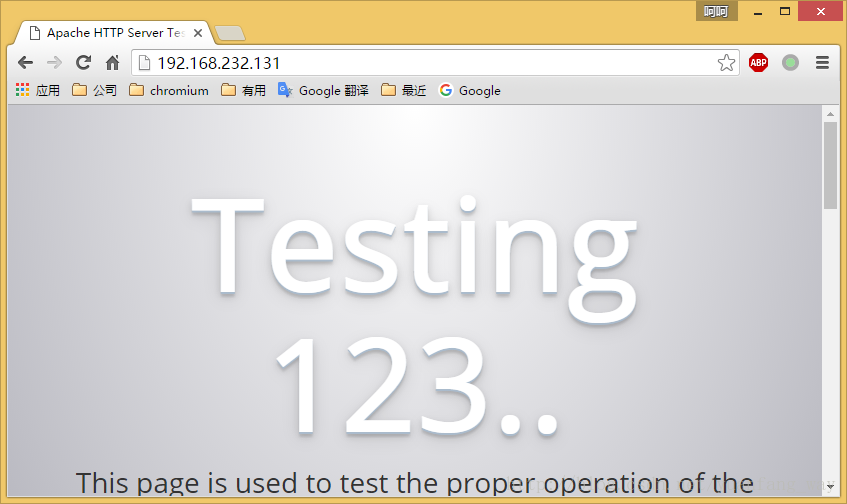
sudo systemctl start httpd.service之後我們就可以在瀏覽器中開啟http://your_server_IP_address/ 我們新安裝的網站,檢查一下Apache是否安裝成功,正常執行。
有時候我們可能打不開,原因是防火牆限制了外包訪問,我們開啟再試試看防火牆:
sudo iptables -I INPUT -p TCP --dport 80 -j ACCEPT或者這樣,防火牆放行http和https協議:
sudo firewall-cmd --permanent --zone=public 這次可以正常訪問了:
如果想以後重啟伺服器之後自動啟動Apache伺服器,可以執行以下命令:
sudo systemctl enable httpd.serviceApache伺服器的網站檔案預設在/var/www目錄。
3. 安裝Mysql(MariaDB)資料庫
執行以下命令安裝MariaDB資料庫:
sudo yum install mariadb-server mariadb 完成之後啟動資料庫:
sudo systemctl start mariad然後安裝一個數據庫安全指令碼,去掉一些危險的預設設定:
sudo mysql_secure_installation然後會提示你輸入資料庫的root賬號密碼,如果是新安裝的則輸入空格,如下所示:
In order to log into MariaDB to secure it, we'll need the current
password for the root user.  If you've just installed MariaDB, and
you haven't set the root password yet, the password will be blank,
so you should just press enter here.
Enter current password for root (enter for none):
然後我們輸入空格,繼續設定root密碼:
Setting the root password ensures that nobody can log into the MariaDB
root user without the proper authorisation.
Set root password? [Y/n] Y
New password:
Re-enter new password:
Password updated successfully!
Reloading privilege tables..
 ... Success!
By default, a MariaDB installation has an anonymous user, allowing anyone
to log into MariaDB without having to have a user account created for
them.  This is intended only for testing, and to make the installation
go a bit smoother.  You should remove them before moving into a
production environment.
Remove anonymous users? [Y/n]
 ... Success!
Normally, root should only be allowed to connect from 'localhost'.  This
ensures that someone cannot guess at the root password from the network.
Disallow root login remotely? [Y/n]
 ... Success!
By default, MariaDB comes with a database named 'test' that anyone can
access.  This is also intended only for testing, and should be removed
before moving into a production environment.
Remove test database and access to it? [Y/n]
 - Dropping test database...
 ... Success!
 - Removing privileges on test database...
 ... Success!
Reloading the privilege tables will ensure that all changes made so far
will take effect immediately.
Reload privilege tables now? [Y/n]
 ... Success!
Cleaning up...
All done!  If you've completed all of the above steps, your MariaDB
installation should now be secure.
Thanks for using MariaDB!
同樣的,設定開機自動啟動MariaDB資料庫:
sudo systemctl enable mariadb.service4. 安裝PHP
執行以下命令安裝PHP:
sudo yum install php php-mysql安裝完成,重啟以下Apache伺服器:
sudo systemctl restart httpd.servicePHP安全完成之後,我們可以在網站目錄下面建立一個info.php的檔案來檢視php的安裝情況我們在/var/www/html目錄建立一個info.php的檔案:
sudo vi /var/www/html/info.php其info.php內容如下:
<?php phpinfo(); ?>5. 安裝phpMyAdmin
phpMyAdmin是個管理MariaDB資料庫的Web介面程式,我喜歡裝一個。
我們首先安裝EPEL庫,這個庫提供很多額外的軟體包:
sudo yum install epel-release完成之後直接安裝phpMyAdmin:
sudo yum install phpmyadmin完成之後,我們設定phpMyAdmin的httpd設定/etc/httpd/conf.d/phpMyAdmin.conf:
Alias /phpMyAdmin /usr/share/phpMyAdmin
Alias /phpmyadmin /usr/share/phpMyAdmin
<Directory /usr/share/phpMyAdmin/>
   AddDefaultCharset UTF-8
   <IfModule mod_authz_core.c>
     # Apache 2.4
     <RequireAny>
       Require ip 127.0.0.1
       Require ip ::1
     </RequireAny>
   </IfModule>
   <IfModule !mod_authz_core.c>
     # Apache 2.2
     Order Deny,Allow
     Deny from All
     Allow from 127.0.0.1
     Allow from ::1
   </IfModule>
</Directory>從配置中可以看出,可以用http://192.168.232.131/phpmyadmin 去訪問phpMyAdmin。實際上我們在瀏覽裡開啟這個地址是403 Forbidden,這是因為還有許可權控制,我們更改一下許可權:
<Directory /usr/share/phpMyAdmin/>
   AddDefaultCharset UTF-8
   <IfModule mod_authz_core.c>
     # Apache 2.4
     <RequireAny>
       #Require ip 127.0.0.1
       #Require ip ::1
        Require all granted
     </RequireAny>
   </IfModule>
   <IfModule !mod_authz_core.c>
     # Apache 2.2
     Order Deny,Allow
    # Deny from All
    # Allow from 127.0.0.1
    # Allow from ::1
      Allow from All
   </IfModule>
</Directory>
然後再重啟以下Apache伺服器:
sudo systemctl restart httpd.service6. 安裝Wordpress
6.1 建立資料庫
我們先要建立Wordpress的資料庫:
#登入資料庫
mysql -u root -p
#建立資料庫
CREATE DATABASE wordpress;
#建立資料庫使用者和密碼
CREATE USER [email protected] IDENTIFIED BY 'wordress_password';
#設定wordpressuser訪問wordpress資料庫許可權
GRANT ALL PRIVILEGES ON wordpress.* TO [email protected] IDENTIFIED BY 'wordress_password';
#重新整理資料庫設定
FLUSH PRIVILEGES;
#退出資料庫
exit
6.2 安裝Wordpress
我們先下載wordpress安裝包:
cd ~
wget http://wordpress.org/latest.tar.gz
然後解壓出來,拷貝到/var/www/html/wordpress目錄:
# 解壓wordpress
tar xzvf latest.tar.gz
# 拷貝到/var/www/html/wordpress目錄
sudo rsync -avP ~/wordpress/ /var/www/html/wordpress/
然後編輯wp-config.php檔案:
# 切換到wordpress目錄
cd /var/www/html/wordpress
# 複製wp-config.php檔案
cp wp-config-sample.php wp-config.php
# 編輯wp-config.php檔案
sudo vim wp-config.php
然後在配置檔案裡設定正確的值:
// ** MySQL settings - You can get this info from your web host ** //
/** The name of the database for WordPress */
define('DB_NAME', 'database_name_here');
/** MySQL database username */
define('DB_USER', 'username_here');
/** MySQL database password */
define('DB_PASSWORD', 'password_here');
/** MySQL hostname */
define('DB_HOST', 'localhost');
按照提示建立好部落格,顯示如下:
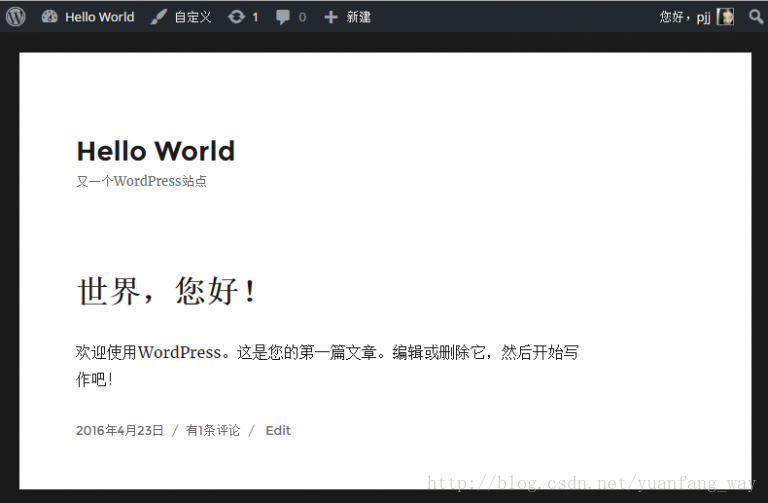
7. 作者介紹
樑明遠,國防科大並行與分散式計算國家重點實驗室(PDL)應屆研究生,14年入學伊始便開始接觸docker,準備在餘下的讀研時間在docker相關開源社群貢獻自己的程式碼,畢業後準備繼續從事該方面研究。郵箱:[email protected]
8. 參考文獻
相關推薦
Centos 7上安裝WordPress
1. 前言 LAMP環境就是Linux+Apache+Mysql+PHP。甲骨文公司收購了MySQL後,有將MySQL閉源的潛在風險。MariaDB資料庫管理系統是MySQL的一個分支,主要由開源社群在維護,採用GPL授權許可。因此目前Mysql被MariaD
【Redis】2、CentOS 7 上安裝 redis3.2.3安裝與配置
sync 倉庫 ace /var/ 發現 wan sudo base str 一、redis源碼安裝 【更正】現在最新穩定的版本已經到了3.2.8 截至到2016.8.11,redis最新穩定版本為3.2.3.本篇文章我們就以此版本為基礎,進行相關的講解。 下載redis源
在CentOS 7上安裝Jenkins
在centos 7上安裝jenkins在CentOS 7上安裝Jenkins安裝添加yum repos,然後安裝sudo wget -O /etc/yum.repos.d/jenkins.repo http://pkg.jenkins-ci.org/RedHat/jenkins.repo sudo rpm -
Centos 7 上安裝Samba的詳細步驟
samba 為了實現Windows主機與Linux服務器之間的資源共享,Linux操作系統提供了Samba服務,Samba服務為兩種不同的操作系統架起了一座橋梁,使Linux系統和Windows系統之間能夠實現互相通信,為廣泛的Linux愛好者提供了極大方便。本文簡要介紹如何在Linux操作系統上搭建S
CentOS 7上安裝Zabbix(高速安裝監控工具Zabbix)
none clas smooth 安裝zabbix www edi cti php配置 copy 前提要求(optional) 安裝Zabbix監控工具前,先安裝必要的執行工具包 yum install gcc gcc-c++ make open
Centos 7上安裝Python3.x
鏈接 open python2 下載 檢驗 ges lib sta 備份 Centos7默認安裝的是2.7,這裏選擇安裝使用Python3.6.3 安裝Python3.6.3 1、安裝python3 需要的依賴包 yum install -y openssl-devel
如何在CentOS 7上安裝OroCRM
OroCRM是在OroPlatform上建立的一個免費的開源客戶關系管理器(CRM)應用。OroPlatform是完全可定制的開源商業應用平臺軟件。OroPlatform提供了創建自定義應用程序所需的所有特性。OroCRM是使用PHP Symfony框架構建的,並將其數據存儲到MySQL /
在CentOS 7上安裝Kafka
conf nproc 修改 ofo hup mit zook group 解壓 參考博文:https://www.mtyun.com/library/how-to-install-kafka-on-centos7 一、安裝準備1、修改系統配置#關閉selinux、firew
在CentOS 7上安裝MongoDB
exe ise $path http pri 1.2 修改環境變量 https mkdir -p 參考博文:https://www.jianshu.com/p/ccdd3e884b86 一、安裝準備1、修改系統配置#關閉selinux、firewall#修改/etc/sec
在CentOS 7上安裝Kafka集群
rop conf path nec zookeeper centos 7 top $path dir 一、安裝準備1、修改系統配置#關閉selinux、firewall#修改/etc/security/limits.conf添加以下內容: soft nofile
Centos 7 上安裝jira7.3及破解
mysql- software 1.2 現在 fig 1.5 extra color -s 一、環境準備1,jira7.2的運行是依賴java環境的,也就是說需要安裝jdk並且要是1.8以上版本,如下: 2,安裝MySQL服務器安裝MySQL的yum源 # yu
騰訊雲CentOS 7 上安裝Nginx
lease 安裝nginx sta add ref roo AD 傳輸 als 以下安裝步驟需要root權限。 添加CentOS 7 EPEL 倉庫 sudo yum install epel-release 安裝Nginx sudo yum install nginx
Kafka安裝之二 在CentOS 7上安裝Kafka
系統 Kafka集群 kafka 客戶 結合 支持 用戶 消息處理 from 一、簡介 Kafka是由Apache軟件基金會開發的一個開源流處理平臺,由Scala和Java編寫。Kafka是一種高吞吐量的分布式發布訂閱消息系統,它可以處理消費者規模的網站中的
如何在CentOS 7上安裝Nginx
正在 zone 系統 service 圖片 reload posit wal OS 第一步 - 添加Nginx存儲庫 要添加CentOS 7 EPEL倉庫,請打開終端並使用以下命令: sudo yum install epel-release 第二步 - 安裝Nginx
CentOS 7上安裝 MongoDB數據庫 4.0.0最新版
code 需要 可執行文件 效率 敏捷 查詢 下載 中文 同時 MongoDB簡介 MongoDB(來自於英文單詞“Humongous”,中文含義為“龐大”)是可以應用於各種規模的企業、各個行業以及各類應用程序的開源數據庫。作為一個適用於敏捷開發的數據庫,MongoDB的數
Centos 7上安裝新版數據庫Oracle12c
red 外連接 工作 運行 windows 密碼 防止 lang bash Oracle 是一個數據庫管理系統,是Oracle公司的核心產品。其在數據安全性與安整性控制方面的優越性能,以及跨操作系統、跨硬件平臺的數據操作能力。基於“客戶端/服務器”(Client/Serve
CentOS 7上安裝Python 3.6.1
ret 例如 應用程序 rap 發包 pda code inux wget CentOS 7默認安裝了Python 2.7,系統本身也使用它來啟用系統命令例如‘yum’ 雖然作為開發人員我可以用Python 2.7做很多事情,但我真的想要利用Python 3附帶的新語言功能
CentOS 7 上安裝vim 解決 centos -bash: vim: command not found
如果 cti 簡單 UNC func command 直接 vim 命令 bsp 用CentOS上使用vim竟然用不了,報錯沒有該命令 centos -bash: vim: command not found 那麽如何安裝 vim 呢? -----------------
在CentOS 7 上安裝Oracle 12c 【贈安裝包】
ack 工具 設置環境變量 最新版 關系數據庫 全局 chmod 操作 img Oracle 概述 Oracle Database,又名Oracle RDBMS,或簡稱Oracle。是甲骨文公司的一款關系數據庫管理系統。它是在數據庫領域一直處於領先地位的產品。可以說Ora
詳細講解在CentOS 7上安裝oracle 12c(內含軟件包)
config 連接 run creating specific rac req ria disable Oracle Database,又名Oracle RDBMS,或簡稱Oracle。是甲骨文公司的一款關系數據庫管理系統。它是在數據庫領域一直處於領先地位的產品。可以說Or