
easygui的安裝以及簡單的使用
1.下載好easygui模組,解壓,然後放到桌面
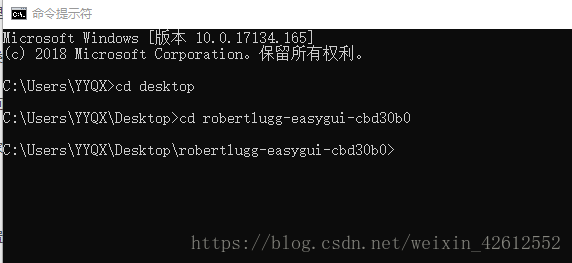
2.開啟cmd
3.輸入cd desktop

4.輸入cd easygui模組的檔名
5.查詢到python安裝的路徑,輸入 路徑\python.exe setup.py install
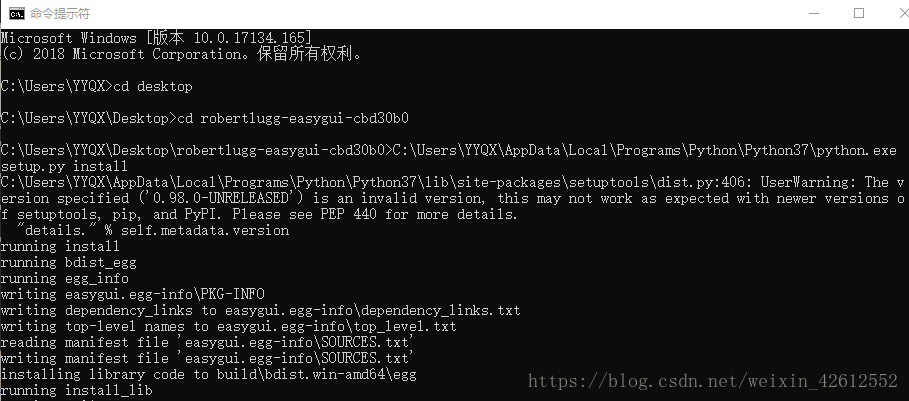
重新開啟idle進行測試
impot sys
import easygui as g
訊息框 g.msbox('msg','title')
選擇框 choice = g.choicesbox('msg','title',choices)
繼續取消框 if not g.ccbox('msg','title'):
sys.exit(0)
相關推薦
easygui的安裝以及簡單的使用
1.下載好easygui模組,解壓,然後放到桌面 2.開啟cmd 3.輸入cd desktop 4.輸入cd easygui模組的檔名 5.查詢到python安裝的路徑,輸入 路徑\python.exe setup.py install 重新開啟id
git的安裝以及簡單使用
本地文件 只需要 master git add ash osi 下載 命令行 傳送門 前提準備: 1、已有github官網賬號;(若無,註冊流程百度一下) 2、git安裝包,官網下載:https://git-scm.com/downloads。(順帶吐槽下,真是龜速下載
openssl原始碼方式安裝以及簡單的實驗
一、引言 這仍然是資訊保安課程的一次作業,老師的要求包括以原始碼方式來安裝openssl,瞭解AES和RSA加密演算法並去嘗試呼叫openssl庫中AES和RSA演算法的API,其實總體上安裝以及實驗還是比較容易的,不過還是踩了一些坑,這裡還是記錄一下,順便試試CSDN的Markdown
docker 安裝以及簡單使用
1.安裝docker docker是在Ubuntu上開發的最合適安裝在Ubuntu系統上 wget -qO- https://get.docker.com/ | sh 執行 sudo docker service start 驗證 [email prot
linux-CentOS7 下的 Docker最新入門教程 超級詳細 (安裝以及簡單的使用)
1、為什麼使用Docker(本人) 最近總是頻繁的在新伺服器釋出專案, 每次釋出都需要佈置專案所需要的環境特別麻煩,而且還有一臺機器需要兩個環境的狀況 例如:釋出java web 專案而言 需要下載安裝jdk 和tomcat 安裝Docker後只需要幾個命令就輕鬆搞定,
MongoDB下載安裝以及簡單的配置
1.MongoDB的下載、安裝以及簡單的配置 進入MongoDB官網找到如下介面 根據需要選擇對應的版本下載,這裡以Windows中3.6.8為例 下載完過後得到如圖的msi檔案 然後雙擊進入安裝介面,選擇Custom 選擇安裝路徑
Python 中scrapy 的框架安裝以及簡單介紹
一、Scrapy的安裝 1. 如果電腦中安裝有Anaconda 直接輸入conda install scrapy 進行安裝. 2. 如果沒有安裝Anaconda,就需要進入http://www.lfd.uci.edu/~gohlke/pythonlibs/,從該網站找到lxml的相關檔案。假
mysql windows 安裝以及簡單配置
1.解壓縮; 2.複製目錄下的my-default.ini檔案為my.ini檔案; 3.修改my.ini檔案: basedir=(mysql根目錄,例如:f:\mysql\) datadri=(mysql根目錄下data資料夾,例如:f:\mysql\data) port=3306 (注:註釋去掉,
docker 的安裝以及簡單centos映象製作、啟動
1.安裝docker[[email protected] ~]# yum install docker2.檢視 docker 是否成功[[email protected] ~]# docker會顯示相關的docker命令3.宿主機 /data下載好tomc
webpack的安裝以及簡單實用
1、其實Webpack和另外兩個並沒有太多的可比性,Gulp/Grunt是一種能夠優化前端的開發流程的工具,而WebPack是一種模組化的解決方案,不過Webpack的優點使得Webpack在很多場景下可以替代Gulp類的工具。2、Gulp的工作方式是:在一個配置檔案中,指明對某些檔案進行類似編譯,組合,壓縮
Nginx安裝以及簡單實現負載均衡
一. Centos7安裝Nginx1.下載壓縮包,上傳到/usr/local目錄,並解壓cd /usr/localtar -zxvf nginx-1.8.1.tar.gz2.在/usr/local目錄下
ubuntu 下bind9安裝以及簡單配置
1、安裝bind9 apt-get bind9 2、bind9簡單配置 配置域名 www.test.com 對應IP 41.85.41.1 /etc/bind/named.conf.default-zones 末尾新增如下內容 zone "test.com" {
Redis安裝以及簡單使用
key EXISTS key 檢查給定key是否存在,存在返回1,否則返回0 KEYS pattern pattern是正則匹配模式。 查詢所有符合給定模式pattern的key。 KEYS *匹配資料庫中所有key 。 KEY
四、Ubuntu PCL、OpenCV 安裝以及簡單使用
OPENCV依賴項: sudo apt-get install libgtk2.0-dev libvtk5-devlibjpeg-dev libtiff4-dev libjasper-dev libopenexr-dev libtbb-dev ______________
Logstash、Kafka和ElastaticSearch安裝以及簡單使用(Linux)
前段時間公司需要做一個日誌分析的需求,於是開始了對於日誌分析這方面的研究。現在系統中整合的是Fluem + elastaticSearch + 還有influxdb,如果基於這些做日誌分析的話,就可能需要使用Flume + kafka + elastaticSearch但是我
每天學一點 Vue3(一) CND方式的安裝以及簡單使用
# 簡介 感覺vue3的新特性很舒服,這樣才是寫軟體的感覺嘛。打算用Vue實現自己的一些想法。 Vue3還有幾個必備庫,比如Vue-Router(負責路由導航)、Vuex(狀態管理、元件間通訊),還有第三方UI庫,比如element Plus、Antdv、Vant 等。 這裡會介紹他們的CND的安裝方法,
Tomcat的簡單介紹,安裝,以及簡單的配置運用
tomcat的簡單介紹 安裝 以及簡單的配置運用 Tomcat介紹: Tomcat 服務器是一個免費的開放源代碼的Web 應用服務器,屬於輕量級應用服務器,是開發和調試JSP 程序的首選。對於一個初學者來說,可以這樣認為,當在一臺機器上配置好Apache 服務器,可利用它響應對HTML
elasticsearch簡單的安裝以及集群配置詳解
nod image acl down IE rec 外網地址 imu 集群 首先要確保有java8的環境,安裝方法如下(centos) 1 wget --no-check-certificate --no-cookies --header "Cookie: oracle
asp.Net Core免費開源分布式異常日誌收集框架Exceptionless安裝配置以及簡單使用圖文教程
true 類型 全部 界面 目錄 () 程序包 light set 最近在學習張善友老師的NanoFabric 框架的時了解到Exceptionless : https://exceptionless.com/ !因此學習了一下這個開源框架!下面對Exceptionless
Linux GitLab安裝過程記錄以及簡單使用
今天給各位同學帶來的是GitLab安裝過程的記錄以及使用,因為gitlab安裝十分容易,所以我在這裡也不去做過多的說明,這篇部落格的主要目的是用於記錄,方便後期自己使用,好了,廢話不多說了。直接按照步驟來進行安裝了,本人這裡使用的是CentOS7,但是6和7的安裝步驟沒有什麼區別