
Caffe初體驗之Caffe-Windows的配置(CPU/GPU)與Mnist資料集測試
配置編譯caffe-windows
安裝CUDA(適用GPU版本)
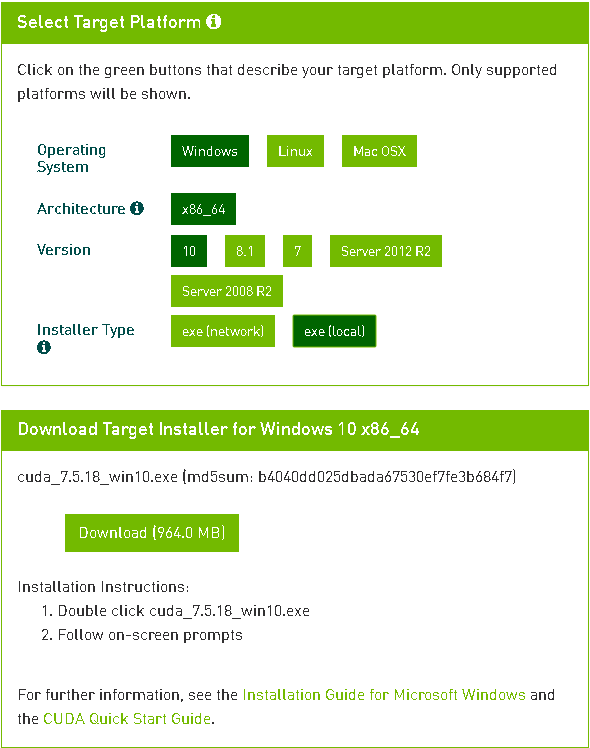
去英偉達下載CUDA7.5,windows10,x86_64,本地安裝,如下圖:
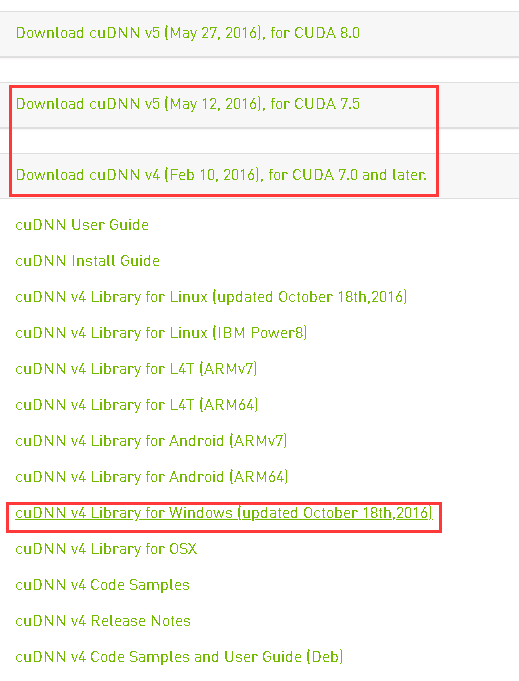
下載安裝CUDNN(V4 for cuda7.0或者V5 for cuda7.5)(適用GPU版本)
這個過程的話新使用者需要註冊,如下圖:
下載解壓縮會得到3個資料夾:include bin lib,將這3個資料夾裡面的內容合併到CUDA的安裝目錄C:\Program Files\NVIDIA GPU Computing Toolkit\CUDA\v7.5下的include bin lib。
下載後解壓進入caffe-windows根目錄,進入windows目錄,可以看到很多VS的工程資料夾,下方有個檔案CommonSettings.props.example,將其備份然後改名為CommonSettings.props,如下圖:

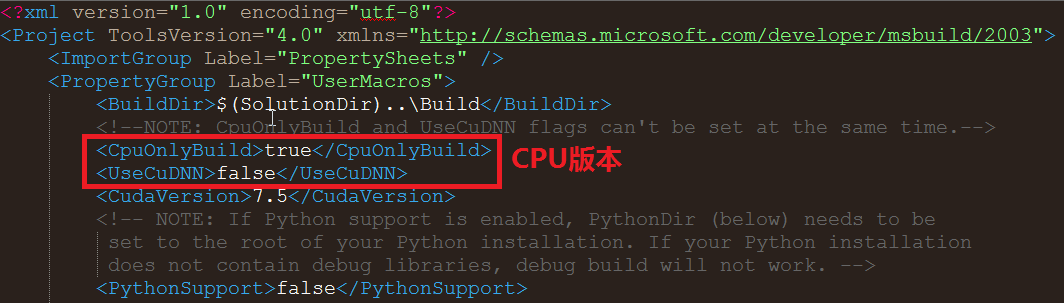
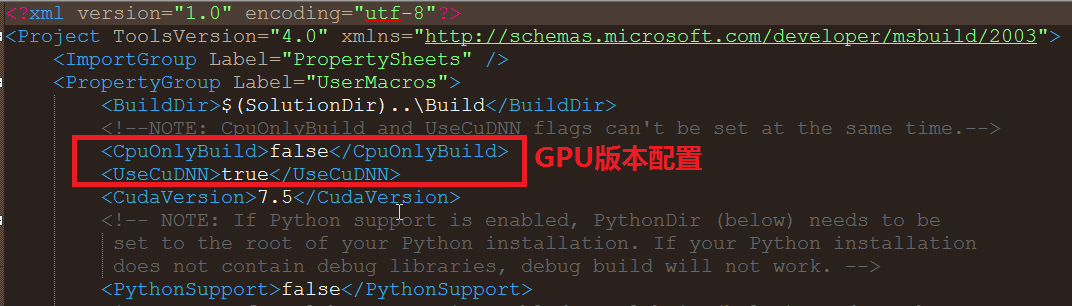
開啟CommonSettings.props.example,配置編譯選項,CPU版本還是GPU版本,如下圖:
編譯caffe-windows(適用CPU/GPU版本)
開啟windows目錄下的Caffe.sln,solution configurations設定成release。然後build solution,剛開始會自動下載一些第三方依賴庫,如果太慢的話就手動下載吧,下載後放到和caffe-windows同級的目錄下,繼續build,經過一段時間,會發現libcaffe - build filed。如下所示:

解決方案是進入libcaffe的property>>c++>Treat Warnings As Error設定為NO。再次編譯不出意外build succeed,如下圖:

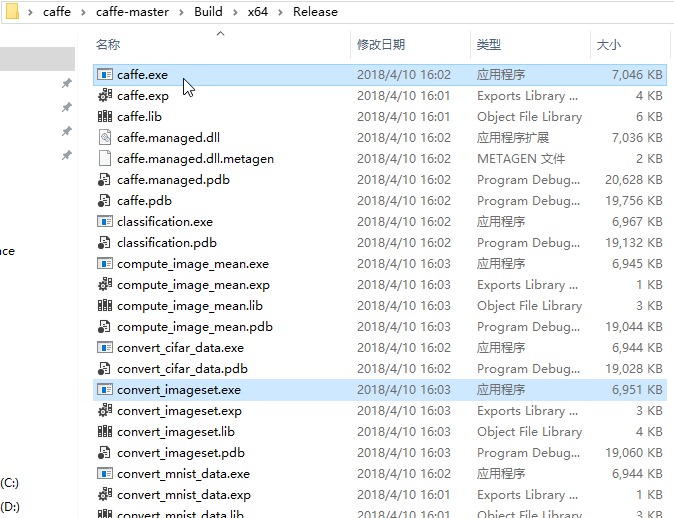
編譯完成之後會在caffe-windows的根目錄下生成Build/x64/Release目錄,並在該目錄下有一系列的caffe工具,比如caffe.exe,convert_imageset.exe等,如下圖:
訓練和測試MNIST資料集
獲取MNIST資料集

轉換lmdb檔案
利用編譯生成的convert_imageset.exe工具將MNIST資料集生成lmdb檔案,在caffe-windows根目錄下的examples/mnist目錄下新建資料夾mycaffe-mnist-test,將MNIST的四個檔案放入其中,進入mycaffe-mnist-test,在mycaffe-mnist-test資料夾下建立convert-mnist-data-train.bat檔案,並新增以下內容:
..\..\..\Build\x64\Release\convert_mnist_data.exe --backend=lmdb train-images.idx3-ubyte train-labels.idx1-ubyte mnist_train_lmdb
pause
儲存,雙擊執行,這時候會在目錄mycaffe-mnist-test下生成訓練集的lmdb檔案。同理,建立convert-mnist-data-test.bat檔案,並新增以下內容:
..\..\..\Build\x64\Release\convert_mnist_data.exe --backend=lmdb t10k-images.idx3-ubyte t10k-labels.idx1-ubyte mnist_test_lmdb
Pause 
配置lenet_solver.prototxt
在examples/mnist目錄下開啟檔案lenet_solver.prototxt進行配置,比如使用CPU還是GPU計算等,如下圖:

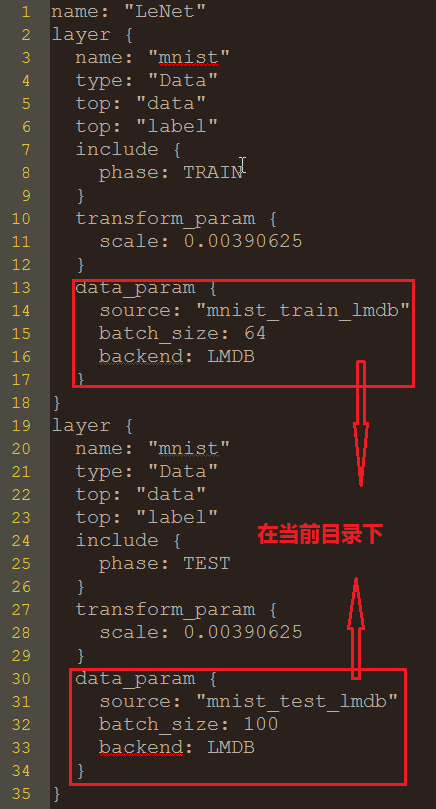
配置lenet_train_test.prototxt
在examples/mnist目錄下開啟檔案lenet_train_test.prototxt進行配置,就是指定訓練集合測試集的lmdb檔案路徑等引數,如下圖:
測試網路效能
在mycaffe-mnist-test目錄下建立檔案run_caffe_mnist.bat,新增以下內容並執行:
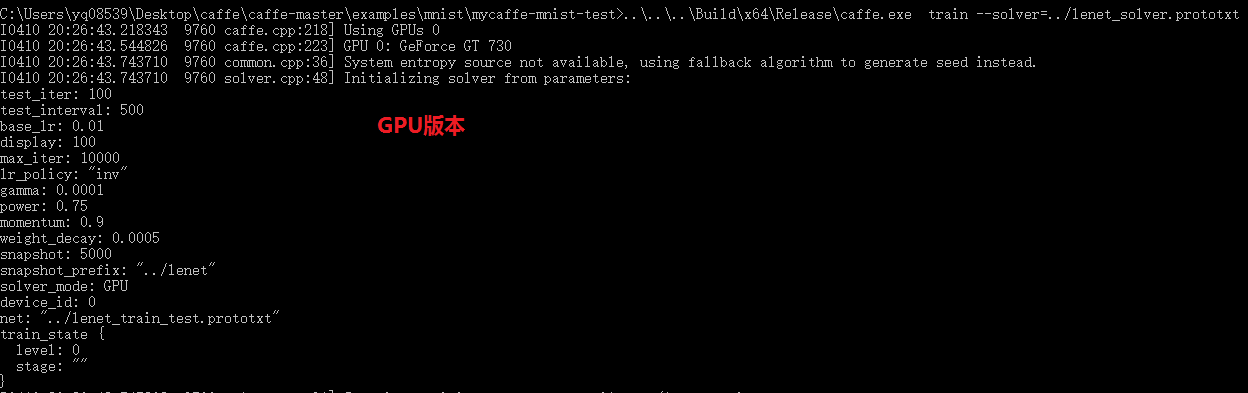
..\..\..\Build\x64\Release\caffe.exe  train --solver=../lenet_solver.prototxt
pause
實驗效果
以下圖片為GPU版本的實驗結果,識別精度大於99%。

可以修改引數看看實驗結果的變化。
參考
https://blog.csdn.net/sunshine_in_moon/article/details/51426073
https://blog.csdn.net/guoyk1990/article/details/52909864