
《Spring Cloud微服務實戰》——服務治理 Spring Cloud Eureka
阿新 • • 發佈:2019-02-18
一、簡介
Spring cloud Eureka是spring Cloud Netflix微服務套件中的一部分,它基於Netflix Eureka做了二次封裝,主要負責完成微服務架構中的服務治理功能。Spring Cloud通過為Eureka增加了Spring Boot 風格的自動化配置,我們只需要通過簡單的引入依賴和註解配置就能讓Spring Boot構建的微服務應用輕鬆地與Eureka服務治理體系進行整合。
二、搭建服務註冊中心:
1、首先建立一個基礎的Spring boot工程,命名為 eureka-server,並在pom中引入必要內容:
2、通過@EnableEurekaServer 註解啟動一個服務註冊中心供給其他應用進行對話。<?xml version="1.0" encoding="UTF-8"?> <project xmlns="http://maven.apache.org/POM/4.0.0" xmlns:xsi="http://www.w3.org/2001/XMLSchema-instance" xsi:schemaLocation="http://maven.apache.org/POM/4.0.0 http://maven.apache.org/xsd/maven-4.0.0.xsd"> <modelVersion>4.0.0</modelVersion> <groupId>com.anzy</groupId> <artifactId>eureka-server</artifactId> <version>0.0.1-SNAPSHOT</version> <packaging>jar</packaging> <name>eureka-server</name> <description>Demo project for Spring Boot</description> <parent> <groupId>org.springframework.boot</groupId> <artifactId>spring-boot-starter-parent</artifactId> <version>1.4.0.RELEASE</version> <relativePath/> <!-- lookup parent from repository --> </parent> <properties> <project.build.sourceEncoding>UTF-8</project.build.sourceEncoding> <project.reporting.outputEncoding>UTF-8</project.reporting.outputEncoding> <java.version>1.8</java.version> </properties> <dependencies> <!--增加eureka-server的依賴--> <dependency> <groupId>org.springframework.cloud</groupId> <artifactId>spring-cloud-starter-eureka-server</artifactId> </dependency> <!--用於測試的,本例可省略--> <dependency> <groupId>org.springframework.boot</groupId> <artifactId>spring-boot-starter-test</artifactId> <scope>test</scope> </dependency> </dependencies> <!--依賴管理,用於管理spring-cloud的依賴,其中Camden.SR3是版本號--> <dependencyManagement> <dependencies> <dependency> <groupId>org.springframework.cloud</groupId> <artifactId>spring-cloud-dependencies</artifactId> <version>Camden.SR3</version> <type>pom</type> <scope>import</scope> </dependency> </dependencies> </dependencyManagement> <build> <plugins> <plugin> <groupId>org.springframework.boot</groupId> <artifactId>spring-boot-maven-plugin</artifactId> </plugin> </plugins> </build> </project>
package com.anzy.eurekaserver;

import org.springframework.boot.autoconfigure.SpringBootApplication;
import org.springframework.boot.builder.SpringApplicationBuilder;
import org.springframework.cloud.netflix.eureka.server.EnableEurekaServer;

@EnableEurekaServer
@SpringBootApplication
public class EurekaServerApplication {

	public static void main(String[] args) {
//		SpringApplication.run(EurekaServerApplication.class, args);
		new SpringApplicationBuilder(EurekaServerApplication.class).web(true).run(args);
	}
}
3、在預設配置下,該服務註冊中心會將自己作為客戶端來嘗試註冊他自己,所以我們需要在application.properties中增加相關配置:
4、完成上述操作啟動專案訪問 http://localhost:1111,可看到如下資訊server.port=1111 eureka.instance.hostname=localhost # 由於應用為註冊中心,所以設定為false,代表不想註冊中心註冊自己 eureka.client.register-with-eureka=false #由於註冊中心的職責就是維護服務例項,他不需要去檢索服務,所以設定為false eureka.client.fetch-registry=false eureka.client.serviceUrl.defaultZone=http://${eureka.instance.hostname}:${server.port}/eureka/
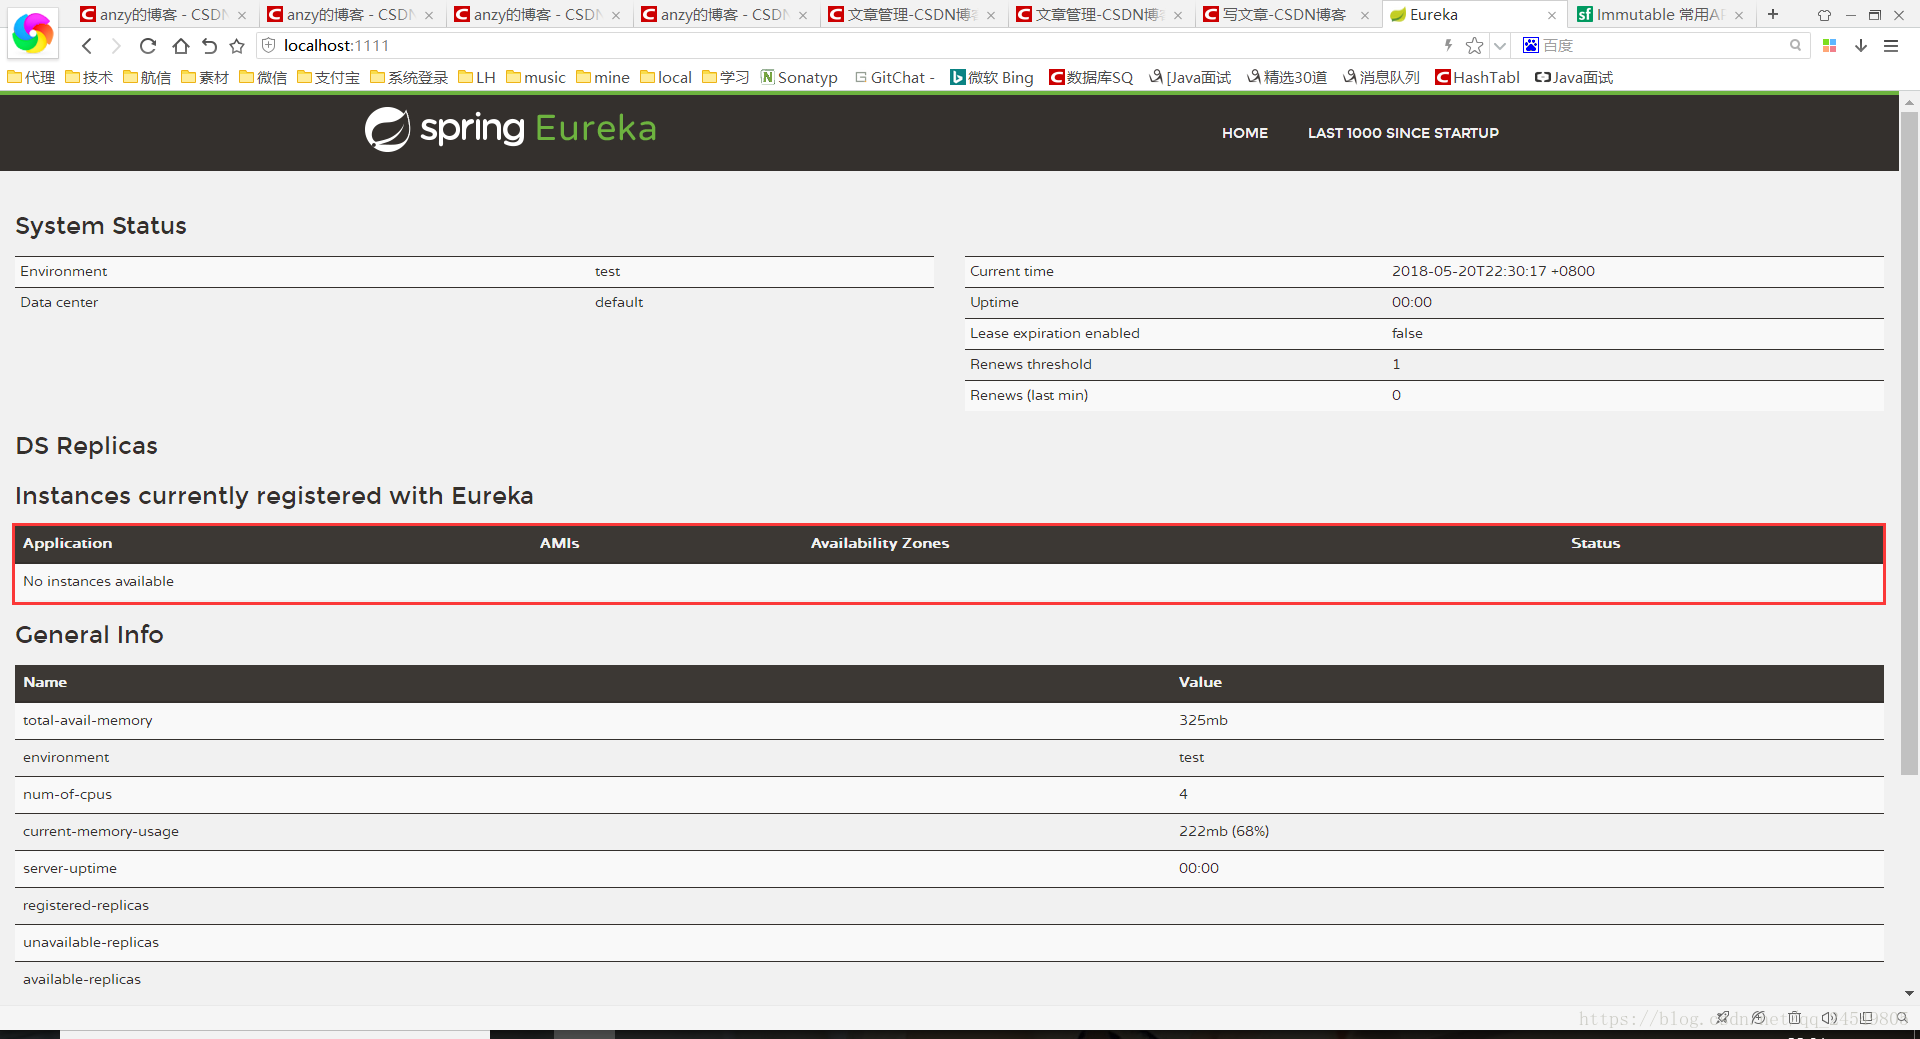
可看到Instances currently registered with Eureka
欄下沒有註冊任何服務。
注:如果啟動報錯可能原因是引入的jar版本有衝突,可修改一下版本號。
三、註冊服務提供者
1、建立一個基礎的Spring boot專案,建立專案名為demo,修改pom:
<?xml version="1.0" encoding="UTF-8"?>
<project xmlns="http://maven.apache.org/POM/4.0.0" xmlns:xsi="http://www.w3.org/2001/XMLSchema-instance"
	xsi:schemaLocation="http://maven.apache.org/POM/4.0.0 http://maven.apache.org/xsd/maven-4.0.0.xsd">
	<modelVersion>4.0.0</modelVersion>

	<groupId>com.anzy</groupId>
	<artifactId>demo</artifactId>
	<version>0.0.1-SNAPSHOT</version>
	<packaging>jar</packaging>

	<name>demo</name>
	<description>Demo project for Spring Boot</description>

	<parent>
		<groupId>org.springframework.boot</groupId>
		<artifactId>spring-boot-starter-parent</artifactId>
		<version>1.4.0.RELEASE</version>
		<relativePath/> <!-- lookup parent from repository -->
	</parent>

	<properties>
		<project.build.sourceEncoding>UTF-8</project.build.sourceEncoding>
		<project.reporting.outputEncoding>UTF-8</project.reporting.outputEncoding>
		<java.version>1.8</java.version>
	</properties>

	<dependencies>
		<dependency>
			<groupId>org.springframework.boot</groupId>
			<artifactId>spring-boot-starter-web</artifactId>
		</dependency>

		<dependency>
			<groupId>org.springframework.boot</groupId>
			<artifactId>spring-boot-starter-test</artifactId>
			<scope>test</scope>
		</dependency>
		<dependency>
			<groupId>org.springframework.boot</groupId>
			<artifactId>spring-boot-starter-actuator</artifactId>
		</dependency>
		<!--增加eureka-server的依賴-->
		<dependency>
			<groupId>org.springframework.cloud</groupId>
			<artifactId>spring-cloud-starter-eureka</artifactId>
		</dependency>
	</dependencies>

	<!--依賴管理,用於管理spring-cloud的依賴,其中Camden.SR3是版本號-->
	<dependencyManagement>
		<dependencies>
			<dependency>
				<groupId>org.springframework.cloud</groupId>
				<artifactId>spring-cloud-dependencies</artifactId>
				<version>Camden.SR3</version>
				<type>pom</type>
				<scope>import</scope>
			</dependency>
		</dependencies>
	</dependencyManagement>

	<build>
		<plugins>
			<plugin>
				<groupId>org.springframework.boot</groupId>
				<artifactId>spring-boot-maven-plugin</artifactId>
			</plugin>
		</plugins>
	</build>


</project>
2、建立controller,新增DiscoverClient
package com.anzy.demo.test;

import org.slf4j.Logger;
import org.slf4j.LoggerFactory;
import org.springframework.beans.factory.annotation.Autowired;
import org.springframework.cloud.client.ServiceInstance;
import org.springframework.cloud.client.discovery.DiscoveryClient;
import org.springframework.web.bind.annotation.GetMapping;
import org.springframework.web.bind.annotation.RestController;


/**
 * Created by anzy on 2018/4/21.
 */
@RestController
public class HelloController {
    private final Logger logger = LoggerFactory.getLogger(HelloController.class);
    @Autowired
    private DiscoveryClient discoveryClient;

    @GetMapping("hello")
    public String hello(){
        ServiceInstance instance = discoveryClient.getLocalServiceInstance();
        logger.info("/hello,host:" + instance.getHost() + ",service_id:"+instance.getServiceId());
        return "hello spring boot";
    }

}
3、在主類(啟動類)裡面新增@EnableEurekaClient
package com.anzy.demo;

import org.springframework.boot.SpringApplication;
import org.springframework.boot.autoconfigure.SpringBootApplication;
import org.springframework.cloud.netflix.eureka.EnableEurekaClient;

@EnableEurekaClient
@SpringBootApplication
public class DemoApplication {

	public static void main(String[] args) {
		SpringApplication.run(DemoApplication.class, args);
	}
}
4、修改配置檔案application.properties
spring.application.name=demo

eureka.client.serviceUrl.defaultZone=http://localhost:1111/eureka
簡單的單機服務治理就此搭建好。
-----------------------------------------------------------------------------------------
服務治理介面上那句紅字具體怎麼回事我暫時還沒研究,有知道的可以簡單說一下,供大家學習。
可加Q群551807041 一起學習。