
Android圖片新增陰影效果的兩種方式
阿新 • • 發佈:2019-02-19
給圖片新增陰影效果,這是很常見的需求。第一種方法是自定義drawable,使用layer-list定義兩個圖片,程式碼如下:
show_view.xml:
<?xml version="1.0" encoding="utf-8"?>
<layer-list xmlns:android="http://schemas.android.com/apk/res/android">
<!-- 陰影圖片,android:left表示陰影圖片左邊到背景圖片左邊的距離
android:top表示陰影圖片上邊到背景圖片上邊的距離-->
<item android:left 在main.xml中定義一個textview作為待顯示控制元件,將show_view.xml設為這個testview的背景,main.xml的程式碼如下:
<?xml version="1.0" encoding="utf-8"?> 執行程式顯示效果如下:
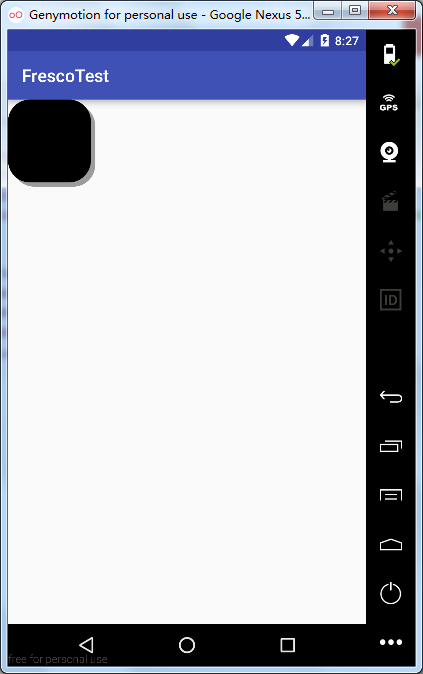
看著還可以,但是這裡面有一個缺陷,大家細看就會發現這個陰影是實邊的,沒有虛化的效果,這樣就不夠真實,影響使用者體驗。下面我們來看第二種方法。
第二種方式就是自定義view,程式碼裡通過setShadowLayer繪製圖片陰影,程式碼如下:
CustomShadowView類:
package com.example.liusiyutaloner.frescotest;

import android.content.Context;
import android.graphics.Canvas;
import android.graphics.Color;
import android.graphics.Paint;
import android.graphics.RectF;
import android.util.AttributeSet;
import android.view.View;

public class CustomShadowView extends View {
        private Paint mPaint;

        public CustomShadowView(Context context, AttributeSet attrs) {
            super(context, attrs);
            mPaint = new Paint();
            mPaint.setColor(Color.BLACK);
            this.setLayerType(View.LAYER_TYPE_SOFTWARE, null);
        }

        @Override
        protected void onDraw(Canvas canvas) {
            super.onDraw(canvas);
            //繪製陰影,param1:模糊半徑;param2:x軸大小:param3:y軸大小;param4:陰影顏色
            mPaint.setShadowLayer(10F, 15F, 15F, Color.GRAY);
            RectF rect = new RectF(0 , 0, 200, 200);
            canvas.drawRoundRect(rect, (float)75, (float)75, mPaint);
        }

}
再將CustomShadowView類加到main.xml中,程式碼如下:
<?xml version="1.0" encoding="utf-8"?>
<RelativeLayout xmlns:android="http://schemas.android.com/apk/res/android"
    xmlns:tools="http://schemas.android.com/tools"
    android:layout_width="150dp"
    android:layout_height="150dp"
    tools:context="com.example.liusiyutaloner.frescotest.MainActivity">

    <com.example.liusiyutaloner.frescotest.CustomShadowView
        android:layout_gravity="center"
        android:layout_width="125dp"
        android:layout_height="125dp"
        android:layout_centerHorizontal="true" />
</RelativeLayout>
執行即可看到以下效果:
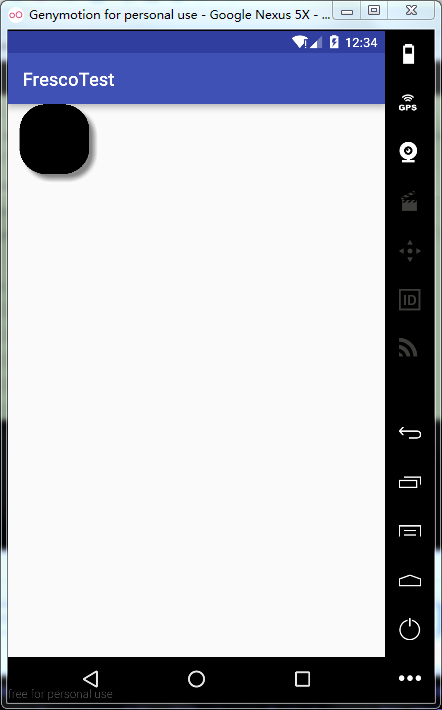
可以看到這種方法繪製出的陰影有虛化效果,多了立體感和層次感,所以更推薦使用。