
IOS 動畫框架pop使用方法
阿新 • • 發佈:2019-02-20
pop支援4種動畫型別:彈簧動畫效果、衰減動畫效果、基本動畫效果和自定義動畫效果。
彈簧動畫效果
- 1.效果圖如下:
- 2.控制器程式碼如下,首先用pod安裝匯入pop框架:
#import "ViewController.h"
#import <POP.h>
@interface ViewController ()
@end
@implementation ViewController
- (void)viewDidLoad {
[super viewDidLoad];
CALayer *layer = [CALayer layer];
layer.frame - 3.上述程式碼設定了彈簧物件的速度(springSpeed)、最終值大小(toValue),最後圖層物件layer新增彈簧物件。
衰減動畫
1.衰減動畫效果
2.實現程式碼:
#import "ViewController.h" - 3.對拖拽物件添加了pan手勢,根據手勢的位置移動拖拽物件,
recognizer.view.center = CGPointMake(recognizer.view.center.x + translation.x,之後要清零相對位置,即呼叫
recognizer.view.center.y + translation.y)[recognizer setTranslation:CGPointMake(0, 0) inView:self.view]。在拖拽動作結束的時候,計算出相對速度設定給衰減動畫物件。
基本動畫效果
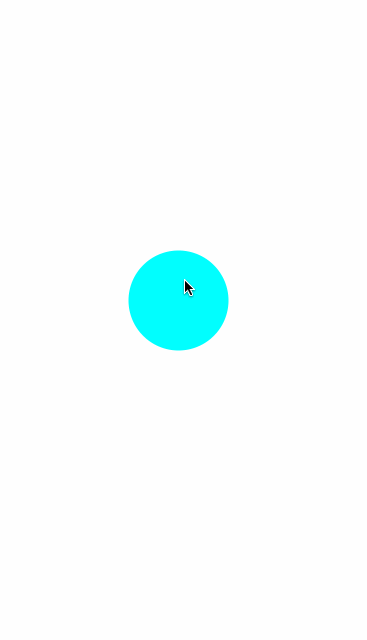
1.基本動畫效果如下:
2.程式碼如下:
   #import "ViewController.h"
    #import <POP.h>

    @interface ViewController ()

    @end

    @implementation ViewController

    - (void)viewDidLoad
    {
        [super viewDidLoad];

        // 建立view
        UIView *showView            = [[UIView alloc] initWithFrame:CGRectMake(0, 0, 100, 100)];
        showView.alpha              = 0.f;
        showView.layer.cornerRadius = 50.f;
        showView.center             = self.view.center;
        showView.backgroundColor    = [UIColor cyanColor];
    [self.view addSubview:showView];

        // 執行基本動畫效果
        POPBasicAnimation *anim = [POPBasicAnimation animationWithPropertyNamed:kPOPViewAlpha];
        anim.timingFunction     = [CAMediaTimingFunction functionWithName:kCAMediaTimingFunctionEaseInEaseOut];
        anim.fromValue          = @(0.0);
        anim.toValue            = @(1.0);
        anim.duration           = 4.f;
        [showView pop_addAnimation:anim forKey:nil];
    }

@end- 3.基本動畫物件只需要設定起始值(fromValue)和最終值(toValue)以及持續時間(duration)就可以了。
POP動畫綜合實戰
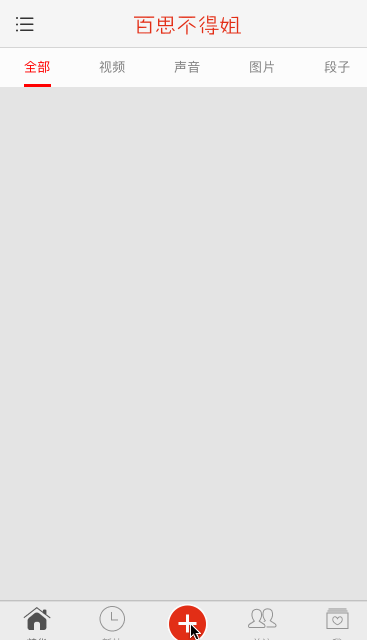
- 1.動畫效果如下:
- 2.點選中間紅色按鈕,6個按鈕從上面墜落。點選取消,6個按鈕又從上邊掉下消失。程式碼實現如下:
#import "BSPublishController.h"
#import "BSVerticalButton.h"
#import <POP.h>

@interface BSPublishController ()
@property(nonatomic,weak)UIImageView *sloganView;
@end

@implementation BSPublishController

- (void)viewDidLoad {
    [super viewDidLoad];
    //新增6個按鈕
    NSArray *name = @[@"發視訊",@"發圖片",@"發段子",@"發聲音",@"審帖",@"離線下載"];
    NSArray *imageName = @[@"publish-video",@"publish-picture",@"publish-text",@"publish-audio",@"publish-review",@"publish-offline"];
    NSUInteger count = name.count;
    NSUInteger maxCols = 3;
    CGFloat buttonW = 72;
    CGFloat buttonH = buttonW + 50;
    CGFloat buttonStartX = 20;
    CGFloat buttonStartY = (BSScreenH-2*buttonH)*0.5;
    CGFloat buttonMargin = (BSScreenW-2*buttonStartX-buttonW*maxCols)/(maxCols-1);
    for (NSUInteger i = 0; i < count; i++) {
        BSVerticalButton *button = [[BSVerticalButton alloc]init];
        [button setImage:[UIImage imageNamed:imageName[i]] forState:UIControlStateNormal];
        [button setTitle:name[i] forState:UIControlStateNormal];
        [button setTitleColor:[UIColor blackColor] forState:UIControlStateNormal];
        button.titleLabel.font = [UIFont systemFontOfSize:14];
        button.tag = i;
        [button addTarget:self action:@selector(btnClick:) forControlEvents:UIControlEventTouchUpInside];
        [self.view addSubview:button];
        //計算frame
        NSUInteger row = i/maxCols;
        NSUInteger col = i%maxCols;
        CGFloat buttonX = buttonStartX + col*(buttonW+buttonMargin);
        CGFloat buttonY = buttonStartY + row*buttonH;
        //使用pop框架,改變frame往下掉,而且不需要再設定frame了,因為pop改變了frame
        POPSpringAnimation *anim = [POPSpringAnimation animationWithPropertyNamed:kPOPViewFrame];
        anim.fromValue = [NSValue valueWithCGRect:CGRectMake(buttonX, buttonY-BSScreenH, buttonW, buttonH)];
        anim.toValue   = [NSValue valueWithCGRect:CGRectMake(buttonX, buttonY, buttonW, buttonH)];
        anim.springBounciness = 8;
        anim.springSpeed = 8;
        anim.beginTime = CACurrentMediaTime()+0.1*i;
        [button pop_addAnimation:anim forKey:nil];
    }
    //新增頂部圖片
    UIImageView *slogan = [[UIImageView alloc]initWithImage:[UIImage imageNamed:@"app_slogan"]];
    self.sloganView = slogan;
    [self.view addSubview:slogan];
    //中心約束
    POPSpringAnimation *anim = [POPSpringAnimation animationWithPropertyNamed:kPOPViewCenter];
    anim.fromValue = [NSValue valueWithCGPoint:CGPointMake(BSScreenW*0.5, BSScreenH*0.2-BSScreenH)];
    anim.toValue   = [NSValue valueWithCGPoint:CGPointMake(BSScreenW*0.5, BSScreenH*0.2)];
    anim.springBounciness = 8;
    anim.springSpeed = 8;
    anim.beginTime = CACurrentMediaTime()+0.1*count;
    [slogan pop_addAnimation:anim forKey:nil];

}
上面沒有單獨設定按鈕的frame,而是在pop物件的屬性(fromValue和toValue)裡進行了設定。這裡重寫了Button按鈕,重寫的程式碼如下:
#import "BSVerticalButton.h"

@implementation BSVerticalButton

- (instancetype)initWithFrame:(CGRect)frame {
    if (self == [super initWithFrame:frame]) {
        self.titleLabel.textAlignment = NSTextAlignmentCenter;
    }
    return self;
}

- (void)awakeFromNib {
    self.titleLabel.textAlignment = NSTextAlignmentCenter;
}

//這個是控制元件重新佈局,所以要呼叫layoutSubviews,而修改控制元件大小,是呼叫setFrame
- (void)layoutSubviews {

    [super layoutSubviews];
    self.imageView.x = 0;
    self.imageView.y = 0;
    self.imageView.width = self.width;
    self.imageView.height = self.imageView.width;

    self.titleLabel.x = 0;
    self.titleLabel.y = self.imageView.height;
    self.titleLabel.width = self.width;
    self.titleLabel.height = self.height - self.width;
}

- (void)setFrame:(CGRect)frame {
    [super setFrame:frame];
}
@end
點選取消6個按鈕從上面掉下來,程式碼如下:
   - (void)cancel:(void(^)(int))completeion{
    //讓按鈕往下掉
    NSUInteger index = 2;
    NSUInteger count = self.view.subviews.count;

    for (NSUInteger i = index; i<count ; i++) {
        UIView *subview = self.view.subviews[i];
        //這裡不需要計算frame,因為已經新增到view中,只需要設定最後的位置
        POPBasicAnimation *anim = [POPBasicAnimation animationWithPropertyNamed:kPOPViewCenter];
        anim.toValue  = [NSValue valueWithCGPoint:CGPointMake(subview.centerX, subview.centerY+BSScreenH)];
        anim.beginTime = CACurrentMediaTime()+0.1*i;
        [subview pop_addAnimation:anim forKey:nil];
        if (i == count-1) {
            //最後一個控制元件pop完退出控制器,寫在外面會直接退出
            [anim setCompletionBlock:^(POPAnimation *anim, BOOL finished) {
                if (completeion) {

                }
                [self dismissViewControllerAnimated:NO completion:nil];
            }];
        }
    }
}