
Flutter開發 使用FCM實現前後臺的推送
阿新 • • 發佈:2019-04-11
前言:
目前Flutter的FCM推送只支援Android,需要google service支援。下面我簡單總結一下在Flutter中如何實現FCM前後臺推送,主要包括“通知訊息”的推送和“底部導航的未讀訊息”推送。
實現的程式碼:
1.Google官網註冊應用
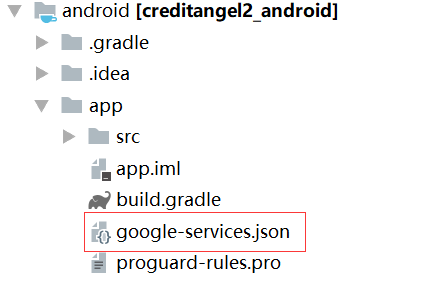
首先去網址:https://console.firebase.google.com/ 去註冊自己的應用,並下載google-services.json的檔案,把它放到自己專案的app/目錄。
2.新增依賴
2.1 Project的build.gradle
classpath 'com.google.gms:google-services:4.0.1' 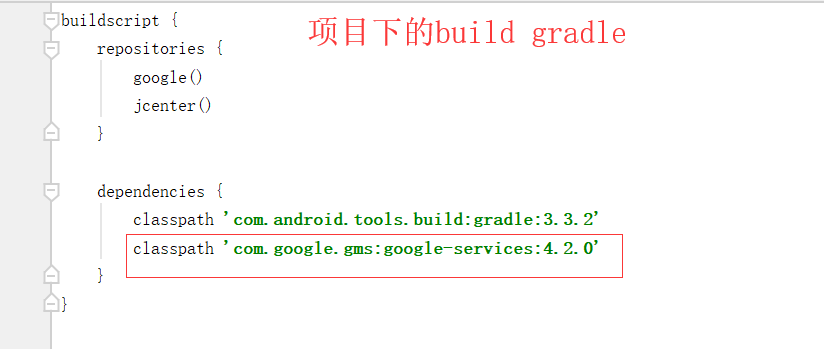
2.2 Module的build.gradle
dependencies {
     implementation 'com.google.firebase:firebase-core:16.0.1'
}
apply plugin: 'com.google.gms.google-services'    //這一句一定要放在最下面,否則無效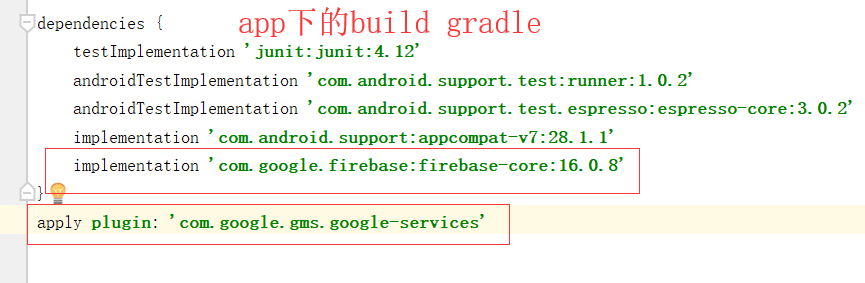
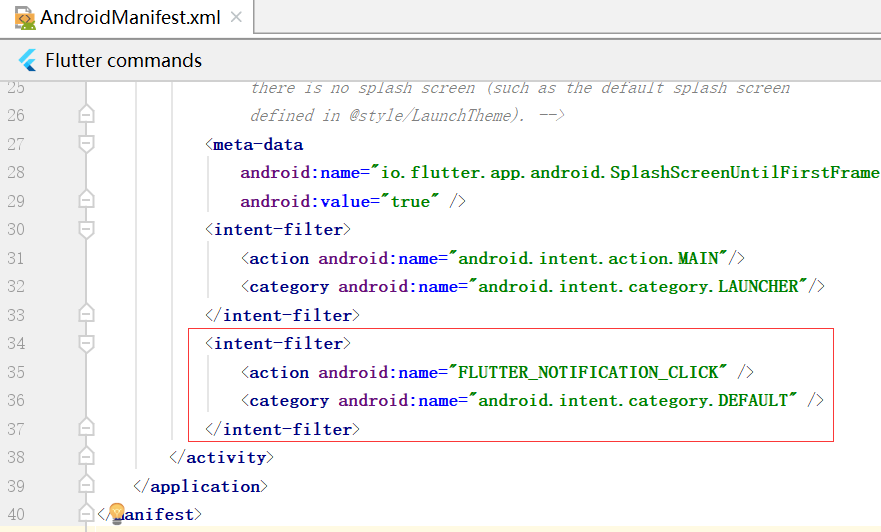
3.配置AndroidMenifest.xml檔案
<manifest xmlns:android="http://schemas.android.com/apk/res/android"
    xmlns:tools="http://schemas.android.com/tools"
    package="專案包名">

    <uses-permission android:name="android.permission.INTERNET"/>

    <application>
        <activity>
            <intent-filter>
                <action android:name="FLUTTER_NOTIFICATION_CLICK" />
                <category android:name="android.intent.category.DEFAULT" />
            </intent-filter>
        </activity>
    </application>
</manifest>
4.在pubspec.yaml新增sdk
dependencies:
  ...
  cupertino_icons: ^0.1.0
  firebase_messaging: ^4.0.0+1
5.通知訊息的推送
class DashboardPageState extends State<DashboardPage>{
  final FirebaseMessaging _fireBaseMessaging = FirebaseMessaging();

  ...

  @override
  void initState() {
    super.initState();

    //push notification
    _fireBaseMessaging.requestNotificationPermissions(
        const IosNotificationSettings(sound: true, badge: true, alert: true));
    _fireBaseMessaging.getToken().then((token) {
//      print(token);
      if (token != null) {
        _postFcm(token);//推送的post請求
      }
    });

  }

  //推送的post請求
  Future _postFcm(String token) async {
      String url = url;
      var data = {"token": token};
      DioUtil.post(url, data: data).then((response) {
    });
  }

}
6.底部導航的未讀訊息推送
class DashboardPageState extends State<DashboardPage>{
  final FirebaseMessaging _fireBaseMessaging = FirebaseMessaging();
  int _tabIndex = 0;
  bool clickBadge = false;
  var count=""; //初始化未讀條數
  List<BottomNavigationBarItem> items;

  //自定義badger的樣式
  BottomNavigationBadge badger = new BottomNavigationBadge(
      backgroundColor: Colors.red,
      badgeShape: BottomNavigationBadgeShape.circle,
      textColor: Colors.white,
      position: BottomNavigationBadgePosition.topRight,
      textSize: 8);

    @override
  void initState() {
    super.initState();
    _fireBaseMessaging.configure(onMessage: (Map message) {
      handleMessage(message);
    }, onLaunch: (Map message) {
      handleMessage(message);
    }, onResume: (Map message) {
      handleMessage(message);
    });
  }

  void handleMessage(Map message) {
    setState(() {
      var data = message["data"];
      count = data["count"]; //獲取未讀條數
    });
  }

  void _change(int index) {
    setState(() {
      _tabIndex = index;
      if (index == 1) {
        clickBadge = true;
        items = badger.removeAll(items);//點選底部導航時,移除badge
      }
    });
  }

   @override
  Widget build(BuildContext context) {
    initData();
    return Scaffold(
        appBar: buildAppBar(),
        body: buildTabContent(),
        bottomNavigationBar: CupertinoTabBar(
          backgroundColor: Color(0xFF384F6F),
          currentIndex: _tabIndex,
          onTap: _change,
          items: items,
        ));
  }

  void initData() {
    setState(() {
      if (clickBadge == false && count!=null) {//根據條件,動態新增badge
        badger.setBadge(items, count, 1);
      }
    });
  }

}
7.總結:
在Flutter上已經實現FCM前後臺的推送功能啦,歡迎大家圍觀。如果有什麼疑問的話,可以