學習springcloud的SpringCloudConfig(配置中心-碼雲git)。記錄其中遇見的問題(參考純潔的微笑)
阿新 • • 發佈:2019-04-30
配置中心服務端處理
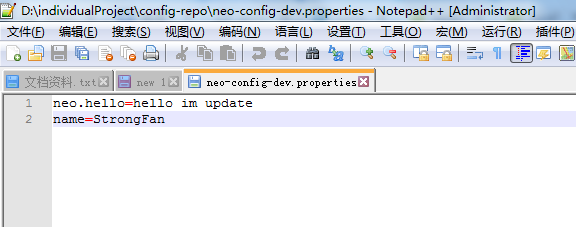
1.先建立配置檔案,將其上傳到git上面


2.新增配置中心的pom依賴
<!--Springclud 的配置中心-->
<dependency>
   <groupId>org.springframework.cloud</groupId>
   <artifactId>spring-cloud-config-server</artifactId>
</dependency>
3.application.properties裡面,增加配置中心配置
###############註冊eureka服務##############
spring.application.name=spring-cloud-producer
server.port=9011
eureka.client.serviceUrl.defaultZone=http://localhost:8000/eureka/


##############整合SpringClud的配置中心##########
spring.cloud.config.server.git.uri=https://gitee.com/strongFan/individualProject/
#spring.cloud.config.server.git.uri=https://gitee.com/strongFan/individualProject.git   這裡獲取的不是git的地址,請參考進行對比
spring.cloud.config.server.git.searchPaths=config-repo  #git上面存放配置的資料夾
spring.cloud.config.server.git.username=xxxxxx
spring.cloud.config.server.git.password=xxxxxx
4.啟動類增加開啟配置中心註解
package com.example.democloudserver;

import org.springframework.boot.SpringApplication;
import org.springframework.boot.autoconfigure.SpringBootApplication;
import org.springframework.cloud.client.discovery.EnableDiscoveryClient;
import org.springframework.cloud.config.server.EnableConfigServer;

@EnableConfigServer  //開啟SpringClud的配置中心
@SpringBootApplication
@EnableDiscoveryClient//啟用服務註冊與發現
public class DemocloudserverApplication {

   public static void main(String[] args) {
      SpringApplication.run(DemocloudserverApplication.class, args);
   }

}
這裡,服務端的配置已經完後了,現在啟動服務中心,啟動配置中心,進行請求,檢視。

接下來,準備客戶端請求獲取服務端的配置
1.pom檔案增加相關依賴
<!--配置中心客戶端-->
<dependency>
   <groupId>org.springframework.cloud</groupId>
   <artifactId>spring-cloud-starter-config</artifactId>
</dependency>
2.如果有application.properties,則建立bootstrap.properties。沒有,則建立bootstrap.properties,原因請看配置檔案
##########配置中心服務端獲取############
spring.cloud.config.name=neo-config-dev
spring.cloud.config.profile=dev
spring.cloud.config.uri=http://localhost:9011/
spring.cloud.config.label=master

#上面這些與spring-cloud相關的屬性必須配置在bootstrap.properties中,config部分內容才能被正確載入。
#因為config的相關配置會先於application.properties,而bootstrap.properties的載入也是先於application.properties。
3.寫一個方法,測試是否可以獲取配置中心服務的配置
package com.example.servicefeign.controller;

import com.example.servicefeign.interfaceServer.HelloRemote;
import org.springframework.beans.factory.annotation.Autowired;
import org.springframework.beans.factory.annotation.Value;
import org.springframework.web.bind.annotation.GetMapping;
import org.springframework.web.bind.annotation.PathVariable;
import org.springframework.web.bind.annotation.RequestMapping;
import org.springframework.web.bind.annotation.RestController;

@RestController
public class HelloController {

    @Autowired
    HelloRemote hello;//註冊介面層

    @Value("${neo.hello:111}")
    private String config;

    @RequestMapping("/hello/{name}")
    public String index(@PathVariable("name") String name) {
        return hello.hello(name);
    }

    /**
     * 獲取配置中心引數
     */
    @GetMapping("/config")
    public String getConfig(){
        return this.config;
    }

}
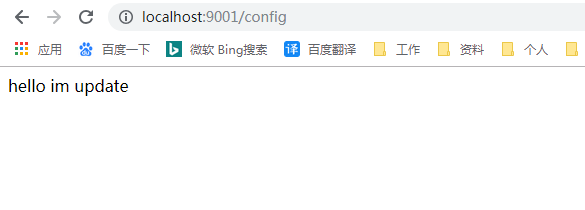
啟動專案,進行檢視

好了,這裡已經獲取了。
我們這裡,在看下git上面的配置檔案

