ElasticSearch Logstash資料採集工具---從mysql自動採集
Logstash是ES下的一款開源軟體,它能夠同時從多個來源採集資料、轉換資料,然後將資料傳送到Eleasticsearch中建立索引。
一、下載Logstash
注意下載的logstash版本最好要和你使用的ElasticSearch版本一致。
下載網址:https://www.elastic.co/downloads/logstash
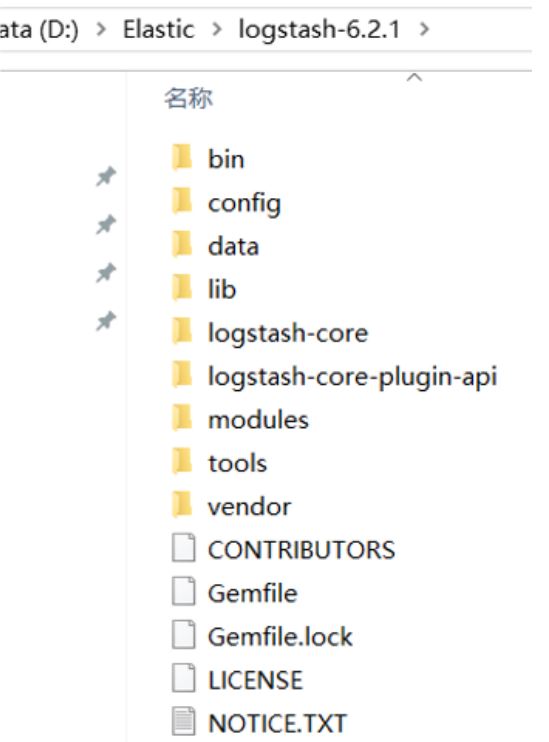
解壓之後:

二、安裝logstash-input-jdbc
logstash-input-jdbc是ruby開發的,先下載ruby並安裝
下載地址:https://rubyinstaller.org/downloads/
下載2.5版本即可。
安裝之後在命令提示符中鍵入 ruby -v 檢視ruby版本

Logstash5.x以上版本本身自帶有logstash-input-jdbc,6.x版本本身不帶logstash-input-jdbc外掛,需要手動安裝

安裝成功後我們可以在logstash根目錄下的以下目錄檢視對應的外掛版本

三、建立模板檔案
我們使用Logstash從MySQL中讀取資料,向ES中建立索引,這裡需要提前建立mapping的模板檔案以便logstash使用。
在logstach的config目錄建立XXX.json,內容和在建立ElasticSearch對映欄位時一樣。
例如,
{
	"mappings" : {
		"doc" : {
			"properties" : {
				"charge" : {
					"type" : "keyword"
				},
				"description" : {
					"analyzer" : "ik_max_word",
					"search_analyzer" : "ik_smart",
					"type" : "text"
				},
				"end_time" : {
					"format" : "yyyy‐MM‐dd HH:mm:ss",
					"type" : "date"
				},
				"expires" : {
					"format" : "yyyy‐MM‐dd HH:mm:ss",
					"type" : "date"
				},
				"grade" : {
					"type" : "keyword"
				},
				"id" : {
					"type" : "keyword"
				},
				"mt" : {
					"type" : "keyword"
				},
				"name" : {
					"analyzer" : "ik_max_word",
					"search_analyzer" : "ik_smart",
					"type" : "text"
				},
				"pic" : {
					"index" : false,
					"type" : "keyword"
				},
				"price" : {
					"type" : "float"
				},
				"price_old" : {
					"type" : "float"
				},
				"pub_time" : {
					"format" : "yyyy‐MM‐dd HH:mm:ss",
					"type" : "date"
				},
				"qq" : {
					"index" : false,
					"type" : "keyword"
				},
				"st" : {
					"type" : "keyword"
				},
				"start_time" : {
					"format" : "yyyy‐MM‐dd HH:mm:ss",
					"type" : "date"
				},
				"status" : {
					"type" : "keyword"
				},
				"studymodel" : {
					"type" : "keyword"
				},
				"teachmode" : {
					"type" : "keyword"
				},
				"teachplan" : {
					"analyzer" : "ik_max_word",
					"search_analyzer" : "ik_smart",
					"type" : "text"
				},
				"users" : {
					"index" : false,
					"type" : "text"
				},
				"valid" : {
					"type" : "keyword"
				}
			}
		}
	},
	"template" : "xc_course"
}
四、配置mysql.conf
在logstash的config目錄下配置mysql.conf檔案供logstash使用,logstash會根據mysql.conf檔案的配置的地址從MySQL中讀取資料向ES中寫入索引。
參考https://www.elastic.co/guide/en/logstash/current/plugins-inputs-jdbc.html
配置輸入資料來源和輸出資料來源。
input {
  stdin {
  }
  jdbc {
  jdbc_connection_string => "jdbc:mysql://localhost:3306/xc_course?useUnicode=true&characterEncoding=utf-8&useSSL=true&serverTimezone=UTC"
  # the user we wish to excute our statement as
  jdbc_user => "root"
  jdbc_password => root
  # the path to our downloaded jdbc driver
  jdbc_driver_library => "D:/software/ElasticSearch01/logstash-6.2.1/config/mysql-connector-java-5.1.32.jar"
  # the name of the driver class for mysql
  jdbc_driver_class => "com.mysql.jdbc.Driver"
  jdbc_paging_enabled => "true"
  jdbc_page_size => "50000"

  #要執行的sql檔案
  #statement_filepath => "/conf/course.sql"
  statement => "select * from course_pub where timestamp > date_add(:sql_last_value,INTERVAL 8 HOUR)"
  #定時配置
  schedule => "* * * * *"
  record_last_run => true
  last_run_metadata_path => "D:/software/ElasticSearch01/logstash-6.2.1/config/logstash_metadata"
  }
}


output {
  elasticsearch {
  #ES的ip地址和埠
  hosts => "localhost:9200"
  #hosts => ["localhost:9200","localhost:9202","localhost:9203"]
  #ES索引庫名稱
  index => "xc_course"
  document_id => "%{id}"
  document_type => "doc"
  template =>"D:/software/ElasticSearch01/logstash-6.2.1/config/xc_course_template.json"
  template_name =>"xc_course"
  template_overwrite =>"true"
  }
  stdout {
 #日誌輸出
  codec => json_lines
  }
}
說明:
1、ES採用UTC時區問題
ES採用UTC 時區,比北京時間早8小時,所以ES讀取資料時讓最後更新時間加8小時
where timestamp > date_add(:sql_last_value,INTERVAL 8 HOUR)
2、logstash每個執行完成會在D:/ElasticSearch/logstash-6.2.1/config/logstash_metadata記錄執行時間下次以此時間為基準進行增量同步資料到索引庫。
六、測試
啟動logstash.bat:
.\logstash.bat ‐f ..\config\mysql.conf
通過在資料庫中更新對應欄位時間戳可以完成Elastic
