
系列四、SpringMVC響應資料和結果檢視
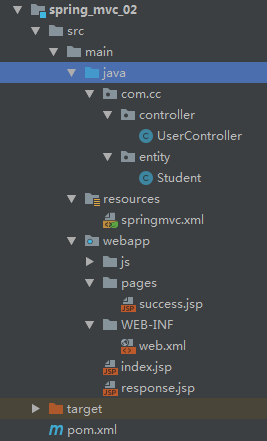
專案結構如下
一、返回值分類
一 返回字串
Controller方法返回字串可以指定邏輯檢視的名稱,根據檢視解析器為物理檢視的地址,根據字串最後跳轉到對應jsp頁面
第一步、匯入依賴座標檔案、配置好webxml檔案、springmvc核心配置檔案
        <resources>
            <!-- mapper.xml檔案在java目錄下 -->
            <resource>
                <directory>src/main/java</directory>
                <includes>
                    <include>**/*.xml</include>
                </includes>
            </resource>
            <resource>
                <directory>src/main/resources</directory>
                <includes>
                    <include>**/*.properties</include>
                    <include>**/*.xml</include>
                </includes>
            </resource>
        </resources>
    </build>
    <!--鎖定所有spring的版本-->
    <properties>
        <spring.version>5.0.2.RELEASE</spring.version>
        <!--編譯版本修改-->
        <project.build.sourceEncoding>UTF-8</project.build.sourceEncoding>
        <maven.compiler.source>1.8</maven.compiler.source>
        <maven.compiler.target>1.8</maven.compiler.target>
    </properties>
    <dependencies>
        <dependency>
            <groupId>org.springframework</groupId>
            <artifactId>spring-context</artifactId>
            <version>${spring.version}</version>
        </dependency>
        <dependency>
            <groupId>org.springframework</groupId>
            <artifactId>spring-web</artifactId>
            <version>${spring.version}</version>
        </dependency>
        <dependency>
            <groupId>org.springframework</groupId>
            <artifactId>spring-webmvc</artifactId>
            <version>${spring.version}</version>
        </dependency>
        <dependency>
            <groupId>javax.servlet</groupId>
            <artifactId>servlet-api</artifactId>
            <version>2.5</version>
            <scope>provided</scope>
        </dependency>
        <dependency>
            <groupId>javax.servlet.jsp</groupId>
            <artifactId>jsp-api</artifactId>
            <version>2.0</version>
            <scope>provided</scope>
        </dependency>
        <dependency>
            <groupId>org.springframework</groupId>
            <artifactId>spring-core</artifactId>
            <version>${spring.version}</version>
        </dependency>
    </dependencies>
<?xml version="1.0" encoding="UTF-8"?>
<web-app version="2.4"
         xmlns="http://java.sun.com/xml/ns/j2ee"
         xmlns:xsi="http://www.w3.org/2001/XMLSchema-instance"
         xsi:schemaLocation="http://java.sun.com/xml/ns/j2ee http://java.sun.com/xml/ns/j2ee/web-app_2_4.xsd">

    <!-- SpringMVC的核心控制器:前端控制器-->
    <servlet>
        <servlet-name>dispatcherServlet</servlet-name>
        <servlet-class>org.springframework.web.servlet.DispatcherServlet</servlet-class>
        <!-- 然後配置Servlet的初始化引數,讀取springmvc的配置檔案,建立spring容器 -->
        <init-param>
            <param-name>contextConfigLocation</param-name>
            <param-value>classpath:springmvc.xml</param-value>
        </init-param>
        <!-- 首先是:servlet啟動時載入物件 -->
        <load-on-startup>1</load-on-startup>
    </servlet>

    <servlet-mapping>
        <servlet-name>dispatcherServlet</servlet-name>
        <url-pattern>/</url-pattern>
    </servlet-mapping>

    <!--配置過濾器解決中文亂碼:提供初始化引數-->
    <filter>
        <filter-name>characterEncodingFilter</filter-name>
        <filter-class>org.springframework.web.filter.CharacterEncodingFilter</filter-class>
        <init-param>
            <param-name>encoding</param-name>
            <param-value>UTF-8</param-value>
        </init-param>
        <!-- 啟動過濾器 -->
        <init-param>
            <param-name>forceEncoding</param-name>
            <param-value>true</param-value>
        </init-param>
    </filter>
    <filter-mapping>
        <filter-name>characterEncodingFilter</filter-name>
        <url-pattern>/*</url-pattern>
    </filter-mapping>
</web-app>
<?xml version="1.0" encoding="UTF-8"?> <beans xmlns="http://www.springframework.org/schema/beans" xmlns:mvc="http://www.springframework.org/schema/mvc" xmlns:context="http://www.springframework.org/schema/context" xmlns:xsi="http://www.w3.org/2001/XMLSchema-instance" xsi:schemaLocation=" http://www.springframework.org/schema/beans http://www.springframework.org/schema/beans/spring-beans.xsd http://www.springframework.org/schema/mvc http://www.springframework.org/schema/mvc/spring-mvc.xsd http://www.springframework.org/schema/context http://www.springframework.org/schema/context/spring-context.xsd"> <!-- 配置spring建立容器時要掃描的包 --> <context:component-scan base-package="com.cc"></context:component-scan> <!-- 配置檢視解析器:返回請求成功後的頁面 --> <bean id="viewResolver" class="org.springframework.web.servlet.view.InternalResourceViewResolver"> <!--檔案所在的目錄:相對路徑--> <property name="prefix" value="/pages/"></property> <!--檔案的字尾名--> <property name="suffix" value=".jsp"></property> </bean> <!--告訴前端控制器,那些靜態資源不攔截--> <!--<mvc:resources location="/css/" mapping="/css/**"/> <!– 樣式 –> <mvc:resources location="/images/" mapping="/images/**"/> <!– 圖片 –>--> <mvc:resources location="/js/" mapping="/js/**"/> <!-- javascript --> <!--配置spring開啟註解mvc的支援--> <mvc:annotation-driven/> </beans>
第二步、建立實體類以及controller層控制類
package com.cc.entity;

public class Student {

    private String name;
    private int age;
    private String password;

    public String getName() {
        return name;
    }

    public void setName(String name) {
        this.name = name;
    }

    public int getAge() {
        return age;
    }

    public void setAge(int age) {
        this.age = age;
    }

    public String getPassword() {
        return password;
    }

    public void setPassword(String password) {
        this.password = password;
    }

    @Override
    public String toString() {
        return "Student{" +
                "name='" + name + '\'' +
                ", age=" + age +
                ", password='" + password + '\'' +
                '}';
    }
}
package com.cc.controller;
import com.cc.entity.Student;
import org.springframework.stereotype.Controller;
import org.springframework.ui.Model;
import org.springframework.web.bind.annotation.RequestBody;
import org.springframework.web.bind.annotation.RequestMapping;
import org.springframework.web.servlet.ModelAndView;
import javax.servlet.http.HttpServletRequest;
import javax.servlet.http.HttpServletResponse;
@Controller
@RequestMapping("/user")
public class UserController {
/**
* 返回引數為字串型別
* @param model使用Model向檢視層傳遞student物件
* @return
*/
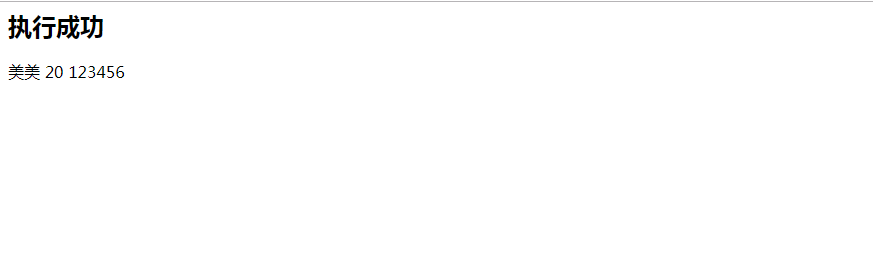
@RequestMapping("/testString")
public String testString(Model model){
System.out.println("testString.....");
//模擬資料庫查詢功能
Student student=new Student();
student.setName("美美");
student.setAge(20);
student.setPassword("123456");
//model物件
model.addAttribute("student",student);
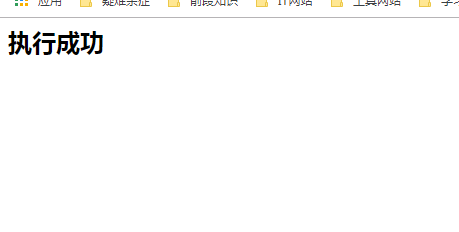
return "success";
}
}
第三步、建立response.jsp響應頁面,相應的執行頁面
<%@ page contentType="text/html;charset=UTF-8" language="java" isELIgnored="false" %>
<html>
<head>
    <title>Title</title>
    <%--響應結果為字串--%>
</head>
<body>
</body>
</html>

二、返回值是void
controller層程式碼新增如下程式碼
返回值是void型別,想跳轉相應的頁面,可以使用HttpServletResponse api進行轉發或者是重定向,也可以直接響應頁面在輸入http://localhost:8080/user/testVoid,會直接響應輸出 hello
    /**
     * 返回結果為void
     * 請求轉發是一次請求
     * @param
     */

    @RequestMapping("/testVoid")
    public  void testVoid(HttpServletRequest request, HttpServletResponse response) throws Exception{
        System.out.println("testVoid.....");
        //使用原生api,編寫請求轉發
        request.getRequestDispatcher("/pages/success.jsp").forward(request, response);
        //使用重定向
        //response.sendRedirect(request.getContextPath()+"/pages/success.jsp");
        //訪問servet會直接進行響應
        //response.getWriter().println("hello");
        return;
    }
response.jsp頁面新增如下程式碼
<%--響應結果為void--%>
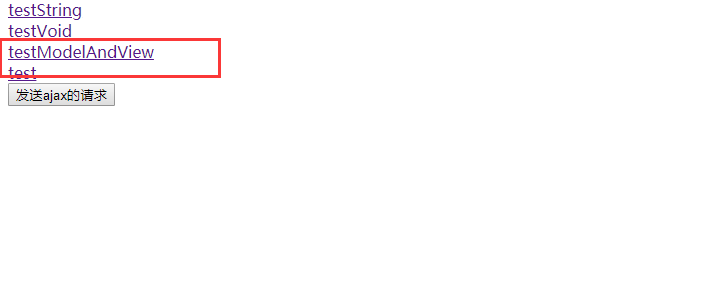
<a href="user/testVoid">testVoid</a><br>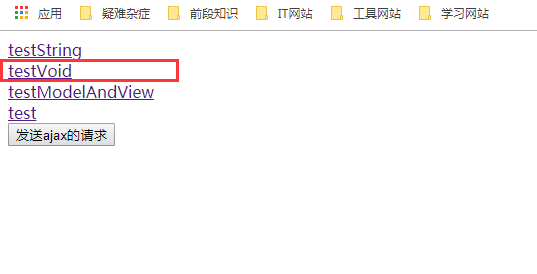

三、返回值是ModelAndView物件
controller層修改程式碼如下:ModelAndView 作為返回值,其實本質上是實現ModelMap介面
/**
* 本質上和model是一樣的,model底層實現都是modelMap
* @return
*/
@RequestMapping("/testModelAndView")
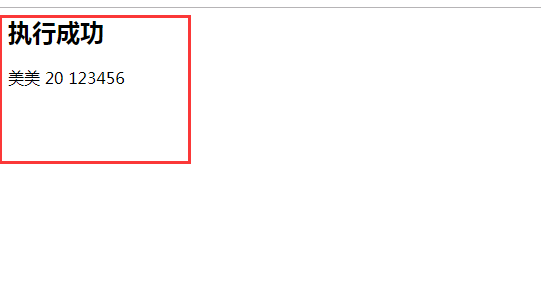
public ModelAndView testModelAndView() {
System.out.println("testModelAndView.....");
//建立ModelAndView物件
ModelAndView mv=new ModelAndView();
Student student=new Student();
student.setName("美美");
student.setAge(20);
student.setPassword("123456");
//把user物件儲存到物件中,也會把user物件存入request物件中
mv.addObject("student",student);
//跳轉到那個頁面
mv.setViewName("success");
return mv;
}response.jsp頁面修改程式碼如下
<%--響應結果為ModeladnView--%>
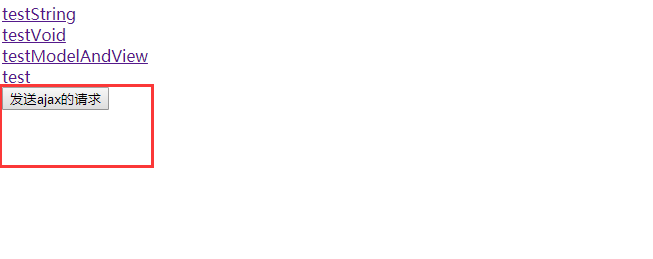
<a href="user/testModelAndView">testModelAndView</a><br>測試如下,攜帶引數進行請求跳轉
二、SpringMVC框架提供的轉發和重定向
直接修改controller層程式碼,需要注意的地方,使用關鍵字實現重定向和轉發只有,檢視配置器這個時候就不起作用了
/**
* 使用關鍵字 forward和redirect請求頁面
* @return
*/
@RequestMapping("/test")
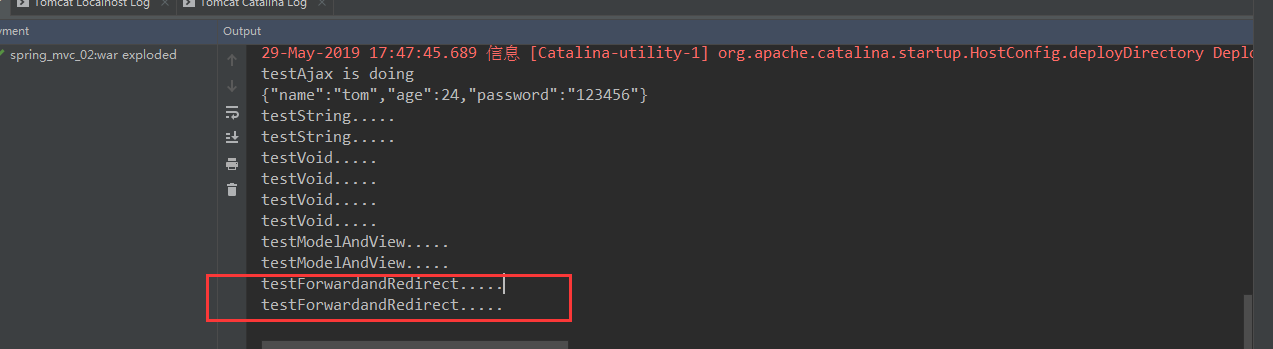
public String testForwardandRedirect() {
System.out.println("testForwardandRedirect.....");
//轉發請求頁面,使用了關鍵字後,就不能使用檢視解析器
//return "forward://pages/success.jsp";
//使用重定向請求頁面
//return "redirect:/index.jsp";
return "redirect:/pages/success.jsp";
}
response.jsp頁面程式碼修改如下
    <%--使用forword和Redirect實現響應--%>
    <a href="user/test">test</a><br>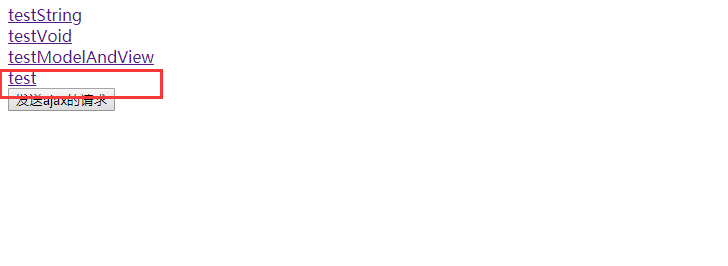

三. ResponseBody響應json資料
該註解用於將 Controller 的方法返回的物件,通過 HttpMessageConverter 介面轉換為指定格式的資料如:json,xml 等,通過 Response 響應給客戶端,幫我們解決了很多麻煩的事情
第一步、DispatcherServlet會攔截到所有的資源,導致一個問題就是靜態資源(img、css、js)也會被攔截到,從而不能被使用。解決問題就是需要配置靜態資源不進行攔截,在springmvc.xml配置檔案新增如下配置
mvc:resources標籤配置不過濾
location元素表示webapp目錄下的包下的所有檔案
mapping元素表示以/static開頭的所有請求路徑,如/static/a 或者/static/a/b
<!--告訴前端控制器,那些靜態資源不攔截-->
<!--<mvc:resources location="/css/" mapping="/css/**"/> <!– 樣式 –>
<mvc:resources location="/images/" mapping="/images/**"/> <!– 圖片 –>-->
<mvc:resources location="/js/" mapping="/js/**"/> <!-- javascript -->第二步、 使用@RequestBody獲取請求體資料
<button id="btn">傳送ajax的請求</button>
<script type="text/javascript" src="${pageContext.request.contextPath}/js/jquery-3.2.1.min.js"></script>
<script>
$(function(){
$("#btn").click(function(){
//使用ajax傳送請求
$.ajax({
type:"post",
url:"${pageContext.request.contextPath}/user/testAjax",
contentType:"application/json;charset=utf-8",
data:'{"name":"tom","age":24,"password":"123456"}',
dataType:"json",
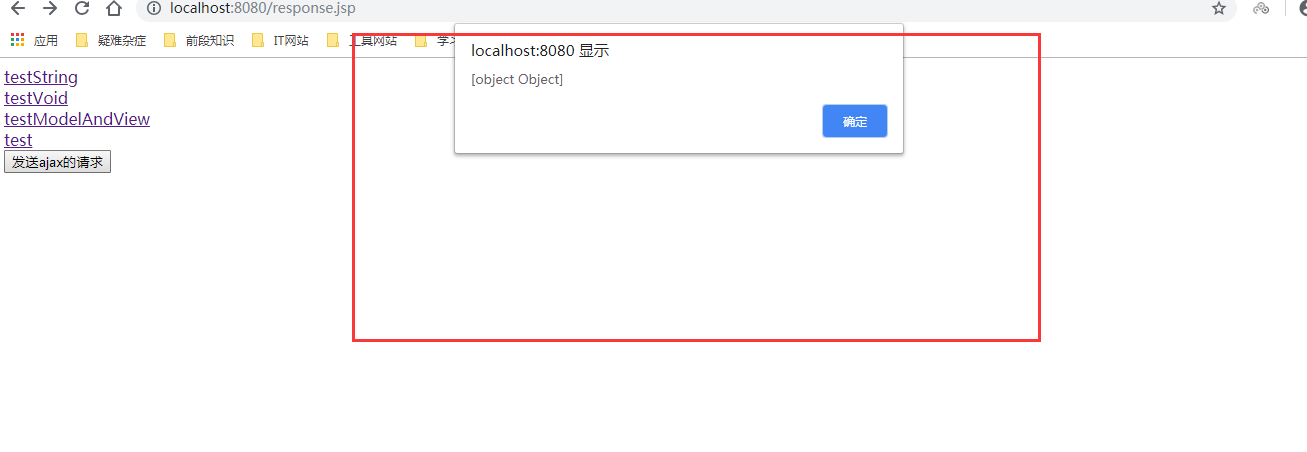
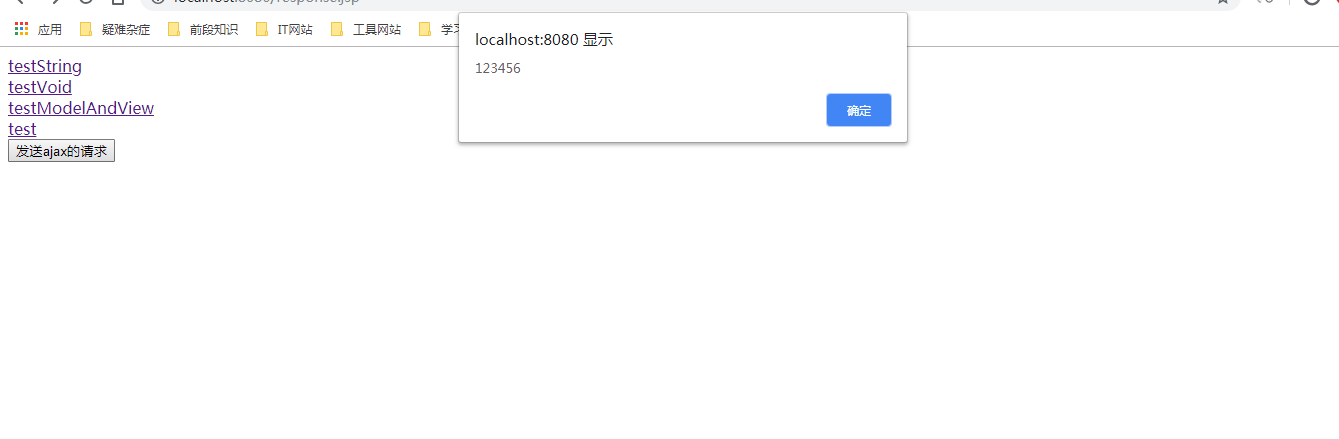
success:function(data){
alert(data);
}
});
});
})
</script>controller層程式碼修改如下
/**
* 測試響應 json 資料
*/
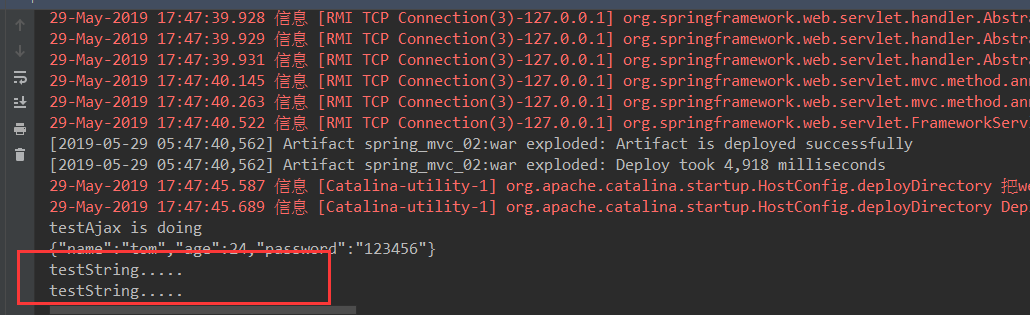
@RequestMapping("/testAjax")
public void testAjax(@RequestBody String body) {
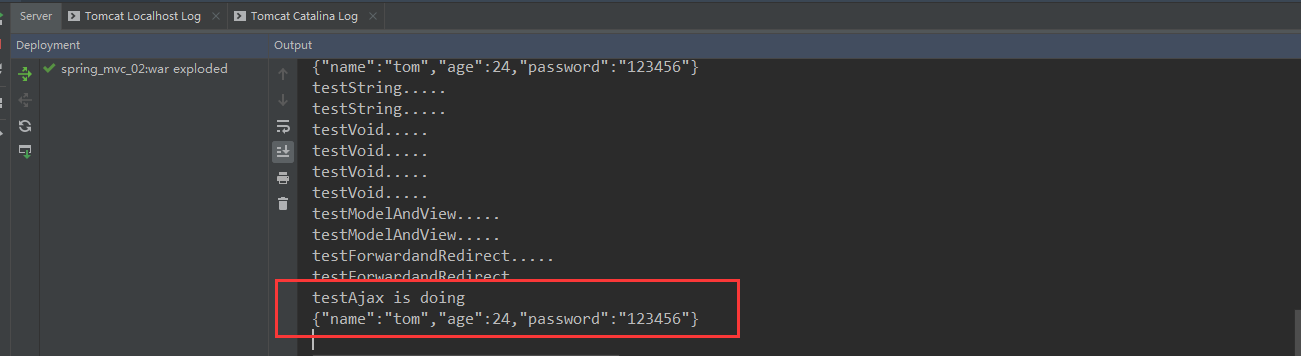
System.out.println("testAjax is doing");
System.out.println(body);
}
後臺拿到前端傳送過來的資料
第三、 使用@RequestBody註解把json的字串轉換成JavaBean的物件
1、json字串和JavaBean物件互相轉換的過程中,需要使用jackson的jar包
<dependency>
<groupId>com.fasterxml.jackson.core</groupId>
   <artifactId>jackson-databind</artifactId>
   <version>2.9.0</version>
</dependency>
<dependency>
   <groupId>com.fasterxml.jackson.core</groupId>
   <artifactId>jackson-core</artifactId>
   <version>2.9.0</version>
</dependency>
<dependency>
   <groupId>com.fasterxml.jackson.core</groupId>
   <artifactId>jackson-annotations</artifactId>
   <version>2.9.0</version>
</dependency
2、controller層修改程式碼如下
@RequestMapping("/testAjax")
    public @ResponseBody Student  testAjax(@RequestBody Student student) {
        //@ResponseBody設定返回封裝物件
        System.out.println("testAjax is doing");
        student.setName("tom");
        student.setPassword("123456");
        System.out.println(student);
        return student;
    }
3.response.jsp頁面程式碼如上一步,點選測試程式碼,控制檯額和view層都接收到了資料
相關推薦
系列四、SpringMVC響應資料和結果檢視
專案結構如下 一、返回值分類 一 返回字串 Controller方法返回字串可以指定邏輯檢視的名稱,根據檢視解析器為
[Swift通天遁地]四、網路和執行緒-(5)解析網路請求資料:String(字串)、Data(二進位制資料)和JSON資料
本文將演示如何解析網路請求資料:使用Alamofire的Get請求並輸出字串(String)、二進位制資料(Data)和JSON資料。 首先確保在專案中已經安裝了所需的第三方庫。 點選【Podfile】,檢視安裝配置檔案。 1 source 'https://github.com/CocoaPod
系列五、springMVC實現檔案上傳和跨伺服器上傳檔案
一、實現檔案上傳 專案目錄如下所示 一、匯入依賴和配置springmvc.xml、web.xml 這個兩個jar
dubbo系列四、dubbo啟動過程源碼解析
eric notify sport contain cse fabs tde sign 平臺 一、代碼準備 1、示例代碼 參考dubbo系列二、dubbo+zookeeper+dubboadmin分布式服務框架搭建(windows平臺) 2、簡單了解下spring自定
四、資料庫之資料型別
首先補充點了解的小知識; select * from mysql.user #顯示出來亂了 select * from mysql.user\G #加了\G後一行一行顯示了 一、資料型別:分不同種類去存不同型別的資料 儲存引
四、Springmvc異常處理器
else pack springmvc item 地方 類名 add 添加 emc springmvc.xml 添加異常處理器 <!-- Springmvc異常處理器 --> <bean class="com.itheima.springmvc.exce
kafka系列四、kafka架構原理
一、概述 Kakfa起初是由LinkedIn公司開發的一個分散式的訊息系統,後成為Apache的一部分,它使用Scala編寫,以可水平擴充套件和高吞吐率而被廣泛使用。目前越來越多的開源分散式處理系統如Cloudera、Apache Storm、Spark等都支援與Kafka整合。
十四、SpringBoot之資料訪問整合MyBatis
pom.xml <!--引入mybatis--> <dependency> <groupId>org.myba
轉 Jmeter如何把響應資料的結果儲存到本地的一個檔案
當做效能壓測時,可能會需要把響應資料的一些欄位統計出來。這裡簡單介紹一下。 1、首先把介面調通,確定需要統計的欄位,這裡以統計ccmpSeq欄位來做例子。 2、新增正則表示式提取器,用來提取響應結果中的ccmpSeq 正則表示式用""包起來,如HT
(四)、讀取資料庫資料並在HighCharts上顯示
在上一篇簡單的靜態例子中,大家應該可以看得出,圖表裡橫縱座標的資料都是靜態的幾個資料,因此我們只要從資料庫讀取出我們想要的橫縱座標值,然後動態賦給Chart就行了。 X軸: xAxis: { categories: ['週
Caffe學習系列:模型各層資料和引數視覺化
從輸入的結果和圖示來看,最大的概率是7.17785358e-01,屬於第5類(標號從0開始)。與cifar10中的10種類型名稱進行對比: airplane、automobile、bird、cat、deer、dog、frog、horse、ship、truck 根據測試結果,判斷為dog。 測試無誤!
EMVTag系列16《AC響應資料》
在一個聯機交易中,要傳送到髮卡行的專有應用資料。 欄位 長度(位元組) 賦值 說明 長度 1 07 分散金鑰索引 1 00 密文版本號 1
SQL系列四——分組(group by和having)
首先,建立資料表如下: 1、資料分組(GROUP BY): SQL中資料可以按列名分組,搭配聚合函式十分實用。 例,統計每個班的人數: SELECT student_class,COUNT(ALL student_name) AS 總人數 FROM t_stud
C# 模仿QQ、MSN訊息提示系列 四、bug修改 效果優化
一、修改內容 1、引用封送類異常提示 出現原因 Point 屬性屬於引用封送類 修改方法: 原來使用 public Point EndPoint; 屬性獲取下一個提示窗口出現的位置於是改為 publicint Y {
十四、字典的初識和使用
fault fir 球類 head ring second -c 但是 三種 一、字典的初識 字典的初識: why: 列表可以存儲大量的數據,數據之間的關聯性不強 [‘太白‘,18,‘男‘,‘大壯‘,3,‘男‘] 列
系列一、SpringMVC概念及測試案例
三層架構和MVC概念 一.、三層架構概念 咱們開發伺服器端程式,一般都基於兩種形式,一種C/S架構程式,一種B/S架構程式
系列三、SpringMVC常用註解
請求和引數型註解 第一、@RequestParam 適用場景,封裝繫結資料的時候,當我們想給形參取其他名字的時候可以用這個
資料科學和人工智慧技術筆記 四、影象預處理
四、影象預處理 作者:Chris Albon 譯者:飛龍 協議:CC BY-NC-SA 4.0 影象二值化 # 載入庫 import cv2 import numpy as np from matplotlib import pyplot as plt
HTTP學習記錄:四、頭資訊(請求和響應)
學習資源主要為:@小坦克HTTP相關部落格 一、請求頭資訊(Request Header) 請求頭資訊包含比較多,如下: 1、Cache頭域 if-modified-Since 作用:把瀏覽器端快取頁面的最後修改時間傳送到伺服器去,伺服器會把這個時間與伺服器上的實際檔案的最後修改時間進行對比
【數字影象處理系列四】影象資料集增強方式總結和實現
本系列python版本:python2.7.15 本系列opencv-python版本:opencv-python3.4.2.17 本系列使用的開發環境是jupyter notebook,是一個python的互動式開發環境,測試十分方便,並集成了vim操作,