Spring5.0原始碼深度解析之SpringBean的Aop通知呼叫鏈原始碼分析

思考:springAOP底層運用了什麼設計模式?
生成代理類:代理設計模式、底層五個通知形成呼叫鏈採用:責任鏈設計模式
下面我們回顧下SpringAop實現流程:
1、配置@EnableAspectJAutoProxy
2、@Import(AspectJAutoProxyRegistrar.class)往IOC容器中注入SpringAOP切面類
3、registerAspectJAnnotationAutoProxyCreatorIfNecessary()註冊切面類
4、AnnotationAwareAspectJAutoProxyCreator.class註冊到IOC容器中,【AOP的入口】
5、postProcessAfterInitialization
6、wrapIfNecessary()判斷該物件是否在AOP的掃包範圍內
7、createAopProxy()判斷被代理類是否實現了介面,如果有實現了介面的化,是採用JDK動態代理,否則情況下就使用CGLIB代理
8、使用JdkDynamicAopProxy()方法實現代理類
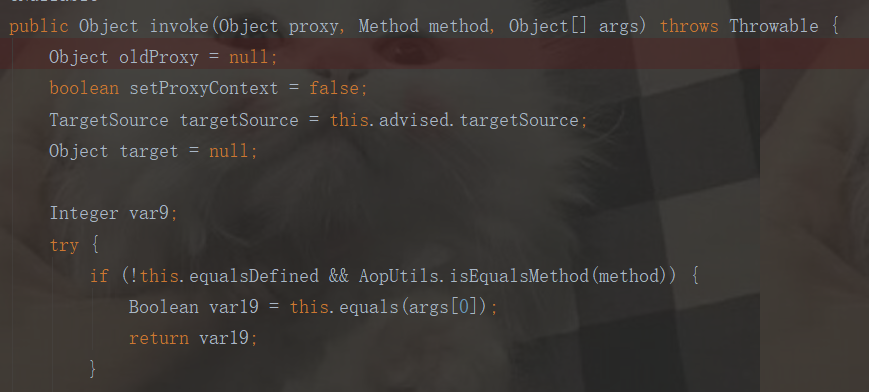
9、最終執行目標方法的時候,就會進入到JdkDynamicAopProxy 的invoke()方法
10、底層使用集合存放使用通知,然後再使用責任鏈設計模式迴圈的呼叫


如果呼叫了目標方法,則最終進入invoke方法

SpringBean的生命週期
主要靠的是後置處理器BeanPostProcessor:在Bean物件初始化前後做一些增強
AnnotationAwareAspectJAutoProxyCreator的祖宗是BeanPostProcessor
純手寫SpringAop呼叫鏈思路
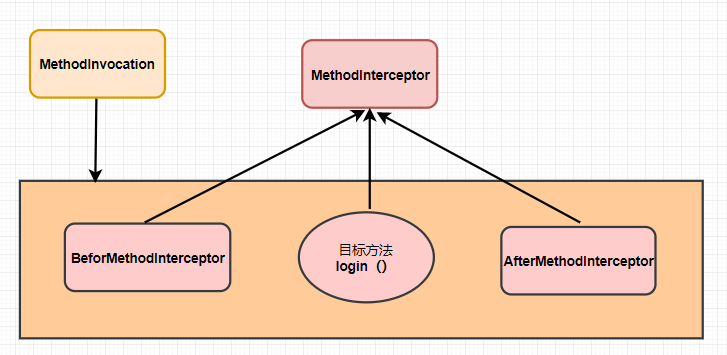
【0】環繞通知之前執行→【1】前置通知→目標方法→【2】後置通知→【3】環繞通知之後執行
責任鏈設計模式,底層通過遞迴演算法+責任鏈
如何存放起來:使用集合存放這些通知,集合當中不存放我們的方法,只存放鏈,那麼如何插入我們的目標方法?
純手寫SpringAop呼叫鏈

MethodInterceptor 介面
public interface MethodInterceptor {
    /**
     * 定義共同通知骨架
     */
    public void invoke(MethodInvocation methodInvocation) throws InvocationTargetException, IllegalAccessException;
}
BeforMethodInterceptor 前置通知
public class BeforMethodInterceptor implements MethodInterceptor {
    public void invoke(MethodInvocation methodInvocation) throws InvocationTargetException, IllegalAccessException {
        System.out.println(">>>>前置通知<<<<");
        // 執行我們的目標方法
        methodInvocation.process();// 遞迴呼叫
    }
}
AfterMethodInterceptor後置通知
public class AfterMethodInterceptor implements MethodInterceptor {
    public void invoke(MethodInvocation methodInvocation) throws InvocationTargetException, IllegalAccessException {
        // 執行我們的前置通知
        methodInvocation.process();
        System.out.println(">>>後置通知<<<");
    }
}
AroundMethodInterceptor 環繞通知
public class AroundMethodInterceptor implements MethodInterceptor {
    public void invoke(MethodInvocation methodInvocation) throws InvocationTargetException, IllegalAccessException {
        System.out.println("環繞通知在目標方法之前執行..");
        methodInvocation.process();
        System.out.println("環繞通知在目標方法之後執行..");
    }
}
UserService
public class UserService {
    public void login(String userName, Integer age) {
        System.out.println("userName:" + userName + ",age:" + age);
    }
}
MethodInvocation 能夠把鏈串起來
public interface MethodInvocation {
    //呼叫鍊形成
    public void process() throws InvocationTargetException, IllegalAccessException;

}
DefaultMethodInvacation 實現通知串起來
public class DefaultMethodInvacation implements MethodInvocation {
    /**
     * 存放所有的通知
     */
    private List<MethodInterceptor> listMethodInterceptor;
    private Object target;// 目標物件
    private Method method;// 目標方法
    private Object args[];// 目標引數
    // 最終使用反射機制執行目標方法
    private int index;// 記錄當前鏈呼叫的位置
    public DefaultMethodInvacation(List<MethodInterceptor> listMethodInterceptor, Object target, Method method, Object[] args) {
        this.listMethodInterceptor = listMethodInterceptor;
        this.target = target;
        this.method = method;
        this.args = args;
    }
    /**
     * 呼叫鍊形成
     */
    @Override
    public void process() throws InvocationTargetException, IllegalAccessException {
        if (index == listMethodInterceptor.size()) {
            method.invoke(target, args); //  執行目標
            return;
        }
        MethodInterceptor methodInterceptor = listMethodInterceptor.get(index++);
        methodInterceptor.invoke(this);
    }
}
執行結果:

>>>>前置通知<<<<
環繞通知在目標方法之前執行..
userName:mayikt,age:12
環繞通知在目標方法之後執行..
>>>後置通知<<<
本文參考
螞蟻課堂:http://www.mayikt.co
