GIT和SVN教程
各種版本控制工具的簡單比較
| 特性 | CVS | SVN | GIT |
|---|---|---|---|
| 併發修改 | 支援 | 支援 | 支援 |
| 併發提交 | 不支援 | 支援 | 支援 |
| 歷史軌跡 | 不支援更名 | 支援更名 | 支援更名 |
| 分散式 | 不支援 | 不支援 | 支援 |
SVN
SVN服務端安裝
下載地址:
https://www.visualsvn.com/server/download/
雙擊安裝包,安裝,選擇好安裝地址,
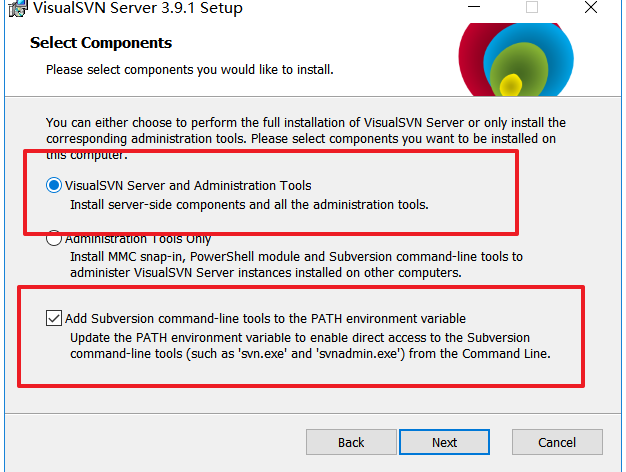
選中這兩項。next
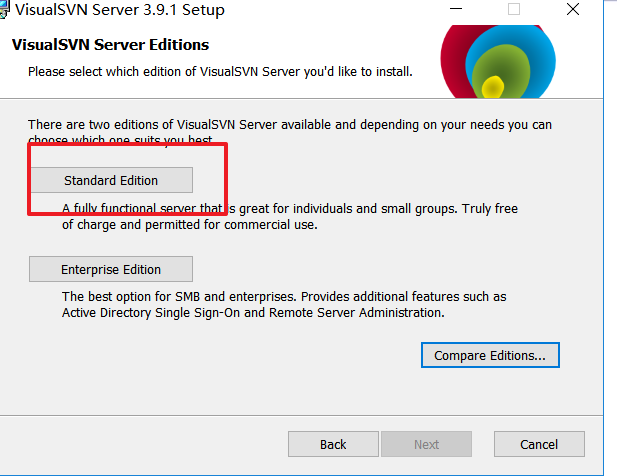
選擇圈中的,
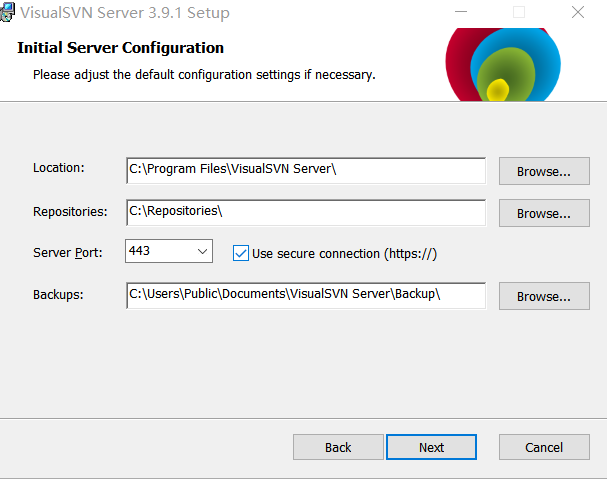
路徑因人而異。埠我選擇3030,這也是因人而異,最後點選install。
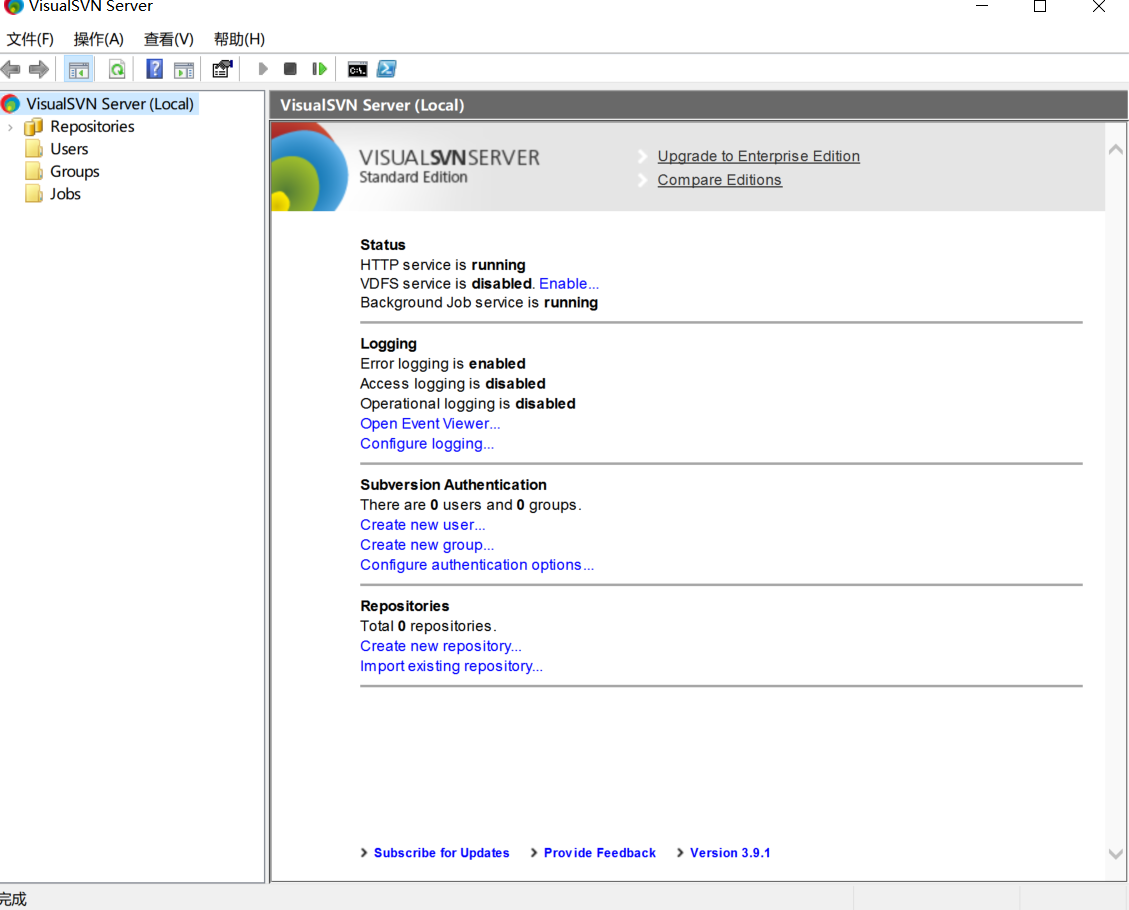
安裝成功後的介面
新增倉庫和使用者
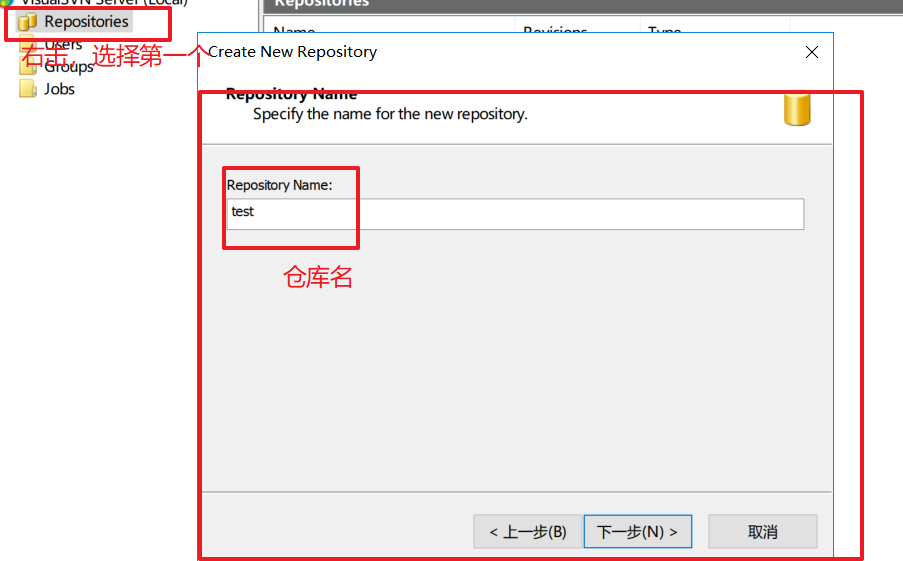
預設next。
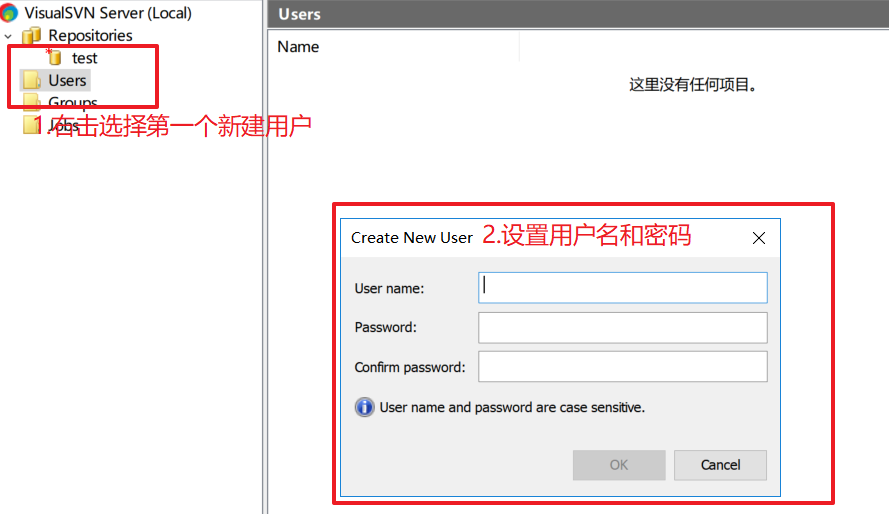
選擇ok。
客戶端安裝與配置
下載地址:
https://tortoisesvn.net/downloads.html
選擇好安裝目錄,其他都是無腦next。
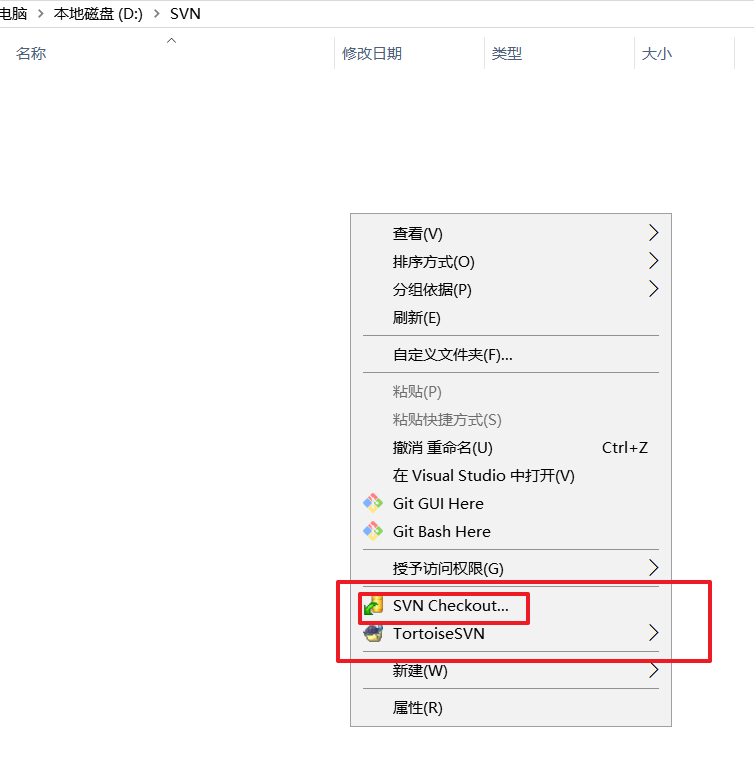
在任何一個資料夾下,右擊滑鼠,都會出現SVN checkout。表示SVN客戶端安裝完成。

選擇SVNcheckout,跳出這個框。
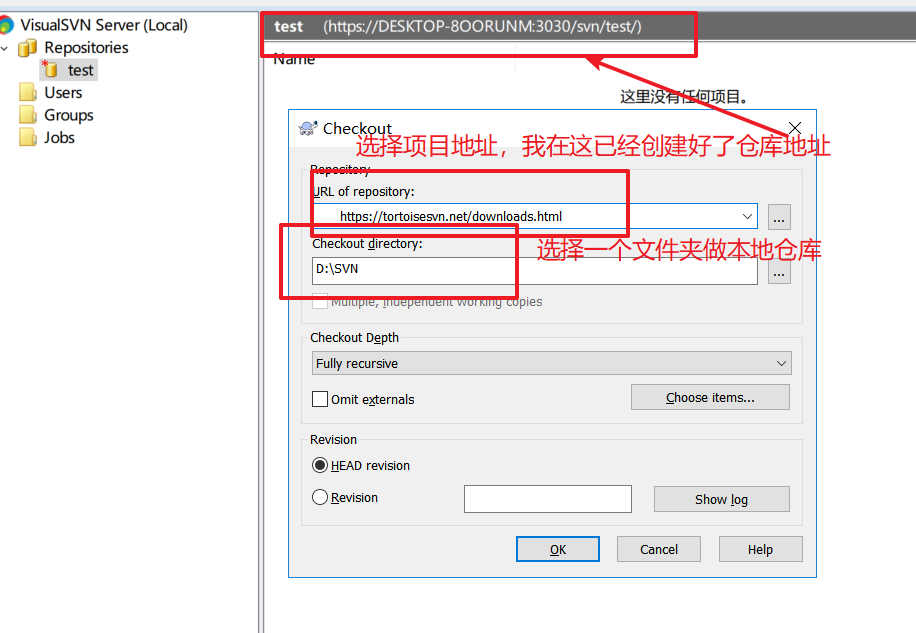
填好倉庫地址後,選擇ok,跳出這個確認使用者框。輸入賬戶密碼然後ok。

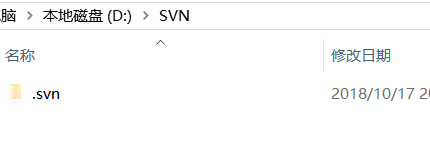
然後本地多了個.svn資料夾
SVN的基本操作
新增
我在本地新建了test.html
右擊,

選擇SVN commit。
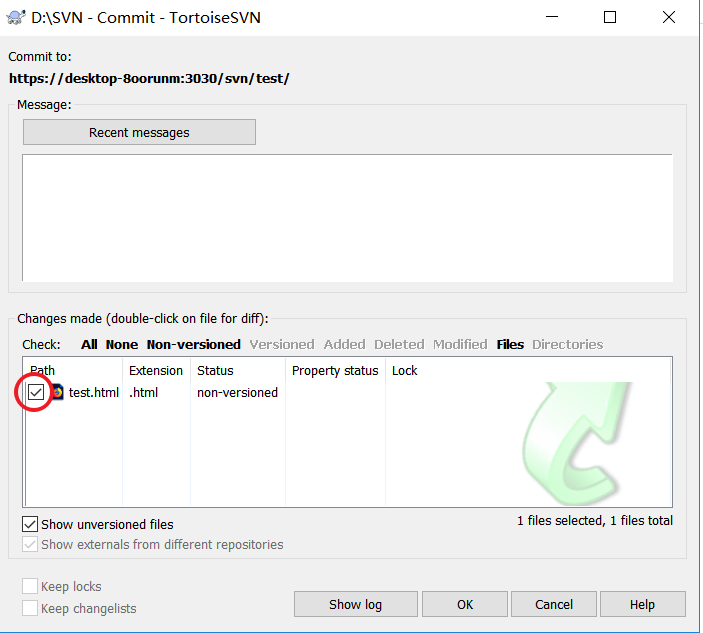
勾選對勾
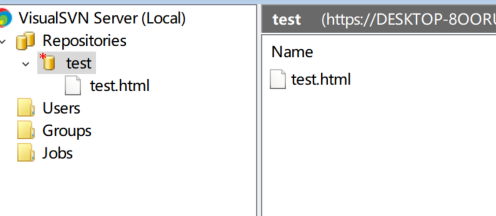
重新整理SVN服務端
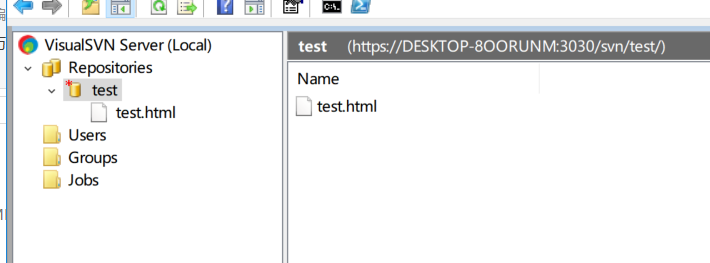
就多了test.html。
刪除
刪除剛才本地倉庫建立的test.html,然後右擊選擇SVN commit。
重新整理SVN服務端

修改
撤回剛才刪除的test.html並修改,然後右擊選擇SVN commit
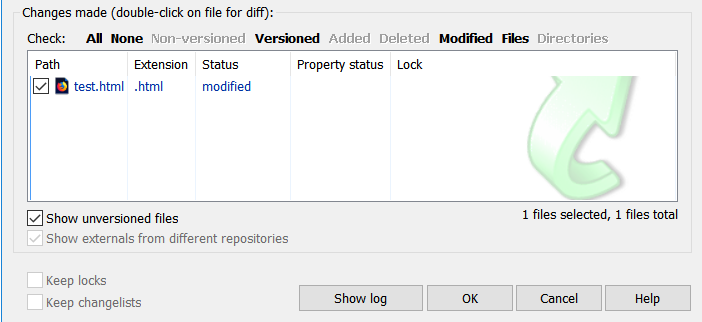
再刷先SVN服務端
git
說到git就會說到GitHub,因為GitHub是通過git這個工具來commit的,而GitHub網站就相當於SVN服務端。
git安裝
在Windows上使用Git,可以從Git官網直接下載安裝程式,(網速慢的同學請移步國內映象),然後按預設選項安裝即可。
安裝完成後,在開始選單裡找到“Git”->“Git Bash”,蹦出一個類似命令列視窗的東西,就說明Git安裝成功!
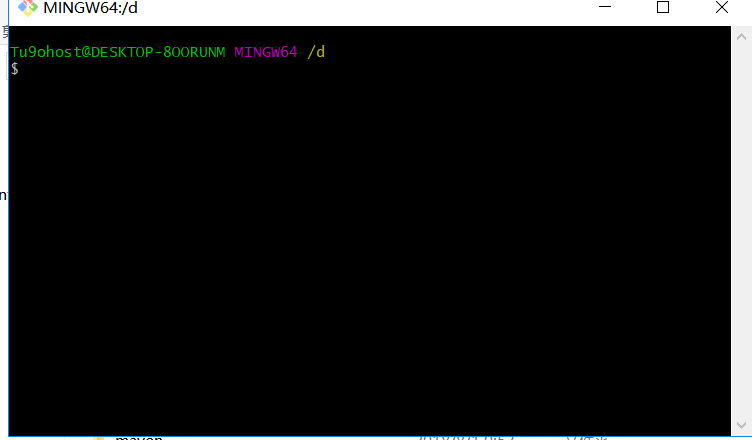
安裝完成後,還需要最後一步設定,在命令列輸入:
git config --global user.name "Your Name"
git config --global user.email "[email protected]"
如果使用GitHub(我一般都用GitHub做自己的專案倉庫伺服器,畢竟免費,自己程式碼也不值錢)
注意git config命令的--global引數,用了這個引數,表示你這臺機器上所有的Git倉庫都會使用這個配置,當然也可以對某個倉庫指定不同的使用者名稱和Email地址。
建立版本庫
如果你用GitHub新建了一個倉庫,
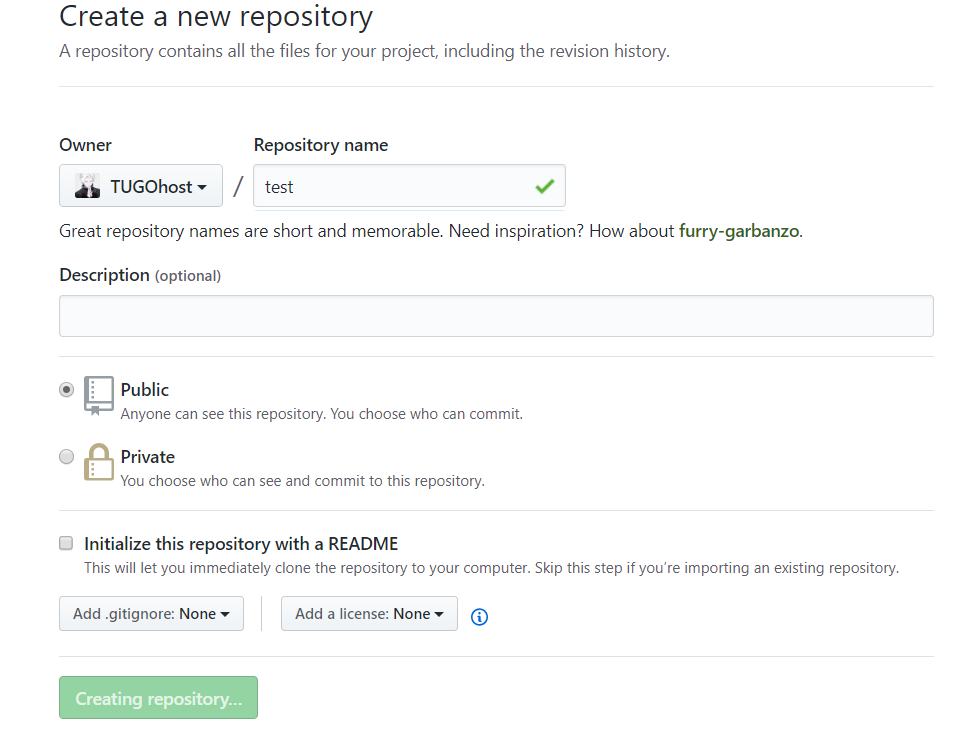

mkdir test
cd test
git init
git add README.md
git commit -m"first commit"
git remot add origin [email protected]:TUGOhost/test.git
git push -u origin master
如果遇到不錯的專案,可以
git clone [email protected]:TUGOhost/test.git
服務端倉庫克隆到本地。
時光機穿梭
我們已經成功地新增並提交了一個READM.md檔案,現在,是時候繼續工作了,於是,我們繼續修改READM.md檔案,新增內容如下:
test
現在,執行git status命令看看結果:

git status命令可以讓我們時刻掌握倉庫當前的狀態,上面的命令輸出告訴我們,READM.md被修改過了,但還沒有準備提交的修改。
雖然Git告訴我們READM.md被修改了,但如果能看看具體修改了什麼內容,自然是很好的。比如你休假兩週從國外回來,第一天上班時,已經記不清上次怎麼修改的READM.md,所以,需要用git diff這個命令看看:

git diff顧名思義就是檢視difference,顯示的格式正是Unix通用的diff格式,可以從上面的命令輸出看到。
版本回退
git log檢視我們的歷史紀錄

好了,現在我們啟動時光穿梭機,準備把README.md回退到上一個版本,也就是第一次first commit的那個版本,怎麼做呢?
首先,Git必須知道當前版本是哪個版本,在Git中,用HEAD表示當前版本,也就是最新的提交(注意我的提交ID和你的肯定不一樣),上一個版本就是HEAD^,上上一個版本就是HEAD^^,當然往上100個版本寫100個^比較容易數不過來,所以寫成HEAD~100。

第一次寫markdown檔名為1.md

命令git reflog用來記錄你的每一次命令:

工作區和版本庫
Git和其他版本控制系統如SVN的一個不同之處就是有暫存區的概念。
工作區(Working Directory)
就是你在電腦裡能看到的目錄,比如我的D:\test\資料夾就是一個工作區:
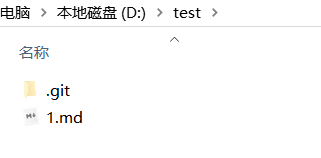
版本庫(Repository)
工作區有一個隱藏目錄.git,這個不算工作區,而是Git的版本庫。
Git的版本庫裡存了很多東西,其中最重要的就是稱為stage(或者叫index)的暫存區,還有Git為我們自動建立的第一個分支master,以及指向master的一個指標叫HEAD。
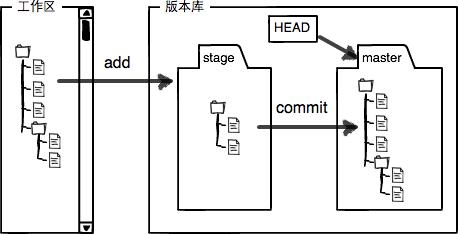
前面講了我們把檔案往Git版本庫裡新增的時候,是分兩步執行的:
第一步是用git add把檔案新增進去,實際上就是把檔案修改新增到暫存區;
第二步是用git commit提交更改,實際上就是把暫存區的所有內容提交到當前分支。
因為我們建立Git版本庫時,Git自動為我們建立了唯一一個master分支,所以,現在,git commit就是往master分支上提交更改。
你可以簡單理解為,需要提交的檔案修改通通放到暫存區,然後,一次性提交暫存區的所有修改。
撤銷檔案和刪除檔案
在你準備提交前,一杯咖啡起了作用,你猛然發現了stupid boss可能會讓你丟掉這個月的獎金!
既然錯誤發現得很及時,就可以很容易地糾正它。你可以刪掉最後一行,手動把檔案恢復到上一個版本的狀態。如果用git status檢視一下:
$ git status
On branch master
Changes not staged for commit:
  (use "git add <file>..." to update what will be committed)
  (use "git checkout -- <file>..." to discard changes in working directory)

    modified:   readme.txt

no changes added to commit (use "git add" and/or "git commit -a")你可以發現,Git會告訴你,git checkout -- file可以丟棄工作區的修改:
$ git checkout -- README.md命令git checkout -- README.md意思就是,把README.md檔案在工作區的修改全部撤銷,這裡有兩種情況:
一種是README.md自修改後還沒有被放到暫存區,現在,撤銷修改就回到和版本庫一模一樣的狀態;
一種是README.md已經新增到暫存區後,又作了修改,現在,撤銷修改就回到新增到暫存區後的狀態。
刪除檔案
git rm README.md在Linux中使用SVN
開發人員經常會上傳程式碼,或者改對程式碼做一些更改。svn就是用來將修改後的程式碼更新到伺服器上的。下面就來看一下怎麼在Linux環境下搭建svn服務(subversion)。
步驟:
1、檢查是否已經有svn
2、安裝subversion
3、檢查是否安裝成功
4、建立svn資源倉庫
5、新增使用者及密碼,配置許可權,配置資源庫許可權
6、啟動或者重啟服務
7、從機安裝subversion
8、測試
一、檢查是否已經有svn
如果沒有安裝就會是下面的樣子,提示找不到命令。
[root@localhost ~]# svnserve --version
-bash: svnserve: command not found
如果已經安裝,會顯示版本資訊:
[root@localhost ~]#  svnserve --version
svnserve, version 1.6.11 (r934486)
   compiled Aug 17 2015, 08:37:43

Copyright (C) 2000-2009 CollabNet.
Subversion is open source software, see http://subversion.tigris.org/
This product includes software developed by CollabNet (http://www.Collab.Net/).

The following repository back-end (FS) modules are available:

* fs_base : Module for working with a Berkeley DB repository.
* fs_fs : Module for working with a plain file (FSFS) repository.

Cyrus SASL authentication is available.
二、安裝
在Linux下安裝的是subversion,直接用yum 安裝即可。
[root@localhost ~]#
[root@localhost ~]# yum install -y subversion
三、檢查安裝是否成功
同樣用的是 svnserve –version成功安裝會顯示版本資訊
[root@localhost ~]# svnserve --version四、建立svn資源倉庫
配置檔案就是在這一步生成。
[root@localhost ~]# svnadmin create /svndir
[root@localhost ~]# cd /svndir/
[root@localhost svndir]# ls
conf  db  format  hooks  locks  README.txt
[root@localhost svndir]# cd conf/
[root@localhost conf]# ls
authz  passwd  svnserve.conf
五、新增使用者及密碼,配置許可權
已經看到在倉庫下面生成了三個檔案
authz #許可權配置檔案
passwd #使用者名稱密碼檔案
svnserve.conf #資源庫配置檔案
[root@localhost conf]# vim passwd
### This file is an example password file for svnserve.
### Its format is similar to that of svnserve.conf. As shown in the
### example below it contains one section labelled [users].
### The name and password for each user follow, one account per line.

[users]
# harry = harryssecret
# sally = sallyssecret
yunwei = 123456
~
新增一行:
yunwei = 123456
新增使用者“yunwei”,密碼是“123456”
[root@localhost conf]# vim authz


[groups]
# harry_and_sally = harry,sally
# harry_sally_and_joe = harry,sally,&joe

[/]
* = r
  @admin = rw
  dangerman =

[svndir:/]
@admin = rw
在[groups]下面加入:
- = r #所有使用者有讀許可權
dangerman = ##危險分子?什麼是危險分子?沒有任何許可權
[svndir:/] ###定義目錄,專案的根目錄
- = rw
[root@localhost conf]# vim svnserve.conf這個配置檔案開啟下面幾行前面的註釋,刪除最前面的空格:
anon-access = read
auth-access = write
password-db = passwd
authz-db = authz
realm = My First Repository
六、啟動或者重啟服務
[root@localhost conf]# /etc/init.d/svnserve start
Starting svnserve:                                     [  OK  ]
如果要指定目錄要加引數:
[root@localhost svndir]# mkdir /svndir/svn
[root@localhost svndir]# svnserve -d -r /svndir/svn  ####(只是看一下可以指定目錄,這個實驗不需要)
svnserve: Can't bind server socket: Address already in use
問題來了!!!問題來了:
顯示Address already in use
原因在這裡:svnserve -d -r /svndir/svn 這條命令就是指定目錄的啟動。但是前面已經啟動一次了。解決辦法:
[root@localhost svndir]# /etc/init.d/svnserve stop
Stopping svnserve:                                         [  OK  ]
[root@localhost svndir]# svnserve -d -r /svndir/
[root@localhost svndir]# ls
conf  db  format  hooks  locks  README.txt
[root@localhost svndir]# netstat -antlp | grep svn
tcp        0      0 0.0.0.0:3690                0.0.0.0:*                   LISTEN      5045/svnserve
七、測試,從機安裝subversion
在次從機安裝也安裝一個subversion 用來測試。
注:
服務主機:192.168.1.65
從機:192.168.1.121
在從機上checkout 根目錄
[root@localhost ~]# svn checkout svn://192.168.1.65/svndir/
Checked out revision 0.
需要注意的這裡check的目錄跟服務主機裡面定義的[svndir]要一樣。
[root@localhost ~]# svn checkout svn://192.168.1.65/svndir/
svn: URL 'svn://192.168.1.65/svndir' doesn't exist
如果出現在這個報錯,就要檢查服務主機的auth配置檔案了:
如果配置檔案的的目錄指定的是[svndir:/],而且svndir的目錄在根下(/svndir)
那啟動的時候即嫑指定目錄直接用/etc/init.d/svnserve start 啟動即可。我們這裡目錄符合預設目錄,不用指定了。直接用/etc/init.d/svnserve start,或者不用指定目錄。
svnserve -d -r /svndir/ 這表示指定目錄到/svndir/
目錄不對應會報錯。
7.1:在從機上從機:192.168.1.121上提交
[root@localhost ~]# ls
Desktop    Downloads  Pictures  svndir     Videos
Documents  Music      Public    Templates
[root@localhost ~]# cd svndir/
[root@localhost svndir]# ls
[root@localhost svndir]# touch xiao
[root@localhost svndir]# ls
xiao
[root@localhost svndir]# pwd
/root/svndir
[root@localhost svndir]# ls
xiao
[root@localhost svndir]# svn add /root/svndir/xiao
A /root/svndir/xiao[root@localhost svndir]# svn commit /root/svndir/xiao -m 1
Authentication realm: <svn://192.168.1.65:3690> My First Repository
Password for 'root':
Authentication realm: <svn://192.168.1.65:3690> My First Repository
Username: ^Csvn: Commit failed (details follow):
n: Caught signal
[root@localhost svndir]# svn commit /root/svndir/xiao -m 1
Authentication realm: <svn://192.168.1.65:3690> My First Repository
Password for 'root':
Authentication realm: <svn://192.168.1.65:3690> My First Repository
Username: yunwei
Password for 'yunwei':
-----------------------------------------------------------------------
ATTENTION! Your password for authentication realm:
<svn://192.168.1.65:3690> My First Repository
can only be stored to disk unencrypted! You are advised to configure
your system so that Subversion can store passwords encrypted, if
possible. See the documentation for details.
You can avoid future appearances of this warning by setting the value
of the 'store-plaintext-passwords' option to either 'yes' or 'no' in
'/root/.subversion/servers'.
-----------------------------------------------------------------------
Store password unencrypted (yes/no)? yes
Adding xiao
Transmitting file data .
Committed revision 1.注意:
1、提交程式碼前,必須先cd到/root/svndir/(就是checkout下來的)目錄裡;
2、伺服器上沒有的檔案,在客戶端需要先add預提交,再commit,如果伺服器端已有的檔案,直接commit
預提交的命令:
svn add /root/svndir/xiao提交的命令:
svn commit /root/svndir/xiao -m 1出現committed revision 1 提交成功了。
到服務端檢視有沒有提交成功:
服務主機:192.168.1.65
[root@localhost svndir]# svn checkout svn://192.168.1.65/svndir/
A    svndir/xiao
Checked out revision 1.
[root@localhost svndir]# ls
conf  db  format  hooks  locks  README.txt  svn  svndir
[root@localhost svndir]# cd svndir/
[root@localhost svndir]# ls
xiao
接下來測試更新:
從機:192.168.1.121:
[root@localhost svndir]# ls
xiao
[root@localhost svndir]# vim xiao

hello koby bryant !
~
修改了xiao 這個檔案的內容,之前是空檔案,現在加上一行內容。
然後重新提交:
[root@localhost svndir]# svn commit /root/svndir/xiao -m 2
Sending        xiao
Transmitting file data .
Committed revision 2.
伺服器主機:192.168.1.65
[root@localhost svndir]# svn up
xiao
Updated to revision 2.
[root@localhost svndir]# ls
xiao
[root@localhost svndir]# vim xiao
hello koby bryant !
~內容已經更改。
因為是更改內容,目錄和檔案已經有了,所以不用checkout了,直接svn up就可以了。
7.2、在伺服器主機:192.168.1.65上提交
[root@localhost svndir]# ls
xiao  yao
[root@localhost svndir]# pwd
/svndir/svndir
[root@localhost svndir]# svn add /svndir/svndir/yao
A         /svndir/svndir/yao
[root@localhost svndir]# svn commit /svndir/svndir/yao -m 3
Authentication realm: <svn://192.168.1.65:3690> My First Repository
Password for 'root':
Authentication realm: <svn://192.168.1.65:3690> My First Repository
Username: yunwei
Password for 'yunwei':

-----------------------------------------------------------------------
ATTENTION!  Your password for authentication realm:

   <svn://192.168.1.65:3690> My First Repository

can only be stored to disk unencrypted!  You are advised to configure
your system so that Subversion can store passwords encrypted, if
possible.  See the documentation for details.

You can avoid future appearances of this warning by setting the value
of the 'store-plaintext-passwords' option to either 'yes' or 'no' in
'/root/.subversion/servers'.
-----------------------------------------------------------------------
Store password unencrypted (yes/no)? yes
Adding         yao
Transmitting file data .
Committed revision 3.
注意:還是要cd到/svndir/svndir裡面再預提交,然後提交。
顯示Committed revision 3.就說明提交成功
到從機:192.168.1.121上更新看效果:
[root@localhost svndir]# svn up
A    yao
Updated to revision 3.
[root@localhost svndir]# ls
xiao  yao
[root@localhost svndir]# cat yao
hello rayallen
上面提交不管是在伺服器主機上還是在從機上,都需要輸入伺服器主機的root使用者密碼,以及在conf檔案裡面設定的使用者和密碼。上面測試是用的檔案測試,目錄同樣可以。
比如:
從機上:192.168.1.121
[root@localhost svndir]# mkdir xiaoyao
[root@localhost svndir]# ls
xiao  xiaoyao  yao
[root@localhost svndir]# svn add /root/svndir/xiaoyao/
A         /root/svndir/xiaoyao
[root@localhost svndir]# svn commit /root/svndir/xiaoyao/ -m 4
Adding         xiaoyao

Committed revision 4.
伺服器主機上:192.168.1.65
[root@localhost svndir]# svn up
A    xiaoyao
Updated to revision 4.
[root@localhost svndir]# ls
xiao  xiaoyao  yao
至此,svn的安裝配置測試就成功了
參考連結
https://blog.csdn.net/weixin_37998647/article/details/78686246
https://www.liaoxuefeng.com/wiki/0013739516305929606dd18361248578c67b8067c8c017b000
https://www.imooc.com/learn/
