
基於python-django框架的支付寶支付案例
目錄
@
一. 開發前的準備
1. 必須瞭解的知識
- SDK:軟體開發工具包,可以為開發者提供快速開發的工具
- 沙箱環境:也就是測試環境
- 支付寶支付金額的精度:小數點後兩位(面試)
支付寶用的什麼加密方式:RSA
2. 沙箱環境的配置
① 登入支付寶開放平臺
https://auth.alipay.com/login/ant_sso_index.htm?goto=https%3A%2F%2Fopen.alipay.com%2Fplatform%2Fhome.htm
② 進入管理中心後選擇研【研發服務】

③ 生成RSA金鑰
- 選擇【檢視應用公鑰】
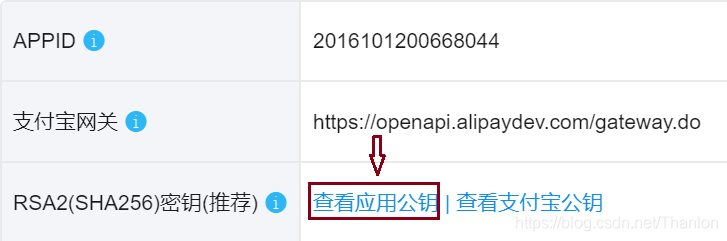
- 選擇【檢視應用公鑰生成方法】
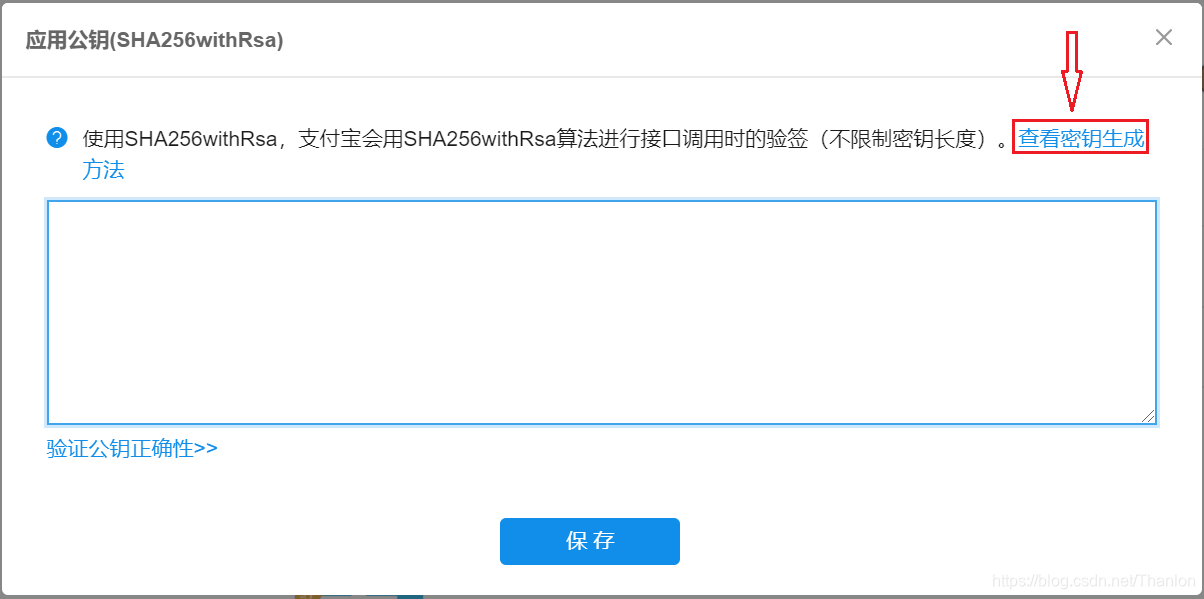
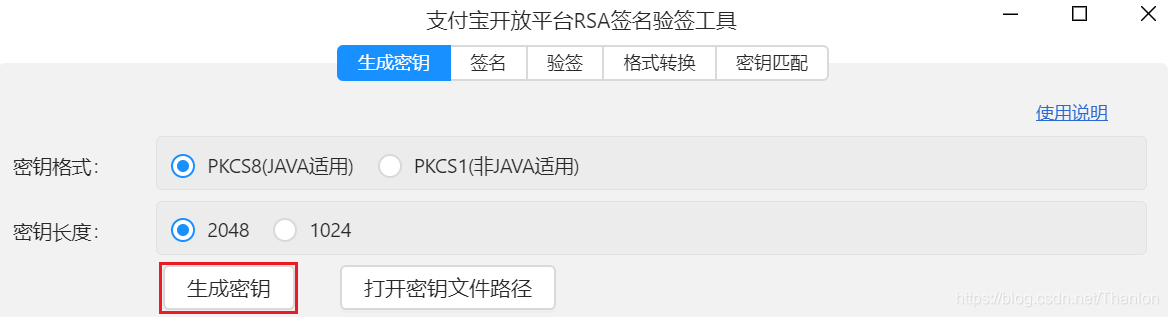
- 下載祕鑰生成工具
連結已經找好了,windows的使用者直接下載:https://ideservice.alipay.com/ide/getPluginUrl.htm?clientType=assistant&platform=win&channelType=WEB - 安裝後開啟工具直接選擇【生成祕鑰】
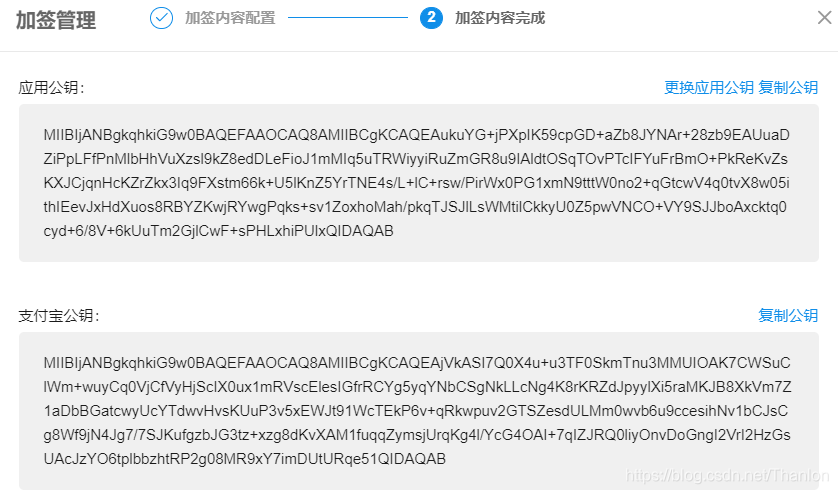
④ 將生成的應用公鑰輸入表單中,選擇【儲存】,系統會根據輸入的應用公鑰自動生成支付寶公鑰,可以選擇【設定/檢視】

⑤下載沙箱錢包APP,用於支付測試

注意: 生成祕鑰工具生成的應用公鑰是用來生成支付寶公鑰,剩下一個應用私鑰注意儲存。
3. 開發環境介紹
- 作業系統:Win10
- 編輯器:PyCharm 2019.2
- 除錯:Chrome 77.0.3865.75
- Python版本:Python 3.7.x
Django版本:Django 2.2.5
4. 支付寶支付流程
使用者點選支付時,網站根據支付寶的 APPID / 閘道器 / 支付寶公鑰私鑰 / SDK生成地址,再根據生成的地址,讓使用者跳轉到支付寶進行支付。使用者支付完成後,支付寶會給網站傳送兩個請求,分別是get和post請求。get請求是從支付寶網站跳轉到自己的網站,post請求是向自己的網站傳送支付相關的資訊,網站可以憑藉這些資訊去修改網站訂單的狀態。
二. 開發實施流程
1. 商品資料表的建立
model.py:
from django.db import models

# Create your models here.
class Goods(models.Model):
    goods_name = models.CharField(max_length=32)
    goods_price = models.FloatField()

class Order(models.Model):
    order_number = models.CharField(max_length=64)
    status_choices = ((0, '未支付'), (1, '已支付'))
    order_status = models.IntegerField(choices=status_choices, default=0)
goods = models.ForeignKey(to='Goods', on_delete=models.CASCADE)在Terminal中執行python manage.py makemigrations和python manage.py migrate,或者到工程目錄下執行這兩條指令,完成建表。
C:\Users\thanlon\PycharmProjects\alipay_django>python manage.py makemigrations
C:\Users\thanlon\PycharmProjects\alipay_django>python manage.py migrate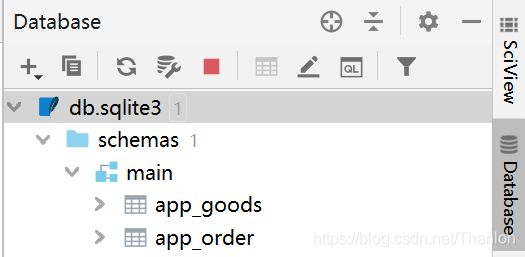
2. 購物車檢視的構建
向商品表插入資料
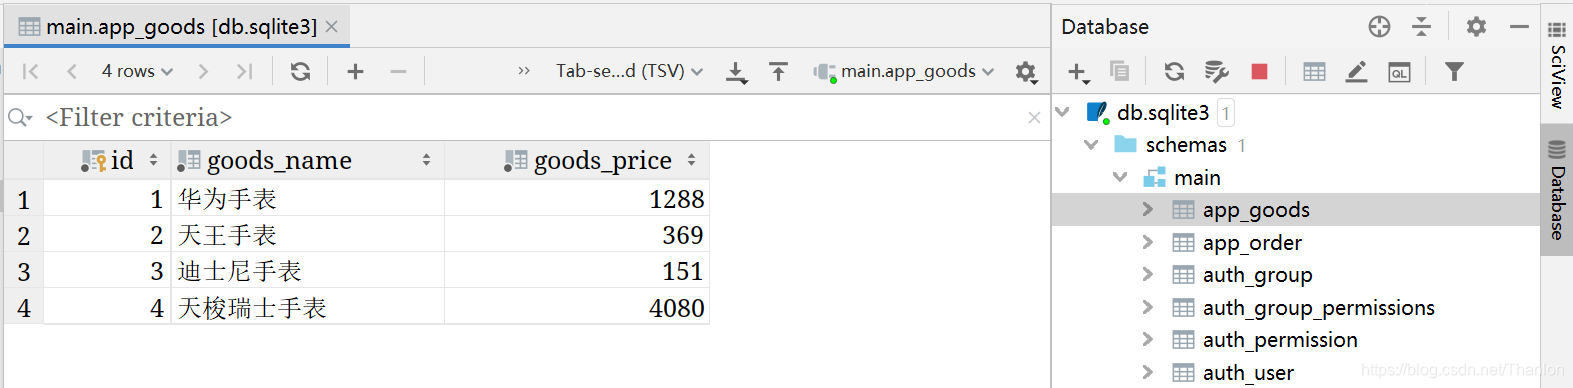
構建商品資訊頁面
urls.py:
from django.contrib import admin
from django.urls import path
from app import views

urlpatterns = [
    path('admin/', admin.site.urls),
    path('goods/', views.goods),
]views.py:
from django.shortcuts import render
from app import models

# Create your views here.
def goods(request):
    goods_list = models.Goods.objects.all()
    # print(goods_list)
    # <QuerySet [<Goods: Goods object (1)>, <Goods: Goods object (2)>, <Goods: Goods object (3)>, <Goods: Goods object (4)>]>
return render(request, 'goods.html', {'goods_list': goods_list})goods.html:
<!doctype html>
<html lang="en">
<head>
<meta charset="UTF-8">
<meta name="viewport"
content="width=device-width, user-scalable=no, initial-scale=1.0, maximum-scale=1.0, minimum-scale=1.0">
<meta http-equiv="X-UA-Compatible" content="ie=edge">
<title>商品資訊</title>
<link rel="stylesheet" href="https://cdn.jsdelivr.net/npm/[email protected]/dist/css/bootstrap.min.css"
integrity="sha384-BVYiiSIFeK1dGmJRAkycuHAHRg32OmUcww7on3RYdg4Va+PmSTsz/K68vbdEjh4u" crossorigin="anonymous">
</head>
<body>
<div class="container">
<div class="row" style="margin-top: 10px">
<h4 style="text-align: center;font-weight: bold">Django支付寶支付案例</h4>
</div>
<div class="row" style="margin-top: 10px">
<div class="col-md-4 col-md-offset-4">
<table class="table table-bordered">
{% for row in goods_list %}
<tr style="text-align: center">
<td>{{ row.id }}</td>
<td>{{ row.goods_name }}</td>
<td>{{ row.goods_price }}</td>
<td><a href="/purchase/{{ row.id }}">購買</a></td>
</tr>
{% endfor %}
</table>
</div>
</div>
</div>
<div class="container-fluid" style="color: #b2bcc5;margin-top: 20px;margin-bottom: 2px">
<div class="row">
<div class="col-md-12 text-center" style="padding: 40px">
Copyright © 2019-2020 藍色旗幟 版權所有
<a target="_blank_" href="http://www.miit.gov.cn/" style="color:#b2bcc5;">豫ICP備19014367號-1</a>
</div>
</div>
</div>
</body>
<script src="https://cdn.jsdelivr.net/npm/[email protected]/dist/js/bootstrap.min.js"
integrity="sha384-Tc5IQib027qvyjSMfHjOMaLkfuWVxZxUPnCJA7l2mCWNIpG9mGCD8wGNIcPD7Txa"
crossorigin="anonymous"></script>
<script src="https://cdn.jsdelivr.net/npm/[email protected]/dist/js/bootstrap.min.js"
integrity="sha384-Tc5IQib027qvyjSMfHjOMaLkfuWVxZxUPnCJA7l2mCWNIpG9mGCD8wGNIcPD7Txa"
crossorigin="anonymous"></script>
</html>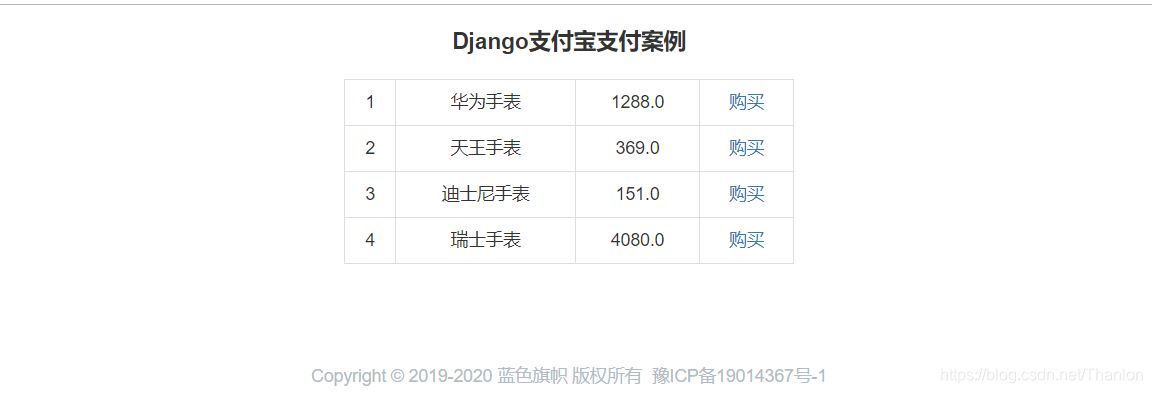
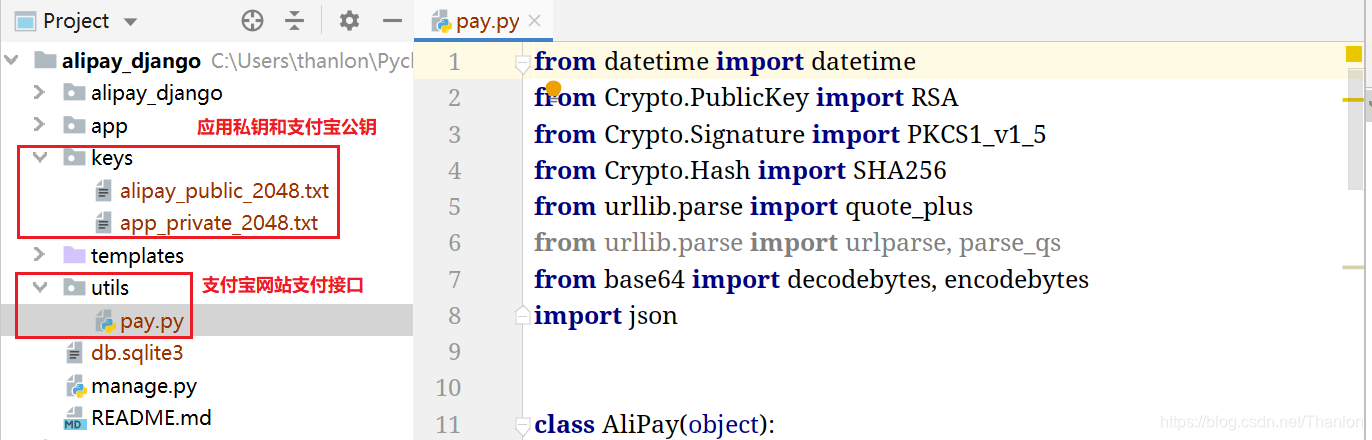
3. 訂單支付
① 把生成好的應用私鑰和支付寶公鑰以及支付寶網站支付介面pay.py也放在專案根目錄下,如下圖所示:
② 安裝pycryptodome模組
pip install pycryptodome,介面依賴於該加密模組。
③ 新增路由
urls.py:
from django.contrib import admin
from django.urls import path
from app import views

urlpatterns = [
    path('admin/', admin.site.urls),
    path('goods/', views.goods),
    path('purchase/<goods_id>/', views.purchase),
]
④ 編寫訂單支付邏輯
views.py:
from django.shortcuts import render, redirect
from app import models
import uuid
from utils.pay import AliPay
# Create your views here.
def goods(request):
goods_list = models.Goods.objects.all()
# print(goods_list)
# <QuerySet [<Goods: Goods object (1)>, <Goods: Goods object (2)>, <Goods: Goods object (3)>, <Goods: Goods object (4)>]>
return render(request, 'goods.html', {'goods_list': goods_list})
def purchase(request, goods_id):
'''
訂單支付
:param request:
:param goods_id:傳過來的商品id
:return:跳轉到支付寶支付頁面
'''
# 獲取商品資訊,因為向支付寶介面傳送請求的時候需要攜帶該商品相關資訊
obj_goods = models.Goods.objects.get(pk=goods_id) # pk就是商品的標識,等價於使用id
'''
生成訂單
'''
order_number = str(uuid.uuid4())
# print(order_number) # bd9ee7fe-aca5-449d-acd1-63bcd8e30cde
models.Order.objects.create(
order_number=order_number,
goods=obj_goods, # 或者goods_id=obj_goods.id
)
'''
跳轉到支付寶支付頁面
'''
# 例項化物件
alipay = AliPay(
appid='2016101200668044',
app_notify_url=' ', # 支付寶傳送支付狀態資訊的地址,支付寶會向這個地址傳送post請求,可以先不寫但是必須有內容(我這裡用的是空格)
return_url=' ', # 將使用者瀏覽器地址重定向回原來的地址,支付寶會向這個地址傳送get請求,可以先不寫但是必須有內容
alipay_public_key_path='keys/alipay_public_2048.txt', # 支付寶公鑰
app_private_key_path='keys/app_private_2048.txt', # 應用私鑰
debug=True, # 預設是True代表測試環境,False代表正式環境
)
# 定義請求地址傳入的引數
query_params = alipay.direct_pay(
subject=obj_goods.goods_name, # 商品的簡單描述
out_trade_no=order_number, # 商品訂單號
total_amount=obj_goods.goods_price, # 交易金額(單位是元,保留兩位小數)
)
# 需要跳轉到支付寶的支付頁面,所以需要生成跳轉的url
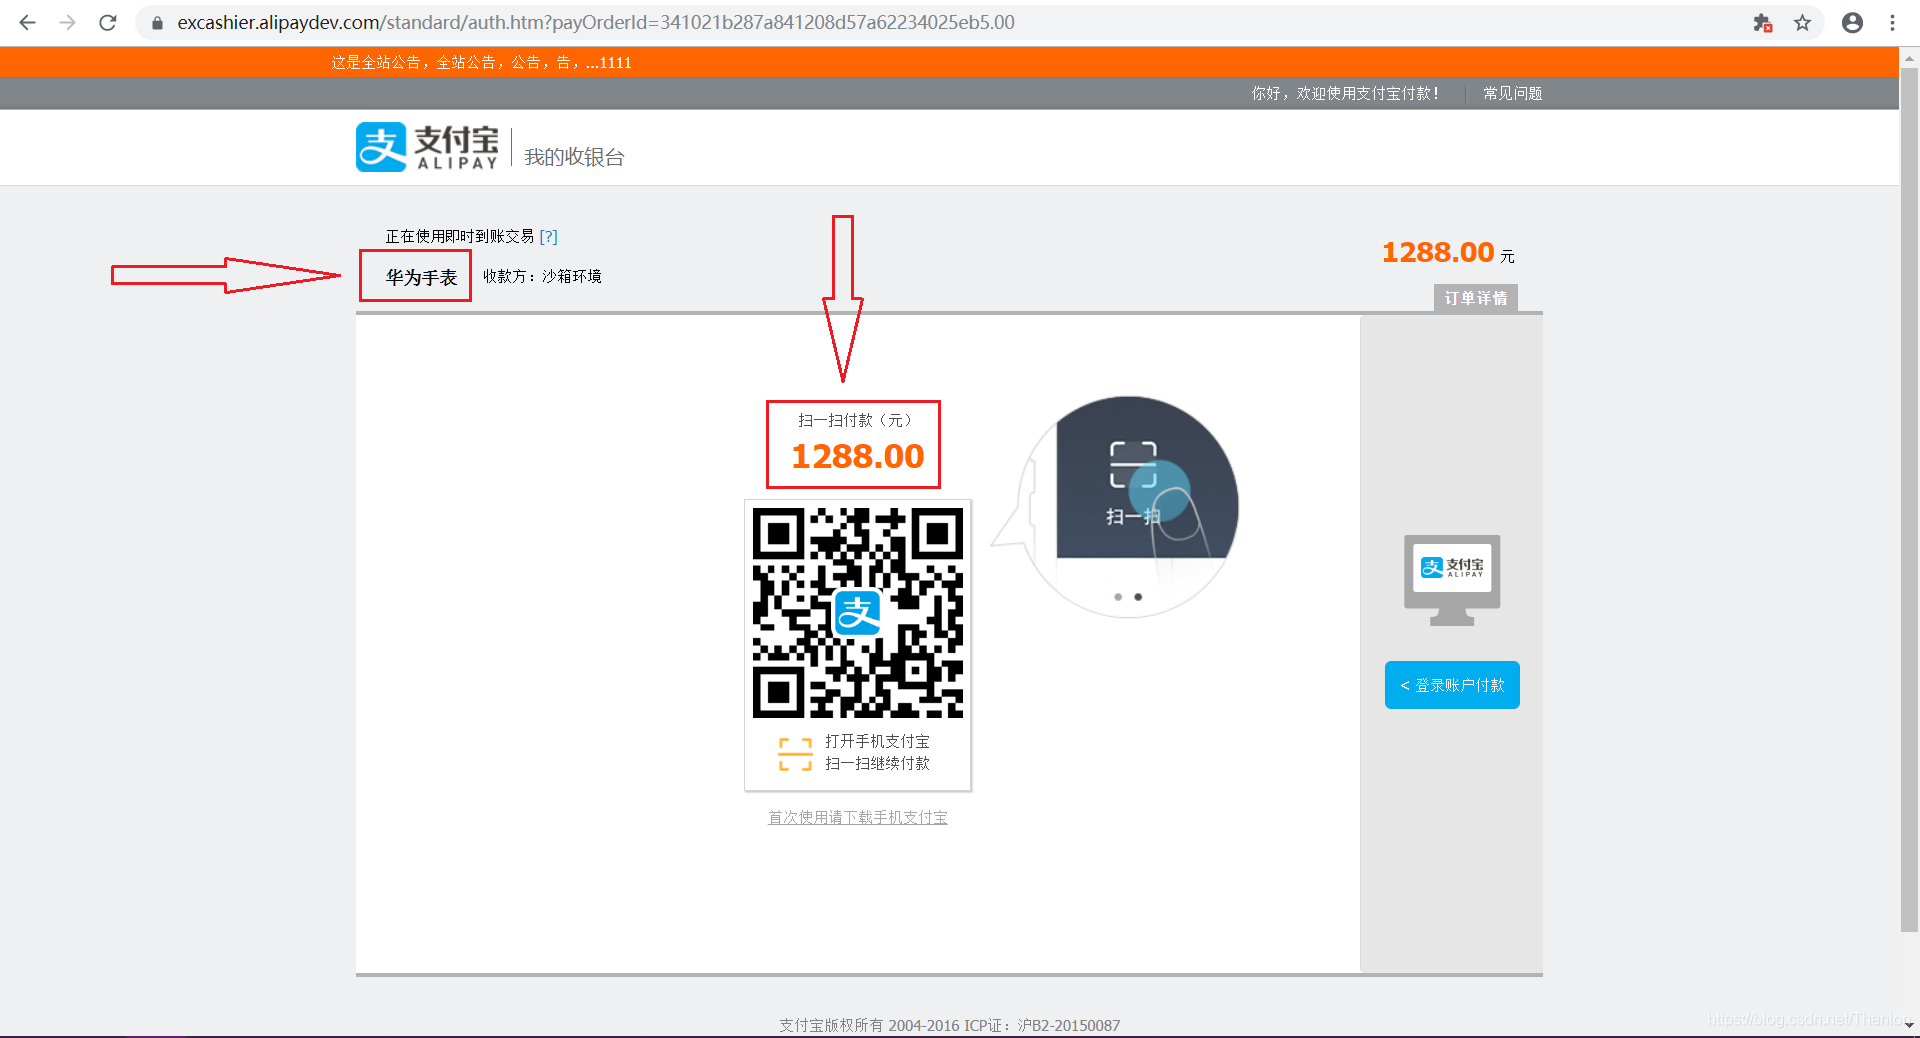
pay_url = 'https://openapi.alipaydev.com/gateway.do?{0}'.format(query_params)
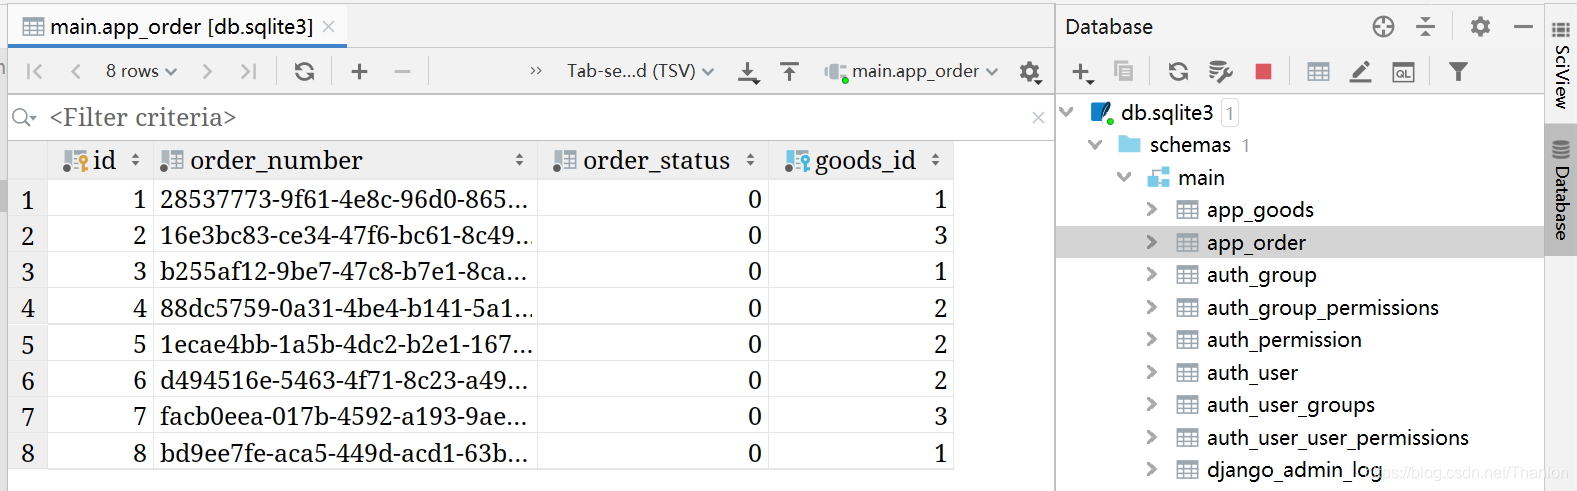
return redirect(pay_url)成功跳轉到支付頁面:
訂單表生成資料:
4. 訂單狀態的更新
① 編寫檢視函式show_msg來接收支付寶的傳送過來的get請求
支付成功後,支付寶向我們指定的地址傳送get請求,也就從支付寶回到我們自己的網站。我們需要根據請求附帶的資訊,如:
http://106.12.115.136:5000/show_msg/?charset=utf-8&out_trade_no=fc4252b0-b0a4-480a-bd83-aaaca3745378&method=alipay.trade.page.pay.return&total_amount=369.00&sign=Is%2FhB%2FmO2c64JerilFTYTwk%2BlR%2FHoCE1E5EOdzZ0DIotykMBuXB0023z0XpmsNq3kKutAF%2FbVusrsrdqUwPeRX%2F4nYphZOWHdrQUYVkY%2BsOdAJl1hfuVRySRBwYVTnbNJpQpnHJb9uQtFRcaktvgrGZKdd3gZCETf90l12JEsG7ishPgvsYIJVvI1VtSKTNvUvk3XxZoiBoyv5h3Wu0wENoEHS3HaHnI0hloTZB9rccW%2Bq7eyVj8dSKcOw51rti%2FBBNfmN%2BpLBTtXn4nwyQDmh%2BnTBVKy%2BY8ifai8iedwhX5I0l7mLfFRZvXf1C8F%2BsxJf4fT2%2Ft7czkJKiOwXBsPg%3D%3D&trade_no=2019092122001473661000497724&auth_app_id=2016101200668044&version=1.0&app_id=2016101200668044&sign_type=RSA2&seller_id=2088102179220884×tamp=2019-09-21+14%3A20%3A07來進行驗證,是否支付成功。下面是實現該功能的核心程式碼:
urls.py:(將路由新增到utls.py檔案中)
path('show_msg/', views.show_msg),views.py:
def show_msg(request):
    if request.method == 'GET':
        alipay = AliPay(
            appid="2016101200668044",  # APPID
            app_notify_url='http://127.0.0.1:8000/check_order/',
            return_url='http://127.0.0.1:8000/show_msg/',
            app_private_key_path='keys/app_private_2048.txt',  # 應用私鑰
            alipay_public_key_path='keys/alipay_public_2048.txt',  # 支付寶公鑰
            debug=True,  # 預設是False
        )
        params = request.GET.dict()  # 獲取請求攜帶的引數並轉換成字典型別
        print(
            request.GET)  # <QueryDict: {'charset': ['utf-8'], 'out_trade_no': ['04f09b6f-e792-4a1d-8dbc-c68f1d046622'], ……}
        print(params)  # {'charset': 'utf-8', 'out_trade_no': '04f09b6f-e792-4a1d-8dbc-c68f1d046622',……}
        sign = params.pop('sign', None)  # 獲取sign的值
        # 對sign引數進行驗證
        status = alipay.verify(params, sign)
        if status:
            return render(request, 'show_msg.html', {'msg': '支付成功'})
        else:
            return render(request, 'show_msg.html', {'msg': '支付失敗'})
    else:
return render(request, 'show_msg.html', {'msg': '只支援GET請求,不支援其它請求'})show_msg.html:
<!DOCTYPE html>
<html>
<head>
    <meta charset="UTF-8">
    <title>支付結果</title>
    <link rel="stylesheet" href="https://cdn.jsdelivr.net/npm/[email protected]/dist/css/bootstrap.min.css"
          integrity="sha384-BVYiiSIFeK1dGmJRAkycuHAHRg32OmUcww7on3RYdg4Va+PmSTsz/K68vbdEjh4u" crossorigin="anonymous">
</head>
<body>
<div class="container">
    <div class="row" style="margin-top: 30px">
        <div class="col-md-4 col-md-offset-4">
            <div class="panel panel-primary">
                <div class="panel-body text-center">{{ msg }}!</div>
            </div>
        </div>
    </div>
</div>
</body>
</html>
支付成功的截圖:

① 編寫檢視函式check_order來接收支付寶的傳送過來的POST請求,根據POST過來的請求體內容,判斷是否支付成功,如果支付成功,把訂單支付狀態改為已支付。
注意:在本地測試app_notify_url引數必須通過公網接收請求,支付寶只能向外網傳送POST請求,所以必須把專案執行在具有公網ip的伺服器上,第三部分【三. 支付專案部署】會論述到。這裡把檢視函式邏輯完成。
因為需要支援POST請求,所以需要修改配置檔案:
settings.py
…
MIDDLEWARE = [
    'django.middleware.security.SecurityMiddleware',
    'django.contrib.sessions.middleware.SessionMiddleware',
    'django.middleware.common.CommonMiddleware',
    # 'django.middleware.csrf.CsrfViewMiddleware', # 註釋掉這一行,就不會報CSRF cookie not set.)的錯誤
    'django.contrib.auth.middleware.AuthenticationMiddleware',
    'django.contrib.messages.middleware.MessageMiddleware',
    'django.middleware.clickjacking.XFrameOptionsMiddleware',
]
…views.py:(需要將所有的 app_notify_url 的值修改為公網地址)
def check_order(request):
    '''
    支付寶通知支付的結果資訊,如果支付成功可以用來修改訂單的狀態
    :param request:
    :return:
    '''
    if request.method == 'POST':
        alipay = AliPay(
            appid="2016101200668044",  # APPID
            app_notify_url='http://106.12.115.136:8000/check_order/',  # 支付寶會向這個地址傳送post請求
            return_url='http://127.0.0.1:8000/show_msg/',  # 支付寶會向這個地址傳送get請求
            app_private_key_path='keys/app_private_2048.txt',  # 應用私鑰
            alipay_public_key_path='keys/alipay_public_2048.txt',  # 支付寶公鑰
            debug=True,
        )
        # print('request.body:', request.body)  # 是位元組型別,b'gmt_create=2019-09-21+17%3A00%3A15&charset=utf-8&……
        body_str = request.body.decode('utf-8')  # 轉成字串
        # print('body_str:', body_str)
        from urllib.parse import parse_qs
        post_data = parse_qs(body_str)  # 根據&符號分割
        print(post_data)  # post_data是一個字串
        post_dict = {}
        for k, v in post_data.items():
            post_dict[k] = v[0]
        sign = post_dict.pop('sign', None)
        status = alipay.verify(post_dict, sign)
        if status:  # 支付成功
            out_trade_no = post_data['out_trade_no']
            models.Order.objects.filter(order_number=out_trade_no).update(order_status=1)
            return HttpResponse('success')  # 向支付寶返回success,表示接收到請求
        else:
            return HttpResponse('支付失敗')
    else:
        return HttpResponse('只支援POST請求')
5. 訂單檢視的生成
order_list.html:
<!doctype html>
<html lang="en">
<head>
<meta charset="UTF-8">
<meta name="viewport"
content="width=device-width, user-scalable=no, initial-scale=1.0, maximum-scale=1.0, minimum-scale=1.0">
<meta http-equiv="X-UA-Compatible" content="ie=edge">
<title>訂單資訊</title>
<link rel="stylesheet" href="https://cdn.jsdelivr.net/npm/[email protected]/dist/css/bootstrap.min.css"
integrity="sha384-BVYiiSIFeK1dGmJRAkycuHAHRg32OmUcww7on3RYdg4Va+PmSTsz/K68vbdEjh4u" crossorigin="anonymous">
</head>
<body>
<div class="container">
<div class="row" style="margin-top: 10px">
<h4 style="text-align: center;font-weight: bold">Django支付寶支付案例</h4>
</div>
<div class="row" style="margin-top: 10px">
<div class="col-md-8 col-md-offset-2">
<table class="table table-bordered">
<tr style="text-align: center">
<th style="text-align: center">訂單ID</th>
<th style="text-align: center">訂單號</th>
<th style="text-align: center">訂單狀態</th>
<th style="text-align: center">商品名稱</th>
<th style="text-align: center">商品價格</th>
</tr>
{% for row in order_obj %}
<tr style="text-align: center">
<td>{{ row.id }}</td>
<td>{{ row.order_number }}</td>
<td>{{ row.get_order_status_display }}</td>
<td>{{ row.goods.goods_name }}</td>
<td>{{ row.goods.goods_price }}</td>
</tr>
{% endfor %}
</table>
</div>
</div>
</div>
<div class="container-fluid" style="color: #b2bcc5;margin-top: 20px;margin-bottom: 2px">
<div class="row">
<div class="col-md-12 text-center" style="padding: 40px">
Copyright © 2019-2020 藍色旗幟 版權所有
<a target="_blank_" href="http://www.miit.gov.cn/" style="color:#b2bcc5;">豫ICP備19014367號-1</a>
</div>
</div>
</div>
</body>
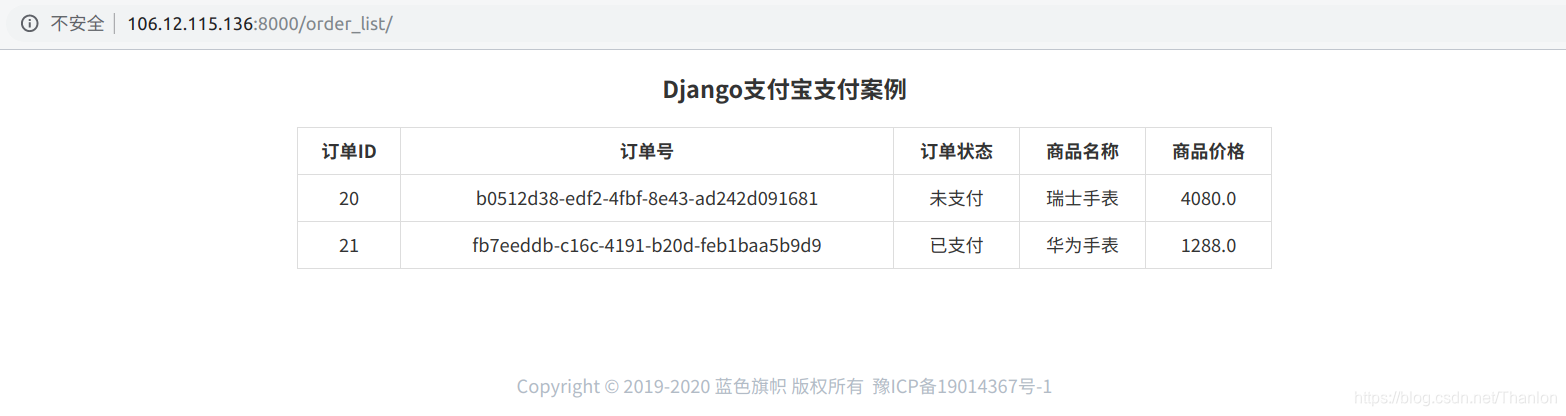
</html>views.py:(訂單列表部分邏輯程式碼)
def order_list(request):
    order_obj = models.Order.objects.all()
    return render(request, 'order_list.html', {'order_obj': order_obj})
截圖:
三. 支付專案的部署
1. 專案部署環境
- 系統:CentOS 7
- Python版本:python 3.7.3
Django版本:Django 2.2.5
2. 安裝python3
① 解決依賴關係
[root@instance-mtfsf05r ~]# yum update
[root@VM_39_157_centos ~]# yum install gcc patch libffi-devel python-devel zlib-devel bzip2-devel openssl-devel ncurses-devel sqlite-devel readline-devel tk-devel gdbm-devel db4-devel libpcap-devel xz-devel -y
② 下載python3的原始碼
[root@VM_39_157_centos ~]# wget https://www.python.org/ftp/python/3.7.3/Python-3.7.3.tgz,或
[root@instance-mtfsf05r ~]# wget https://www.python.org/ftp/python/3.7.4/Python-3.7.4.tar.xz
③ 解壓縮原始碼
[root@instance-mtfsf05r ~]# tar zxvf Python-3.7.3.tgz -C ./或
[root@instance-mtfsf05r ~]# xz -d Python-3.4.7.tar.xz
[root@instance-mtfsf05r ~]# tar -xf Python-3.4.7.tar
④ 切換進入python原始碼目錄
[root@instance-mtfsf05r ~]# cd Python-3.7.3/
⑤ 釋放編譯檔案
[root@instance-mtfsf05r Python-3.7.3]# ./configure --prefix=/usr/local/python373
執行完這條語句後還不會生成/usr/local/python373這個資料夾。./configure是用來檢測安裝平題啊的目標特徵。比如,它會檢測你是不是有CC或GCC,它是一個sheel指令碼。configure指令碼執行後,會生成一個Makefile檔案。
./configure:是當前資料夾下面的configure檔案(綠色的檔案表示可執行檔案)
./configure --prefix=/usr/local:釋放指令碼檔案,指明安裝路徑。
執行後會檢查依賴問題,如果依賴沒解決好,就會有各種報錯。
⑥ 編譯與安裝
[root@instance-mtfsf05r Python-3.7.3]# make
[root@instance-mtfsf05r Python-3.7.3]# make install
這兩步完成後才會建立/usr/local/python373這個資料夾。make是用來編譯的,它從Makefile中讀取指令,然後編譯。make install是用來安裝的,它也會從Makefile中讀取指令,安裝到指定的位置。
這兩句也可以一句執行:make && make install,表示make執行成功之後,才會執行make install命令。make命令執行的時候,就會調Makefile開始編譯。
⑦ 配置軟連結,快捷啟動python3和pip3(如果選擇配置軟連結,請忽略⑧⑨ )
[root@instance-mtfsf05r bin]# ln -s /usr/local/python373/bin/python3 /usr/bin/python3
[root@instance-mtfsf05r bin]# ln -s /usr/local/python373/bin/pip3 /usr/bin/pip3
[root@instance-mtfsf05r ~]# pip3 install --upgrade pip
pip3 install --upgrade pip的意思是:通過pip3 install 這個命令去升級pip
如果想要直接執行python就使用python3可以執行下面的操作:
[root@instance-mtfsf05r ~]# cd /usr/bin
[root@instance-mtfsf05r bin]# mv python python.backup
[root@instance-mtfsf05r bin]# ln -s /usr/local/bin/python3.7 /usr/bin/python
⑧ 配置系統環境變數,加入python3的目錄(與⑦ 任選其一種方式)
- 第一種方式:PATH=/usr/local/sbin:/usr/local/bin:/usr/sbin:/usr/bin:/root/bin:/usr/local/python3/bin/
第二種方式:PATH=$PATH:/usr/local/python3/bin/
配置環境變數需要謹慎,如果配錯了,其它命令也會丟失。
⑨ 寫入個人配置檔案,永久生效
- 編輯配置檔案:[root@instance-mtfsf05r bin]# vim /etc/profile
- 將PATH寫入到配置檔案中:PATH=$PATH:/usr/local/python3/bin/(可以放到最後一行)
讀取配置檔案,生效配置:[root@instance-mtfsf05r bin]# source /etc/profile
2. 安裝django
[root@instance-mtfsf05r ~]# pip3 install django
注意:專案依賴的第三方庫也都要安裝到系統中。
3. 啟動支付寶專案
啟動專案之前需要修改django配置檔案(settings.py)修改為所有主機都可以訪問,這是為了防止專案不能被訪問:
ALLOW_HOST = ['*'][root@instance-mtfsf05r ~]# cd alipay_django/
[root@instance-mtfsf05r alipay_django]# python3 manage.py runserver 0.0.0.0:5000
網頁訪問不到的解決方案:1. iptables -F:清空規則;2. setenforce 0:把兩個防火牆都關閉。
可能用到的linux命令:
- 查詢被佔用的埠: netstat -tln | grep 8000
- 檢視被佔用埠的PID: lsof -i:8000
- kill掉該程序:kill -s -9 32290

四. 支付案例的總結
1. 案例的下載
github:https://github.com/ThanlonSmith/alipay_django
2. 伺服器宕機問題(面試)
使用者支付完成後,支付寶剛剛返回支付完成的資訊時,但伺服器卻宕機了。要知道這個時候,我們系統的訂單支付狀態還沒更新呢,該如何解決?其實不用過多擔心的,實際上如果支付寶沒有收到返回結果,會不時間隔一段時間在24小時之內不停地向我們的伺服器傳送請求。如果伺服器在24小時之內執行起來了,還是可以更新我們的訂單支付狀態的。但是,如果超過24小時,就只能自己修改站內的訂單狀態資訊了。還有,可以在程式程式碼中看到有這樣一行程式碼 return HttpResponse('success') ,這其實再告訴支付寶,我們網站已經收到資訊,不用再發請求了,這是支付寶的一種檢測機