
SpringBoot系列:Spring Boot使用模板引擎FreeMarker
一、Java模板引擎
模板引擎(這裡特指用於Web開發的模板引擎)是為了使使用者介面與業務資料(內容)分離而產生的,它可以生成特定格式的文件,用於網站的模板引擎就會生成一個標準的HTML文件。
在java中,主要的模板引擎有JSP、Thymeleaf、FreeMarker、
Velocity等。
雖然隨著前後端分離的崛起和流行,模板引擎已遭受到冷落,但不少舊專案依然使用java的模板引擎渲染介面,而偶爾自己寫一些練手專案,使用模板引擎也比起前後端分離要來的快速。
本系列會分別講解SpringBoot怎麼整合JSP、Thymeleaf和FreeMarker,至於Velocity,高版本的SpringBoot已經不支援Velocity了,這裡也就不進行講解了。
而這一篇,主要講解Spring Boot如何整合FreeMarker。
一、Spring Boot整合FreeMarker
首先我們要引入依賴,除了核心的web依賴外,只需引入freemarker的statrer即可。
<dependency>
    <groupId>org.springframework.boot</groupId>
    <artifactId>spring-boot-starter-web</artifactId>
</dependency>

<!--freemarker依賴-->
<dependency>
    <groupId>org.springframework.boot</groupId>
    <artifactId>spring-boot-starter-freemarker</artifactId>
</dependency>
然後就是配置檔案了。主要配置spring.freemarker節點下的檢視檔案目錄template-loader-path以及檔案字尾suffix,如果是本地開發,cache可以設定為false關閉快取,避免修改檔案後需要重新啟動服務。
server:
  port: 10900

spring:
  profiles:
    active: dev
  freemarker:
    enabled: true #是否啟用freemarker
    template-loader-path: classpath:/templates/ #設定模板的載入路徑,多個以逗號分隔
    suffix: .ftl #設定模板的字尾
    content-type: text/html
    check-template-location: true #是否檢查模板位置是否存在
    cache: false #是否啟用模板快取
    charset: UTF-8 #模板編碼
    #一些常用配置
    allow-request-override: false #是否允許HttpServletRequest屬性覆蓋(隱藏)控制器生成的同名模型屬性
    allow-session-override: false #是否允許HttpSession屬性覆蓋(隱藏)控制器生成的同名模型屬性
    expose-request-attributes: false #設定所有request的屬性在merge到模板的時候,是否要都新增到model中
    expose-session-attributes: false #是否在merge模板的時候,將HttpSession屬性都新增到model中
    expose-spring-macro-helpers: true #設定是否以springMacroRequestContext的形式暴露RequestContext給Spring’s macro library使用
    prefer-file-system-access: true #是否優先從檔案系統載入template,以支援熱載入,預設為true
然後resoucres目錄下新建templates目錄,分別新建了hello.ftl和mv.ftl檔案。
<h3>hello freemarker</h3><!DOCTYPE html>
<html lang="en">
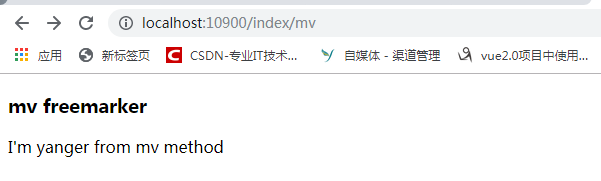
<h3>mv freemarker</h3>
<span>I'm ${name} from mv method</span>
</html>這裡主要講解如何整合FreeMarker,不對FreeMarker語法做過多的講解,所以僅僅提供了兩個簡單的html檔案作為演示。
接著再建立Controller類路由頁面,該類十分簡單,跳轉hello頁面,以及攜帶name=imyang跳轉mv頁面。
@Controller
@RequestMapping("index")
public class IndexApi {

    @RequestMapping("/hello")
    public String hello(){
        return "hello";
    }

    @RequestMapping("/mv")
    public ModelAndView mv(){
        ModelAndView mv = new ModelAndView("mv");
        mv.addObject("name","yanger");
        return mv;
    }

}
啟動專案,分別訪問http://localhost:10900/index/hello和http://localhost:10900/index/mv,可以看到已經可以展示頁面資訊了。
原始碼地址:https://github.com/imyanger/springboot-project/tree/master/p19-springboot-freemar