
【10分鐘學Spring】:@Profile、@Conditional實現條件化裝配
根據不同的環境來裝配不同的bean
企業級開發中,我們一般有多種環境,比如開發環境、測試環境、UAT環境和生產環境。而系統中有些配置是和環境強相關的,比如資料庫相關的配置,與其他外部系統的整合等。
如何才能實現一個部署包適用於多種環境呢?
Spring給我們提供了一種解決方案,這便是條件化裝配bean的機制。最重要的是這種機制是在執行時決定該注入適用於哪個環境的bean物件,不需要重新編譯構建。
下面使用Spring的profile機制實現dataSource物件的條件化裝配。
1、給出開發環境、測試環境、生產環境dataSource的不同實現類
說明:此處只為演示條件化裝配bean,不做真實資料來源物件模擬。
public interface DataSource {
    void show();
}

public class DevDataSource implements DataSource{

    public DevDataSource(){
        show();
    }
    public void show() {
        System.out.println("開發環境資料來源物件");
    }
}

public class TestDataSource implements DataSource{

    public TestDataSource() {
        show();
    }

    public void show() {
        System.out.println("測試環境資料來源物件");
    }
}

public class ProDataSource implements DataSource{

    public ProDataSource() {
        show();
    }

    public void show() {
        System.out.println("生產環境資料來源物件");
    }
}
2、使用profile配置條件化bean
其實profile的原理就是將不同的bean定義繫結到一個或多個profile之中,在將應用部署到不同的環境時,確保對應的profile處於啟用狀態即可。
這裡我們使用JavaConfig的方式配置profile bean
@Configuration
public class DataSourceConfig {

    @Bean
    @Profile("dev")
    public DataSource devDataSource(){
        return new DevDataSource();
    }

    @Bean
    @Profile("test")
    public DataSource testDataSource(){
        return new TestDataSource();
    }

    @Bean
    @Profile("pro")
    public DataSource proDataSource(){
        return new ProDataSource();
    }
}
可以看到我們使用了@Profile註解,將不同環境的bean繫結到了不同的profile中。
3、啟用profile
只要上面的兩步還不行,我們還必須啟用profile,這樣Spring會依據啟用的哪個profile,來建立並裝配對應的bean物件。
啟用profile需要兩個屬性。
spring.profiles.active
spring.profiles.default
可以在web.xml中配置Web應用的上下文引數,來啟用profile屬性。比如在web.xml中增加如下配置來啟用dev的profile:
    <context-param>
        <param-name>spring.profiles.active</param-name>
        <param-value>dev</param-value>
    </context-param>
4、測試條件化裝配
使用@ActiveProfiles註解在測試類中啟用指定profile。
@RunWith(SpringJUnit4ClassRunner.class)
@ContextConfiguration(classes = {DataSourceConfig.class})
@ActiveProfiles("dev")
public class TestConditionDataSource {

    @Autowired
    private DataSource dataSource;

    @Test
    public void testDataSource(){
        Assert.assertNotNull(dataSource);
    }

}
輸出:
開發環境資料來源物件我們profile換成生產環境的pro試下,
@RunWith(SpringJUnit4ClassRunner.class)
@ContextConfiguration(classes = {DataSourceConfig.class})
@ActiveProfiles("pro")
public class TestConditionDataSource {

    @Autowired
    private DataSource dataSource;

    @Test
    public void testDataSource(){
        Assert.assertNotNull(dataSource);
    }

}
輸出:
生產環境資料來源物件通過spring的profile機制,我們實現了不同環境dataSource資料來源物件的條件化裝配。比較簡單,就兩步:1、使用@Profile註解為不同的bean配置profile(當然這裡也可以是xml的方式),2、根據不同環境啟用不同的profile。
使用@Conditional註解實現條件化的bean
Spring 4.0引入的新註解@Conditional註解,它可以用到帶有@Bean註解的方法上,如果給定的條件計算結果為true,就會建立這個bean,否則不建立。
1、我們建立一個helloWorld物件
public class HelloWorld {

    public void sayHello(){
        System.out.println("conditional 裝配helloworld");
    }
}
2、建立配置類
在該配置類中我們首先使用了@PropertySource註解載入了屬性檔案hello.properties,其次可以看到在helloWorld的bean配置中,除了@Bean註解外,多了一個@Conditional註解,不錯,@Conditional註解是我們實現條件化裝配bean的核心註解。
@Conditional註解中有一個HelloWorldConditional類,該類定義了我們建立該bean物件的條件。
@Configuration
@PropertySource("classpath:hello.properties")
public class HelloWorldConfig {

    @Bean
    @Conditional(HelloWorldConditional.class)
    public HelloWorld helloWorld(){
        return new HelloWorld();
    }
}
3、建立條件類HelloWorldConditional,需要實現Condition介面。
實現了Condition介面,重寫了matches方法,在該方法中我們檢測了環境變數中是否有hello屬性,如果有就建立。沒有則忽略。
注意:hello.properties中屬性會儲存到spring的Environment物件中,因此我們可以檢測到其中的屬性是否存在。
public class HelloWorldConditional implements Condition {
    public boolean matches(ConditionContext conditionContext, AnnotatedTypeMetadata annotatedTypeMetadata) {
        return conditionContext.getEnvironment().containsProperty("hello");
    }
}
4、測試條件裝配
public class HelloWorldConditionTest {
    public static void main(String[] args) {
        ApplicationContext applicationContext = new AnnotationConfigApplicationContext(HelloWorldConfig.class);
        HelloWorld helloWorld = applicationContext.getBean("helloWorld",HelloWorld.class);
        helloWorld.sayHello();
    }
}
開始,我們在hello.properties中增加一條屬性,
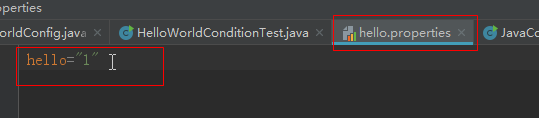
執行測試示例,會輸出:
conditional 裝配helloworld說明此時,bean已成功裝配。
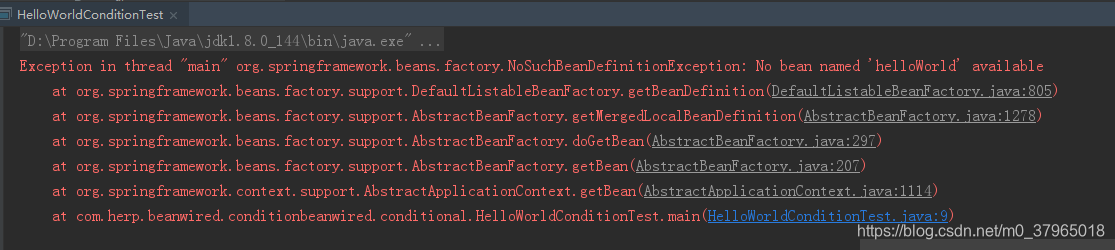
如果我們註釋掉hello.properties的這行屬性。再次執行示例,則會提示bean不存在。

提示沒有“helloWorld”的bean物件,說明了條件不滿足不會建立bean物件。
總結
Spring條件化裝配bean的兩種方式,第一種是使用profile機制,在bean的配置類中使用@profile註解,標識哪些bean對應哪個profile配置,然後在web.xml或Servlet啟動引數中配置啟用哪個profile來實現條件裝配;第二種是使用@Conditional註解,在帶有@Bean註解的方法上增加@Conditional註解,在註解屬性值中提供一個實現了Condition介面的類(該類會重寫matches方法,定義具體的建立條件)。<完>
