F版本SpringCloud 4—Eureka註冊中心開發和客戶端開發
阿新 • • 發佈:2020-03-29

> 原始碼地址:https://gitee.com/bingqilinpeishenme/Java-Tutorials
## 前言
通過前三篇文章,用大白話介紹了微服務和SpringCloud以及服務治理相關的概念,從這篇開始SpringCloud程式碼的開發。
## SpringCloud 專案環境搭建
> **SpringCloud所有的demo都會採用 多模組開發 的方式**,通過父專案約束整個專案所有Module的版本,如果你不知道什麼是 多模組開發,請閱讀我的文章:SpringBoot 多模組開發 https://mp.weixin.qq.com/s/CDWnG0wr6hk6TvDYIELIaQ
>
### 建立父專案「約束版本」
> 父專案最大的作用就是約束版本,所有的步驟請嚴格按照教程進行,會有全面的截圖
>
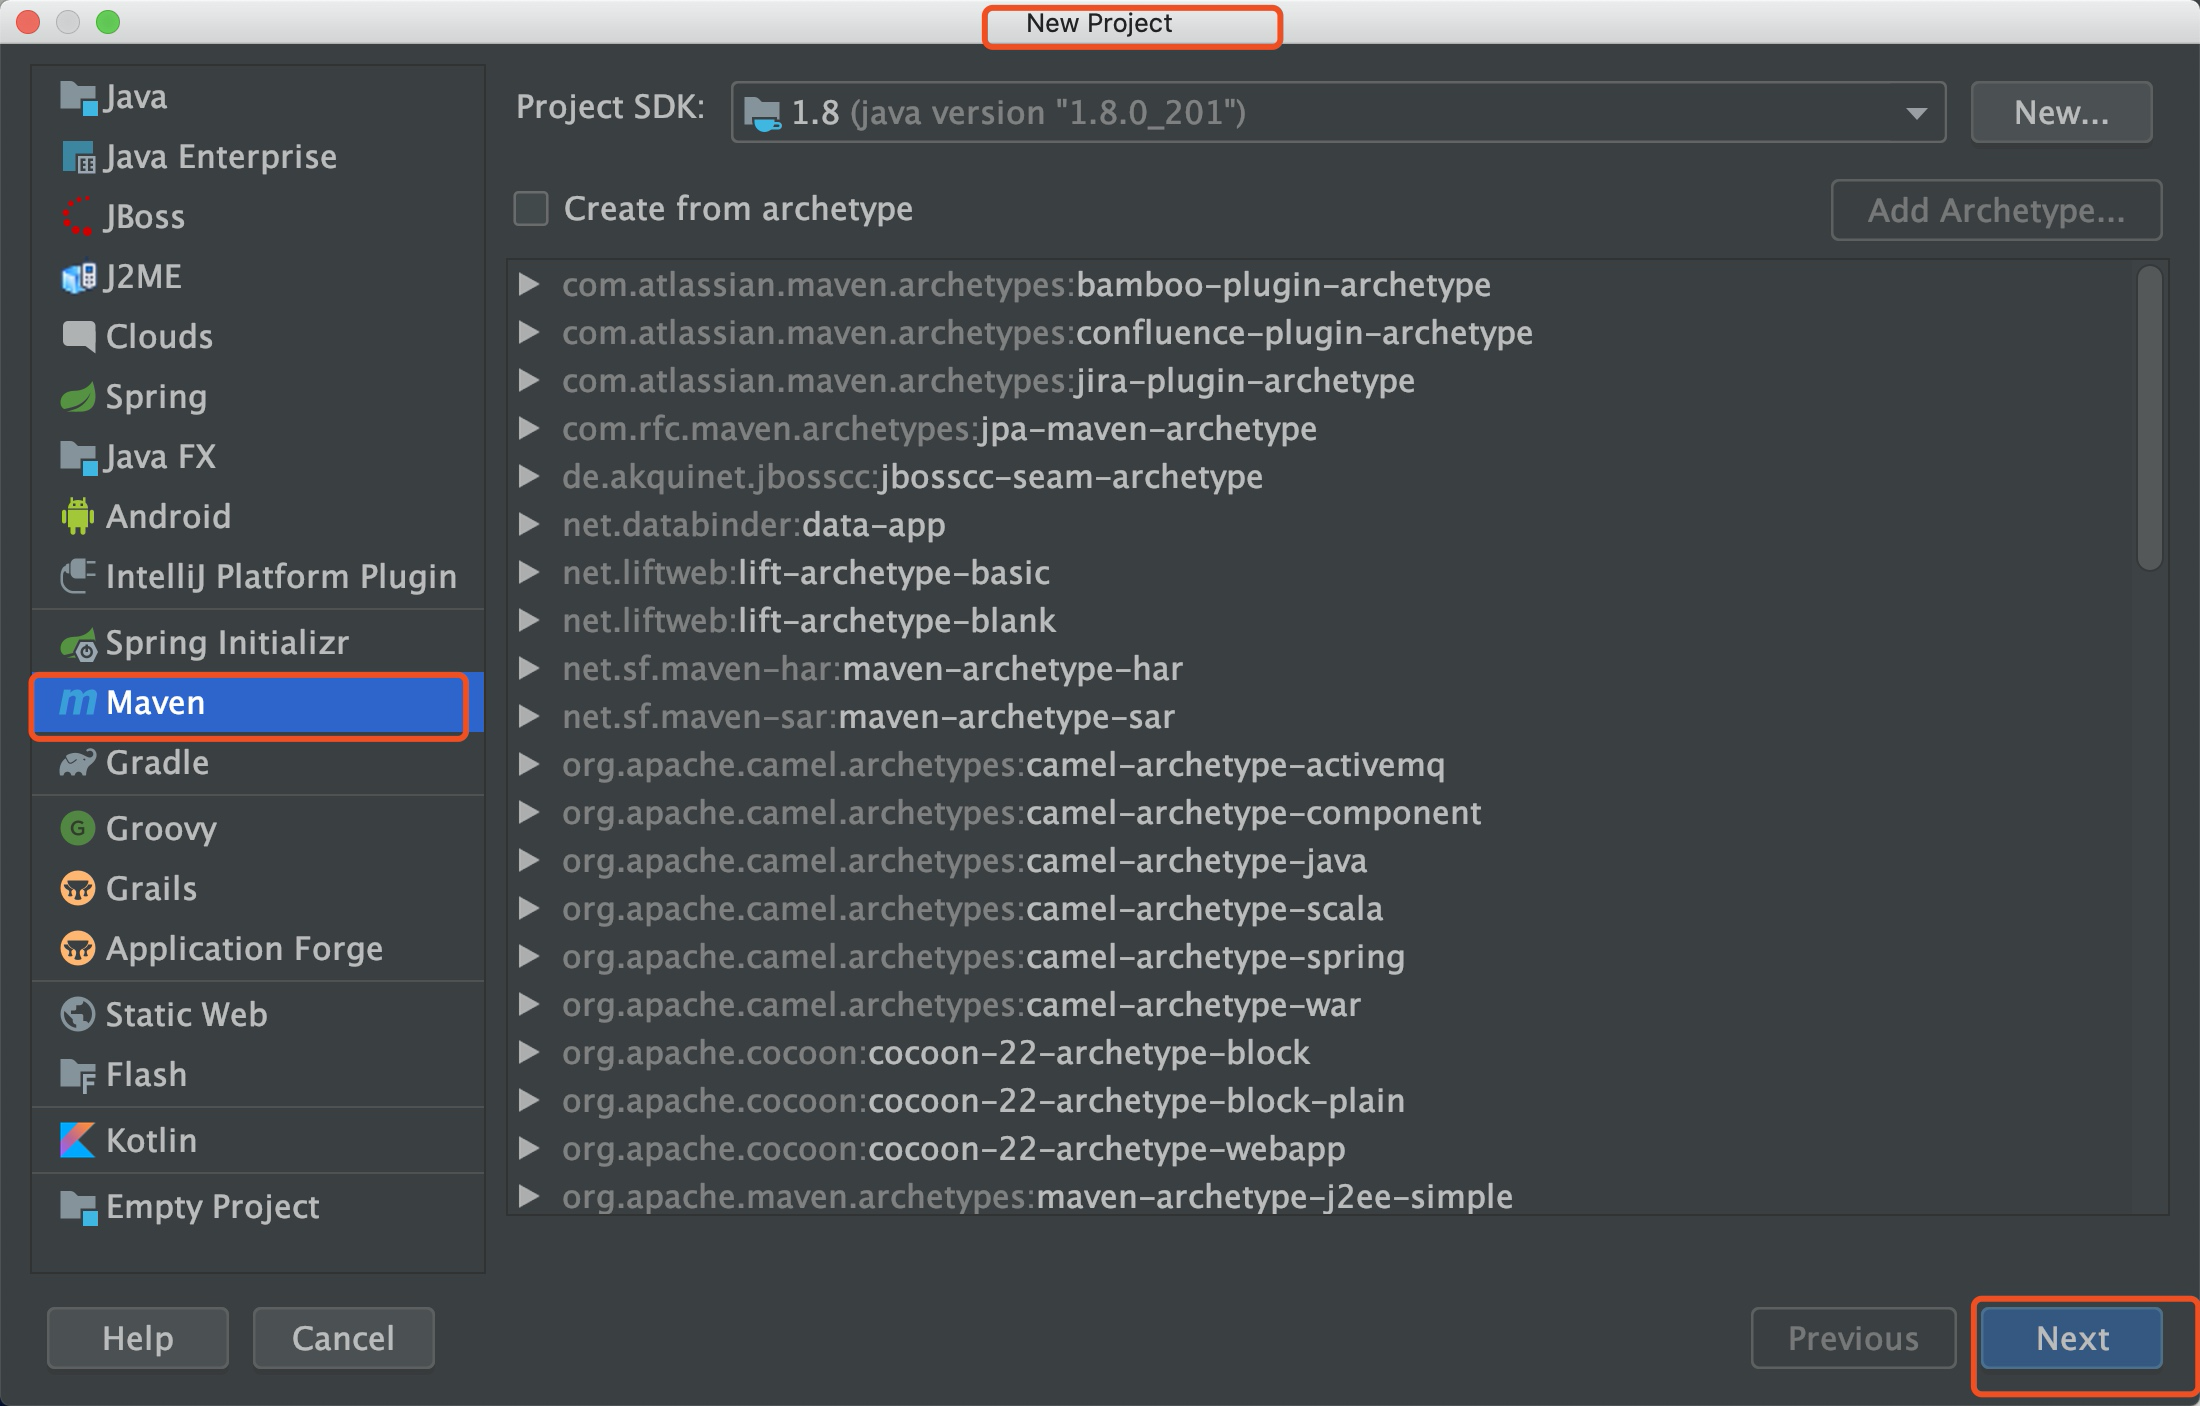
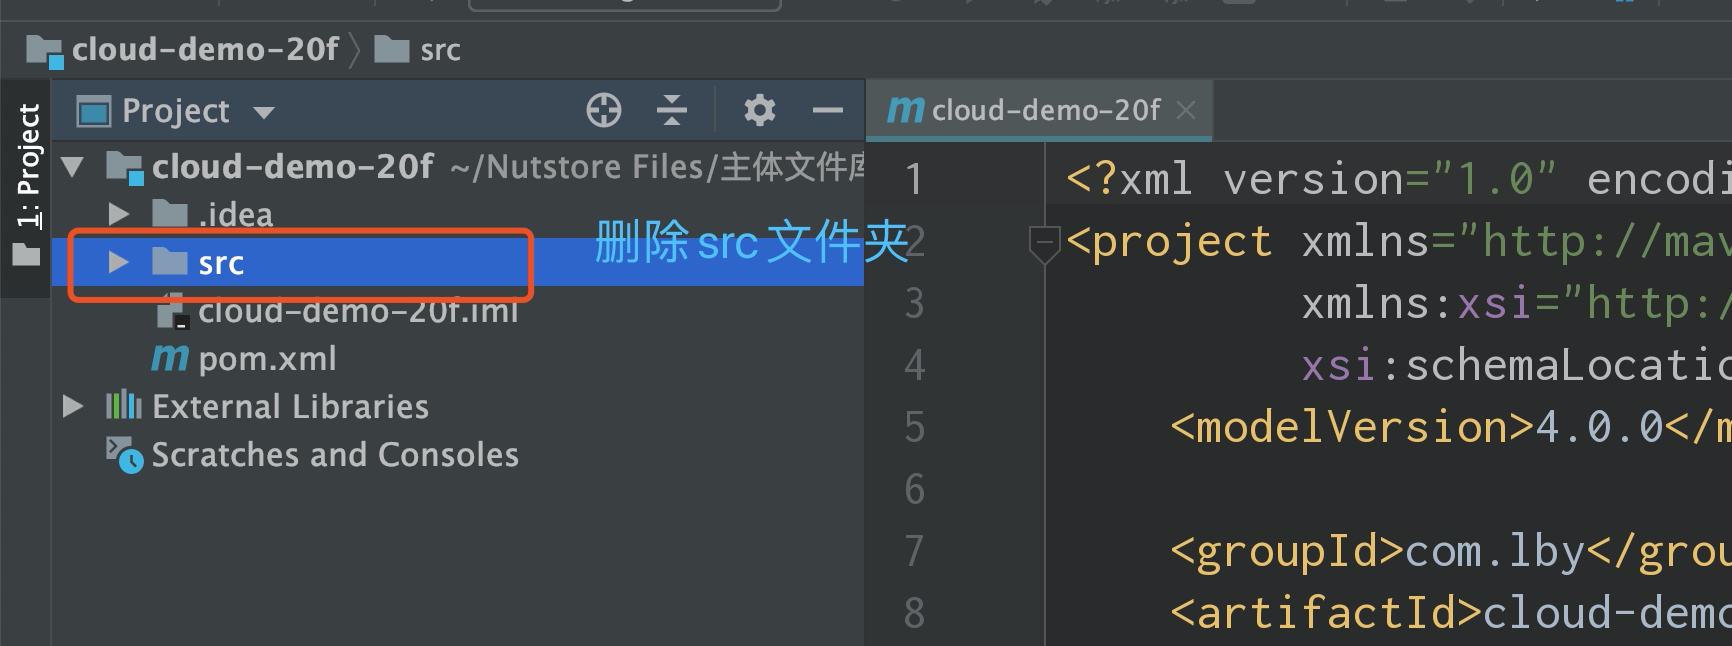
**1.在IDEA中建立一個maven專案(project)**

**2.修改pom檔案**
SpringCloud版本選擇:Finchley.SR2,SpringBoot版本選擇:2.0.3.RELEASE
pom檔案如下:
```
```
## Eureka註冊中心開發「單機版」
**1.基於Project建立一個新的Module**

至於骨架,不選擇任何骨架,maven還是Spring Initializr主要看個人習慣,我選擇maven。


**2.修改eureka-server-8801專案的pom檔案**
> 觀察pom檔案可以發現,eureka-server-8801專案已經自動繼承了父專案
> 
註冊中心的完整pom配置:
```
```
**3.建立SpringBoot的啟動類,添加註解**
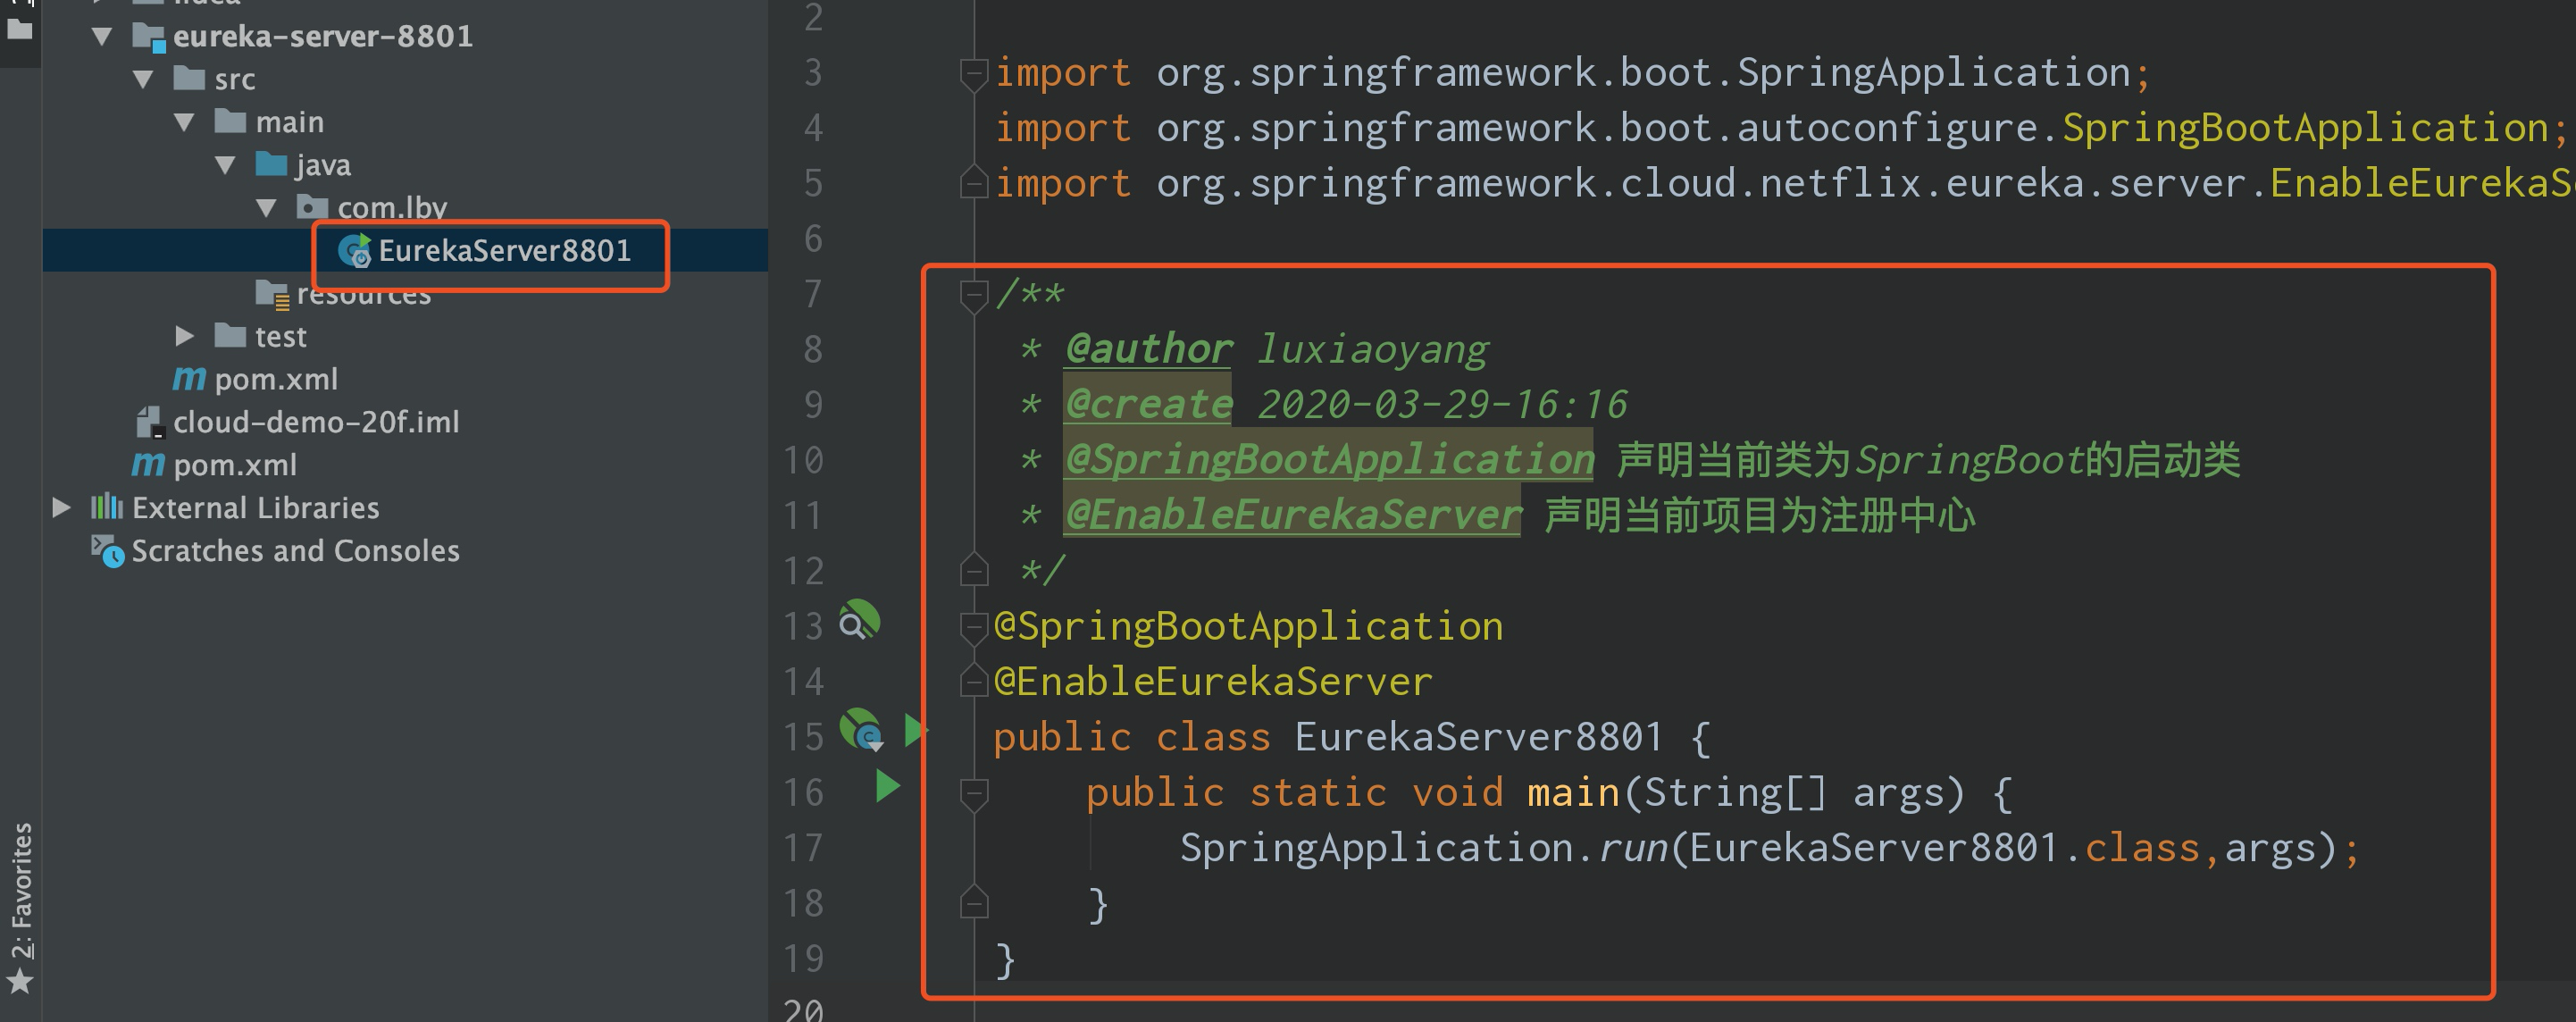
程式碼如下:
```
package com.lby;
import org.springframework.boot.SpringApplication;
import org.springframework.boot.autoconfigure.SpringBootApplication;
import org.springframework.cloud.netflix.eureka.server.EnableEurekaServer;
/**
* @author luxiaoyang
* @create 2020-03-29-16:16
* @SpringBootApplication 聲明當前類為SpringBoot的啟動類
* @EnableEurekaServer 聲明當前專案為註冊中心
*/
@SpringBootApplication
@EnableEurekaServer
public class EurekaServer8801 {
public static void main(String[] args) {
SpringApplication.run(EurekaServer8801.class,args);
}
}
```
**4.建立配置檔案,寫入註冊中心的配置**
```
server:
port: 8801
eureka:
client:
# 在預設設定下,該服務註冊中心也會將自己作為客戶端來嘗試註冊它自己,所以我們需要禁用它的客戶端註冊行為
# 因為當前服務就是註冊中心 不需要向任何人註冊
# eureka.client. register-with-eureka:由於該應用為註冊中心,所以設定為false,代表不向註冊中心註冊自己
registerWithEureka: false
# eureka. client . fetch-registry:由於註冊中心的職責就是維護服務例項,它並不需要去檢索服務,所以也設定為false。
# 不主動發現別人
fetchRegistry: false
# 宣告註冊中心的地址
serviceUrl:
defaultZone: http://localhost:8801/eureka/
```
通過以上四步 就完成註冊中心的搭建
**5.啟動專案,訪問http://localhost:8801可以訪問註冊中心的管理頁面**
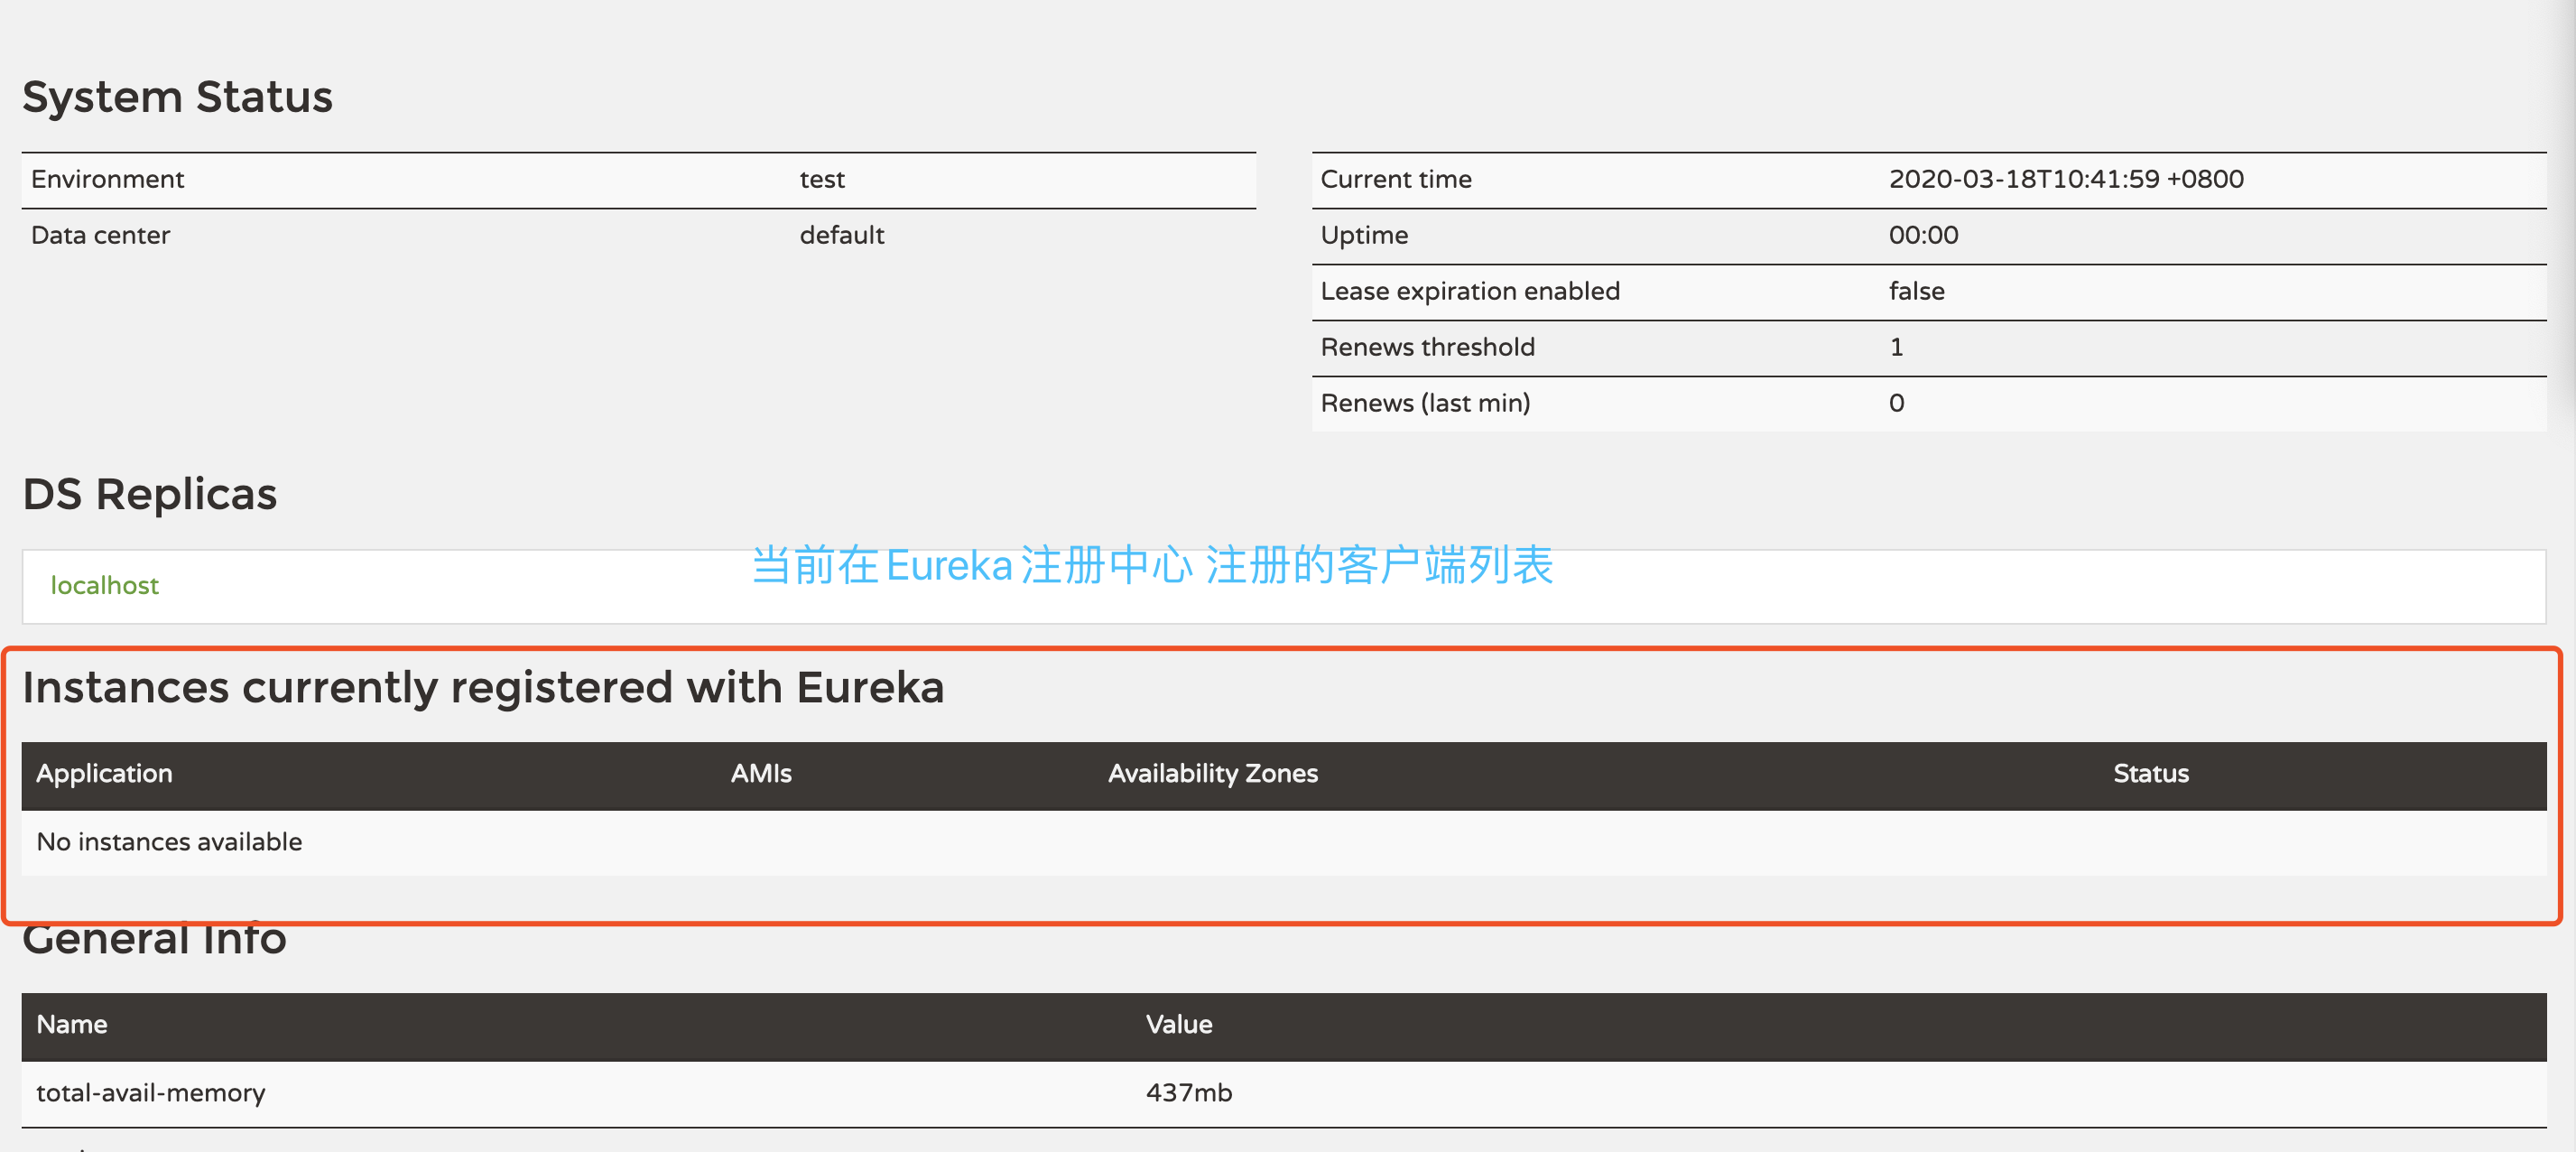
No application available 目前沒有客戶端註冊到註冊中心
## Eureka客戶端開發
不用關閉註冊中心,接下來建立一個客戶端,讓客戶端註冊到註冊中心上
> 建立客戶端的步驟和註冊中心類似
> 1. 建立專案結構
> 2. 修改pom
> 3. 修改啟動類
> 4. 修改配置檔案
>
**1.建立客戶端專案 eureka-client-8803**


**2.修改pom檔案,匯入依賴**
```
```
**3.建立啟動類**
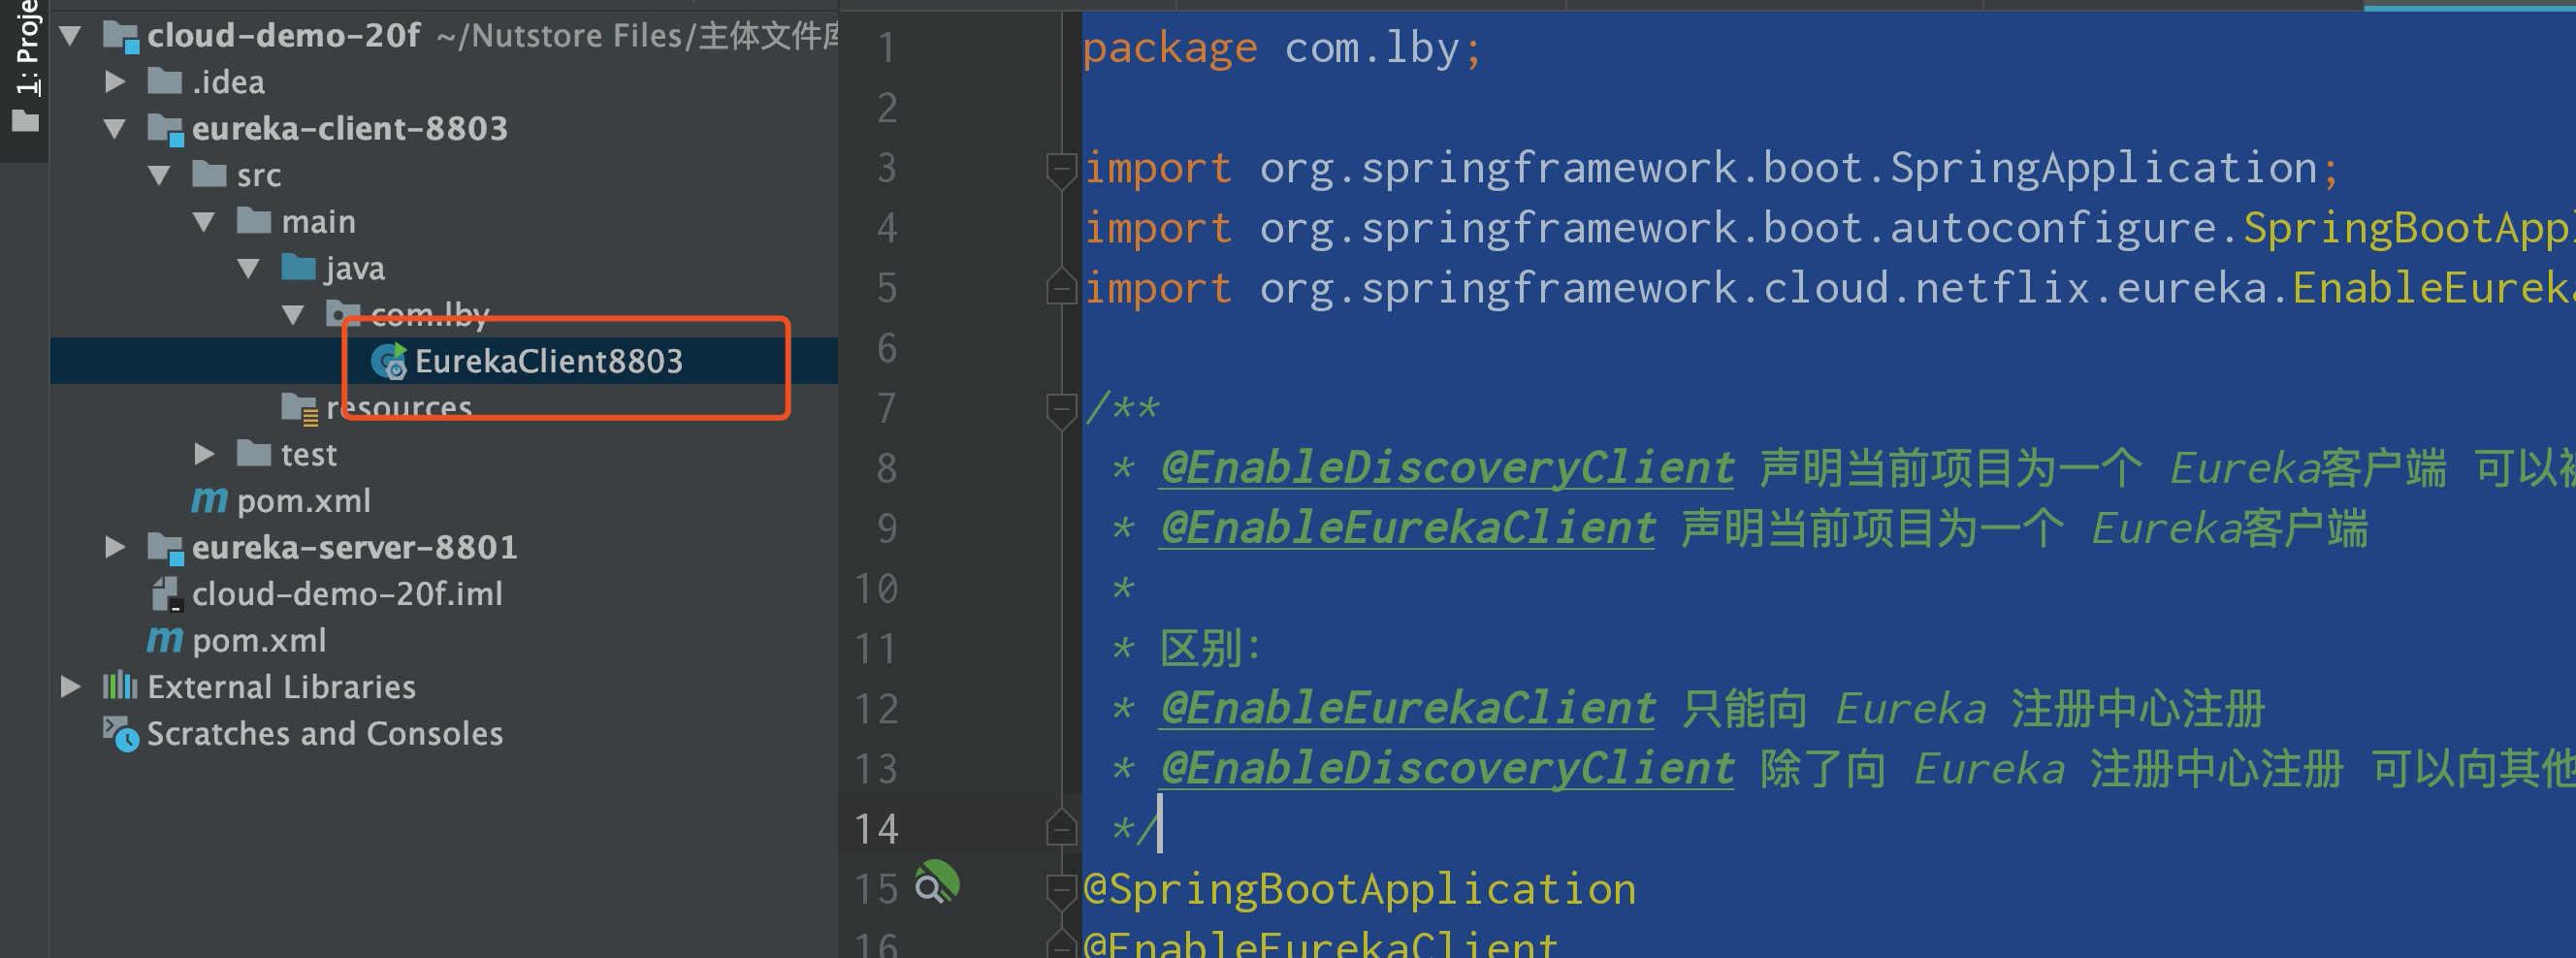
```
package com.lby;
import org.springframework.boot.SpringApplication;
import org.springframework.boot.autoconfigure.SpringBootApplication;
import org.springframework.cloud.netflix.eureka.EnableEurekaClient;
/**
* @EnableDiscoveryClient 聲明當前專案為一個 Eureka客戶端 可以被發現的客戶端
* @EnableEurekaClient 聲明當前專案為一個 Eureka客戶端
*
* 區別:
* @EnableEurekaClient 只能向 Eureka 註冊中心註冊
* @EnableDiscoveryClient 除了向 Eureka 註冊中心註冊 可以向其他的註冊中心註冊 zookeeper consul
*/
@SpringBootApplication
@EnableEurekaClient
public class EurekaClient8803 {
public static void main(String[] args) {
SpringApplication.run(EurekaClient8803.class,args);
}
}
```
**4.建立並修改配置檔案**

通過上面的四步,就完成一個Eureka 客戶端的搭建
**5.啟動專案 觀察註冊中心的監控頁面 看一看有沒有服務註冊到註冊中心**
> 確保註冊中心和客戶端都啟動了
>
開啟註冊中心的網址http://localhost:8803 可以看到
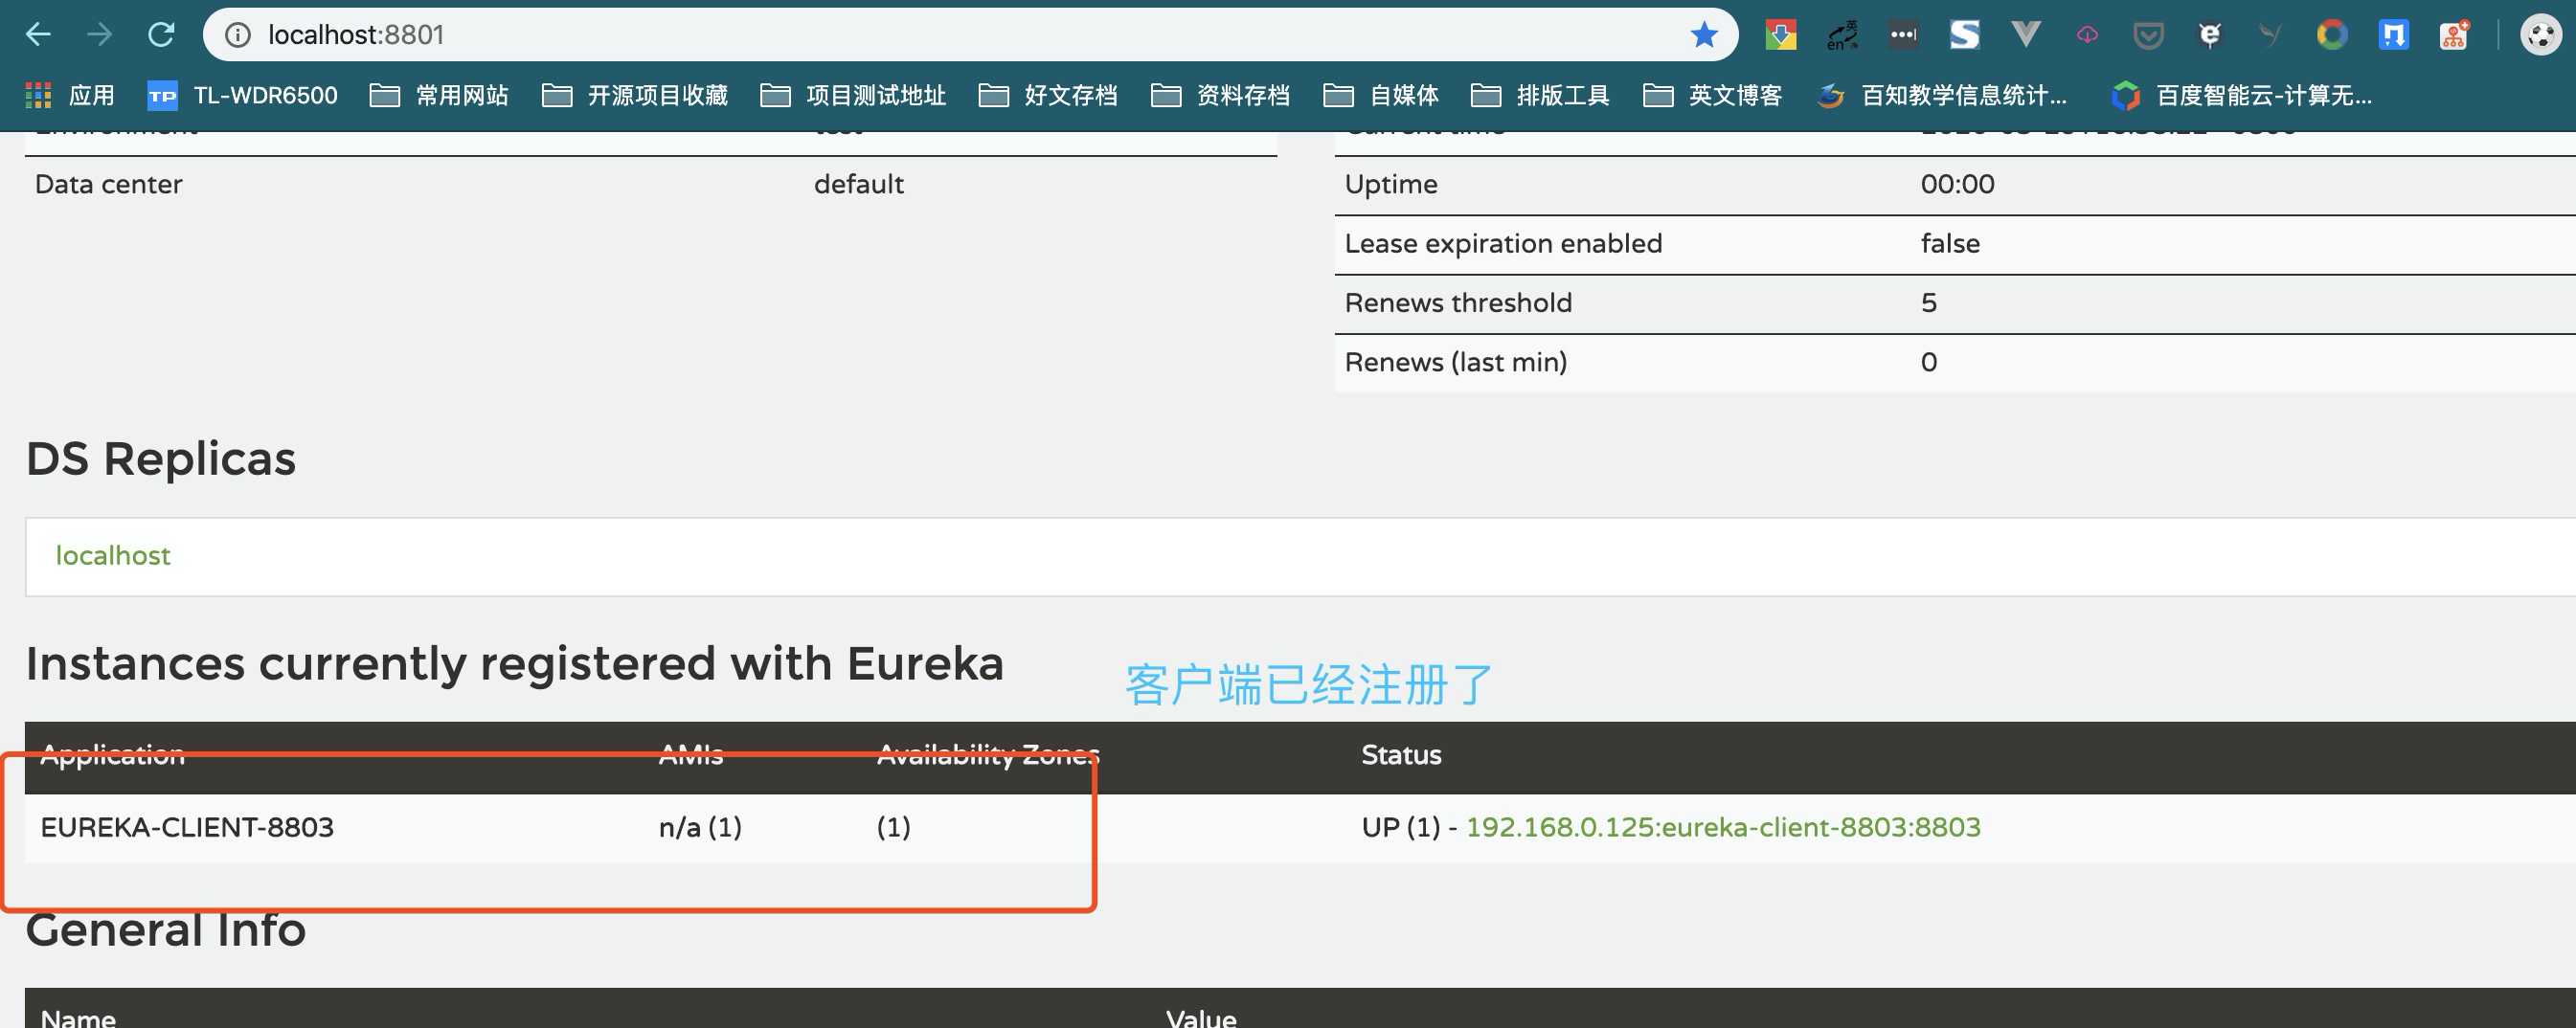
通過以上步驟就完成了最基本的註冊中心和客戶端的開發
## 總結
> 原始碼地址:https://gitee.com/bingqilinpeishenme/Java-Tutorials
通過SpringCloud做微服務開發,不管是註冊中心,還是客戶端,還是閘道器等,SpringCloud幾乎所有的元件都是四板斧:
1. 匯入依賴
2. 啟動類上加註解
3. 寫配置檔案
4. 直接使用
**恭喜你完成了本章的學習,為你鼓掌!如果本文對你有幫助,請幫忙點贊,評論,轉發,這對作者很重要,謝謝。**

要掌握SpringCloud更多的用法,請持續關注本系列教程。
## 求關注,求點贊,求轉發
> 歡迎關注本人公眾號:鹿老師的Java筆記,將在長期更新Java技術圖文教程和視訊教程,Java學習經驗,Java面試經驗以及Java實戰開發
