1. 程式人生 > >DRF比Django的認證和許可權高在哪裡

DRF比Django的認證和許可權高在哪裡

Django可以用`LoginRequiredMixin`和`PermissionRequiredMixin`給類檢視新增認證和許可權,DRF做了高階封裝,提供了更簡潔的實現方式。我們通過繼續學習官網教程來進行了解。 # 更新model 首先修改`Snippet`模型,新增2個欄位:`owner`,儲存snippet建立者,`highlighted`,儲存高亮HTML。同時重寫`save`方法,在同步資料庫的時候,使用`pygments`包把`code`格式化後存到`highlighted`欄位。修改後的`snippets/models.py`完整程式碼如下: ```python from django.db import models from pygments.lexers import get_all_lexers from pygments.styles import get_all_styles from pygments.lexers import get_lexer_by_name from pygments.formatters.html import HtmlFormatter from pygments import highlight LEXERS = [item for item in get_all_lexers() if item[1]] LANGUAGE_CHOICES = sorted([(item[1][0], item[0]) for item in LEXERS]) STYLE_CHOICES = sorted([(item, item) for item in get_all_styles()]) class Snippet(models.Model): created = models.DateTimeField(auto_now_add=True) title = models.CharField(max_length=100, blank=True, default='') code = models.TextField() linenos = models.BooleanField(default=False) language = models.CharField(choices=LANGUAGE_CHOICES, default='python', max_length=100) style = models.CharField(choices=STYLE_CHOICES, default='friendly', max_length=100) owner = models.ForeignKey('auth.User', related_name='snippets', on_delete=models.CASCADE) highlighted = models.TextField() class Meta: ordering = ['created'] def save(self, *args, **kwargs): """ Use the `pygments` library to create a highlighted HTML representation of the code snippet. """ lexer = get_lexer_by_name(self.language) linenos = 'table' if self.linenos else False options = {'title': self.title} if self.title else {} formatter = HtmlFormatter(style=self.style, linenos=linenos, full=True, **options) self.highlighted = highlight(self.code, lexer, formatter) super(Snippet, self).save(*args, **kwargs) ``` 接著刪除資料庫和`migrations`,重新遷移資料庫: ```shell rm -f db.sqlite3 rm -r snippets/migrations python manage.py makemigrations snippets python manage.py migrate ``` 並建立超級管理員: ```shell python manage.py createsuperuser ``` # User新增Endpoint Endpoint,表示API的具體網址。我們按照`models.py`→`serializers.py`→`views.py`→`urls.py`的程式碼編寫順序,給User模型新增Endpoint。 **models.py** 直接使用Django預設User模型,不需要修改程式碼。 **serializers.py** 新增`UserSerializer`,由於User沒有`snippets`欄位,所以需要顯式新增: ```python from django.contrib.auth.models import User class UserSerializer(serializers.ModelSerializer): snippets = serializers.PrimaryKeyRelatedField(many=True, queryset=Snippet.objects.all()) class Meta: model = User fields = ['id', 'username', 'snippets'] ``` **views.py** 新增只讀的列表檢視`UserList`和詳情檢視`UserDetail`,分別用到了`ListAPIView`和`RetrieveAPIView`: ```python from django.contrib.auth.models import User from snippets.serializers import UserSerializer class UserList(generics.ListAPIView): queryset = User.objects.all() serializer_class = UserSerializer class UserDetail(generics.RetrieveAPIView): queryset = User.objects.all() serializer_class = UserSerializer ``` **urls.py** 新增訪問路徑: ```python path('users/', views.UserList.as_view()), path('users//', views.UserDetail.as_view()), ``` # 關聯User和Snippet 
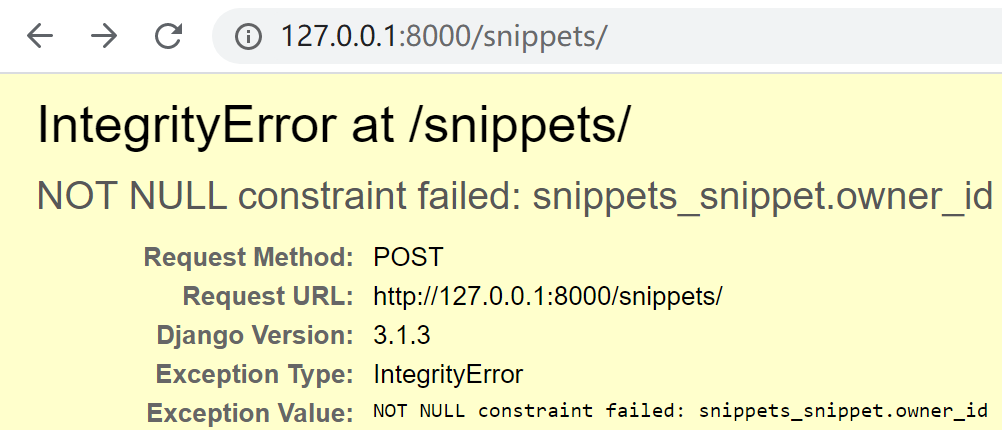
如果使用POST方法請求`http://127.0.0.1:8000/snippets/`,嘗試新增1條資料:
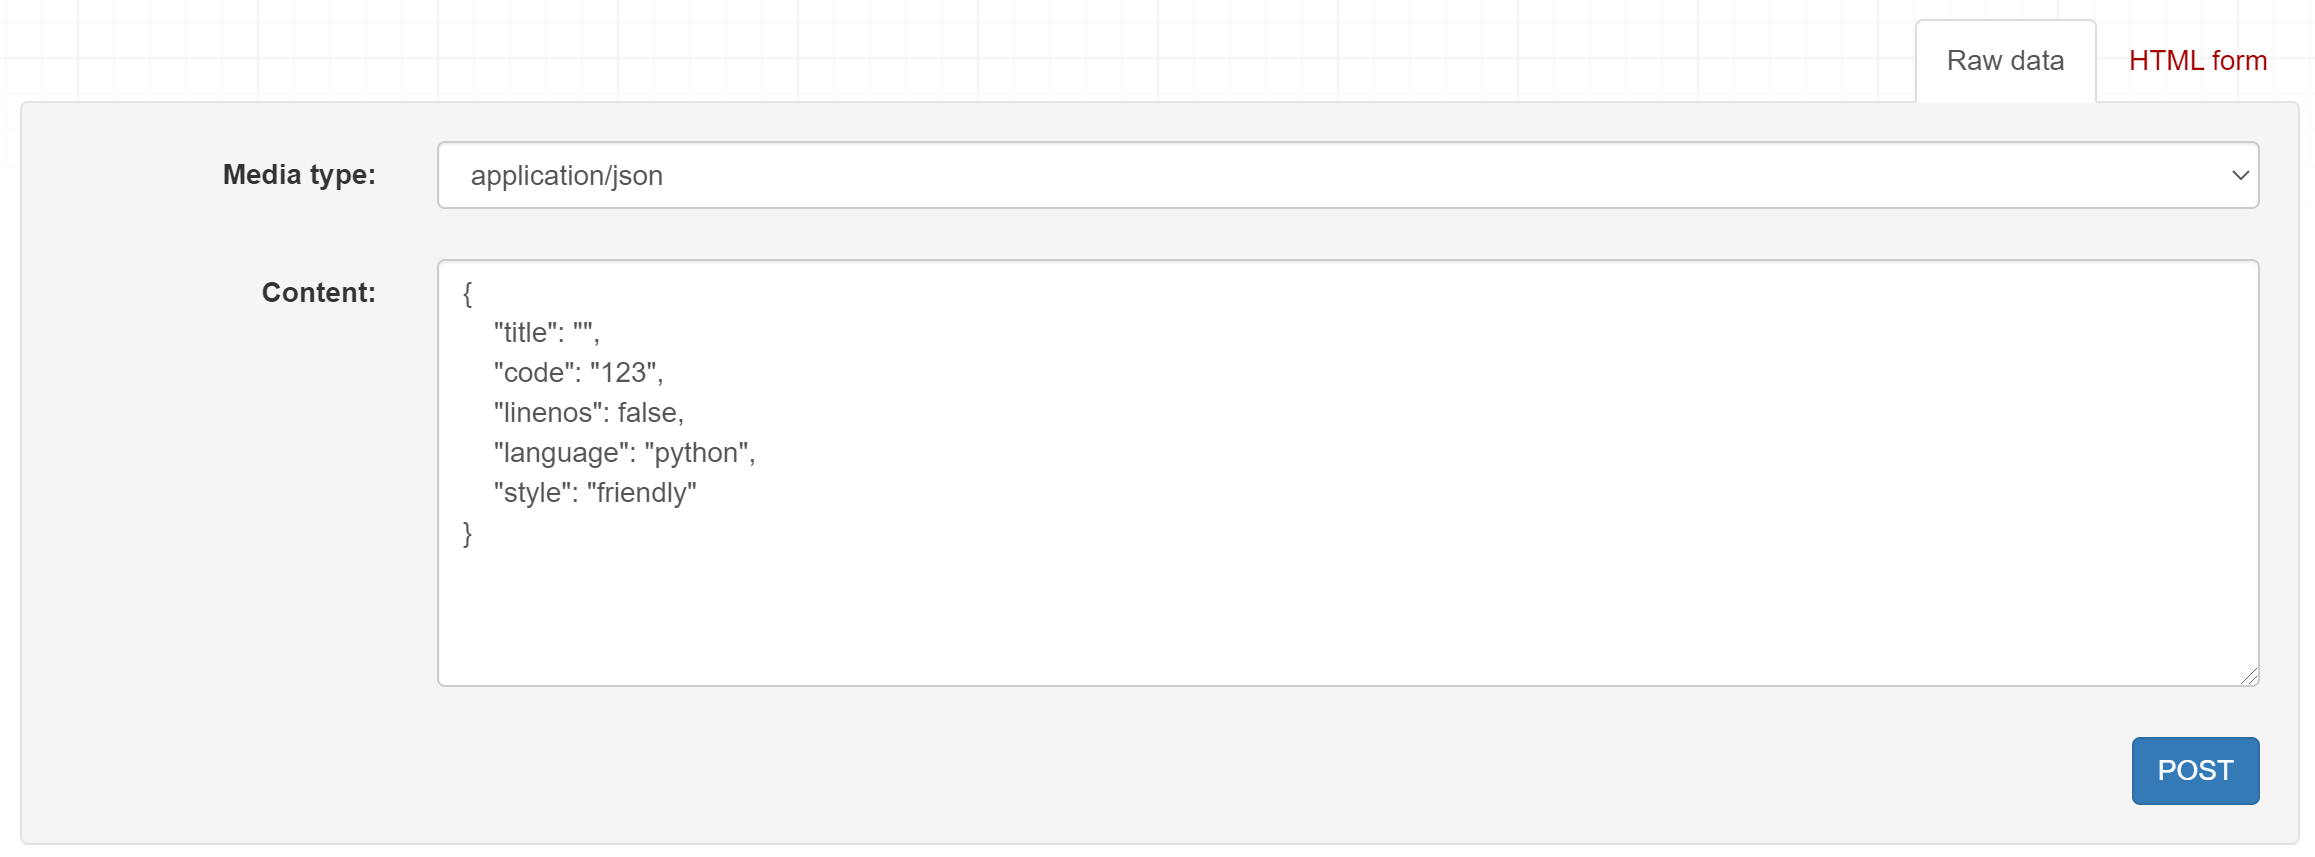
 ![image-20201219145940635](https://img2020.cnblogs.com/blog/1629545/202012/1629545-20201220085506702-56728604.png) 會發現介面報錯了:
owner_id不能為空?因為前面只給`Snippet`添加了`owner`欄位,還沒有寫反序列化更新模型的程式碼,所以通過請求訪問檢視,再嘗試反序列化的時候,報錯了。我們先修改檢視`SnippetList`來修復這個問題: ```python def perform_create(self, serializer): serializer.save(owner=self.request.user) ``` 在`SnippetList`檢視中重寫`perform_create()`方法,意思是在儲存時,把`request.user`值賦給`owner`欄位。`perform_create()`方法的原始碼是: ```python class CreateModelMixin: """ Create a model instance. """ def create(self, request, *args, **kwargs): serializer = self.get_serializer(data=request.data) serializer.is_valid(raise_exception=True) self.perform_create(serializer) headers = self.get_success_headers(serializer.data) return Response(serializer.data, status=status.HTTP_201_CREATED, headers=headers) def perform_create(self, serializer): serializer.save() ``` 再修改`snippets/serializers.py`,新增`owner`欄位,支援序列化: ```python class SnippetSerializer(serializers.ModelSerializer): # ReadOnlyField表示只能序列化為JSON,不能反序列化更新模型 # 也可以改成CharField(read_only=True) owner = serializers.ReadOnlyField(source='owner.username') class Meta: model = Snippet fields = ['id', 'title', 'code', 'linenos', 'language', 'style', 'owner'] ``` >
注意Meta.fields也要加上`owner`哦。 再請求一次: ![image-20201219151728225](https://img2020.cnblogs.com/blog/1629545/202012/1629545-20201220085507102-191082781.png) 剛才的錯誤沒有了,但是報了個新的錯誤:`Snippet.owner`必須是`User`例項,給它賦值的是`AnonymousUser`(匿名使用者),導致ValueError了。這個報錯是發生這條程式碼: ```python serializer.save(owner=self.request.user) ``` 也就是說請求訪問檢視後,進行反序列化了,但是反序列化失敗了。非常奇怪!我們的請求中並沒有使用者資訊,正常來說在訪問檢視的時候就該被攔截了。 # 給檢視新增認證 我們需要讓API更符合常規,讓未認證的使用者不能執行檢視中的程式碼。DRF提供了`rest_framework .permissions`來給檢視新增認證:
其中`IsAuthenticatedOrReadOnly`表示只有認證了才能讀寫,否則只能讀。把它新增到`SnippetList`和`SnippetDetail`檢視中: ```python from rest_framework import permissions permission_classes = [permissions.IsAuthenticatedOrReadOnly] ``` 再請求試試,剛才的錯誤沒有了,API返回的是需要提供使用者憑證: ![image-20201219160601041](https://img2020.cnblogs.com/blog/1629545/202012/1629545-20201220085507380-263609294.png) # 登入檢視 如果用瀏覽器開啟`http://127.0.0.1:8000/snippets/`,會發現只有GET方法沒有POST,這是因為需要新增DRF登入檢視,在`tutorial/urls.py`中新增`rest_framework.urls`: ```python urlpatterns += [ path('api-auth/', include('rest_framework.urls')), ] ``` >
api-auth/可以自定義。 重新整理頁面右上角就會出現`Log in`按鈕,登入後就能POST了。 # 物件級許可權 為了更細粒度的控制權限,讓使用者只能編輯自己建立的`snippet`,新建`snippets/permissions.py`: ```python from rest_framework import permissions class IsOwnerOrReadOnly(permissions.BasePermission): """ Custom permission to only allow owners of an object to edit it. """ def has_object_permission(self, request, view, obj): # Read permissions are allowed to any request, # so we'll always allow GET, HEAD or OPTIONS requests. if request.method in permissions.SAFE_METHODS: return True # Write permissions are only allowed to the owner of the snippet. return obj.owner == request.user ``` 新增`IsOwnerOrReadOnly`許可權,繼承了`permissions.BasePermission`,重寫了`has_object_permission()`方法。接著在`snippets/views.py`中給`SnippetDetail`加上: ```python from snippets.permissions import IsOwnerOrReadOnly permission_classes = [permissions.IsAuthenticatedOrReadOnly, IsOwnerOrReadOnly] ``` 試下訪問其他使用者建立的`snippet`,發現只能檢視: ![image-20201219180310509](https://img2020.cnblogs.com/blog/1629545/202012/1629545-20201220085507689-652116533.png) 訪問自己建立的`snippet`,可以修改和刪除: ![image-20201219180516850](https://img2020.cnblogs.com/blog/1629545/202012/1629545-20201220085508095-2099010933.png) # 自定義許可權 以上是官網的示例,我在Postman測試了下,發現超管dongfanger可以建立`snippet`: ![image-20201219152719121](https://img2020.cnblogs.com/blog/1629545/202012/1629545-20201220085508507-227071889.png) 普通使用者player也可以建立`snippet`: ![image-20201219153118906](https://img2020.cnblogs.com/blog/1629545/202012/1629545-20201220085508911-686423342.png) 我想讓普通使用者不能建立,只能超管建立。仿照官網示例,在`snippets/permissions.py`中新增`IsAdminOrReadOnly`: ```python class IsAdminOrReadOnly(permissions.BasePermission): def has_permission(self, request, view): return request.user.is_superuser ``` 接著給`SnippetList`加上: ```python permission_classes = [permissions.IsAuthenticatedOrReadOnly, IsAdminOrReadOnly] ``` 用普通使用者嘗試建立,提示沒有許可權: ![image-20201219181059751](https://img2020.cnblogs.com/blog/1629545/202012/1629545-20201220085509319-581369982.png) 用超級管理員嘗試建立,成功: ![image-20201219181537178](https://img2020.cnblogs.com/blog/1629545/202012/1629545-20201220085509643-353762766.png) # 其他認證方式 本文使用的認證方式是預設的`SessionAuthentication`和`BasicAuthentication`,只要資料庫的使用者名稱、密碼和請求中的使用者憑證(使用者名稱、密碼)匹配上了,就認為認證成功。如果要實現token或jwt認證,需要使用到`rest_framework.authentication`:
或`rest_framework_jwt.authentication`:
> pip install djangorestframework-jwt 這一部分內容官網教程中並沒有提及,等我們把教程學完了,以後再找時間來介紹。 # 東方說 DRF實現認證和許可權的關鍵在於新增`permissions.py`模組,編寫class,繼承`permissions.BasePermission`,重寫`has_permission()`或`has_object_permission()`方法,再新增class到類檢視的`permission_classes`中。這塊的內容比Django的認證系統那套簡潔,但是有點混淆,另外我之前參照網上實現了一版JWT,也有點不一樣。看來還得寫篇對比的文章才行。 > 參考資料: > > https://www.django-rest-framework.org/tutorial/4-authentication-and-perm