在 WSL Ubuntu 上使用 .NET 進行跨平臺開發新手入門
阿新 • • 發佈:2020-12-29
> 翻譯自 haydenb 2020年6月3日的文章[《Getting started with cross-platform development using .NET on Ubuntu on WSL》](https://ubuntu.com/blog/creating-cross-platform-applications-with-net-on-ubuntu-on-wsl) [^1]
[^1]: Getting started with cross-platform development using .NET on Ubuntu on WSL
.NET 是一個開源軟體框架,用於在 Linux、Windows 和 macOS 上構建跨平臺應用程式。[WSL 上的 Ubuntu](https://ubuntu.com/wsl) [^wsl]允許您同時為 Ubuntu 和 Windows 構建和測試應用程式。當我們把這些融合在一起時會發生什麼呢?這篇部落格將演示如何在 WSL 上安裝 .NET 開發棧,並構建一個簡單的作業系統感知應用,然後在 Linux 和 Windows 上測試它。
[^wsl]: Ubuntu on WSL wiki
## 安裝 Windows Terminal
從 Microsoft Store 中下載 Windows Terminal:
[Windows Terminal on the Microsoft Store](https://www.microsoft.com/store/productId/9N0DX20HK701) [^Terminal]
[^Terminal]: Windows Terminal on the Microsoft Store
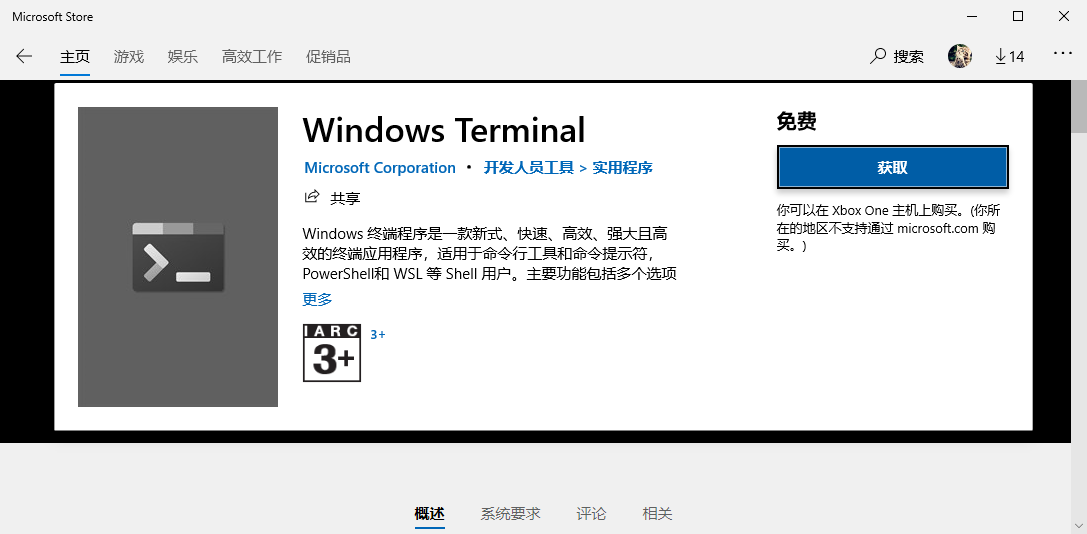
也可以從 [GitHub](https://github.com/microsoft/terminal/releases) 下載 Windows Terminal。
## 執行 WSL 上的 Ubuntu
開啟 Windows Terminal 並執行:
```powershell
ubuntu.exe
```
當您首次在 WSL 上執行 Ubuntu 時,它將安裝,並提示您建立一個 Linux 使用者,這個使用者是獨立於 Windows 使用者的。
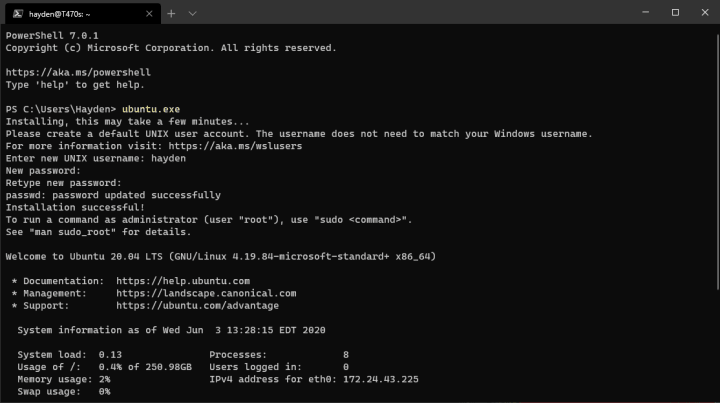
退出並重新開啟 Windows Terminal,您將會發現 Ubuntu 出現在下拉選單中:
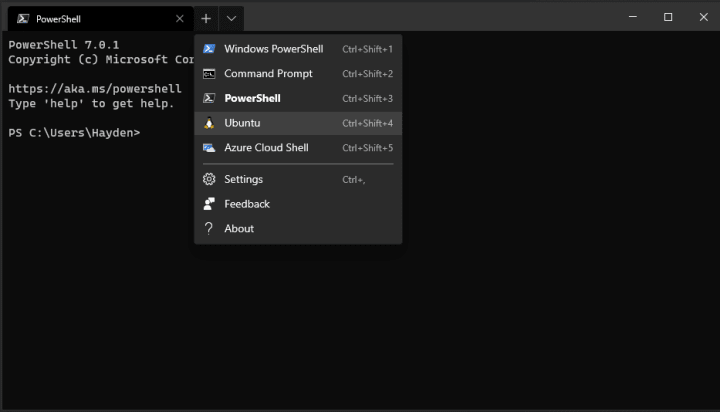
您可以在 [settings.json](https://docs.microsoft.com/en-us/windows/terminal/get-started#configuration) 中設定 Windows Terminal,將 Ubuntu 設定為預設項。
## 更新 WSL 上的 Ubuntu
您應該定期檢查更新,並在 WSL 上的 Ubuntu 中執行升級。我們用 apt (Ubuntu 包管理器)來實現。
要檢查更新,請執行:
```bash
sudo apt update
```
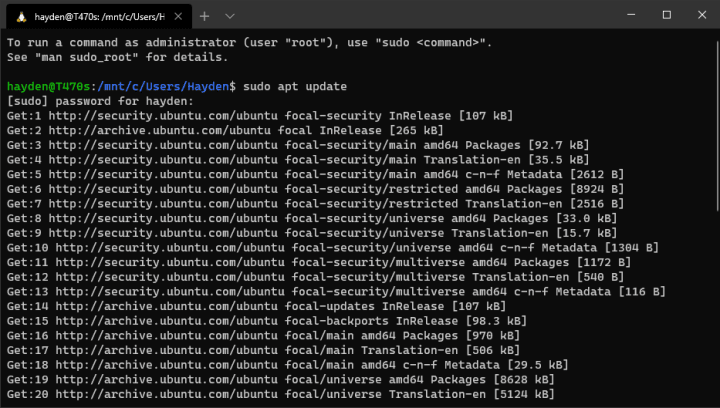
要獲得升級,請執行:
```bash
sudo apt upgrade
```
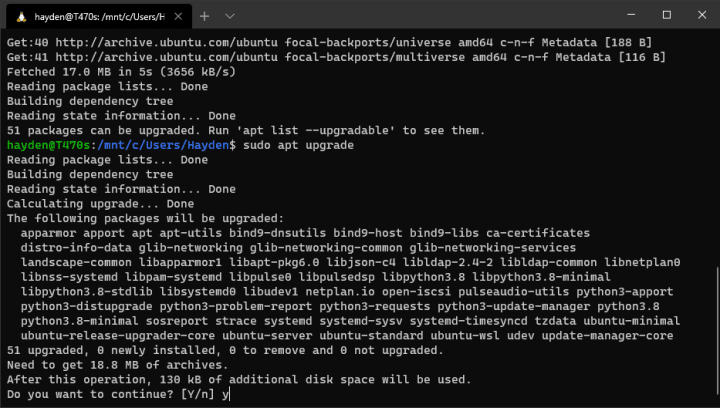
您可以通過用 `&&` 將它們連線在同一行並新增 `-y` 標籤,自動更新並應用可用的升級:
```bash
sudo apt update && sudo apt upgrade -y
```
## 新增微軟的 .NET 資源庫和簽名金鑰
我們需要為 apt 新增微軟的 .NET 資源庫和簽名金鑰。我們將從微軟下載並安裝一個包來完成這項工作。
請確保您正在為您的 Ubuntu 版本安裝正確的資源庫。您可以使用下面的命令檢查 Ubuntu 的當前版本:
```bash
cat /etc/os-release
```
下面的示例使用 Ubuntu 20.04,來自 Canonical 的最新 LTS 發行版。如果您仍在使用 Ubuntu 16.04、18.04 或 19.10,您可以在[微軟文件](https://docs.microsoft.com/en-us/dotnet/core/install/linux-ubuntu) [^repos]中找到相應的資源庫。想要了解更多關於 LTS 和中間版本之間的區別,我們有一個[釋出週期頁面](https://ubuntu.com/about/release-cycle) [^cycle]。
[^repos]:
[^cycle]:
為 20.04 版本下載微軟的資源庫和金鑰包:
```bash
wget https://packages.microsoft.com/config/ubuntu/20.04/packages-microsoft-prod.deb -O packages-microsoft-prod.deb
```

使用 dpkg -i 手動安裝微軟資源包:
```bash
sudo dpkg -i packages-microsoft-prod.deb
```
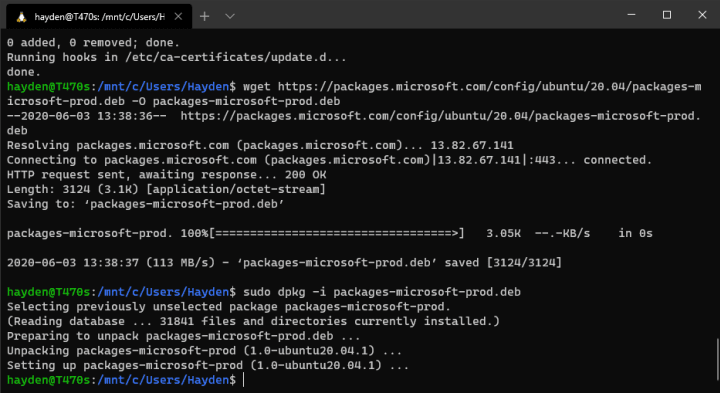
現在當你更新 apt 時,你會看到微軟資源庫已檢查升級了:

## 安裝 .NET SDK
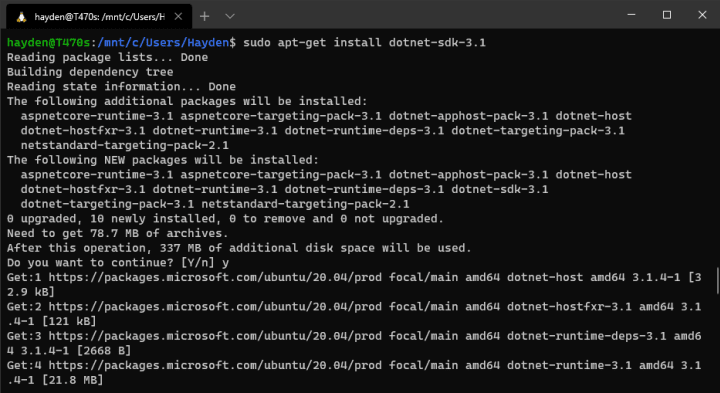
使用 apt 從微軟資源庫安裝 .NET 和相關依賴項:
```bash
sudo apt-get install dotnet-sdk-3.1 -y
```
## 新建工作區
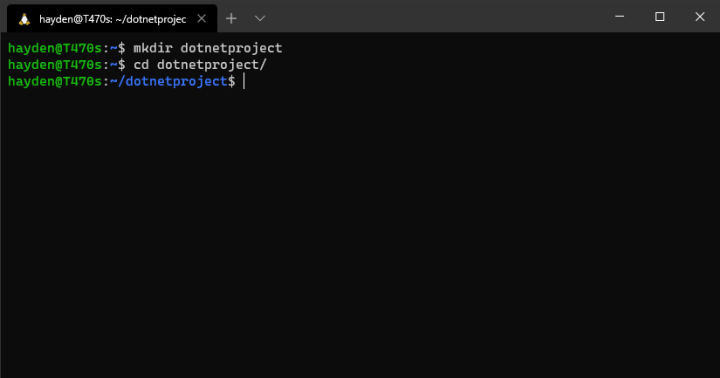
建立一個新的工作目錄並開啟該目錄:
```bash
mkdir dotnetproject
cd dotnetproject/
```
## 新建一個 .NET 專案
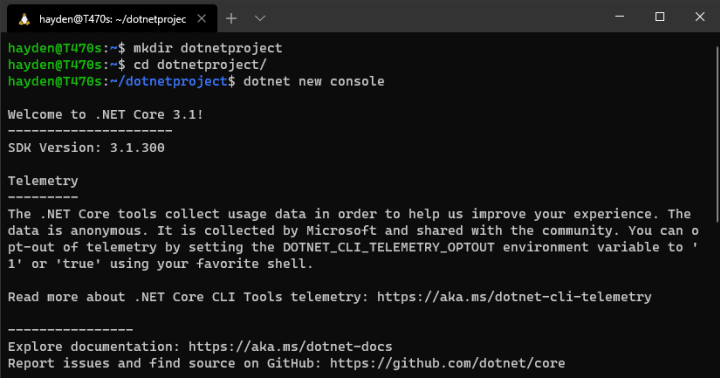
使用 `dotnet new` 建立一個新的 .NET 控制檯專案,這會建立一個名為 `Program.cs` 的檔案和其他一些必要的資料夾和檔案:
```bash
dotnet new console
```
## 探索我們的 .NET 應用
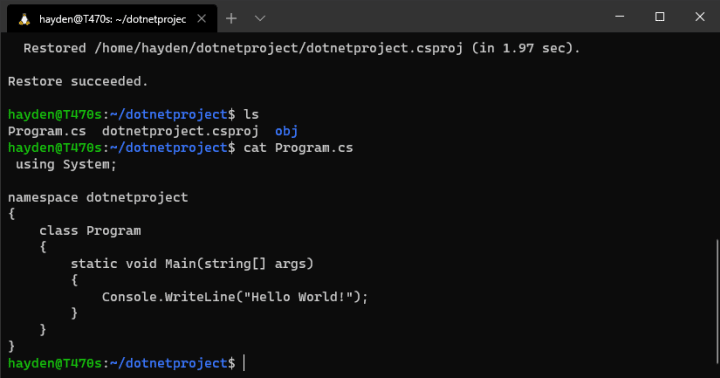
列出您的新 .NET 專案中的檔案:
```bash
ls
```
檢視 `Program.cs` 的內容:
```bash
cat Program.cs
```
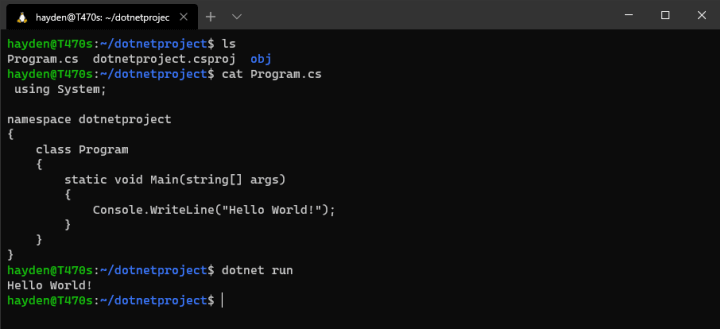
執行示例程式:
```bash
dotnet run
```
## 自定義我們的 .NET 應用
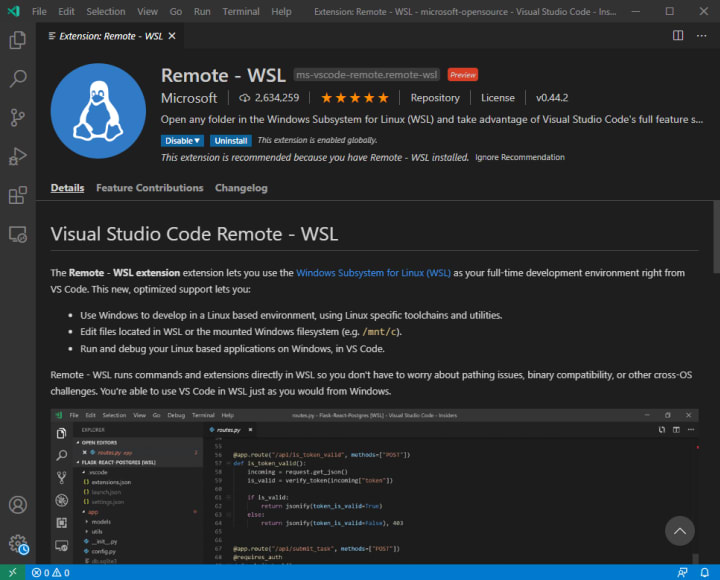
在您最喜歡的編輯器中開啟 `Program.cs`:vi、nano、emacs 或者有 remote WSL 擴充套件的 [VS Code](https://code.visualstudio.com/):
在這裡,我們使用 WSL 上的 Ubuntu 中包含的 nano:
```bash
nano Program.cs
```
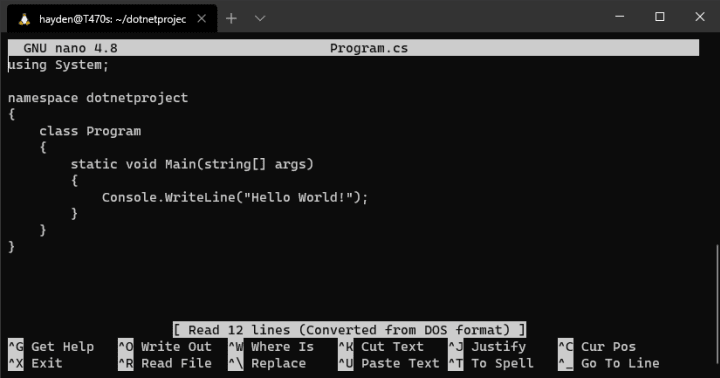
首先,我們新增 [Interop services 名稱空間](https://docs.microsoft.com/en-us/dotnet/api/system.runtime.interopservices?view=netcore-3.1):
```csharp
using System.Runtime.InteropServices;
```
然後把:
```csharp
Console.WriteLine("Hello World!");
```
替換成:
```csharp
Console.WriteLine($"Hello {System.Environment.GetEnvironmentVariable("USER")}");
if (RuntimeInformation.IsOSPlatform(OSPlatform.Linux))
{
Console.WriteLine("We're on Linux!");
}
if (RuntimeInformation.IsOSPlatform(OSPlatform.Windows))
{
Console.WriteLine("We're on Windows!");
}
Console.WriteLine("Version {0}", Environment.OSVersion.Version);
```
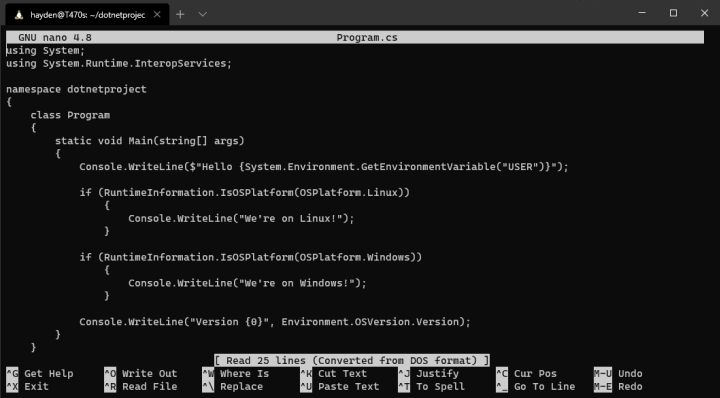
這段程式碼也可以在[這裡](https://pastebin.ubuntu.com/p/swbPxXXSKD/?_ga=2.158712185.2144654207.1608393893-1964088564.1608393893) [^code]找到。
[^code]:
win10-x64;linux-x64
```
這將引導 .NET 同時為 Windows 10 x64 和 Linux x64 構建自包含的二進位制檔案。

## 構建我們的跨平臺應用程式
當我們配置好專案後,構建 .NET 應用程式變得如此簡單:
```csharp
dotnet publish -r win10-x64
dotnet publish -r linux-x64
```
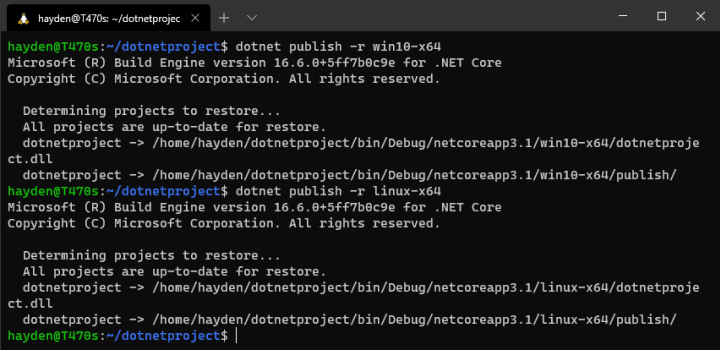
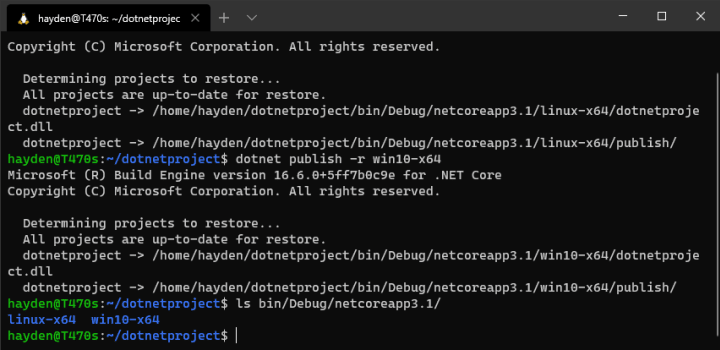
可以在專案的 `/bin/` 資料夾中找到每個平臺的自包含二進位制檔案及其所有必需的庫:
```bash
ls bin/Debug/netcoreapp3.1/
```
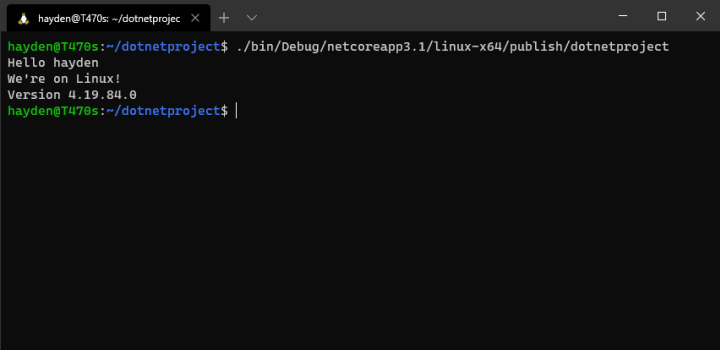
## 測試 Linux 版本
您可以直接執行 Linux 二進位制檔案,如下所示:
```bash
./bin/Debug/netcoreapp3.1/linux-x64/publish/dotnetproject
```
## 測試 Windows 版本
要執行 Windows 版本,請將其複製到 Windows 檔案系統中:
```bash
cp -r ~/dotnetproject/bin/Debug/netcoreapp3.1/win10-x64/publish /mnt/c/Users/Hayden/OneDrive/Desktop/
```
> 譯者注:
> 此處的 `/mnt/` 為 Ubuntu 系統中看到的 Windows 檔案系統的根目錄,`/mnt/c/` 即為 Windows 系統中的 C 盤。
然後執行:
```bash
/mnt/c/Users/Hayden/OneDrive/Desktop/publish/dotnetproject.exe
```
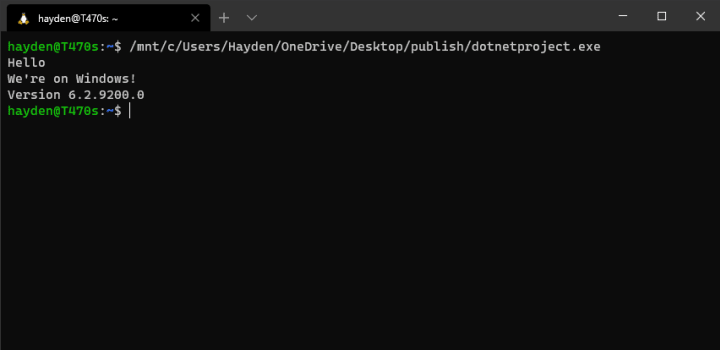
至此,我們已經為 Linux 和 Windows 構建並運行了相同的應用程式。我們可以使用 WSL 同時測試它們。
> 作者 : haydenb > 譯者 : 技術譯民 > 出品 : [技術譯站](https://ittranslator.cn/) > 連結 : [英文原文](https://ubuntu.com/blog/creating-cross-platform-applications-with-net-on-ubuntu-
> 作者 : haydenb > 譯者 : 技術譯民 > 出品 : [技術譯站](https://ittranslator.cn/) > 連結 : [英文原文](https://ubuntu.com/blog/creating-cross-platform-applications-with-net-on-ubuntu-
