
手把手教你Spring Boot整合Mybatis Plus和Swagger2
阿新 • • 發佈:2021-02-23
#前言:如果你是初學者,請完全按照我的教程以及程式碼來搭建(文末會附上完整的專案程式碼包,你可以直接下載我提供的完整專案程式碼包然後自行體驗!),為了照顧初學者所以貼圖比較多,請耐心跟著教程來,希望這個專案Demo能給你一些幫助,如果覺得寫的還可以請給個關注和點贊,謝謝!
#題外話:這是我第一篇用markdown來寫的博文,格式不好的地方請見諒
#一、pom.xml和application.yml
##1、pom.xml中新增相關依賴,這裡我把我的pom.xml程式碼貼出來
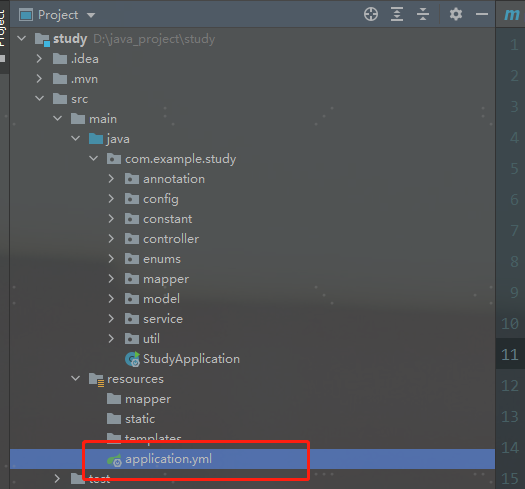
##2、在resources下新建application.yml檔案,並新增如下配置
# 配置埠
server:
port: 8080
#----------------druid資料來源配置-----------------------
spring:
datasource:
type: com.alibaba.druid.pool.DruidDataSource
druid:
#這裡跟pom裡面mysql-connector版本相關8.0之後用com.mysql.cj.jdbc.Driver,之前用com.mysql.jdbc.Driver
driver-class-name: com.mysql.cj.jdbc.Driver
#這裡改成你自己的資料庫名稱以及賬號和密碼
url: jdbc:mysql://127.0.0.1:3306/study?serverTimezone=Asia/Shanghai&useUnicode=true&characterEncoding=utf-8&zeroDateTimeBehavior=convertToNull&useSSL=false&allowPublicKeyRetrieval=true
username: root
password: 123456
initialSize: 10
minIdle: 10
maxActive: 30
# 配置獲取連線等待超時的時間
maxWait: 60000
# 配置間隔多久才進行一次檢測,檢測需要關閉的空閒連線,單位是毫秒
timeBetweenEvictionRunsMillis: 60000
# 配置一個連線在池中最小生存的時間,單位是毫秒
minEvictableIdleTimeMillis: 300000
validationQuery: SELECT 1 FROM DUAL
testWhileIdle: true
testOnBorrow: false
testOnReturn: false
# 開啟PSCache,並且指定每個連線上PSCache的大小
poolPreparedStatements: true
# 配置監控統計攔截的filters,去掉後監控介面sql無法統計,'wall'用於防火牆
#filters: stat,wall,log4j
# 通過connectProperties屬性來開啟mergeSql功能;慢SQL記錄
connection-properties: druid.stat.mergeSql=true;druid.stat.slowSqlMillis=5000
# 合併多個DruidDataSource的監控資料
useGlobalDataSourceStat: true
#----------------mybatis plus配置-----------------------
mybatis-plus:
# xml掃描,多個目錄用逗號或者分號分隔(告訴 Mapper 所對應的 XML 檔案位置)
mapper-locations: classpath:mapper/*.xml
configuration:
# 是否開啟自動駝峰命名規則對映:從資料庫列名到Java屬性駝峰命名的類似對映
map-underscore-to-camel-case: true
# 如果查詢結果中包含空值的列,則 MyBatis 在對映的時候,不會對映這個欄位
call-setters-on-nulls: true
# 這個配置會將執行的sql打印出來,在開發或測試的時候可以用
log-impl: org.apache.ibatis.logging.stdout.StdOutImpl
# 實體掃描,多個package用逗號或者分號分隔(這裡更改為你的實體類存放路徑)
typeAliasesPackage: com.example.study.model.entity
global-config:
db-config:
#主鍵型別 AUTO:"資料庫ID自增" INPUT:"使用者輸入ID",ID_WORKER:"全域性唯一ID (數字型別唯一ID)", UUID:"全域性唯一ID UUID";
id-type: auto
#欄位策略 IGNORED:"忽略判斷" NOT_NULL:"非 NULL 判斷") NOT_EMPTY:"非空判斷"
field-strategy: NOT_EMPTY
#資料庫型別
db-type: MYSQL
# 邏輯刪除配置
# 刪除前
logic-not-delete-value: 1
# 刪除後
logic-delete-value: 0
#----------------swagger配置-----------------------
swagger:
#生產環境改為false(改為false後swagger-ui.html則無法訪問)
enable: true
#解決Swagger2 異常 NumberFormatException:For input string:""
logging:
level:
io:
swagger:
models:
parameters:
AbstractSerializableParameter: ERROR
#二、整合Swagger2
##1、新增swagger的配置類SwaggerConfig.java
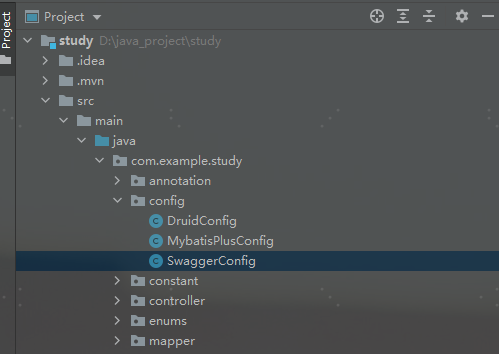
package com.example.study.config;
import io.swagger.annotations.Api;
import org.springframework.boot.autoconfigure.condition.ConditionalOnProperty;
import org.springframework.context.annotation.Bean;
import org.springframework.context.annotation.Configuration;
import springfox.documentation.builders.ApiInfoBuilder;
import springfox.documentation.builders.PathSelectors;
import springfox.documentation.builders.RequestHandlerSelectors;
import springfox.documentation.service.ApiInfo;
import springfox.documentation.service.ApiKey;
import springfox.documentation.spi.DocumentationType;
import springfox.documentation.spring.web.plugins.Docket;
import springfox.documentation.swagger2.annotations.EnableSwagger2;
import java.util.ArrayList;
import java.util.List;
/**
* Swagger配置類
*
* @author [email protected]
* @date: 2021/2/22 10:02:00
*/
@Configuration
@EnableSwagger2
@ConditionalOnProperty(name = "swagger.enable", havingValue = "true")
public class SwaggerConfig {
/**
* 建立API應用
* apiInfo() 增加API相關資訊
* 通過select()函式返回一個ApiSelectorBuilder例項,用來控制哪些介面暴露給Swagger來展現,
* 本例採用指定掃描的包路徑來定義指定要建立API的目錄。
*
* @return
*/
@Bean
public Docket createRestApi() {
return new Docket(DocumentationType.SWAGGER_2)
.apiInfo(this.apiInfo())
.select()
//設定選擇器,選擇帶Api介面類的類
.apis(RequestHandlerSelectors.withClassAnnotation(Api.class))
//api包掃描
.apis(RequestHandlerSelectors.basePackage("com.example.study"))
.paths(PathSelectors.any())
.build()
.securitySchemes(securitySchemes());
}
/**
* 建立該API的基本資訊(這些基本資訊會展現在文件頁面中)
* 訪問地址:http://ip:埠/swagger-ui.html
*
* @return ApiInfo
*/
private ApiInfo apiInfo() {
return new ApiInfoBuilder().title("demo專案")
.description("demo專案API文件")
.termsOfServiceUrl("http://localhost")
.version("1.0")
.build();
}
priv