jumpserver 跳板機安裝教程
首先確保系統的iptables 和selinux屬於關閉狀態
[[email protected] ~]# ipbatables -F --臨時清空iptables裏面的規則
[[email protected] ~]# getenforce --查看selinux狀態
Disabled
[[email protected] ~]#
software下載地址: 鏈接:http://pan.baidu.com/s/1pLFjRuF 密碼:erdv
安裝jumpserver所需的依賴包
[[email protected] ~]# yum -y install git python-pip mysql-devel gcc automake autoconf python-devel vim sshpass readline-devel gcc-c++
[[email protected] ~]# yum -y install libtiff-devel libjpeg-devel libzip-devel freetype-devel lcms2-devel libwebp-devel tcl-devel tk-devel sshpass openldap-devel
解壓! --這裏的話 我是把軟件包放在了/tmp下面。
[[email protected] ~tmp]# unzip jumpserver-dev.zip
[[email protected] ~tmp]# cd jumpserver-dev
錯誤提示:
[[email protected] jumpserver-dev]# pip install
You are using pip version 7.1.0, however version 9.0.1 is available.
You should consider upgrading via the ‘pip install --upgrade pip‘ command.
You must give at least one requirement to install (see "pip help install")
解決方法 升級pip到9.0 再把python升級為3.5
[[email protected] jumpserver-dev]# pip install --upgrade pip
You are using pip version 7.1.0, however version 9.0.1 is available.
You should consider upgrading via the ‘pip install --upgrade pip‘ command.
/usr/lib/python2.6/site-packages/pip/_vendor/requests/packages/urllib3/util/ssl_.py:90: InsecurePlatformWarning: A true SSLContext object is not available. This prevents urllib3 from configuring SSL appropriately and may cause certain SSL connections to fail. For more information, see https://urllib3.readthedocs.org/en/latest/security.html#insecureplatformwarning.
InsecurePlatformWarning
Collecting pip
Downloading pip-9.0.1-py2.py3-none-any.whl (1.3MB)
100% |████████████████████████████████| 1.3MB 11kB/s
Installing collected packages: pip
Found existing installation: pip 7.1.0
Uninstalling pip-7.1.0:
Successfully uninstalled pip-7.1.0
Successfully installed pip-9.0.1
編譯安裝python 3.5
[[email protected] jumpserver-dev]#
[[email protected] tmp]# tar xf Python-3.5.4.tgz
[[email protected] tmp]# cd Python-3.5.4
[[email protected] Python-3.5.4]# ./configure --enable-optimizations --enable-shared
[[email protected] Python-3.5.4]#make install
[[email protected] Python-3.5.4]# rm -rf /usr/bin/python
[[email protected] Python-3.5.4]# ln -sv /usr/local/bin/python3.5 /usr/bin/python
"/usr/bin/python" -> "/usr/local/bin/python3.5"
[[email protected] Python-3.5.4]#
查看python版本是報錯。
[[email protected] Python-3.5.4]# python -V
python: error while loading shared libraries: libpython3.5m.so.1.0: cannot open shared object file: No such file or directory
解決方法:
[[email protected] Python-3.5.4]# ln -sv /usr/local/lib/libpython3.5m.so.1.0 /usr/lib64
"/usr/lib64/libpython3.5m.so.1.0" -> "/usr/local/lib/libpython3.5m.so.1.0"
[[email protected] Python-3.5.4]# ldconfig
[[email protected] Python-3.5.4]# python -V
Python 3.5.4
[[email protected] Python-3.5.4]#
[[email protected] jumpserver-dev]# pip install pipreqs
Collecting pipreqs
Using cached pipreqs-0.4.9-py2.py3-none-any.whl
Collecting yarg (from pipreqs)
Using cached yarg-0.1.9-py2.py3-none-any.whl
Collecting docopt (from pipreqs)
Using cached docopt-0.6.2.tar.gz
Collecting requests (from yarg->pipreqs)
Downloading requests-2.18.4-py2.py3-none-any.whl (88kB)
100% |████████████████████████████████| 92kB 15kB/s
Collecting idna<2.7,>=2.5 (from requests->yarg->pipreqs)
Downloading idna-2.6-py2.py3-none-any.whl (56kB)
100% |████████████████████████████████| 61kB 15kB/s
Collecting urllib3<1.23,>=1.21.1 (from requests->yarg->pipreqs)
Downloading urllib3-1.22-py2.py3-none-any.whl (132kB)
100% |████████████████████████████████| 133kB 11kB/s
Collecting certifi>=2017.4.17 (from requests->yarg->pipreqs)
Downloading certifi-2017.7.27.1-py2.py3-none-any.whl (349kB)
100% |████████████████████████████████| 358kB 11kB/s
Collecting chardet<3.1.0,>=3.0.2 (from requests->yarg->pipreqs)
Downloading chardet-3.0.4-py2.py3-none-any.whl (133kB)
100% |████████████████████████████████| 143kB 12kB/s
Installing collected packages: idna, urllib3, certifi, chardet, requests, yarg, docopt, pipreqs
Running setup.py install for docopt ... done
Successfully installed certifi-2017.7.27.1 chardet-3.0.4 docopt-0.6.2 idna-2.6 pipreqs-0.4.9 requests-2.18.4 urllib3-1.22 yarg-0.1.9
安裝 pip install -r requirements.txt
[[email protected] jumpserver-dev]# pip install -r requirements/requirements.txt
[[email protected] jumpserver-dev]#
[[email protected] jumpserver-dev]# yum list mysql-python
File "/usr/bin/yum", line 30
except KeyboardInterrupt, e:
^
SyntaxError: invalid syntax
解決方法: --#修改yum安裝工具包的python源為2.7版本、 並將python3.5鏈接為python
vim /usr/bin/yum
#!/usr/bin/python2.6
安裝pip install -r requirements.txt
[[email protected] requirements]# pip install -r requirements.txt
Successfully installed Django-1.11.4 ForgeryPy-0.1 MarkupSafe-1.0 PyYAML-3.12 amqp-2.2.1 ansible-2.3.2.0 asn1crypto-0.22.0 bcrypt-3.1.3 billiard-3.5.0.3 celery-4.1.0 cffi-1.10.0 coreapi-2.3.1 coreschema-0.0.4 cryptography-2.0.3 decorator-4.1.2 django-auth-ldap-1.2.15 django-bootstrap3-9.0.0 django-filter-1.0.4 django-formtools-2.0 django-redis-cache-1.7.1 django-rest-swagger-2.1.2 django-simple-captcha-0.5.5 djangorestframework-3.6.4 djangorestframework-bulk-0.2.1 ecdsa-0.13 enum-compat-0.0.2 eventlet-0.21.0 greenlet-0.4.12 gssapi-1.2.0 itsdangerous-0.24 itypes-1.1.0 jinja2-2.9.6 kombu-4.1.0 ldap3-2.3 openapi-codec-1.3.2 paramiko-2.2.1 passlib-1.7.1 pyasn1-0.3.2 pycparser-2.18 pycrypto-2.6.1 pyldap-2.4.37 pynacl-1.1.2 pytz-2017.2 redis-2.10.6 simplejson-3.11.1 six-1.10.0 sshpubkeys-2.2.0 uritemplate-3.0.0 vine-1.1.4
準備配置文件
[[email protected] docs]# cd ..
[[email protected] jumpserver-dev]# cp config_example.py config.py
[[email protected] jumpserver-dev]# vim config.py
class DevelopmentConfig(Config):
EMAIL_HOST = ‘smtp.exmail.qq.com‘
EMAIL_PORT = 465
EMAIL_HOST_USER = ‘[email protected]‘
EMAIL_HOST_PASSWORD = ‘somepasswrd‘
EMAIL_USE_SSL = True
EMAIL_USE_TLS = False
EMAIL_SUBJECT_PREFIX = ‘[Jumpserver] ‘
SITE_URL = ‘http://localhost:8080‘
初始化數據庫
[[email protected] jumpserver-dev]# cd utils/
[[email protected] utils]# sh make_migrations.sh
[[email protected] utils]# sh init_db.sh
Installed 4 object(s) from 1 fixture(s)
安裝redis
[[email protected] utils]# yum -y install redis
[[email protected] utils]# service redis start
啟動 : [確定]
啟動服務
[[email protected] jumpserver-dev]# python run_server.py
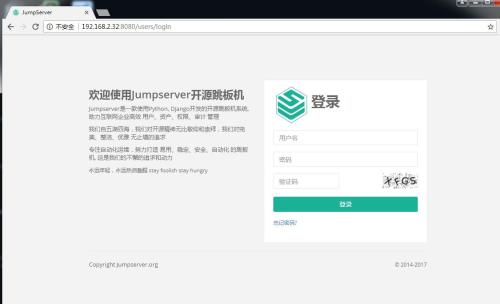
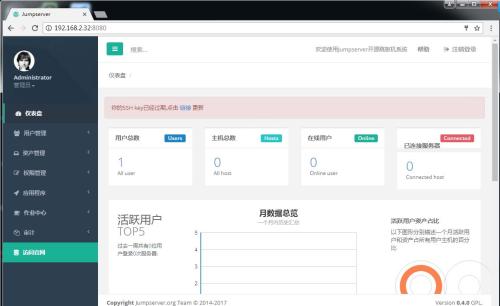
訪問http://ip+8080端口
默認密碼都是admin: admin


到了這就已經安裝完成了,上面哪有問題的 大神們可以幫忙指出來 ! 十分感謝
jumpserver 跳板機安裝教程
