React Native 系列(八)
前言
本系列是基於React Native版本號0.44.3寫的。我們都知道,一個App不可能只有一個不變的界面,而是通過多個界面間的跳轉來呈現不同的內容。那麽這篇文章將介紹RN中的導航。
導航
什麽是導航? 其本質就是視圖之間的界面跳轉,例如首頁跳轉到詳情頁。
在RN中有兩個組件負責實現這樣的效果,它們是:
- NavigatorIOS
- React Navigation
你可能在很多地方聽說過Navigator,這個老組件會逐漸被React Navigation代替。筆者在最後也會講解一下Navigator的使用,並實戰演練一番。
- Navigator
從
0.44版本開始,Navigator被從react native的核心組件庫中剝離到了一個名為react-native-deprecated-custom-components的單獨模塊中。如果你需要繼續使用Navigator,則需要先yarn add react-native-deprecated-custom-components安裝,然後從這個模塊中import,即import { Navigator } from ‘react-native-deprecated-custom-components‘。
NavigatorIOS
講解NavigatorIOS之前,先說說NavigatorIOS的弊端和優勢吧。
-
NavigatorIOS 弊端:
- 看名字就能猜出只能適用於 iOS,不能用於 android。
- 導航條不能自定義
-
NavigatorIOS 優勢:
- 有系統自帶的返回按鈕
常用屬性
barTintColor : 導航條的背景顏色
navigationBarHidden : 為true , 隱藏導航欄。
shadowHidden : 是否隱藏陰影,true/false。
tintColor : 導航欄上按鈕的顏色設置。
titleTextColor : 導航欄上字體的顏色 。
translucent : 導航欄是否是半透明的,true/false。
常用方法
push(route) : 加載一個新的頁面(視圖或者路由)並且路由到該頁面。
pop():返回到上一個頁面。
popN(n):一次性返回N個頁面。當 N=1 時,相當於 pop() 方法的效果。
replace(route):替換當前的路由。
replacePrevious(route):替換前一個頁面的視圖並且回退過去。
resetTo(route):取代最頂層的路由並且回退過去。
popToTop():回到最上層視圖。
NavigatorIOS使用步驟
-
初始化路由
- 註意:
component,需要傳入組件,自定義組件 NavigatorIOS上的按鈕圖片,默認會被渲染成藍色NavigatorIOS上的按鈕,只能放一張圖片- 註意:導航欄一定要有尺寸,
flex: 1,否則看不到子控件
// 用於初始化路由。其參數對象中的各個屬性如下: initialRoute: { component: function, //加載的視圖組件 title: string, //當前視圖的標題 passPros: object, //傳遞的數據 backButtonIcon: Image.propTypes.source, // 後退按鈕圖標 backButtonTitle: string, //後退按鈕標題 leftButtonIcon: Image.propTypes.soruce, // 左側按鈕圖標 leftButtonTitle: string, //左側按鈕標題 onLeftButtonPress: function, //左側按鈕點擊事件 rightButtonIcon: Image.propTypes.soruce,// 右側按鈕圖標 rightButtonTitle: string, //右側按鈕標題 onRightButtonPress: function, //右側按鈕點擊事件 }- 使用
<NavigatorIOS style={{flex: 1}} initialRoute={{ component: HelloView, title: ‘首頁‘, }} /> - 註意:
-
獲取Navigator,實現跳轉
this.props.navigator.push() -
跳轉界面方法
this.props.navigator.push({
    component: Detail,
    title: ‘詳細信息‘,
    passProps: {name: ‘scott‘},
    rightButtonTitle: "完成",
    onRightButtonPress: ()=> {
        this.props.navigator.pop()
    },
})
實戰演練
效果圖:
我們先創建一個HelloViewComponent.js組件,然後布局成上面效果圖中的首頁,它看起來是樣子的:
export default class HelloViewCompnent extends Component {
    render() {
        return (
            <View style={styles.container}>
                <Text style={styles.welcome}>
                    歡迎光臨Scott博客,點擊我跳轉
                </Text>
            </View>
        );
    }
}

const styles = StyleSheet.create({
    container: {
        flex: 1,
        justifyContent: ‘center‘,
        alignItems: ‘center‘,
        backgroundColor: ‘white‘,
    },
    welcome: {
        fontSize: 20,
        textAlign: ‘center‘,
        margin: 10,
    },
});然後我們在index.ios.js文件初始化一個路由,指定Component為HelloViewComponent,我們需要先導入HelloViewComponent.js文件到index.ios.js中,因此,index.ios.js看起來像這樣:
import React, { Component, PropTypes } from ‘react‘;
import {
    AppRegistry,
    StyleSheet,
    Text,
    View,
    NavigatorIOS,
} from ‘react-native‘;

import HelloView from ‘./HelloViewCompnent‘

export default class RNDemoOne extends Component {
    render() {
        return (
            <NavigatorIOS
                style={{flex: 1}}
                initialRoute={{
                    component: HelloView,
                    title: ‘首頁‘,
                }}
            />
        );
    }
}

AppRegistry.registerComponent(‘RNDemoOne‘, () => RNDemoOne);
運行項目,可以看到現在界面上有一個導航欄了。
接下來我們來實現界面跳轉,以及傳遞值到下一個界面。
我們來給HelloViewComponent.js中的<Text></Text>添加點擊事件,主要代碼:
constructor(props, context) {
    super(props, context);
    this._onPressed = this._onPressed.bind(this);
}

_onPressed(){
    AlertIOS.alert("點擊了")
}

render() {
    return (
        <View style={styles.container}>
            <TouchableOpacity onPress={this._onPressed} activeOpacity={1}>
                <Text style={styles.welcome}>
                    歡迎光臨Scott博客,點擊我跳轉
                </Text>
            </TouchableOpacity>
        </View>
    );
}我們再創建一個Detail.js組件,它看來像這樣:
render() {
    return (
        <View style={styles.container}>
            <Text style={styles.welcome}>
                這是上個界面傳遞過來的數據: {this.props.name}
            </Text>
        </View>
    );
}然後修改HelloViewComponent.js裏面的_onPressed()方法,
_onPressed(){
    this.props.navigator.push({
        component: Detail,
        title: ‘詳細信息‘,
        passProps: {name: ‘scott‘},
        rightButtonTitle: "完成",
        onRightButtonPress: ()=> {
            this.props.navigator.pop()
        },
    })
}
到此為止,保存代碼,選中模擬器,command + R 刷新界面,看起來和效果圖是一樣的。
React Navigation
由於NavigatorIOS的弊端,通常我們在RN不使用NavigatorIOS來實現導航。而是采用React Navigation來實現。
React Navigation 導入
首先需要在項目中導入,在項目目錄下,終端執行
sudo yarn add react-navigationReact Navigation 介紹
該庫包含三類組件:
- StackNavigator: 用來頁面跳轉和傳遞參數
- TabNavigator: 類似底部導航欄,用來在同一屏幕下切換不同界面
- DrawerNavigator: 側滑菜單導航欄,用於設置帶有抽屜導航的
由於篇幅以及本文標題,在這裏,我們只講述StackNavigator。
StackNavigator 常用屬性
navigationOptions:配置StackNavigator的一些屬性。
    title:標題,如果設置了這個導航欄和標簽欄的title就會變成一樣的,不推薦使用
    header:可以設置一些導航的屬性,如果隱藏頂部導航欄只要將這個屬性設置為null
    headerTitle:設置導航欄標題,推薦
    headerBackTitle:設置跳轉頁面左側返回箭頭後面的文字,默認是上一個頁面的標題。可以自定義,也可以設置為null
    headerTruncatedBackTitle:設置當上個頁面標題不符合返回箭頭後的文字時,默認改成"返回"
    headerRight:設置導航條右側。可以是按鈕或者其他視圖控件
    headerLeft:設置導航條左側。可以是按鈕或者其他視圖控件
    headerStyle:設置導航條的樣式。背景色,寬高等
    headerTitleStyle:設置導航欄文字樣式
    headerBackTitleStyle:設置導航欄‘返回’文字樣式
    headerTintColor:設置導航欄顏色
    headerPressColorAndroid:安卓獨有的設置顏色紋理,需要安卓版本大於5.0
    gesturesEnabled:是否支持滑動返回手勢,iOS默認支持,安卓默認關閉


screen:對應界面名稱,需要填入import之後的頁面

mode:定義跳轉風格
    card:使用iOS和安卓默認的風格
    modal:iOS獨有的使屏幕從底部畫出。類似iOS的present效果

headerMode:返回上級頁面時動畫效果
    float:iOS默認的效果
    screen:滑動過程中,整個頁面都會返回
    none:無動畫

cardStyle:自定義設置跳轉效果
    transitionConfig: 自定義設置滑動返回的配置
    onTransitionStart:當轉換動畫即將開始時被調用的功能
    onTransitionEnd:當轉換動畫完成,將被調用的功能

path:路由中設置的路徑的覆蓋映射配置

initialRouteName:設置默認的頁面組件,必須是上面已註冊的頁面組件

initialRouteParams:初始路由參數
實戰演練
由於篇幅原因,就不做太多說明了,直接上代碼吧,如果有不懂的問題,可以評論裏面討論。
我們先創建一個HelloViewComponent.js文件,然後在index.ios.js文件導入,並且修改index.ios.js的代碼,如下:
import HelloView from ‘./HelloViewComponent‘

export default class RNDemoTwo extends Component {
    render() {
        return (
            <HelloView/>
        );
    }
}接下來,我們修改HelloViewComponent.js裏面的代碼。
最終代碼類似這樣:
import {
    AppRegistry,
    StyleSheet,
    Text,
    View,
    TouchableOpacity,
    Button,
    AlertIOS,
} from ‘react-native‘;

import {StackNavigator} from ‘react-navigation‘
import DetailComponent from ‘./DetailComponent‘
import ThreeComponent from ‘./Three‘

class HelloViewCompnent extends Component {

    // 配置導航欄屬性
    static navigationOptions = {
        headerTitle: "首頁",
        headerBackTitle: null,
        headerRight: <Button title={"右側按鈕"} onPress={()=>{AlertIOS.alert("點擊右側按鈕")}}/>
    }

    render() {
        return (
            <View style={styles.container}>
                <TouchableOpacity onPress={()=>{
                    this.props.navigation.navigate(‘Detail‘, {name: ‘scott‘})
                }} activeOpacity={1}>
                    <Text style={styles.welcome}>
                        歡迎光臨Scott博客,點擊我跳轉
                    </Text>
                </TouchableOpacity>
            </View>
        );
    }
}

const SimpleApp = StackNavigator({
    Home: {
        screen: HelloViewCompnent,
    },
    Detail: {
        screen: DetailComponent,
    },
    Three: {
        screen: ThreeComponent,
    }
},{
    headerMode : ‘screen‘,
})

export default SimpleApp

const styles = StyleSheet.create({
    container: {
        flex: 1,
        justifyContent: ‘center‘,
        alignItems: ‘center‘,
        backgroundColor: ‘white‘,
    },
    welcome: {
        fontSize: 20,
        textAlign: ‘center‘,
        margin: 10,
    },
});註意點:此處向外提供出去的組件是SimpleApp,需要把HelloViewComponent默認的export default刪除
接下來,我們創建DetailComponent.js和Three.js文件。DetailComponent.js最終應該是這樣:
export default class Detail extends Component {
    static navigationOptions = {
        headerTitle: ‘詳情‘,
    }

    render() {
        return (
            <View style={styles.container}>
                <TouchableOpacity activeOpacity={0.5} onPress={this._onPress.bind(this)}>
                    <Text style={styles.welcome}>
                        這是上個界面傳遞過來的數據: {this.props.navigation.state.params.name}
                        點擊我pop
                    </Text>
                </TouchableOpacity>
            </View>
        );
    }

    _onPress(){
        this.props.navigation.navigate("Three")
    }
}

const styles = StyleSheet.create({
    container: {
        flex: 1,
        justifyContent: ‘center‘,
        alignItems: ‘center‘,
        backgroundColor: ‘white‘,
    },
    welcome: {
        fontSize: 20,
        textAlign: ‘center‘,
        margin: 10,
    },
});Three.js文件,只是賦值了index.android.js裏面的代碼。
然後,運行項目,可以看到效果:

哈哈,是不是很有成就感了。
Navigator
-
Navigator作用:只提供跳轉功能,支持 iOS 和 android- 註意:導航條需要自定義,需要導航條的界面,自己添加
- 只要一個控件,包裝成
Navigator就能獲取跳轉功能
Navigator 導入
在之前的版本可以直接導入:
import {
    AppRegistry,
    StyleSheet,
    Text,
    View,
    Navigator,
} from ‘react-native‘;但是從0.44這個版本開始在RN中直接導入的話,運行起來會報錯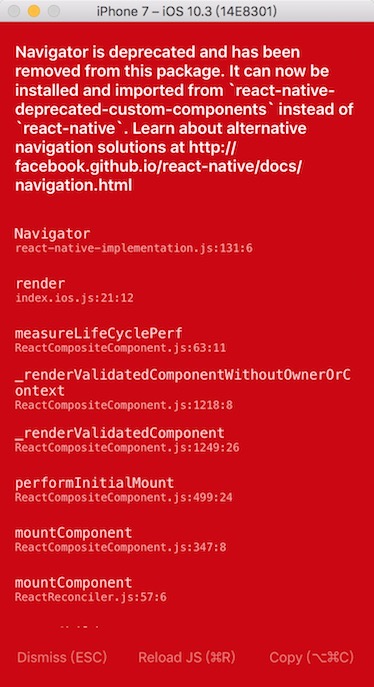
- 解決辦法:進入當前項目文件,安裝
Navigator所在的庫。
yarn add react-native-deprecated-custom-components-
tip: 筆者在終端運行
yarn add react-native-deprecated-custom-components總報權限錯誤。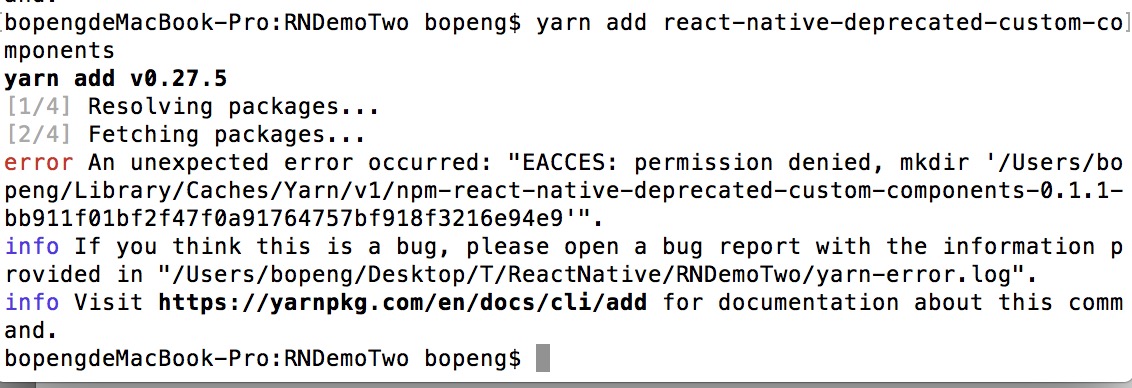
-
解決辦法:在前面添加
sudo,即yarn add react-native-deprecated-custom-components。
安裝好之後,就可以看到Navigator了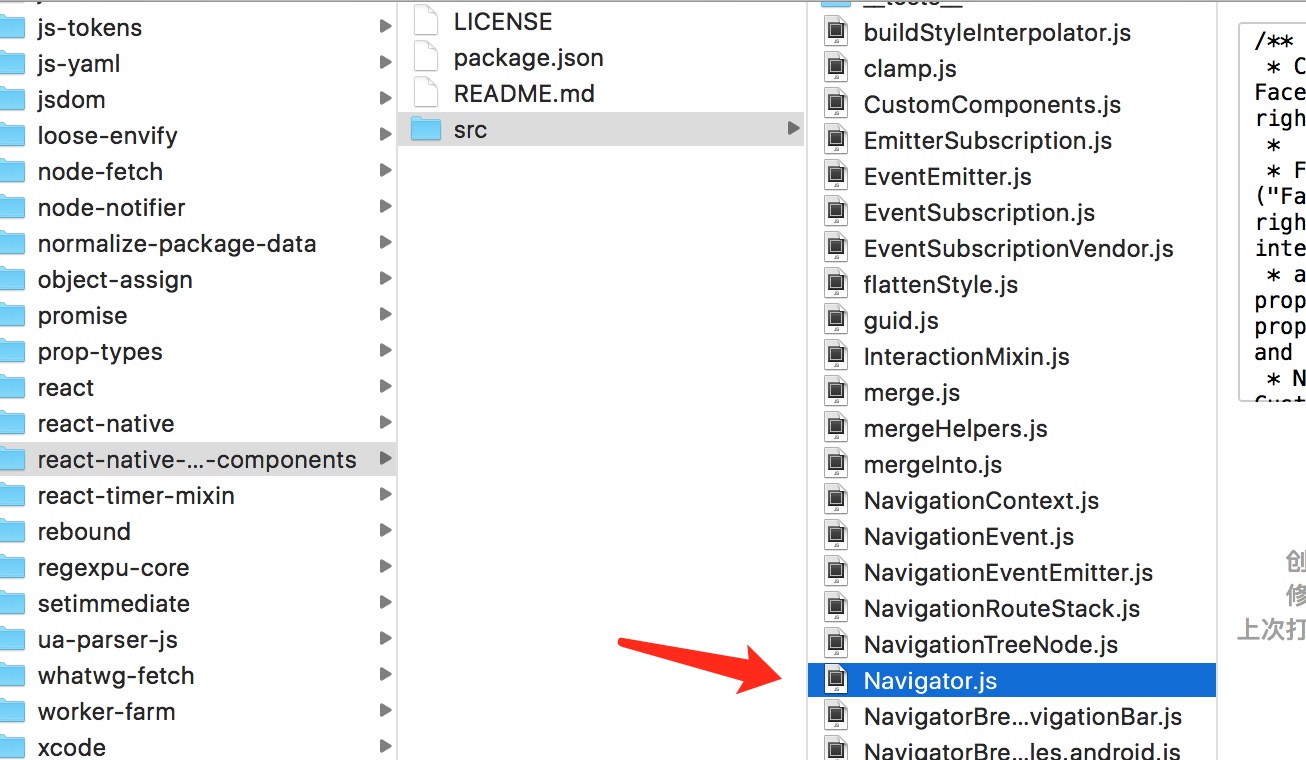
直接在項目中導入就行:
import {Navigator} from ‘react-native-deprecated-custom-components‘Navigator 使用步驟
-
創建 Navigator
<Navigator style={{flex:1}} initialRoute={{ component: HelloView }} configureScene={this._configureScene.bind(this)} renderScene={this._renderScene.bind(this)} /> _configureScene(route, routeStack){ return Navigator.SceneConfigs.PushFromLeft; } _renderScene(route, navigator){ // 把導航控制器傳遞給HelloView // ...route: 獲取route中所有屬性,傳遞給HelloView // ...擴展符, 作用:如果是對象,就獲取對象中所有值,如果是數組,就獲取數組中所有值 // <route.component navigator={navigator} {...route}/> 類似下面寫法,把route的屬性取出來賦值 // <route.component navigator={navigator} component=route.component/> return (<route.component navigator={navigator} {...route.passProps}/>) }-
初始化路由:設置初始化界面,描述一開始顯示哪個界面
initialRoute={{component: HelloView}} -
配置場景:設置跳轉方向
_configureScene(route, routeStack){ return Navigator.SceneConfigs.PushFromLeft; } -
渲染場景:根據路由,生成組件
// 生成組件,變量要用{}包住 _renderScene(route, navigator) { // 類似<HomeView navigator={navigator} {...route.props}/> // 把導航控制器傳遞給HomeView // ...route.props: 獲取route中所有屬性,傳遞給HomeView // ...擴展符, 作用:如果是對象,就獲取對象中所有值,如果是數組,就獲取數組中所有值 return (<route.component navigator={navigator} {... route.passProps}/>) } -
設置導航尺寸:
style={{flex: 1}}
-
-
跳轉界面
this.props.navigator.push({
    component: Detail,
    title: ‘詳細信息‘,
    passProps: {name: ‘scott‘},
})
可以發現,Navigator是不帶導航欄的,需要自定義。
參考文章:
- React Navigation
- React Native未來導航者:react navigation
致謝
如果發現有錯誤的地方,歡迎各位指出,謝謝!
React Native 系列(八)
