
Struts2繼承ActionSupport流程
阿新 • • 發佈:2018-11-01
今天這個是來講述Struts2繼承ActionSupport,其中有以下幾步
1.是最簡單也是必不可少的一步了

2.這個繼承的 需要做兩個JSP,一個需要用來作為登入介面,一個用來顯示。
<%@ page language="java" contentType="text/html; charset=utf-8"
    pageEncoding="utf-8"%>
<%@ taglib prefix="s" uri="/struts-tags"%>
<html>
<head>
<meta http-equiv="Content-Type" content="text/html; utf-8">
<title>Insert title here</title>
<style type="text/css">
ul,li {
    list-style-type:none;
    margin:0px;
    float:left;
}
</style>
</head>
<body>

<form action="helloworldAction" method="post">
    <input type="hidden" name="submitFlag" value="login"/>
    <div>
        <font color=red><s:fielderror fieldName="account"/></font>
        <br/>
          賬號:<input type="text" name="account">
    </div>
    <div>
        <font color=red><s:fielderror fieldName="password"/></font>
        <br/>
            密碼:<input type="password" name="password">
    </div>
    <input type="submit" value="提交">
</form>

</body>
</html>
<%@ page language="java" import="java.util.*" pageEncoding="utf-8"%>
<%
String path = request.getContextPath();
String basePath = request.getScheme()+"://"+request.getServerName()+":"+request.getServerPort()+path+"/";
%>

<!DOCTYPE HTML PUBLIC "-//W3C//DTD HTML 4.01 Transitional//EN">
<html>
  <head>
    <base href="<%=basePath%>">

    <title>My JSP 'welcome.jsp' starting page</title>

  </head>

  <body>
    登入成功 <br>
  </body>
</html>
這是兩個JSP完成了
3.新建一個類以及配置檔案
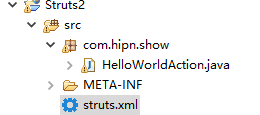
以下為程式碼可以參考
package com.hipn.show;

import com.opensymphony.xwork2.ActionSupport;

public class HelloWorldAction extends ActionSupport {
	 private String account;
	    private String password;
	    private String submitFlag;
	    public String execute() throws Exception {
	        this.businessExecute();
	        return "toWelcome";
	    }
	    public void validate(){
	        if(account==null || account.trim().length()==0){
	            this.addFieldError("account", "賬號不可以為空");
	        }
	        if(password==null || password.trim().length()==0){
	            this.addFieldError("password", "密碼不可以為空");
	        }
	        if(password!=null && !"".equals(password.trim()) && password.trim().length()<6){
	            this.addFieldError("password", "密碼長度至少為6位");
	        }
	    }
	    /**
	     * 示例方法,表示可以執行業務邏輯處理的方法,
	     */
	    public void businessExecute(){
	        System.out.println("使用者輸入的引數為==="+"account="+account+",password="+password+",submitFlag="+submitFlag);
	    }
	    public String getAccount() {
	        return account;
	    }
	    public void setAccount(String account) {
	        this.account = account;
	    }
	    public String getPassword() {
	        return password;
	    }
	    public void setPassword(String password) {
	        this.password = password;
	    }
	    public String getSubmitFlag() {
	        return submitFlag;
	    }
	    public void setSubmitFlag(String submitFlag) {
	        this.submitFlag = submitFlag;
	    }

	}
下面是配置檔案
<?xml version="1.0" encoding="UTF-8"?>
<!DOCTYPE struts PUBLIC
    "-//Apache Software Foundation//DTD Struts Configuration 2.0//EN"
    "http://struts.apache.org/dtds/struts-2.0.dtd">
 <struts>
<package name="helloworld"  extends="struts-default">
        <action name="helloworldAction" class="com.hipn.show.HelloWorldAction">
            <result name="toWelcome">/welcome.jsp</result>
             <result name="input">/index.jsp</result>
        </action>
    </package>
</struts>
這個需要注意的是在Class的地方那個路徑要和你上面那個類的路徑一致,還有action name這裡要和上面JSP頁面那裡也要一致。
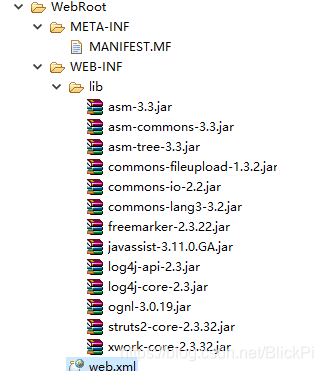
4.配置一個過濾器當然jar也不要忘了加進去
<?xml version="1.0" encoding="UTF-8"?>
<web-app version="2.5"
	xmlns="http://java.sun.com/xml/ns/javaee"
	xmlns:xsi="http://www.w3.org/2001/XMLSchema-instance"
	xsi:schemaLocation="http://java.sun.com/xml/ns/javaee
	http://java.sun.com/xml/ns/javaee/web-app_2_5.xsd">
  <welcome-file-list>
    <welcome-file>index.jsp</welcome-file>
  </welcome-file-list>

  <filter>
  <filter-name>struts2</filter-name>
  <filter-class>org.apache.struts2.dispatcher.ng.filter.StrutsPrepareAndExecuteFilter</filter-class>
  </filter>
  <filter-mapping>
  <filter-name>struts2</filter-name>
  <url-pattern>/*</url-pattern>
  </filter-mapping>
</web-app>
下面為顯示效果
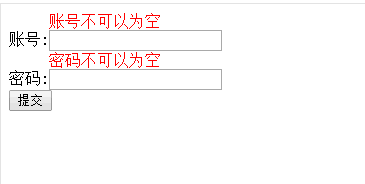
這樣一個Struts2繼承ActionSupport流程就完成了,有什麼不完整的地方,歡迎各路大神提出來。