使用SpringBoot整合ssm專案
SpringBoot是什麼?
Spring Boot是由Pivotal團隊提供的全新框架,其設計目的是用來簡化新Spring應用的初始搭建以及開發過程。
Spring Boot 現在已經成為Java 開發領域的一顆璀璨明珠,它本身是包容永珍的,可以跟各種技術整合。成為SpringBoot全家桶,成為一把萬能鑰匙。
SpringBoot的特點
1.建立獨立的Spring應用程式
2.嵌入的Tomcat,無需部署WAR檔案
3.簡化Maven配置
4.自動配置Spring
5.提供生產就緒型功能,如指標,健康檢查和外部配置
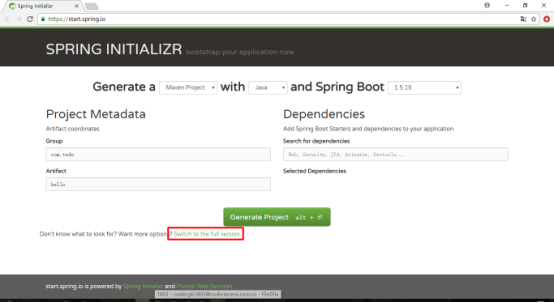
Spring官方支援SpringBoot提供的專案框架生成頁面
https://start.spring.io/

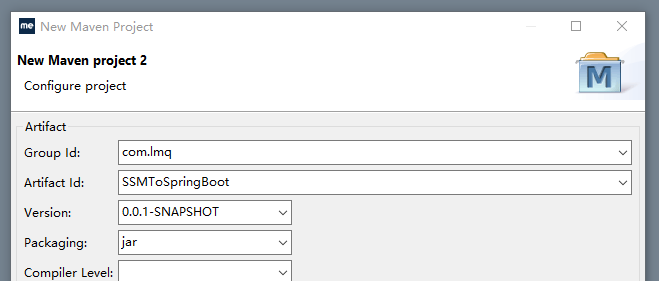
在eclipse上建立springboot工程
(jdk版本必須1.8以上,springboot基本上廢除了1.6、1.7)
eclipse版本也有要求,版本過低,建立的工程會報錯或者可以使用springboot低版本。也可以使用STS或IDEA,版本支援較好,下面演示用的是eclipse
簡單的使用springboot整合ssm
1.建立

pom.xml
額外需要的jar,還得自己依賴,例如:mysql驅動包,阿里的資料來源druid包
<parent>
        <groupId>org.springframework.boot</groupId>
        <artifactId>spring-boot-starter-parent</artifactId>
        <version>1.5.4.RELEASE</version>
        <relativePath /> <!-- lookup parent from repository -->
    </parent>
    <properties>
        <project.build.sourceEncoding>UTF-8</project.build.sourceEncoding>
        <project.reporting.outputEncoding>UTF-8</project.reporting.outputEncoding>
        <java.version>1.8</java.version>
    </properties>

    <dependencies>
        <dependency>
            <groupId>org.mybatis.spring.boot</groupId>
            <artifactId>mybatis-spring-boot-starter</artifactId>
            <version>1.3.0</version>
        </dependency>
        <dependency>
            <groupId>org.springframework.boot</groupId>
            <artifactId>spring-boot-starter-web</artifactId>
        </dependency>
        <dependency>
            <groupId>org.springframework.boot</groupId>
            <artifactId>spring-boot-starter-test</artifactId>
            <scope>test</scope>
        </dependency>
        <dependency>
            <groupId>mysql</groupId>
            <artifactId>mysql-connector-java</artifactId>
        </dependency>
        <dependency>
            <groupId>com.alibaba</groupId>
            <artifactId>druid-spring-boot-starter</artifactId>
            <version>1.1.0</version>
        </dependency>
</dependencies>建立pojo物件
public class User implements Serializable{
    private static final long serialVersionUID = 1L;

    private Integer id;
    private String name;

    @DateTimeFormat(pattern="yyyy-MM-dd")
    private Date birthday;
    private String address;

    public Integer getId() {
        return id;
    }
    public void setId(Integer id) {
        this.id = id;
    }
    public String getName() {
        return name;
    }
    public void setName(String name) {
        this.name = name;
    }
    public Date getBirthday() {
        return birthday;
    }
    public void setBirthday(Date birthday) {
        this.birthday = birthday;
    }
    public String getAddress() {
        return address;
    }
    public void setAddress(String address) {
        this.address = address;
    }
    @Override
    public String toString() {
        return "User [id=" + id + ", name=" + name + ", birthday=" + birthday + ", address=" + address + "]";
    }

}
建立 UserMapper.xml
<?xml version="1.0" encoding="UTF-8"?>
<!DOCTYPE mapper
    PUBLIC "-//mybatis.org//DTD Mapper 3.0//EN"
    "http://mybatis.org/dtd/mybatis-3-mapper.dtd">

<!-- namespace名稱空間,唯一特性 -->
<mapper namespace="com.lmq.mapper.UserMapper">
    <select id="find" resultType="User">
        select id,name,birthday,address from user
    </select>
</mapper>
建立UserMapper介面
public interface UserMapper {
    //呼叫xml方式
    public List<User> find();

    //呼叫註解方式
    @Select("select * from user where id=#{id}")
    public User get(@Param("id") Integer id);
}
建立UserService介面
public interface UserService {
    public List<User> find();
    public User get(Integer id);
}
建立UserServiceImpl介面實現類
@Service
public class UserServiceImpl implements UserService{
    @Autowired
    private UserMapper userMapper;

    public List<User> find() {
        return userMapper.find();
    }

    public User get(Integer id){
        return userMapper.get(id);
    }
}
建立UserController類
使用@RestController替代@Controller和@ResponseBody(返回json串)
@RestController
@RequestMapping(value = "/user")
public class UserController {
    @Autowired
    private UserService userService;

    @RequestMapping("/find")
    public List<User> find() {
        return userService.find();
    }

    @RequestMapping("/get/{id}")
    public User get(@PathVariable Integer id){
        return userService.get(id);
    }
}
建立application.yml
全域性配置檔案,yml為新的配置檔案方式,注意其中格式為空格,不能有tab。
配置埠,配置資料來源,配置mybatis全域性配置。
注意:如果埠,啟動時日誌顯示8080,說明此檔案未載入。檢查原因一般是檔名或者路徑不正確。
server:
  port: 8080

spring:
    datasource:
        type: com.alibaba.druid.pool.DruidDataSource
        driver-class-name: com.mysql.jdbc.Driver
        url: jdbc:mysql://127.0.0.1:3306/mybatisdb
        username: root
        password: root

mybatis:
  typeAliasesPackage: com.lmq.pojo
  mapperLocations: classpath:mappers/*.xml

logging:
  level:
    com.lmq.mapper: debug
建立RunApplication.java
@SpringBootApplication
@MapperScan("cn.lmq.mapper")        //掃描Mybatis介面檔案
public class RunApplication {
    public static void main(String[] args) {
        SpringApplication.run(RunApplication.class, args);
    }
}
初步整合完畢,比三大框架ssm好用太多了
傳統構建Maven專案,pom中的依賴包繁多,升級一個jar版本時,會引發新的衝突,除錯許久。而SpringBoot接管了jar的版本,它構建好一套,這套中各jar的版本已經測試好,開發者再無需去關注每個依賴包的版本及衝突問題,從而簡化開發。
再者,它啟動也非常快,直接執行一個類,使用tomcat的maven外掛。開發除錯時效率提高。
熱部署支援
配置pom.xml
<!-- 熱部署支援 -->
        <dependency>
            <groupId>org.springframework.boot</groupId>
            <artifactId>spring-boot-devtools</artifactId>
            <optional>true</optional>
        </dependency>
