
bbs專案引入富文字編輯器和處理xss攻擊和文章預覽
阿新 • • 發佈:2018-11-07
一、富文字編輯上傳文章和圖片
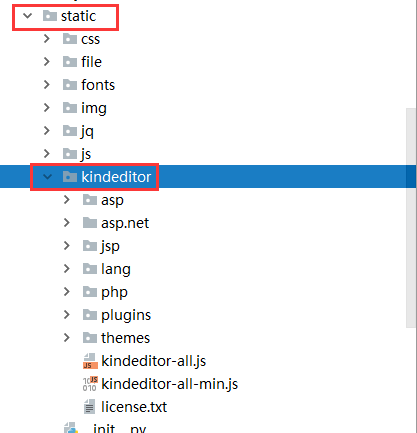
富文字編輯器我們使用kindeditor,我們首先去官網下載,然後解壓,放到我們的static的目錄中
然後我們在html中這樣使用富文字編輯器
<!DOCTYPE html>
<html lang="en">
<head>
    <meta charset="UTF-8">
    <title>Title</title>
    <link rel="stylesheet" href="/static/css/bootstrap-theme.css">
</head>
<body>
<h2>{{ auther }}個人部落格站點管理後臺</h2>

<h3>文章標題</h3>
<form method="post" enctype="multipart/form-data" action="">
    {% csrf_token %}

    <label for="article_id"></label><input type="text" id="article_id" placeholder="文章標題" name="new_article_name">
    <h3>文章內容</h3>
    <textarea name="new_article_content" cols="70" rows="20" id="editor_id">

    </textarea>
    <input type="submit" value="提交" class="btn btn-success">
</form>

<script src="/static/jq/jquery-3.3.1.js"></script>
<script charset="utf-8" src="/static/kindeditor/kindeditor-all.js"></script>
{#<script charset="utf-8" src="/static/kindeditor/lang/zh-CN.js"></script>#}
<script>
        KindEditor.ready(function(K) {
                window.editor = K.create('#editor_id',{
                width : '1200px',
                item:[
                    'source', '|', 'undo', 'redo', '|', 'preview', 'print', 'template', 'code', 'cut', 'copy', 'paste',
                    'plainpaste', 'wordpaste', '|', 'justifyleft', 'justifycenter', 'justifyright',
                    'justifyfull', 'insertorderedlist', 'insertunorderedlist', 'indent', 'outdent', 'subscript',
                    'superscript', 'clearhtml', 'quickformat', 'selectall', '|', 'fullscreen', '/',
                    'formatblock', 'fontname', 'fontsize', '|', 'forecolor', 'hilitecolor',
                    'italic', 'underline', 'strikethrough', 'lineheight', 'removeformat', '|', 'image', 'multiimage',
                    'flash', 'media', 'insertfile', 'table', 'hr', 'emoticons', 'baidumap', 'pagebreak',
                    'anchor', 'link', 'unlink', '|', 'about'
                ],
                    uploadJson:"/app1/upload/",
                    extraFileUploadParams:{
                        csrfmiddlewaretoken:$("[name='csrfmiddlewaretoken']").val()
                    },
                    filePostName:"upload_img"
                });
        });
</script>
</body>
</html>
主要是看這裡
首先要為textarea標籤設定一個id,這樣,我們就可以把富文字編輯器通過id鑲嵌到textarea標籤中
<textarea name="new_article_content" cols="70" rows="20" id="editor_id">
然後下面的script標籤中就是引入富文字編輯器的js檔案
<script src="/static/jq/jquery-3.3.1.js"></script>
<script charset="utf-8" src="/static/kindeditor/kindeditor-all.js"></script>
我們上一篇部落格重點講了一下富文字編輯上傳圖片,這裡我們就簡單的看下程式碼就可以了
<script>
        KindEditor.ready(function(K) {
                window.editor = K.create('#editor_id',{
                width : '1200px',
                item:[
                    'source', '|', 'undo', 'redo', '|', 'preview', 'print', 'template', 'code', 'cut', 'copy', 'paste',
                    'plainpaste', 'wordpaste', '|', 'justifyleft', 'justifycenter', 'justifyright',
                    'justifyfull', 'insertorderedlist', 'insertunorderedlist', 'indent', 'outdent', 'subscript',
                    'superscript', 'clearhtml', 'quickformat', 'selectall', '|', 'fullscreen', '/',
                    'formatblock', 'fontname', 'fontsize', '|', 'forecolor', 'hilitecolor',
                    'italic', 'underline', 'strikethrough', 'lineheight', 'removeformat', '|', 'image', 'multiimage',
                    'flash', 'media', 'insertfile', 'table', 'hr', 'emoticons', 'baidumap', 'pagebreak',
                    'anchor', 'link', 'unlink', '|', 'about'
                ],
                    uploadJson:"/app1/upload/",
                    extraFileUploadParams:{
                        csrfmiddlewaretoken:$("[name='csrfmiddlewaretoken']").val()
                    },
                    filePostName:"upload_img"
                });
        });
</script>
window.editor = K.create('#editor_id'
這個是固定寫法,把富文字放到id為editor_id的標籤中,這個標籤必須是textarea標籤
                item:[
                    'source', '|', 'undo', 'redo', '|', 'preview', 'print', 'template', 'code', 'cut', 'copy', 'paste',
                    'plainpaste', 'wordpaste', '|', 'justifyleft', 'justifycenter', 'justifyright',
                    'justifyfull', 'insertorderedlist', 'insertunorderedlist', 'indent', 'outdent', 'subscript',
                    'superscript', 'clearhtml', 'quickformat', 'selectall', '|', 'fullscreen', '/',
                    'formatblock', 'fontname', 'fontsize', '|', 'forecolor', 'hilitecolor',
                    'italic', 'underline', 'strikethrough', 'lineheight', 'removeformat', '|', 'image', 'multiimage',
                    'flash', 'media', 'insertfile', 'table', 'hr', 'emoticons', 'baidumap', 'pagebreak',
                    'anchor', 'link', 'unlink', '|', 'about'
                ],
這個item就是設定支援哪些功能和操作,比如加粗和斜體等等一系列操作
uploadJson:"/app1/upload/",
這個引數就是上傳會呼叫走哪個url
                    extraFileUploadParams:{
                        csrfmiddlewaretoken:$("[name='csrfmiddlewaretoken']").val()
                    },
由於我們採用form的post方式上傳,這裡是為了解決crsf檔案
filePostName:"upload_img"
這個是設定我們上傳的檔案的k值
def upload(request):
    print(settings.MEDIA_ROOT,type(settings.MEDIA_ROOT))
    file_obj = request.FILES.get("upload_img")
    upload_path = os.path.join(settings.MEDIA_ROOT,"upload",file_obj.name)
    with open(upload_path,"wb") as f:
        for line in file_obj:
            f.write(line)

    res={
        "error":0,
        "url":"/media/upload/"+file_obj.name
    }


    return HttpResponse(json.dumps(res))
這裡是我們上傳檔案的檢視函式的處理,這裡我們返回一個圖片上傳的路徑,然後返回給前端,前端就會自動把img標籤的src屬性指向這個地址,這樣我們開啟部落格就可以看到圖片
二、利用bs4模組實現文章預覽
另外我們一般部落格一般會有一個預覽的效果,這個我們該如何實現呢
這裡需要引入一個模組
from bs4 import BeautifulSoup
然後利用這個模組來實現,把前端傳遞過來的文章內容去除標籤。然後在對去除標籤的字串進行切片,然後寫到資料庫中即可
    s = """
    <li class="editor_pick"><a href="https://www.cnblogs.com/xiangnanl/p/9833965.html" id="editor_pick_lnk" target="_blank">【編輯推薦】一文弄懂“分散式鎖”<span id="editor_pick_count"> (2/735)</span></a> <a href="/aggsite/headline" title="檢視更多編輯推薦" class="right_more">»</a></li>
    """

    ret = BeautifulSoup(s,"html.parser")

    print(ret.text)
    # 獲取html標籤字串中的所有的文字內容
def article_site(request,auther):
    method = request.method.lower()
    if method == "get":
        return render(request,"article.html",{"auther":auther})
    else:
        title = request.POST.get("new_article_name")
        contend = request.POST.get("new_article_content")
        ret = models.Article.objects.create(
            title = title,
            desc = BeautifulSoup(contend,"html.parser").text[0:150],
            comment_count =1,
            up_count = 2,
            down_count = 1,
            category = models.Category.objects.filter(nid=1)[0],
            user = models.Userinfo.objects.filter(username=auther)[0],
        )
        models.ArticleDetail.objects.create(
            content = contend,
            article = ret
        )

        return redirect("/app1/index/")
三、利用bs4模組實現解決xss攻擊
最後我們怎麼解決xss攻擊呢,還是需要bs4這個模組,我們需要先安裝這個模組,然後匯入,然後把前端發過來的字元中有scrip的標籤全部刪除掉
    s = """<div id="headline_block" class="headline">
    <ul><li class="editor_pick"><a href="https://www.cnblogs.com/xiangnanl/p/9833965.html" id="editor_pick_lnk" target="_blank">【編輯推薦】一文弄懂“分散式鎖”<span id="editor_pick_count"> (2/769)</span></a> <a href="/aggsite/headline" title="檢視更多編輯推薦" class="right_more">»</a></li><li><a href="https://www.cnblogs.com/coco1s/p/9913885.html" target="_blank" title="閱讀726, 評論11, 推薦30">[最多推薦]你所不知道的 CSS 陰影技巧與細節(11/726)</a> <a href="/aggsite/topdigged24h" title="檢視24小時推薦排行" class="right_more">»</a></li><li><a href="https://www.cnblogs.com/ryzen/p/9914827.html" target="_blank" title="閱讀1409, 評論19, 推薦0">[最多評論]致C#,致我這工作一年(上)(19/1409)</a> <a href="/aggsite/topcommented24h" title="檢視24小時評論排行" class="right_more">»</a></li><li><a href="https://news.cnblogs.com/n/611408/" target="_blank" title="閱讀1976, 評論13, 推薦6">[新聞頭條]iPhone XR產能砍掉25% 蘋果供應商股價集體暴跌(13/1976)</a> <a href="https://news.cnblogs.com/" title="檢視更多新聞" class="right_more">»</a></li><li><a href="https://news.cnblogs.com/n/611463/" target="_blank" title="閱讀847, 評論5, 推薦9">[推薦新聞]比爾·蓋茨舉起一杯糞便,號召應對全球衛生危機(5/847)</a> <a href="https://news.cnblogs.com/n/recommend" title="檢視更多推薦新聞" class="right_more"></a></li></ul></div>"""

    ret = BeautifulSoup(s,"html.parser")

    ret = ret.find_all("a")
    # 查詢所有的a標籤


    for label in ret:

        print(label.get("href"))
        # 獲取a標籤的href的屬性

        print(label.name)
        # 獲取標籤的名稱

    ret = BeautifulSoup(s, "html.parser")

    for tag in ret.find_all():
        # 查詢所有的標籤
        if tag.name == "div":
            tag.decompose()
            # 在字串中刪除tag.name=div的標籤,這裡需要注意,如果div中有包裹的標籤,則會一併刪除
    print(ret)
<textarea name="new_article_content" cols="70" rows="20" id="editor_id">