
SpringBoot下使用ElasticSearch教程(一)
一:ElasticSearch簡單介紹.
ES是一款實時分析的分散式搜尋引擎,易擴充套件叢集,全文搜尋,分散式實時檔案儲存,基於RESTful風格的簡單易用API,底層使用Lucene封裝,使用Java語言開發,和多種語言容易互動使用,速度非常快, 穩定,可靠,容易安裝,開源.Lucene專注與底層搜尋建設,ElasticSearch專注於企業應用.
ElasticSearch官網有非常詳細的介紹:ElasticSearch.
ElasticSearch權威指南中文版:
二:環境準備.
我是方便測試,使用的Windows本地安裝的ES,ES的安裝教程比較多了,先把安裝環境跑起吧.
ElasticSearch:6.4.1
SpringBoot:2.0.5.RELEASE
Maven
PostMan:介面測試工具,有json格式的資料校驗,新增索引文章會比較方便的.
瀏覽器:Chrome
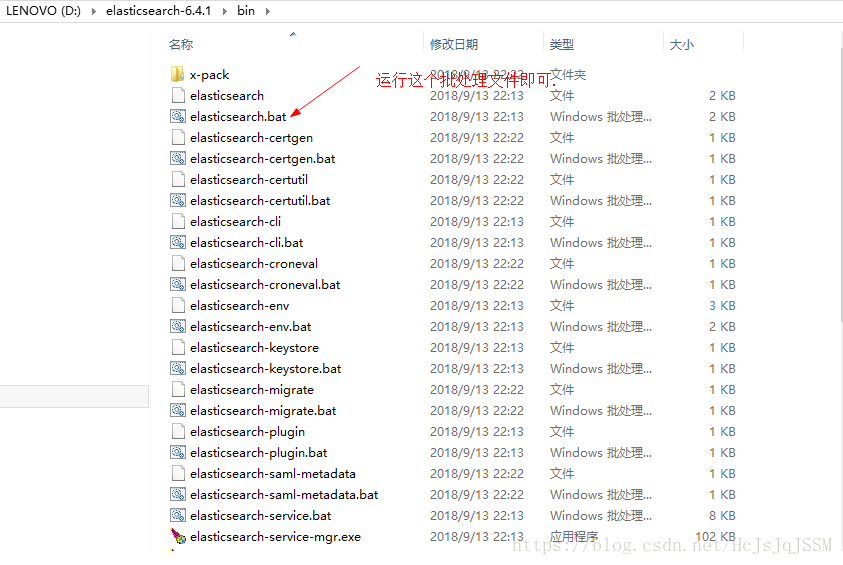
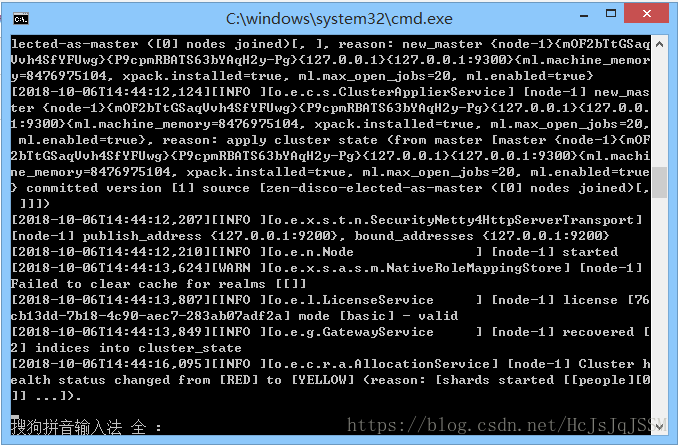
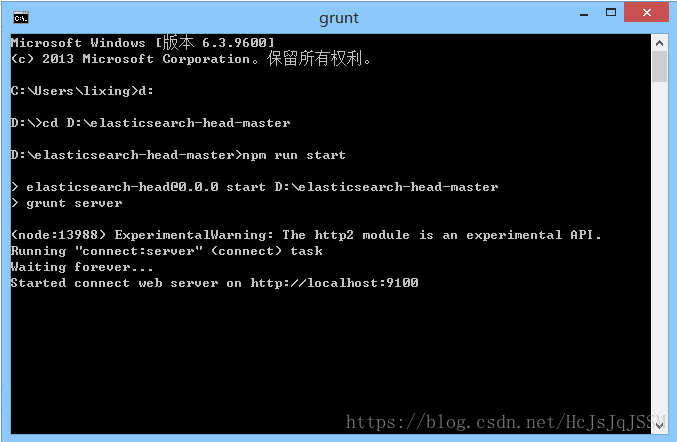
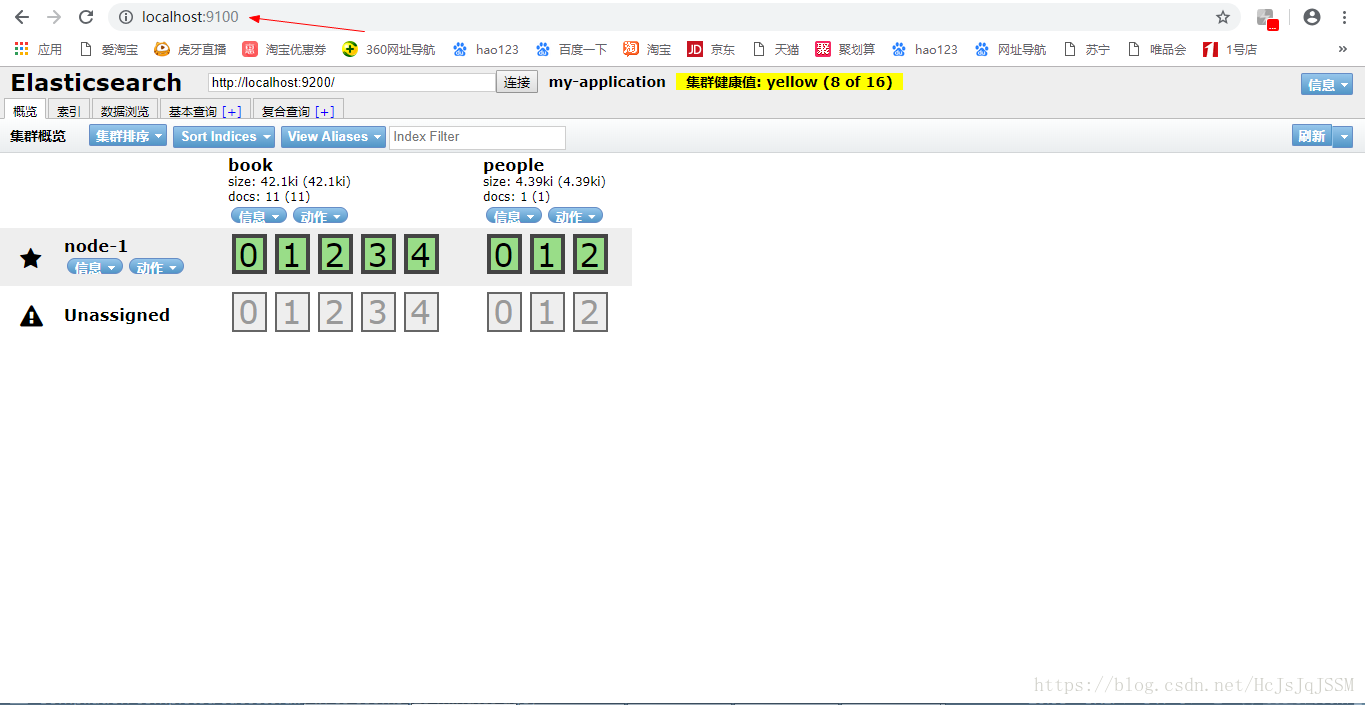
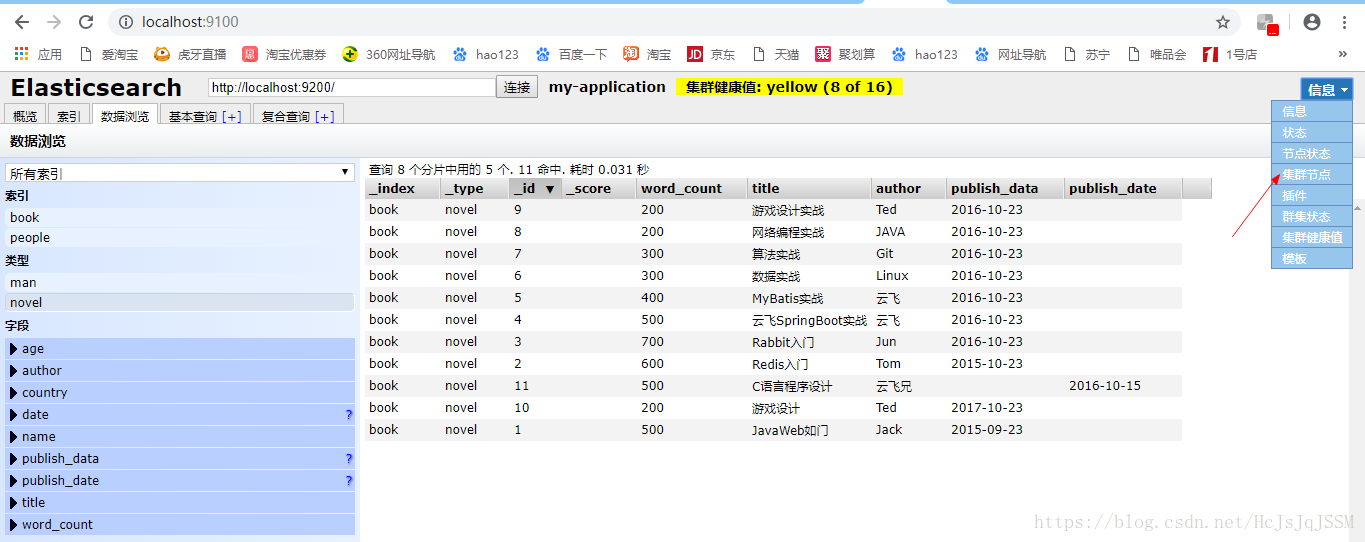
然後是安裝好啟動叢集管理header外掛.可以看到以正確啟動了.
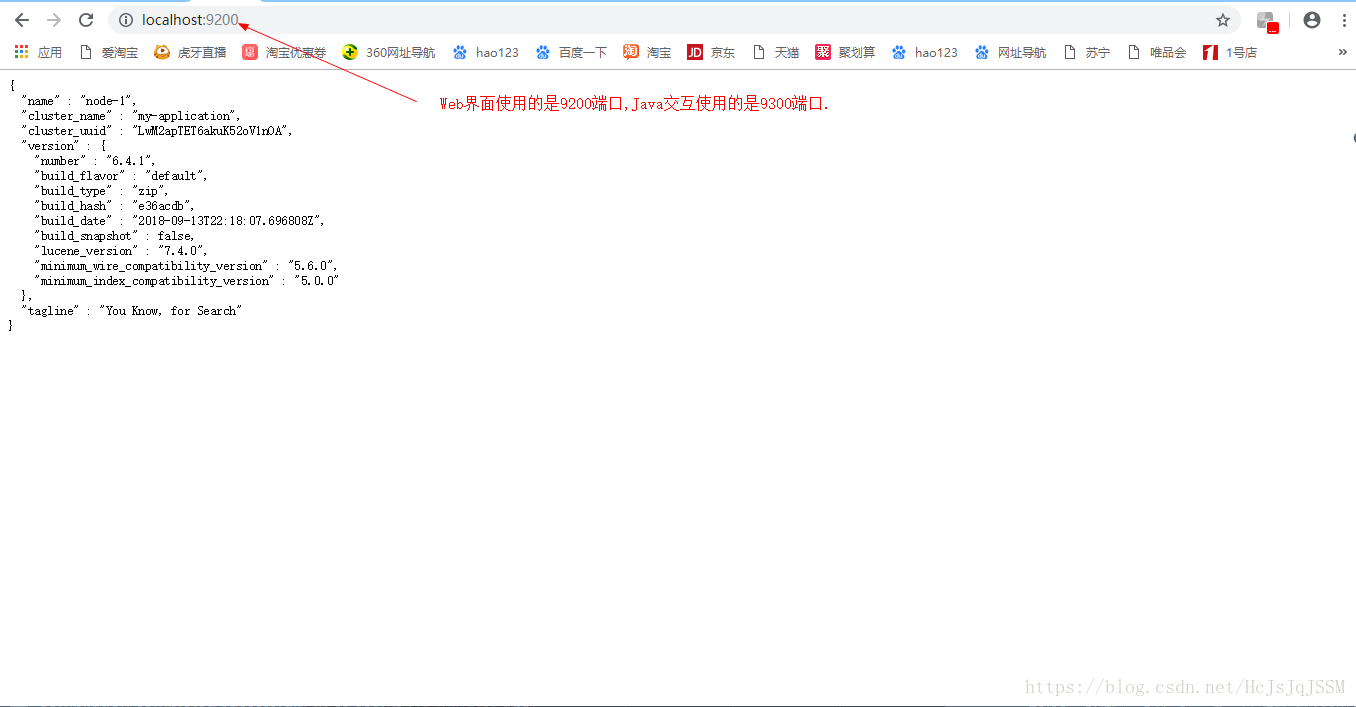
訪問ES的叢集面板.
使用PostMan新增索引.(說明一下,ES 6中,一個Index只能指定一個Type,親測).下面是新建的Index.
{
    "settings": {
        "number_of_shards": 5,
        "number_of_replicas": 1
   },
    "mappings":{
        "novel":{
            "properties":{
                "word_count":{
                    "type":"integer"
                },
                "author":{
                    "type":"keyword"
                },
                "title":{
                    "type":"text"
                },
                "publish_date":{
                    "type":"date",
                    "format":"yyyy-MM-dd HH:mm:ss || yyyy-MM-dd || epoch_millis"
                }
            }
        }
    }
}
新建索引指定id和自動生成id兩種方式.
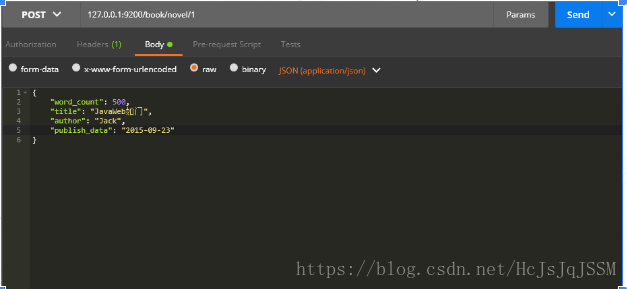
例如這裡插入第一條吧.(PostMan),(發現字打錯了如換成入吧,嚴謹一點吧.)
POST 127.0.0.1/book/novel/1
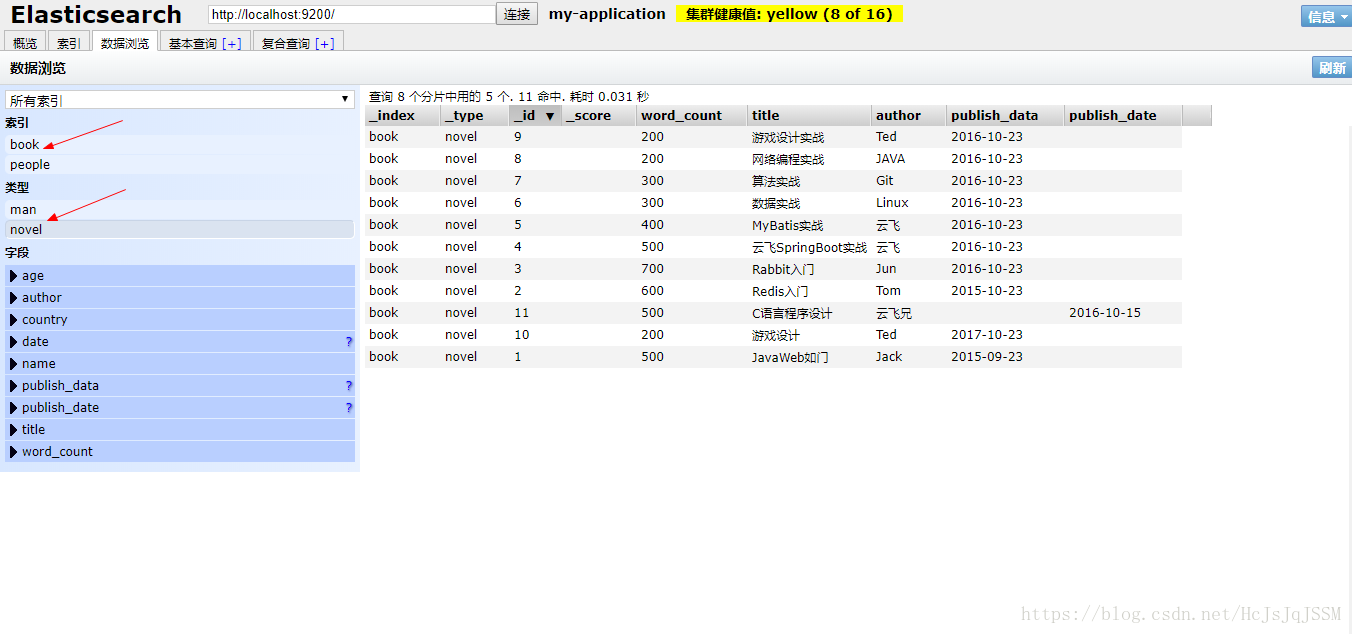
查詢文件是否存在.

二:整合SpringBoot(仔細閱讀注意一些不必要的坑 !!!).
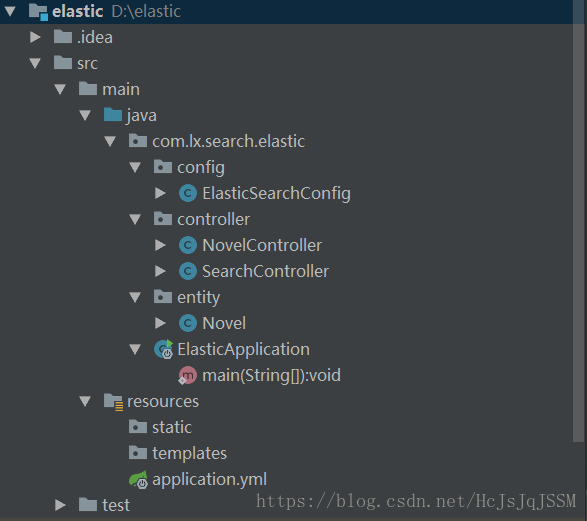
新建一個SpringBoot專案.建立一下的目錄.
pom.xml檔案依賴如下.
<?xml version="1.0" encoding="UTF-8"?>
<project xmlns="http://maven.apache.org/POM/4.0.0" xmlns:xsi="http://www.w3.org/2001/XMLSchema-instance"
xsi:schemaLocation="http://maven.apache.org/POM/4.0.0 http://maven.apache.org/xsd/maven-4.0.0.xsd">
<modelVersion>4.0.0</modelVersion>
<groupId>com.lx.search</groupId>
<artifactId>elastic</artifactId>
<version>0.0.1-SNAPSHOT</version>
<packaging>jar</packaging>
<name>elastic</name>
<description>ElasticSearch project for Spring Boot</description>
<parent>
<groupId>org.springframework.boot</groupId>
<artifactId>spring-boot-starter-parent</artifactId>
<version>2.0.5.RELEASE</version>
<relativePath/> <!-- lookup parent from repository -->
</parent>
<properties>
<project.build.sourceEncoding>UTF-8</project.build.sourceEncoding>
<project.reporting.outputEncoding>UTF-8</project.reporting.outputEncoding>
<java.version>1.8</java.version>
</properties>
<dependencies>
<!-- 引入ElasticSearch-->
<dependency>
<groupId>org.springframework.boot</groupId>
<artifactId>spring-boot-starter-data-elasticsearch</artifactId>
</dependency>
<dependency>
<groupId>org.elasticsearch.plugin</groupId>
<artifactId>transport-netty3-client</artifactId>
<version>5.6.10</version>
</dependency>
<dependency>
<groupId>org.springframework.boot</groupId>
<artifactId>spring-boot-starter-web</artifactId>
</dependency>
<dependency>
<groupId>org.springframework.boot</groupId>
<artifactId>spring-boot-starter-test</artifactId>
<scope>test</scope>
</dependency>
</dependencies>
<build>
<plugins>
<plugin>
<groupId>org.springframework.boot</groupId>
<artifactId>spring-boot-maven-plugin</artifactId>
</plugin>
</plugins>
</build>
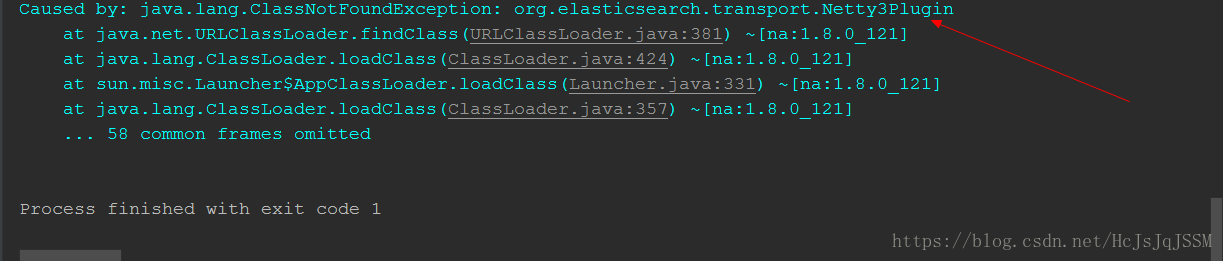
</project>要引入那個transport-netty3-client的.否在報錯喲.報錯資訊如下.
ES返回的文件對應實體物件,首先是完成實體類物件的編寫吧.(如果覺得Set/Get麻煩,使用Lombok吧).
import org.springframework.data.annotation.Id;
import org.springframework.data.elasticsearch.annotations.Document;
import java.util.Date;

@Document(indexName = "book",type="novel")
public class Novel {
    @Id
    private Long id;
    private String title;
    private String author;
    private Integer word_count;
    private Date publish_data;

    public Novel(){
      super();
    }

    public Long getId() {
        return id;
    }

    public void setId(Long id) {
        this.id = id;
    }

    public String getTitle() {
        return title;
    }

    public void setTitle(String title) {
        this.title = title;
    }

    public String getAuthor() {
        return author;
    }

    public void setAuthor(String author) {
        this.author = author;
    }

    public Integer getWord_count() {
        return word_count;
    }

    public void setWord_count(Integer word_count) {
        this.word_count = word_count;
    }

    public Date getPublish_data() {
        return publish_data;
    }

    public void setPublish_data(Date publish_data) {
        this.publish_data = publish_data;
    }

    @Override
    public String toString() {
        return "Novel{" +
                "id=" + id +
                ", title='" + title + '\'' +
                ", author='" + author + '\'' +
                ", word_count=" + word_count +
                ", publish_data=" + publish_data +
                '}';
    }
}
接下來就是兩種配置方式了.
方式一:ElasticsearchTemplate完成.(檢視一下cluster_name,新增了一個預設的節點,就不是預設的elasticsearch了).
application.yml中的編寫如下.
# 配置埠
server:
  port: 8081
# 配置ElasticSearch
spring:
  data:
    elasticsearch:
      cluster-nodes: 127.0.0.1:9300
      cluster-name: my-application
      repositories:
        enabled: true
接下來就是完成查詢了.(需求是查出所有帶有word_count的書).
NovelController入下.
import com.lx.search.elastic.entity.Novel;
import org.elasticsearch.index.query.QueryBuilder;
import org.elasticsearch.index.query.QueryBuilders;
import org.springframework.beans.factory.annotation.Autowired;
import org.springframework.data.elasticsearch.core.ElasticsearchTemplate;
import org.springframework.data.elasticsearch.core.query.NativeSearchQueryBuilder;
import org.springframework.data.elasticsearch.core.query.SearchQuery;
import org.springframework.web.bind.annotation.RequestMapping;
import org.springframework.web.bind.annotation.RestController;
import java.util.List;
/**
 * title: com.lx.search.elastic.controller
 * @author: lixing
 * date: 2018/10/6 14:06
 * description:查詢小說吧
 */
@RestController
public class NovelController {
    @Autowired
    private ElasticsearchTemplate elasticsearchTemplate;

    @RequestMapping("/search")
    public String findDoc(){
        // 構造搜尋條件
        QueryBuilder builder=QueryBuilders.existsQuery("word_count");
        SearchQuery searchQuery=new NativeSearchQueryBuilder().withQuery(builder).build();
        // 執行查詢
        List<Novel> novels=elasticsearchTemplate.queryForList(searchQuery,Novel.class);
        for(Novel novel:novels){
            System.out.println(novel);
        }
        return "Search Success";
    }
}
在啟動類的註解上新增包掃描.將實體類注入到容器成為Bean.
@SpringBootApplication(scanBasePackages = "com.lx.search.elastic")啟動訪問一下吧:瀏覽器訪問一下.

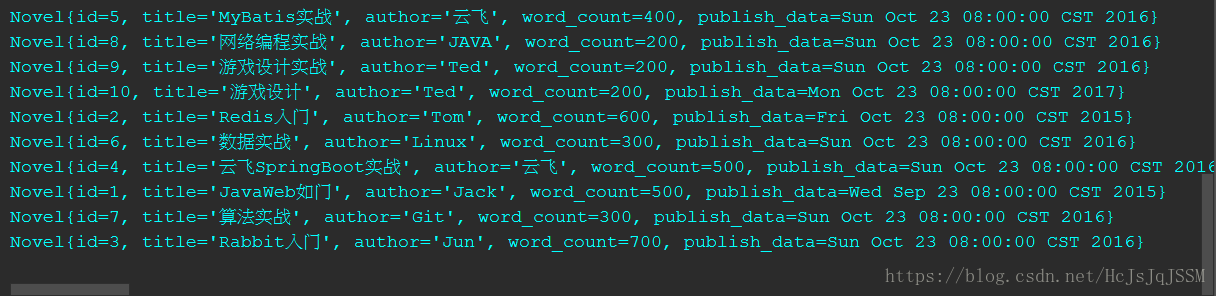
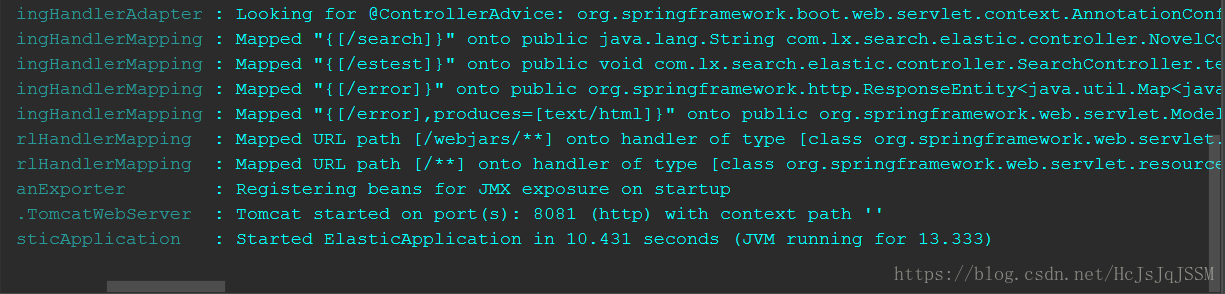
檢視控制檯如下:
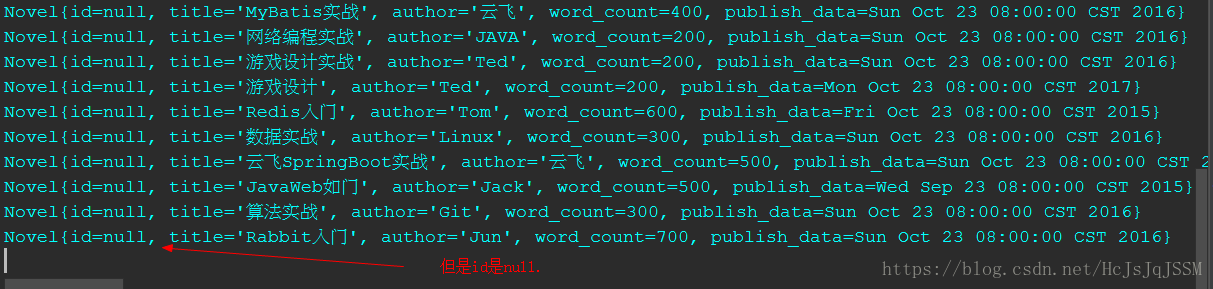
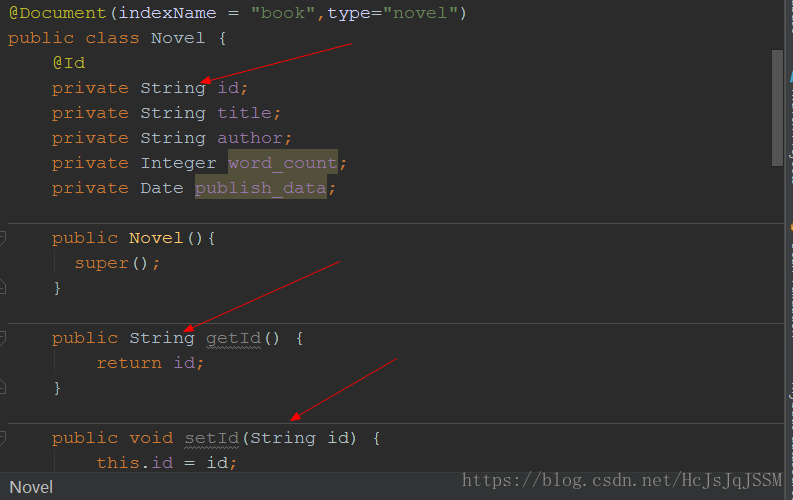
id為null是說明資料型別不符合唄,直接修改為將id的型別修改String吧,ES自動和手動生成的id是String型別的.
修改為String型別後:
重新訪問一下,問題解決.
方式二:TransportClient.
ElasticSearchConfigimport org.elasticsearch.client.transport.TransportClient;
import org.elasticsearch.common.settings.Settings;
import org.elasticsearch.common.transport.InetSocketTransportAddress;
import org.elasticsearch.common.transport.TransportAddress;
import org.elasticsearch.transport.client.PreBuiltTransportClient;
import org.slf4j.Logger;
import org.slf4j.LoggerFactory;
import org.springframework.context.annotation.Bean;
import org.springframework.context.annotation.Configuration;
import java.net.InetAddress;
/**
* title: com.lx.search.elastic.config
* @author: lixing
* date: 2018/10/2 14:50
* description:ElasticSearchConfig的配置類
*/
@Configuration
public class ElasticSearchConfig {
private static final Logger logger = LoggerFactory.getLogger(ElasticSearchConfig.class);
@Bean
public TransportClient client() {
logger.info("初始化開始中...");
TransportClient client = null;
try {
TransportAddress transportAddress = new InetSocketTransportAddress(InetAddress.getByName("localhost"),
Integer.valueOf(9300));
// 配置資訊
Settings esSetting = Settings.builder()
.put("cluster.name","my-application")
.build();
// 配置資訊Settings自定義
client= new PreBuiltTransportClient(esSetting);
client.addTransportAddresses(transportAddress);
} catch (Exception e) {
logger.error("elasticsearch TransportClient create error!!!", e);
}
return client;
}
}SaerchController.
import org.elasticsearch.action.get.GetResponse;
import org.elasticsearch.client.transport.TransportClient;
import org.springframework.beans.factory.annotation.Autowired;
import org.springframework.web.bind.annotation.RequestMapping;
import org.springframework.web.bind.annotation.RestController;

@RestController
public class SearchController {
    @Autowired
    private TransportClient client;

    @RequestMapping("/estest")
    public void test(){
        // 查詢一條
        GetResponse result=client.prepareGet("book","novel","1").get();
        System.out.println(result);
    }
}
瀏覽器訪問一下:

控制檯檢視:(返回了id為1的json資料).

遇到問題如下:

2018-10-06 15:27:24.926 WARN 15064 --- [][generic][T#1]] o.e.c.t.TransportClientNodesService : node {#transport#-1}{Dv7dhgGlQCyxgGsSOd_JjQ}{localhost}{127.0.0.1:9300} not part of the cluster Cluster [elastic], ignoring...
控制檯列印上述資訊.
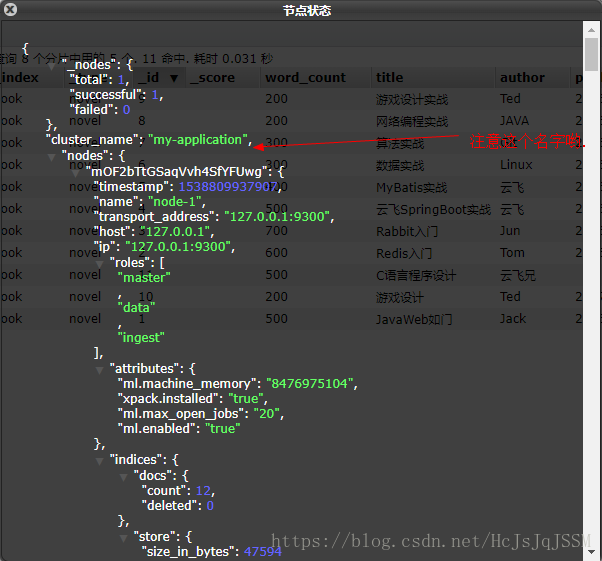
可以看出是節點名字錯了吧,不是那個elastic.就進入到那個叢集面板裡面檢視一下這個127.0.0.1:9300節點的cluster_name是那個
elastic嗎???是預設的elasticsearch嗎???,當然我是新建了節點的.
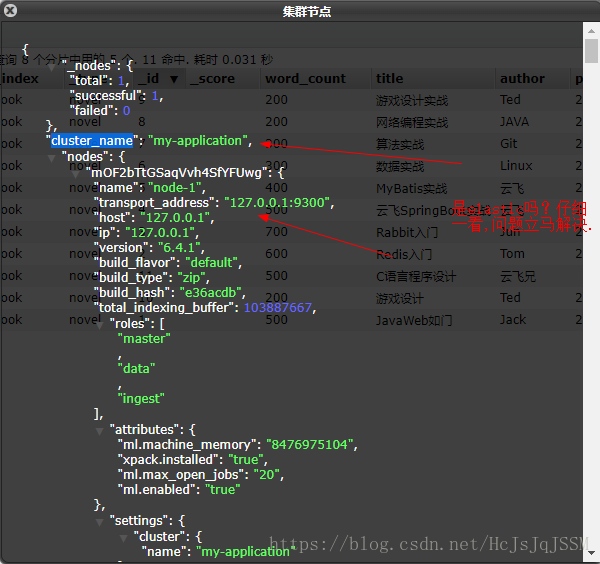
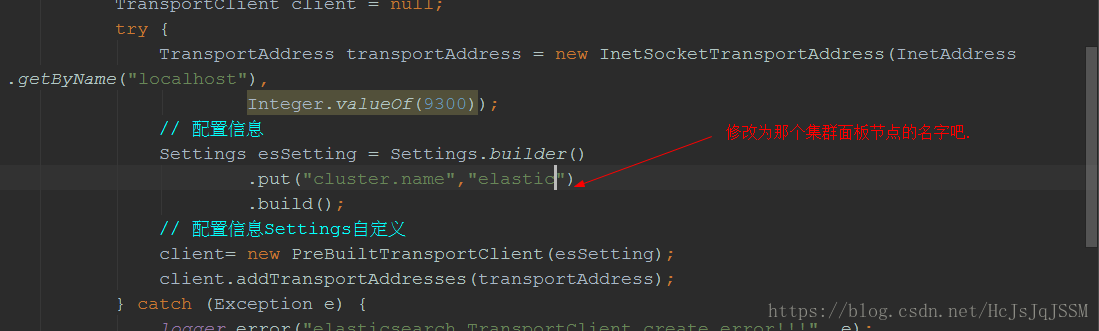
修改為my-application
在這裡還可以檢視一下配置檔案.config目錄下elasticsearch.yml檔案.

再次重新啟動一下,正常啟動了,可以正常訪問了.
三:簡單總結.
在這次整合中也是遇到了問題,首先是自己認真的觀察和仔細的思考一下,一步一步耐心解決吧.後面使用過程中在總結吧.