
python爬蟲資料處理
阿新 • • 發佈:2018-11-10
資料處理的兩種方式
- re正則表示式:通過對資料文字進行匹配,來得到所需的資料
- BeautifulSoup:通過該類建立一個物件,通過對類裡面封裝的方法進行呼叫,來提取資料。
bs4
對標籤進行查詢
- 獲取標籤的內容
import re
from bs4 import BeautifulSoup

soup = BeautifulSoup(open('hello.html'),'html5lib')
print(soup.title)
print(soup.p)  #只能匹配到第一個P標籤
print(type(soup.title))  #一個元素標籤
結果:

- 獲取標籤的屬性
import re
from bs4 import BeautifulSoup

soup = BeautifulSoup(open('hello.html'),'html5lib')
print(soup.p['id'])
print(soup.p['style'])
結果:
- 獲取標籤的文字內容
import re
from bs4 import BeautifulSoup

soup = BeautifulSoup(open('hello.html'),'html5lib')
print(soup.title.text)
print(soup.title.string)
結果:

- 獲取標籤的子節點
import re
from bs4 import BeautifulSoup

soup = BeautifulSoup(open('hello.html'),'html5lib')
print(soup.div.children)  #返回的是一個可迭代物件
print(soup.head.contents)  #返回的是一個列表
for i in soup.div.children:
    print(i)
結果:

對物件進行操作
- 查詢指定標籤的內容
import re
from bs4 import BeautifulSoup

soup = BeautifulSoup(open('hello.html'),'html5lib')
#查詢指定標籤的內容
res = soup.find_all('p')  #返回的是一個列表
print(res)

#配合正則的使用,對正則表示式進行編譯可以提高查詢的速率
res = soup.find_all(re.compile('di\w'))  #find_all方法返回的是一列表
print(res)
結果:

- 詳細查詢指定標籤
import re
from bs4 import BeautifulSoup

soup = BeautifulSoup(open('hello.html'),'html5lib')
print(soup.find_all('p',id='id1'))
print(soup.find_all('p',id=re.compile('id\d')))
#注意:根據類匹配標籤時,class後面要加一個_,是為了與關鍵字class重複
print(soup.find_all('p',class_=re.compile('class\d')))
結果:

- 詳細查詢多個標籤的內容
import re
from bs4 import BeautifulSoup

soup = BeautifulSoup(open('hello.html'),'html5lib')
#注意:向find_all裡面新增多個匹配時,一個列表的形式傳入
print(soup.find_all([re.compile('p'),re.compile('div')]))
結果:

- css常見的匹配
#css常見的選擇器:標籤選擇器,類選擇器,id選擇器,屬性選擇器
#標籤選擇器
res1 = soup.select('p')  #返回的是一個列表
print(res1)
#類鎖選擇器
res = soup.select('.class1')
print(res)
#id選擇器
res = soup.select('#id2')
print(res)
#屬性選擇器
res = soup.select("p[id='id1']")
print(res)
結果:

bs4的簡單引用
爬取多個電影的id和名字
from bs4 import BeautifulSoup
import requests
url = 'https://movie.douban.com/cinema/nowplaying/xian/'
'''
<li id="26425063" class="list-item" data-title="無雙"
data-score="8.1" data-star="40" data-release="2018"
data-duration="130分鐘" data-region="中國大陸 香港"
data-director="莊文強"
data-actors="周潤發 / 郭富城 / 張靜初"
data-category="nowplaying" data-enough="True" data-showed="True"
data-votecount="199648" data-subject="26425063">'''
def getPagehtml(url):
return requests.get(url).text
def dealdata(text):
# 利用BeautifulSoup對傳入的html檔案進行一個解析,並返回一個物件
soup = BeautifulSoup(text,'html5lib')
#查詢所有類名為list-item的li標籤,把匹配到的內容返回給一個列標
li_list = soup.find_all('li',class_="list-item")
movie_info=[]
for i in li_list:
onn_movie_info = {}
#對匹配到標籤內容用標籤的屬性作為索引去獲取
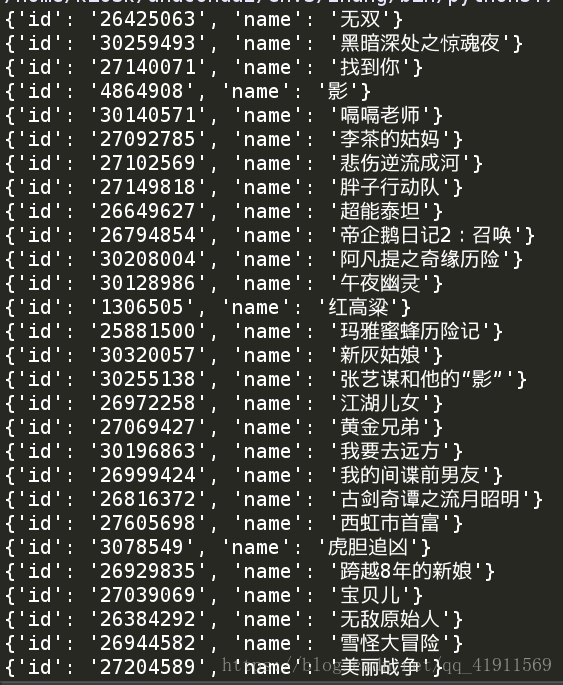
onn_movie_info['id']=i['id']
onn_movie_info['name']=i['data-title']
movie_info.append(onn_movie_info)
[print(i) for i in movie_info]
dealdata(getPagehtml(url))
結果:
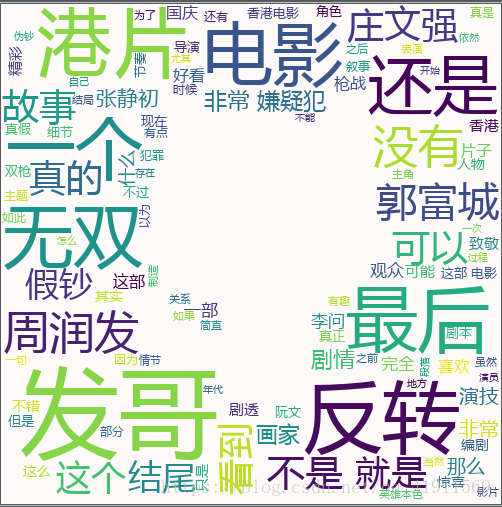
獲取電影的影評資訊繪製為詞雲
import re
import jieba
import wordcloud
import requests
from bs4 import BeautifulSoup
import numpy
from PIL import Image


def getPagehtml(url):
    return requests.get(url).text

def deal_one_text(text):
    soup = BeautifulSoup(text,'html5lib')
    tag_li = soup.find_all('span',class_='short')
    comment_li = []
    for tag in tag_li:
        comment_li.append(tag.string)
    return comment_li
# deal_one_text(getPagehtml(url))

def create_cloud(text):
    # 此函式實現一個繪製詞雲圖片的功能,並將圖片儲存起來
    # 對傳入的文字進行切割,返回一個列表,裡面存有文字的詞語
    result = jieba.lcut(text)
    #生成一個圖片物件
    imgobj = Image.open('./img1.jpg')
    cloud_mask = numpy.array(imgobj)
    wc = wordcloud.WordCloud(
        mask=cloud_mask,
        width=500,
        background_color='snow',
        max_font_size=200,
        min_font_size=10,
        font_path='./font/msyh.ttf',
    )
    wc.generate(','.join(result))
    #生成圖片
    wc.to_file('./cloud1.png')

def main():
    all_comments = []
    #對十頁的內容進行操作
    for i in range(10):
        start = i*20
        #生成每一頁的url
        url = 'https://movie.douban.com/subject/26425063/comments?start=%d&limit=20&sort=new_score&status=P' %start
        text =getPagehtml(url)
        comment = deal_one_text(text)
        #將每一頁的電影的名字和資訊都存入到列表
        [all_comments.append(i) for i in comment]
    comment_str = "".join(all_comments)
    comments =  re.findall(r'([\u4e00-\u9fa5]+|[a-zA-Z]+)',comment_str)
    print(''.join(comments))
    create_cloud(''.join(comments))


main()
結果:
詞雲圖形的繪製
# 對傳入的文字進行切割,返回一個列表,裡面存有文字的詞語
 imgobj = Image.open('./img1.jpg')
    cloud_mask = numpy.array(imgobj)
    wc = wordcloud.WordCloud(
        mask=cloud_mask,
        width=500,
        background_color='snow',
        max_font_size=200,
        min_font_size=10,
        font_path='./font/msyh.ttf',
    )
    wc.generate(','.join(result))
    #生成圖片
    wc.to_file('./cloud1.png')