
封裝一個動態導航欄
《android中如何打造一個動態的底部導航欄》
在上一篇只是教大家一些基礎的東西,今天來完成一個真正的動態底部導航欄的專案,本專案還是會分幾步來完成,不懂的可以根據步驟一步一步的來,每個步驟都會解釋清楚,相信大家一定會學習到一些東西,相信學習之後,自己也能有自己的一些自定義控制元件,那就開始吧!
第一步:新建一個類名字為NavFootView,然後繼承LinearLayout,要重寫至少兩個構造方法.
public class NavFootView extends LinearLayout {

    public NavFootView(Context context) {
        super(context);
    }
    public NavFootView(Context context, @Nullable AttributeSet attrs) {
        super(context, attrs);
    }
    public NavFootView(Context context, @Nullable AttributeSet attrs, int defStyleAttr) {
        super(context, attrs, defStyleAttr);
    }
}
第二步:就是如何動態獲取該控制元件的寬高,和手指點選該控制元件後的座標,為什麼要這樣做呢?因為我們只有獲取到控制元件的寬高,才能進行計算出每個圖標占多少的空間。
public class NavFootView extends LinearLayout {
    public NavFootView(Context context) {
        super(context);
    }
    public NavFootView(Context context, @Nullable AttributeSet attrs) {
        super(context, attrs);
    }
    public NavFootView(Context context, @Nullable AttributeSet attrs, int defStyleAttr) {
        super(context, attrs, defStyleAttr);
    }
    //獲取觸控的座標
    @Override
    public boolean onTouchEvent(MotionEvent event) {
        Log.i("data-->", "" + event.getX());
        Log.i("data-->", "" + event.getX());

        return super.onTouchEvent(event);
    }
    //獲取控制元件的寬高
    @Override
    protected void onMeasure(int widthMeasureSpec, int heightMeasureSpec) {
        //獲取控制元件的寬
        int parentWidth = MeasureSpec.getSize(widthMeasureSpec);
        //獲取控制元件的高
        int parentHeight = MeasureSpec.getSize(heightMeasureSpec);
        Log.i("data-->", "寬:" + parentWidth);
        Log.i("data-->", "高:" + parentHeight);
        this.setMeasuredDimension(parentWidth, parentHeight);
        super.onMeasure(widthMeasureSpec, heightMeasureSpec);
    }
}
這個時候就可以獲取到控制元件的寬高和觸控的座標。
第三步:嚮導航欄內動態新增資料
在做這個之前我們要先進行物理資料的儲備,因為之後的操作需要根據這些資料,進行操作,比如導航欄點選之後圖示變成什麼樣子,字型的顏色等。新建幾個方法採用java中的鏈式程式設計的方式.
//新增item
    public NavFootView addItem(String title, int icBefore, int icAfter) {
        return this;
    }
 //進行專案的建立--所有的操作放在這個地方
    public void build(){

    }
    //這個方法是上篇的一個方法就是用於動態生成
 private TextView getTextView(String title, int drawableId) {
        TextView textView = new TextView(context);
        textView.setText(title);
        //這一步就是讓字型居中
        textView.setGravity(Gravity.CENTER);
        //給TextView設定佈局引數--第一個引數是寬,第二個引數是高,第三個引數是相當於 android:layout_weight="1"
        LayoutParams params = new LayoutParams(LayoutParams.WRAP_CONTENT, LayoutParams.WRAP_CONTENT, 1.0f);
        textView.setLayoutParams(params);
        textView.setTextColor(Color.BLACK);
        Drawable drawable = getResources().getDrawable(drawableId);
        //這句話一定要寫
        drawable.setBounds(0, 0, drawable.getMinimumWidth(), drawable.getMinimumHeight());
        // setCompoundDrawables(left ,top ,right, bottom);
        textView.setCompoundDrawables(null, drawable, null, null);
        return textView;
    }
下邊就是第三步整體的程式碼:
public class NavFootView extends LinearLayout {
    public NavFootView(Context context) {
        super(context);
        this.context = context;
    }
    public NavFootView(Context context, @Nullable AttributeSet attrs) {
        super(context, attrs);
        this.context = context;
    }
    public NavFootView(Context context, @Nullable AttributeSet attrs, int defStyleAttr) {
        super(context, attrs, defStyleAttr);
        this.context = context;
    }
    //點選之前的圖示
    private Map<String, Integer> icBeforeMap = new HashMap<>();
    //點選之後的圖示
    private Map<String, Integer> icAfterMap = new HashMap<>();
    //儲存標題
    private List<String> titleList = new ArrayList<>();
    //獲取控制元件的寬
    private int parentWidth;
    //獲取控制元件的高
    private int parentHeight;
    private Context context;
    //獲取觸控的座標
    @Override
    public boolean onTouchEvent(MotionEvent event) {
        float x = event.getX();
        float y = event.getY();
        return super.onTouchEvent(event);
    }
    //獲取控制元件的寬高
    @Override
    protected void onMeasure(int widthMeasureSpec, int heightMeasureSpec) {
        //獲取控制元件的寬
        parentWidth = MeasureSpec.getSize(widthMeasureSpec);
        //獲取控制元件的高
        parentHeight = MeasureSpec.getSize(heightMeasureSpec);
        this.setMeasuredDimension(parentWidth, parentHeight);
        super.onMeasure(widthMeasureSpec, heightMeasureSpec);
    }
    //新增item
    public NavFootView addItem(String title, int icBefore, int icAfter) {
        titleList.add(title);
        icBeforeMap.put(title, icBefore);
        icAfterMap.put(title, icAfter);
        return this;
    }
    //進行專案的建立--所有的操作放在這個地方
    public void build() {
        Iterator<String> iterator = titleList.iterator();
        while (iterator.hasNext()){
            String next = iterator.next();
            this.addView(getTextView(next,icBeforeMap.get(next)));
        }
    }
    //建立一個TextView
    private TextView getTextView(String title, int drawableId) {
        TextView textView = new TextView(context);
        textView.setText(title);
        //這一步就是讓字型居中
        textView.setGravity(Gravity.CENTER);
        //給TextView設定佈局引數--第一個引數是寬,第二個引數是高,第三個引數是相當於 android:layout_weight="1"
        LayoutParams params = new LayoutParams(LayoutParams.WRAP_CONTENT, LayoutParams.WRAP_CONTENT, 1.0f);
        textView.setLayoutParams(params);
        textView.setTextColor(Color.BLACK);
        Drawable drawable = getResources().getDrawable(drawableId);
        //這句話一定要寫
        drawable.setBounds(0, 0, drawable.getMinimumWidth(), drawable.getMinimumHeight());
        // setCompoundDrawables(left ,top ,right, bottom);
        textView.setCompoundDrawables(null, drawable, null, null);
        return textView;
    }
}
那怎麼使用呢?請看下邊
首先就是在xml裡進行配置,本教程採用的是在xml裡配置的方式,也可以用程式碼動態也可以,只是為了方便而已.
xml中配置
<?xml version="1.0" encoding="utf-8"?>
<LinearLayout
  xmlns:android="http://schemas.android.com/apk/res/android"
  xmlns:tools="http://schemas.android.com/tools"
  android:layout_width="match_parent"
  android:layout_height="match_parent"
  tools:context="com.listview.MainActivity">
  <com.listview.NavFootView
    android:layout_width="match_parent"
    android:layout_height="wrap_content"
    android:id="@+id/container"
    android:orientation="horizontal">
  </com.listview.NavFootView>
</LinearLayout>
在程式碼中使用
public class MainActivity extends AppCompatActivity {
    NavFootView container;
    @Override
    protected void onCreate(Bundle savedInstanceState) {
        super.onCreate(savedInstanceState);
        setContentView(R.layout.activity_main);
        container = findViewById(R.id.container);
        container.addItem("首頁", R.mipmap.ads1, R.mipmap.ads2);
        container.addItem("訊息", R.mipmap.datav1, R.mipmap.datav2);
        container.addItem("聯絡人", R.mipmap.openad1, R.mipmap.openad2);
        container.addItem("我的", R.mipmap.re1, R.mipmap.re2);
        container.build();
    }
}
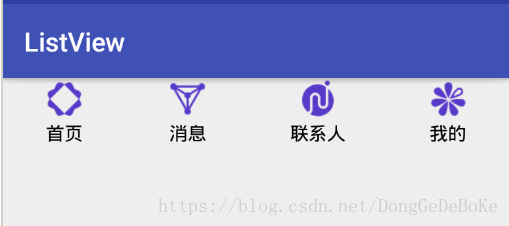
效果圖:
現在短短的幾行,就已經顯示出來了,但是這樣是不夠的,怎麼實現點選之後圖示顏色變換呢?
第四步:如何改變點選之後圖示的變換和字型顏色的變換?
這個時候就要用到第一步的那兩個方法了,一個是獲得觸控的座標,一個是獲得控制元件寬高,那怎麼使用呢?這個時候新建一個方法
 //獲取點選的是哪個
    public void selectPage(int index){

    }
如何使用呢?直接這樣使用就好了, int index = (int)(x/(parentWidth/titleList.size()));這個計算的理念是,導航欄平分之後,就只需要計算出觸控的區域是在哪個區域就可以了
 //獲取觸控的座標
    @Override
    public boolean onTouchEvent(MotionEvent event) {
        float x = event.getX();
       int index  = (int) (x/(parentWidth/titleList.size()));
        selectPage(index);
        return super.onTouchEvent(event);
    }
既然資料要新增完了,這個時候就是要獲取點選的那個控制元件了.新建一個方法
    //給TextView設定圖片
    private void setTextViewDrawable(TextView textView, int drawableId) {
        Drawable drawable = getResources().getDrawable(drawableId);
        //這句話一定要寫
        drawable.setBounds(0, 0, drawable.getMinimumWidth(), drawable.getMinimumHeight());
        // setCompoundDrawables(left ,top ,right, bottom);
        textView.setCompoundDrawables(null, drawable, null, null);
    }
這個時候selectPage這個方法就變成
 //獲取點選的是哪個
    public void selectPage(int index) {
        //獲得控制元件總共的數量
        int childCount = this.getChildCount();
        for (int i = 0; i < childCount; i++) {
            TextView textView = (TextView) this.getChildAt(i);
            if (index == i) {
                //選中
                textView.setTextColor(Color.RED);
                setTextViewDrawable(textView,icAfterMap.get(textView.getText().toString().trim()));
            } else {
                //未選中
                textView.setTextColor(Color.BLACK);
                setTextViewDrawable(textView,icBeforeMap.get(textView.getText().toString().trim()));
            }
        }
    }
整體程式碼:
public class NavFootView extends LinearLayout {
    public NavFootView(Context context) {
        super(context);
        this.context = context;
    }
    public NavFootView(Context context, @Nullable AttributeSet attrs) {
        super(context, attrs);
        this.context = context;
    }
    public NavFootView(Context context, @Nullable AttributeSet attrs, int defStyleAttr) {
        super(context, attrs, defStyleAttr);
        this.context = context;
    }
    //點選之前的圖示
    private Map<String, Integer> icBeforeMap = new HashMap<>();
    //點選之後的圖示
    private Map<String, Integer> icAfterMap = new HashMap<>();
    //儲存標題
    private List<String> titleList = new ArrayList<>();
    //獲取控制元件的寬
    private int parentWidth;
    //獲取控制元件的高
    private int parentHeight;
    private Context context;
    //獲取觸控的座標
    @Override
    public boolean onTouchEvent(MotionEvent event) {
        float x = event.getX();
        int index = (int) (x / (parentWidth / titleList.size()));
        selectPage(index);
        return super.onTouchEvent(event);
    }
    //獲取控制元件的寬高
    @Override
    protected void onMeasure(int widthMeasureSpec, int heightMeasureSpec) {
        //獲取控制元件的寬
        parentWidth = MeasureSpec.getSize(widthMeasureSpec);
        //獲取控制元件的高
        parentHeight = MeasureSpec.getSize(heightMeasureSpec);
        this.setMeasuredDimension(parentWidth, parentHeight);
        super.onMeasure(widthMeasureSpec, heightMeasureSpec);
    }
    //新增item
    public NavFootView addItem(String title, int icBefore, int icAfter) {
        titleList.add(title);
        icBeforeMap.put(title, icBefore);
        icAfterMap.put(title, icAfter);
        return this;
    }
    //進行專案的建立--所有的操作放在這個地方
    public void build() {
        Iterator<String> iterator = titleList.iterator();
        while (iterator.hasNext()) {
            String next = iterator.next();
            this.addView(getTextView(next, icBeforeMap.get(next)));
        }
    }
    //獲取點選的是哪個
    public void selectPage(int index) {
        //獲得控制元件總共的數量
        int childCount = this.getChildCount();
        for (int i = 0; i < childCount; i++) {
            TextView textView = (TextView) this.getChildAt(i);
            if (index == i) {
                //選中
                textView.setTextColor(Color.RED);
                setTextViewDrawable(textView,icAfterMap.get(textView.getText().toString().trim()));
            } else {
                //未選中
                textView.setTextColor(Color.BLACK);
                setTextViewDrawable(textView,icBeforeMap.get(textView.getText().toString().trim()));
            }
        }
    }
    //建立一個TextView
    private TextView getTextView(String title, int drawableId) {
        TextView textView = new TextView(context);
        textView.setText(title);
        //這一步就是讓字型居中
        textView.setGravity(Gravity.CENTER);
        //給TextView設定佈局引數--第一個引數是寬,第二個引數是高,第三個引數是相當於 android:layout_weight="1"
        LayoutParams params = new LayoutParams(LayoutParams.WRAP_CONTENT, LayoutParams.MATCH_PARENT,
            1.0f);
        textView.setLayoutParams(params);
        textView.setTextColor(Color.BLACK);
        Drawable drawable = getResources().getDrawable(drawableId);
        //這句話一定要寫
        drawable.setBounds(0, 0, drawable.getMinimumWidth(), drawable.getMinimumHeight());
        // setCompoundDrawables(left ,top ,right, bottom);
        textView.setCompoundDrawables(null, drawable, null, null);
        return textView;
    }
    //給TextView設定圖片
    private void setTextViewDrawable(TextView textView, int drawableId) {
        Drawable drawable = getResources().getDrawable(drawableId);
        //這句話一定要寫
        drawable.setBounds(0, 0, drawable.getMinimumWidth(), drawable.getMinimumHeight());
        // setCompoundDrawables(left ,top ,right, bottom);
        textView.setCompoundDrawables(null, drawable, null, null);
    }
}
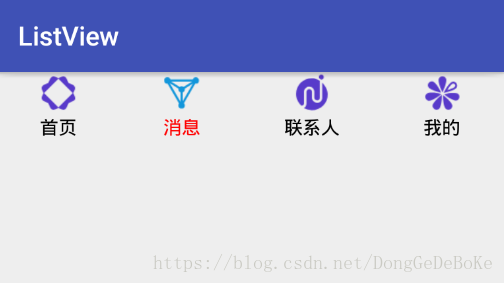
效果如下:
是不是越來越完善了呢,對的現在已經完成了一大步了。
第五步:也是最重要的一步了,導航欄的作用是什麼,大家都知道是用於使用者單擊跳轉到其他頁面的,導航欄一般在Fragment和Activity中都會使用,那首先就是如何才能在Fragment使用呢?
首先就是修改activity的xml檔案,加入幀佈局
<?xml version="1.0" encoding="utf-8"?>
<LinearLayout
  xmlns:android="http://schemas.android.com/apk/res/android"
  xmlns:tools="http://schemas.android.com/tools"
  android:layout_width="match_parent"
  android:layout_height="match_parent"
  tools:context="com.listview.MainActivity"
  android:orientation="vertical">
  <FrameLayout
    android:id="@+id/frameLayout"
    android:layout_width="match_parent"
    android:layout_height="wrap_content"
    android:layout_weight="1">
  </FrameLayout>
  <com.listview.NavFootView
    android:layout_width="match_parent"
    android:layout_height="wrap_content"
    android:id="@+id/container"
    android:orientation="horizontal">
  </com.listview.NavFootView>
</LinearLayout>
然後就是修改之前的一個方法,就是新增資料的那個方法,加入能夠新增Fragment的功能,就是多了一個物理資源的儲備.
   //新增item
    public NavFootView addItem(String title, int icBefore, int icAfter, Fragment fragment) {
        titleList.add(title);
        icBeforeMap.put(title, icBefore);
        icAfterMap.put(title, icAfter);
        fragmentMap.put(title, fragment);
        return this;
    }
再新建處理跳轉的方法和設定Fragment佈局id的方法
    //跳轉頁面
    private void switchFragment(String title) {

    }
     public void setFrameLayoutId(int frameLayoutId){
        this.frameLayoutId = frameLayoutId;
    }
處理跳轉的方法:
  private Fragment currentFragment = null;
    //跳轉頁面
    private void switchFragment(String title) {
        Fragment fragment = fragmentMap.get(title);
        //開啟事務
        FragmentTransaction fragmentTransaction = ((Activity) context).getFragmentManager()
            .beginTransaction();
        if (fragment.isAdded()) {
            if (currentFragment != null) {
                fragmentTransaction.hide(currentFragment).show(fragment);
            } else {
                fragmentTransaction.show(fragment);
            }
        } else {
            if (currentFragment != null) {
                fragmentTransaction.hide(currentFragment).add(frameLayoutId, fragment);
            } else {
                fragmentTransaction.add(frameLayoutId, fragment);
            }
        }
        currentFragment = fragment;
        fragmentTransaction.commit();
    }
好了到這裡,如果僅僅是使用,現在已經可以使用了,現在先貼出全部的程式碼:
首先貼出導航欄的程式碼
public class NavFootView extends LinearLayout {
    public NavFootView(Context context) {
        super(context);
        this.context = context;
    }
    public NavFootView(Context context, @Nullable AttributeSet attrs) {
        super(context, attrs);
        this.context = context;
    }
    public NavFootView(Context context, @Nullable AttributeSet attrs, int defStyleAttr) {
        super(context, attrs, defStyleAttr);
        this.context = context;
    }
    //點選之前的圖示
    private Map<String, Integer> icBeforeMap = new HashMap<>();
    //點選之後的圖示
    private Map<String, Integer> icAfterMap = new HashMap<>();
    //儲存標題
    private List<String> titleList = new ArrayList<>();
    //獲取控制元件的寬
    private int parentWidth;
    //獲取控制元件的高
    private int parentHeight;
    //儲存Fragment
    private Map<String, Fragment> fragmentMap = new HashMap<>();
    private Context context;
    //佈局id
    private int frameLayoutId;
    //獲取觸控的座標
    @Override
    public boolean onTouchEvent(MotionEvent event) {
        float x = event.getX();
        int index = (int) (x / (parentWidth / titleList.size()));
        selectPage(index);
        return super.onTouchEvent(event);
    }
    //獲取控制元件的寬高
    @Override
    protected void onMeasure(int widthMeasureSpec, int heightMeasureSpec) {
        //獲取控制元件的寬
        parentWidth = MeasureSpec.getSize(widthMeasureSpec);
        //獲取控制元件的高
        parentHeight = MeasureSpec.getSize(heightMeasureSpec);
        this.setMeasuredDimension(parentWidth, parentHeight);
        super.onMeasure(widthMeasureSpec, heightMeasureSpec);
    }
    //新增item
    public NavFootView addItem(String title, int icBefore, int icAfter, Fragment fragment) {
        titleList.add(title);
        icBeforeMap.put(title, icBefore);
        icAfterMap.put(title, icAfter);
        fragmentMap.put(title, fragment);
        return this;
    }
    //進行專案的建立--所有的操作放在這個地方
    public void build() {
        Iterator<String> iterator = titleList.iterator();
        while (iterator.hasNext()) {
            String next = iterator.next();
            this.addView(getTextView(next, icBeforeMap.get(next)));
        }
    }
    //獲取點選的是哪個
    public void selectPage(int index) {
        //獲得控制元件總共的數量
        int childCount = this.getChildCount();
        for (int i = 0; i < childCount; i++) {
            TextView textView = (TextView) this.getChildAt(i);
            String title = textView.getText().toString().trim();
            if (index == i) {
                //選中
                textView.setTextColor(Color.RED);
                setTextViewDrawable(textView, icAfterMap.get(title));
                switchFragment(title);
            } else {
                //未選中
                textView.setTextColor(Color.BLACK);
                setTextViewDrawable(textView, icBeforeMap.get(title));
            }
        }
    }
    //設定佈局id
    public void setFrameLayoutId(int frameLayoutId) {
        this.frameLayoutId = frameLayoutId;
    }
    private Fragment currentFragment = null;
    //跳轉頁面
    private void switchFragment(String title) {
        Fragment fragment = fragmentMap.get(title);
        //開啟事務
        FragmentTransaction fragmentTransaction = ((Activity) context).getFragmentManager()
            .beginTransaction();
        if (fragment.isAdded()) {
            if (currentFragment != null) {
                fragmentTransaction.hide(currentFragment).show(fragment);
            } else {
                fragmentTransaction.show(fragment);
            }
        } else {
            if (currentFragment != null) {
                fragmentTransaction.hide(currentFragment).add(frameLayoutId, fragment);
            } else {
                fragmentTransaction.add(frameLayoutId, fragment);
            }
        }
        currentFragment = fragment;
        fragmentTransaction.commit();
    }
    //建立一個TextView
    private TextView getTextView(String title, int drawableId) {
        TextView textView = new TextView(context);
        textView.setText(title);
        //這一步就是讓字型居中
        textView.setGravity(Gravity.CENTER);
        //給TextView設定佈局引數--第一個引數是寬,第二個引數是高,第三個引數是相當於 android:layout_weight="1"
        LayoutParams params = new LayoutParams(LayoutParams.WRAP_CONTENT, LayoutParams.MATCH_PARENT,
            1.0f);
        textView.setLayoutParams(params);
        textView.setTextColor(Color.BLACK);
        Drawable drawable = getResources().getDrawable(drawableId);
        //這句話一定要寫
        drawable.setBounds(0, 0, drawable.getMinimumWidth(), drawable.getMinimumHeight());
        // setCompoundDrawables(left ,top ,right, bottom);
        textView.setCompoundDrawables(null, drawable, null, null);
        return textView;
    }

    //給TextView設定圖片
    private void setTextViewDrawable(TextView textView, int drawableId) {
        Drawable drawable = getResources().getDrawable(drawableId);
        //這句話一定要寫
        drawable.setBounds(0, 0, drawable.getMinimumWidth(), drawable.getMinimumHeight());
        // setCompoundDrawables(left ,top ,right, bottom);
        textView.setCompoundDrawables(null, drawable, null, null);
    }
}
再貼出使用過程的程式碼:
public class MainActivity extends AppCompatActivity {
    NavFootView container;
    @Override
    protected void onCreate(Bundle savedInstanceState) {
        super.onCreate(savedInstanceState);
        setContentView(R.layout.activity_main);
        container = findViewById(R.id.container);
        container.setFrameLayoutId(R.id.fl_container);
        container.addItem("首頁", R.mipmap.ads1, R.mipmap.ads2, new HomeFragment());
        container.addItem("訊息", R.mipmap.datav1, R.mipmap.datav2, new Home2Fragment());
        container.addItem("聯絡人", R.mipmap.openad1, R.mipmap.openad2, new Home3Fragment());
        container.addItem("我的", R.mipmap.re1, R.mipmap.re2, new Home4Fragment());
        container.build();
    }
}
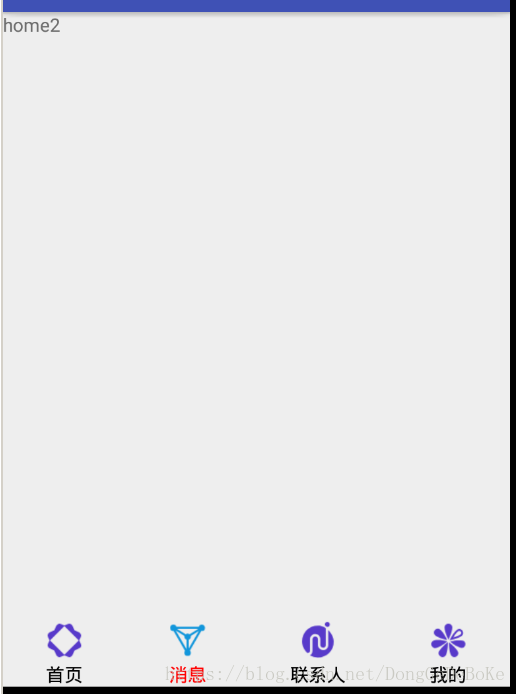
效果圖:
看到這麼短短几行的程式碼就完成了,動態導航欄的功能,還能實現跳轉是不是感覺很驚喜,對就是這麼簡單,相信大家在一步一步的過程也能學到一些東西。下邊就是對這個導航欄的加強,如果有興趣的話,那就跟我繼續奮鬥吧。
第六步:設定預設頁面,相信很多小夥伴都知道,比如首頁,開啟就會自動跳轉到首頁.
新建一個方法
    //設定預設跳轉頁面
    public void setDefaultIndex(int defaultIndex) {
        this.defaultIndex = defaultIndex;
    }
重寫build(),簡單的一句就實現了預設跳轉
 //進行專案的建立--所有的操作放在這個地方
    public void build() {
        Iterator<String> iterator = titleList.iterator();
        while (iterator.hasNext()) {
            String next = iterator.next();
            this.addView(getTextView(next, icBeforeMap.get(next)));
        }
        if (defaultIndex != -1) {
            selectPage(defaultIndex);
        }
    }
第七步:之前的fragment的跳轉已經完成了,那關於Activity的跳轉呢?
之後再更新,好累了,一口氣完成這麼多,下次再完善,程式碼,大家也可以自行進行修改,還有就是一些小夥伴,會在這裡報錯,大家注意Fragment有兩個版本,所以大家按需求匯入特定的包,使用也會有一些區別,就不一一介紹了,遇到問題自己百度解決吧!
//跳轉頁面
private void switchFragment(String title) {
Fragment fragment = fragmentMap.get(title);
//開啟事務
FragmentTransaction fragmentTransaction = ((Activity) context).getFragmentManager()
.beginTransaction();
if (fragment.isAdded()) {
if (currentFragment != null) {
fragmentTransaction.hide(currentFragment).show(fragment);
} else {
fragmentTransaction.show(fragment);
}
} else {
if (currentFragment != null) {
fragmentTransaction.hide(currentFragment).add(frameLayoutId, fragment);
} else {
fragmentTransaction.add(frameLayoutId, fragment);
}
}
currentFragment = fragment;
fragmentTransaction.commit();
}`
下邊貼上處全部的程式碼,分享給大家
import android.app.Activity;
import android.app.Fragment;
import android.app.FragmentTransaction;
import android.content.Context;
import android.graphics.Color;
import android.graphics.drawable.Drawable;
import android.support.annotation.Nullable;
import android.util.AttributeSet;
import android.view.Gravity;
import android.view.MotionEvent;
import android.widget.LinearLayout;
import android.widget.TextView;
import java.util.ArrayList;
import java.util.HashMap;
import java.util.Iterator;
import java.util.List;
import java.util.Map;
public class NavFootView extends LinearLayout {

    public NavFootView(Context context) {
        super(context);
        this.context = context;
    }

    public NavFootView(Context context, @Nullable AttributeSet attrs) {
        super(context, attrs);
        this.context = context;
    }

    public NavFootView(Context context, @Nullable AttributeSet attrs, int defStyleAttr) {
        super(context, attrs, defStyleAttr);
        this.context = context;
    }

    //點選之前的圖示
    private Map<String, Integer> icBeforeMap = new HashMap<>();
    //點選之後的圖示
    private Map<String, Integer> icAfterMap = new HashMap<>();
    //儲存標題
    private List<String> titleList = new ArrayList<>();
    //獲取控制元件的寬
    private int parentWidth;
    //獲取控制元件的高
    private int parentHeight;
    //儲存Fragment
    private Map<String, Fragment> fragmentMap = new HashMap<>();
    private Context context;
    //佈局id
    private int frameLayoutId;
    //預設跳轉的頁面
    private int defaultIndex = -1;
    //碎片處理
    private Fragment currentFragment = null;

    //獲取觸控的座標
    @Override
    public boolean onTouchEvent(MotionEvent event) {
        float x = event.getX();
        int index = (int) (x / (parentWidth / titleList.size()));
        selectPage(index);
        return super.onTouchEvent(event);
    }

    //獲取控制元件的寬高
    @Override
    protected void onMeasure(int widthMeasureSpec, int heightMeasureSpec) {
        //獲取控制元件的寬
        parentWidth = MeasureSpec.getSize(widthMeasureSpec);
        //獲取控制元件的高
        parentHeight = MeasureSpec.getSize(heightMeasureSpec);
        this.setMeasuredDimension(parentWidth, parentHeight);
        super.onMeasure(widthMeasureSpec, heightMeasureSpec);
    }

    //新增item
    public NavFootView addItem(String title, int icBefore, int icAfter, Fragment fragment) {
        titleList.add(title);
        icBeforeMap.put(title, icBefore);
        icAfterMap.put(title, icAfter);
        fragmentMap.put(title, fragment);
        return this;
    }

    //進行專案的建立--所有的操作放在這個地方
    public void build() {
        Iterator<String> iterator = titleList.iterator();
        while (iterator.hasNext()) {
            String next = iterator.next();
            this.addView(getTextView(next, icBeforeMap.get(next)));
        }
        if (defaultIndex != -1) {
            selectPage(defaultIndex);
        }
    }

    //獲取點選的是哪個
    public void selectPage(int index) {
        //獲得控制元件總共的數量
        int childCount = this.getChildCount();
        for (int i = 0; i < childCount; i++) {
            TextView textView = (TextView) this.getChildAt(i);
            String title = textView.getText().toString().trim();
            if (index == i) {
                //選中
                textView.setTextColor(Color.RED);
                setTextViewDrawable(textView, icAfterMap.get(title));
                switchFragment(title);
            } else {
                //未選中
                textView.setTextColor(Color.BLACK);
                setTextViewDrawable(textView, icBeforeMap.get(title));
            }
        }
    }

    //設定佈局id
    public void setFrameLayoutId(int frameLayoutId) {
        this.frameLayoutId = frameLayoutId;
    }

    //設定預設跳轉頁面
    public void setDefaultIndex(int defaultIndex) {
        this.defaultIndex = defaultIndex;
    }

    //跳轉頁面
    private void switchFragment(String title) {
        Fragment fragment = fragmentMap.get(title);
        //開啟事務
        FragmentTransaction fragmentTransaction = ((Activity) context).getFragmentManager()
            .beginTransaction();
        if (fragment.isAdded()) {
            if (currentFragment != null) {
                fragmentTransaction.hide(currentFragment).show(fragment);
            } else {
                fragmentTransaction.show(fragment);
            }
        } else {
            if (currentFragment != null) {
                fragmentTransaction.hide(currentFragment).add(frameLayoutId, fragment);
            } else {
                fragmentTransaction.add(frameLayoutId, fragment);
            }
        }
        currentFragment = fragment;
        fragmentTransaction.commit();
    }

    //建立一個TextView
    private TextView getTextView(String title, int drawableId) {
        TextView textView = new TextView(context);
        textView.setText(title);
        //這一步就是讓字型居中
        textView.setGravity(Gravity.CENTER);
        //給TextView設定佈局引數--第一個引數是寬,第二個引數是高,第三個引數是相當於 android:layout_weight="1"
        LayoutParams params = new LayoutParams(LayoutParams.WRAP_CONTENT, LayoutParams.MATCH_PARENT,
            1.0f);
        textView.setLayoutParams(params);
        textView.setTextColor(Color.BLACK);
        Drawable drawable = getResources().getDrawable(drawableId);
        //這句話一定要寫
        drawable.setBounds(0, 0, drawable.getMinimumWidth(), drawable.getMinimumHeight());
        // setCompoundDrawables(left ,top ,right, bottom);
        textView.setCompoundDrawables(null, drawable, null, null);
        return textView;
    }

    //給TextView設定圖片
    private void setTextViewDrawable(TextView textView, int drawableId) {
        Drawable drawable = getResources().getDrawable(drawableId);
        //這句話一定要寫
        drawable.setBounds(0, 0, drawable.getMinimumWidth(), drawable.getMinimumHeight());
        // setCompoundDrawables(left ,top ,right, bottom);
        textView.setCompoundDrawables(null, drawable, null, null);
    }

}
import android.os.Bundle;
import android.support.v7.app.AppCompatActivity;

public class MainActivity extends AppCompatActivity {

    NavFootView container;

    @Override
    protected void onCreate(Bundle savedInstanceState) {
        super.onCreate(savedInstanceState);
        setContentView(R.layout.activity_main);
        container = findViewById(R.id.container);
        container.setFrameLayoutId(R.id.fl_container);
        container.setDefaultIndex(0);
        container.addItem("首頁", R.mipmap.ads1, R.mipmap.ads2, new HomeFragment());
        container.addItem("訊息", R.mipmap.datav1, R.mipmap.datav2, new Home2Fragment());
        container.addItem("聯絡人", R.mipmap.openad1, R.mipmap.openad2, new Home3Fragment());
        container.addItem("我的", R.mipmap.re1, R.mipmap.re2, new Home4Fragment());
        container.build();
    }
}
簡單方便的動態導航欄就完成了,謝謝大家支援,後續會跟大家分享更多的東西.