
Angular7教程-03-Angular常用操作(上)
本節來介紹angular中的操作以及TypeScript語法的簡單介紹。關於TypeScript語法的更為詳細的內容,打算在整個angular教程結束後再單獨介紹。
0. 安裝所需要的外掛及配置外掛
安裝bootstrap
進入專案目錄,使用以下命令安裝:
cd media
npm install bootstrap --save
然後在angular.json配置檔案中新增樣式的引用。
"styles": [
           "src/styles.css",
           "./node_modules/bootstrap/dist/css/bootstrap.min.css"
            ]
安裝jquery
cd media
npm install jquery --save
在angular.json中引入jquery:
"scripts": ["./node_modules/jquery/dist/jquery.min.js"]
1. angular中新建一個元件
現在我們在專案中新建一個名稱為article的元件,由於手動建立元件比較麻煩,所以我們使用angular提供的angular cli工具來建立(手動建立的方法附在文末,不感興趣的童鞋不用看),命令如下:
ng generate component article也可使用命令的簡寫方式:
ng g c article
src/app目錄下會多出一個article資料夾,裡面angular cli工具幫我們建立的4個檔案,article.component.css, article.component.html,article.component.spec.ts, article.component.ts。同時,還會更新ng.modules.ts這個檔案。
2. 引用元件
在根元件的模板檔案app.component.html中加入<app-article></app-article>即可引用我們剛剛新建的article元件,app.component.html程式碼:
<div style="text-align:center">
    <h1>
        Welcome to {{ title }}!
    </h1>
</div>
<!-- 下面是對article元件的引用 -->
<app-article></app-article>
顯示效果如下:
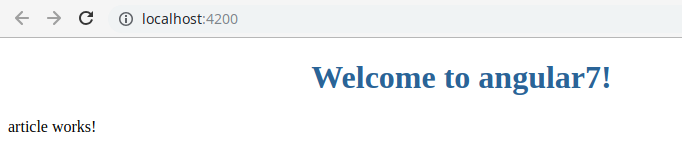
表明我們的article元件引用成功。
3. 元件的巢狀引用
新建一個operator元件,然後在article元件中引入operator。article.component.html模板檔案內容:
<p>
  article works!
</p>
<!--  引用operator元件 -->
<app-operator></app-operator>
頁面重新整理後顯示如下:

引用關係如下: 根元件(app)引用了article,article又引用了operator.
4.元件選擇器的其它定義方式
元件選擇器的定義還可以通過屬性和類的方法來定義,如下所示:
@Component({
  //selector: 'app-article',
  //selector: '[app-article]', //屬性方式
    selector: '.app-article',//類方式
  templateUrl: './article.component.html',
  styleUrls: ['./article.component.css']
})
則引用元件的方式也需要發生改變:
<!--屬性方式來引用-->
<div app-article></div>

<!--類方式引用-->
<div class="app-article"></div>
5. 資料模型定義以及資料繫結
將業務邏輯中的資料通過插值表示式顯示在模板檔案,即html頁面上,或者將html頁面上的事件傳輸到業務邏輯。
插值表示式
首先我們在article頁面上新增需要顯示的內容:
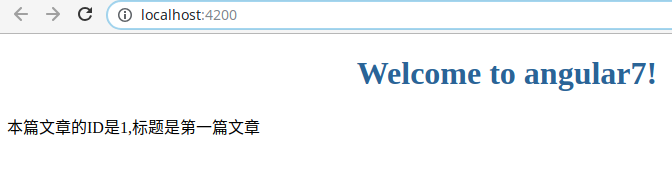
<p>
  本篇文章的ID是{{id}},標題是{{title}}
</p>
同時我們在article.component.ts中定義id和title。
export class ArticleComponent implements OnInit {
 id:number = 1;
 title:string = "第一篇文章";
}
頁面顯示效果如下:
屬性繫結
在article.component.html中定義如下內容:
文章ID:<input type="text" [value]="id" >
文章標題:<input type="text" [value]="title">
頁面顯示效果如下:

插值運算
article.component.html程式碼:
{{ 5 + 3}}, {{ "a" + "b"}}頁面顯示效果:
事件繫結
article.component.ts中設定一個狀態,然後新建一個函式供頁面呼叫,在函式中改變這個狀態。
export class ArticleComponent implements OnInit {
 status = "隱藏狀態";
 changeStatus(){
     this.status = "顯示狀態";
 }
}
article.component.html中定義一個按鈕並繫結changeStatus()這個函式。
{{status}}
<button class="btn btn-info btn-sm" (click)="changeStatus()">改變狀態</button>
按鈕單擊前和單擊後頁面顯示效果分別如下:


事件繫結傳遞資料
現在我們實現當我們在input框中輸入內容的時候,內容同時顯示在輸入框的下面,article.component.html檔案內容:
<input type="text" (keyup) = "updateContent($event)"><br>
{{content}}
article.component.ts中共定義變數以及函式:
content = "";
updateContent(event:any){
    this.content = event.target.value;
}
頁面顯示效果:

延伸閱讀: 手動建立元件
- 元件建立
在app目錄下新建一個資料夾,名字叫article.在article目錄下新建article.componnent.ts的空白檔案,注意檔名字的命名,article是元件名稱,component表示型別,即元件,.ts則是檔案的字尾名,檔案內容如下所示:
import {Component} from '@angular/core';

@Component({
    selector: 'app-article',
    templateUrl:'./article.component.html'
})

export class ArticleComponent{

}
檔案內容說明:
第一行從@angular/core中引入Component裝飾器,然後建立一個普通的類ArticleComponent,並用@Component裝飾它,在@Component中,分別定義元件的選擇器名稱和模板檔案。
然後在article中新建模板檔案article.component.html檔案內容與普通html檔案無異。
- 元件的註冊
開啟app目錄下的app.modules.ts檔案,檔案內容如下:
import { BrowserModule } from '@angular/platform-browser';
import { NgModule } from '@angular/core';

import { AppRoutingModule } from './app-routing.module';
import { AppComponent } from './app.component';

@NgModule({
  declarations: [
    AppComponent
  ],
  imports: [
    BrowserModule,
    AppRoutingModule
  ],
  providers: [],
  bootstrap: [AppComponent]
})
export class AppModule { }
檔案內容的說明:
- 上面import部分是模組以及裝飾器的引入。
- declarations部分是宣告模組的內部成員。
- imports部分是匯入其它模組。
- providers指定應用程式根級別需要使用的service。
- bootstrap是app啟動的根元件。
- export控制將那些內部成員暴露給外部使用。
修改檔案內容,新增import {ArticleComponent} from './article/article.component';將模組引入,然後在declarations中新增ArticleComponent. 修改後的內容如下所示:
//...省略部分程式碼...
import { AppComponent } from './app.component';
import {ArticleComponent} from './article/article.component';  //step1 引入

@NgModule({
  declarations: [
    AppComponent,
    ArticleComponent      //step2 宣告
  ]
})
//...省略部分程式碼...