
第21天 常用模組二
阿新 • • 發佈:2018-11-11
介紹的模組
pickle
shelve
json
xml
configparser
人生三問
序列化是什麼
  序列化就是將記憶體中資料格式轉換成中間物件,儲存到硬碟上面或者是傳輸到網路上面。
  反序列化就是將硬碟或者網路中傳輸的中間物件轉換成記憶體中資料格式的過程。

為什麼要有序列化
1. 為了持久化儲存檔案
  資料是為了使用的,當我們的電腦斷電之後資料就丟失是一件讓人無法忍受的事情,因此我們要儲存檔案,儲存的
方式有兩種,一種就是自己開啟檔案寫入檔案,一種就是使用模組給我們儲存檔案。
2. 為了跨平臺進行互動
  之前我們在寫atm程式的時候,為了持久儲存資訊都是自己通過open開啟檔案,然後將我們自己的資料轉換成字串的形式
寫入檔案中,當我們需要的時候重新按照一定的格式翻譯成我們想要的樣子展現給我們。這樣做不僅麻煩,而且跨平臺性很差,因為
無論我們把資料傳給誰,我們都要告訴對方我這個資料是怎麼儲存的,你要怎麼去獲取,可能對方就算是獲取了你的資料,也不一定
用它的語言去得到想要的值,或者說需要花費很長的時間去解析你的資料才能真正得到想要的資料。
  為了解決這樣的問題,有了序列化。
  一天,有一個人告訴大家,以後你們都不要隨便的儲存資料了,都按照我的格式來儲存,也都按照我的格式來解析好了,因此
網路上就出現了各式各樣的序列化操作方法。歸根結底就是一種通用的標準來來儲存資料,方便其他人進行解析的。

怎麼使用序列化
  序列化的方法有很多種,python中自帶的有pickle, shelve模組,通用的模組有xml和json。接下來我來詳細的
介紹一下怎麼使用這幾個模組。
模組一:pickel
方法1: dumps和loads
import pickle user = { 'name': 'alex', 'sex': 'male', 'age': 32 } # 序列化 將記憶體中的格式轉換成位元組流之後儲存到檔案中 with open('a.kle','wb') as f: f.write(pickle.dumps(user)) # 反序列化 將檔案中的位元組流讀取到記憶體轉換成想要的格式with open('a.kle', 'rb') as f: res = pickle.loads(f.read()) print(res)
方法2: dump和load
# dump和load封裝了檔案的write和read方法
# 使得模組使用起來更加的方便
# 序列化
with open('a', 'wb') as f:
    pickle.dump(user, f)
# 反序列化
with open('a', 'rb') as f:
    print(pickle.load(f))
模組二:shevel
import shelve# shelve只有一個open函式 # 開啟檔案,檔案可以存在也可以不存在, f = shelve.open(r'shelve.txt', writeback=True) # 在關閉之前可讀可寫引數writeback=True代表的是否可以進行修改 # f['user'] = {'name': 'hu'} print(f['user']) f['user']['sex'] = 'male' f.close()
通用的模組
模組三:json
json是什麼?
json是一種輕量級的資料交換語言。簡單清晰的層次結構使得它更易於人們的閱讀以及機器的解析。能夠有效的提高網路傳輸速率。
'''
js中的資料型別和python中資料型別的一一轉換關係

js中的資料型別                python中的資料型別
{}                            dict
[]                            list
int/float                     int/float
string""雙引號                str
true/false                    True/False
null                          None


json格式的語法規範:
    最外層通常是一個字典或者列表
    字串要用雙引號
    你可以在裡面套用任意多的層次
'''
方法一:dumps, loads
# 和pickle的使用方法是一樣的,如果是dumps和loads要通過f.write和f.readfang方法輔助
import json
user = {
    'name': 'hu',
    'sex': 'male',
    'age': 123
}

# 序列化
with open('a.json', 'wt', encoding='utf-8') as f:
    f.write(json.dumps(user))

# 反序列化
with open('a.json', 'rt', encoding='utf-8') as f:
    print(json.loads(f.read()))
方法二:dump, load
with open('a.json', 'wt', encoding='utf-8') as f:
    json.dump(user, f)

with open('a.json', 'rt', encoding='utf-8') as f:
    print(json.load(f))
模組四:xml
xml是什麼
    xml是一種可擴充套件的標記語言,它制定了一種文字內容的書寫規範,使得計算機能夠很輕鬆的識別這些資料。用於多個平臺之間
的資料交換。和json類似。

xml語法標準
  1. xml的每一個標籤必須有一個結束標籤
  2. 標籤可以巢狀使用
  3. 所有的屬性必須有值
  4. 所有的值必須是加上雙引號
  5. 一個標籤中可以同時表示起始和結束標籤 eg:<百度百科詞條/>
eg:標籤是由
  <a>
    <b name="hu">
    <b/>
  <a/>
'''
xml.etree.ElementTree as ET
tree = ET.parse('b.xml')
root = tree.getroot()
tree的方法:
步驟一:獲得根標籤
    parse     解析一個xml文件獲得一個物件
    getroot   根據獲得得物件獲得當前xml文件的跟標籤
步驟二:根據根標籤找子標籤
    iter      全xml文件去尋找標籤
    find      找到當前層的一個標籤
    findall   找到當前層的所有標籤
    getchildren   獲得當前標籤的兒子標籤
步驟三:找到子標籤更改標籤的內容:
    text       標籤文字,必須是葉子節點
    attrib     屬性值
    set()      設定屬性
步驟四:刪除該標籤
    remove     刪除當前節點
步驟五:新增標籤
    建立節點:
        year2 = ET.Element('year2')
        # 設定節點的text
        year2.text = '新年'
        # 設定節點的屬性
        year2.attrib = {'updated': 'yes'}

步驟六:一系列操作完成之後寫入檔案:
    tree.write()
    ET.dump()  把xml物件轉換成一個文字
'''
案例:


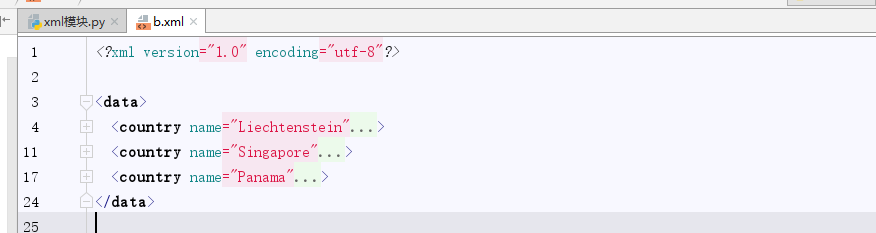
<?xml version="1.0"?>
<data>
    <country name="Liechtenstein">
        <rank updated="yes">2</rank>
        <year>2008</year>
        <gdppc>141100</gdppc>
        <neighbor name="Austria" direction="E"/>
        <neighbor name="Switzerland" direction="W"/>
    </country>
    <country name="Singapore">
        <rank updated="yes">5</rank>
        <year>2011</year>
        <gdppc>59900</gdppc>
        <neighbor name="Malaysia" direction="N"/>
    </country>
    <country name="Panama">
        <rank updated="yes">69</rank>
        <year>2011</year>
        <gdppc>13600</gdppc>
        <neighbor name="Costa Rica" direction="W"/>
        <neighbor name="Colombia" direction="E"/>
    </country>
</data>

xml資料
xml檔案內容
方法一:parse獲得根標籤
import xml.etree.ElementTree as ET
# 解析xml文件為一顆樹,如果此時報錯,說明xml文件有問題,到xml格式化網站進行格式化就可以了
tree = ET.parse('b.xml')
# 根據一棵樹先得到樹根(也就是根標籤)
root = tree.getroot()
方法二:遍歷當前一層標籤
# 遍歷xml文件
for child in root:
    print('=====》', child.tag, child.attrib, child.attrib['name'])
    # for i in child:
    #     print(i.tag, i.attrib, i.text)

結果:
=====》 country {'name': 'Liechtenstein'} Liechtenstein
=====》 country {'name': 'Singapore'} Singapore
=====》 country {'name': 'Panama'} Panama
方法三:iter全文件查詢當前標籤
# iter方法代表全文件檢視標籤名為year的節點,然後迴圈遍歷
for node in root.iter('year'):
    # 獲得當前節點的標籤名,屬性和文字
    print(node.tag, node.attrib, node.text)

# 結果:
# year {} 2008
# year {} 2011
# year {} 2011
方法四:修改節點的值以及新增屬性
for node in root.iter('year'):
    # 把年加一
    new_year = int(node.text) + 1
    # 然後重新賦值給當前節點
    node.text = str(new_year)
    # 給節點node設定了兩個屬性值,updatted='yes', 'version' = 1.0
    node.set('updated', 'yes')
    node.set('version', '1.0')
# 把這棵樹重新寫入檔案中
tree.write('b.xml')
方法五:刪除節點
# # rank的值如果大於50,就刪除當前country節點
# # 查詢當前層內的所有country節點
# for country in root.findall('country'):
#     # 查抄當前country節點下的rank節點並返回他的值
#     rank = int(country.find('rank').text)
#     # 如果rank的值大於50, 則刪除
#     if rank > 50:
#         root.remove(country)
方法六:新增節點
for country in root.findall('country'):
    for year in country.findall('year'):
        # 如果大於2000則新增節點
        if int(year.text) > 2000:
            # 建立一個節點,tag = 'year2'
            year2 = ET.Element('year2')
            # 設定節點的text
            year2.text = '新年'
            # 設定節點的屬性
            year2.attrib = {'updated': 'yes'}
            # 把建立好的節點加入
            country.append(year2)
# 然後寫入xml檔案中
tree.write('b.xml')
方法七:建立一個xml文件
# 通過Element建立一個節點
new_xml = ET.Element('namelist')
# 通過SubElement建立子節點
name = ET.SubElement(new_xml, 'name', attrib={'enrolled': 'yes'})
age = ET.SubElement(new_xml, "age", attrib={'checked':'no'})
sex = ET.SubElement(new_xml, 'sex')
sex.text = '33'
# 通過Element建立一個節點
name2 = ET.SubElement(new_xml, 'name2', attrib={'enrolled': 'no'})
age = ET.SubElement(new_xml, 'age', attrib={'enrolled': 'no'})
age.text = '19'
# 生成文件物件
et = ET.ElementTree(new_xml)
# 把生成的文件物件寫入到text檔案中
et.write('text.xml', encoding='utf-8', xml_declaration=True)
# 列印生成的格式物件
ET.dump(new_xml)
模組五:configparser
'''
配置檔案解析模組
配置檔案的格式:
    1. 分割槽section
    2. 選項option
    eg: 下面的格式有兩個分割槽有是三個選項
        [user_list]  # 以[]包含的就是分割槽
            username = hu   # key=value形式的是選項
            password = 123
        [db]
            file_path = 'C://user'
'''
'''
config = configparser.ConfigParser()
config.read('')
檢視:
1. 查section
    config.sections()
2. 查options
    config.items()
    config.options()
    config.get('section', 'k1')
    config.getint('section', 'k1')
    config.getfloat('section', 'k1')
    config.getboolean('section', 'k1')

刪除:
1. 刪除section
    config.remove_section()
2. 刪除option
    config.remove_option()

新增:
1. 新增section
    config.add_section()
2. 新增option
    config.set()

寫入:
    config.write()
'''
案例:
配置檔案內容:
# 註釋1
; 註釋2

[section1]
k1 = v1
k2:v2
user=egon
age=18
is_admin=true
salary=31

[section2]
k1 = v1
conf.cfg
檢視方法
# config = configparser.ConfigParser().read('conf.cfg', encoding='utf-8')

config = configparser.ConfigParser()
config.read('conf.cfg', encoding='utf-8')

# 查
print(config.sections())
print(config.items('section1'))
print(config.options('section1'))
print(config.get('section1', 'k1'))
print(config.getint('section1', 'age'))
print(config.getfloat('section1', 'age'))
# print(config.getboolean('section1', 'is_admin'))

# 改
# config.remove_section('section2')  # 刪除的是整個分割槽
config.remove_option('section2', 'k1')
print(config.has_section('section2'))
print(config.has_option('section2', 'sje'))
# config.add_section('egon')
config.set('egon','name', 'egon')
config.set('egon', 'age', '18')
config.write(open('conf.cfg', 'w'))