微信小程式專案實戰【二】-------實現授權登入
阿新 • • 發佈:2018-11-11
這節的內容主要根據專案中的功能模組做一個詳細的講解,專案結構圖如下

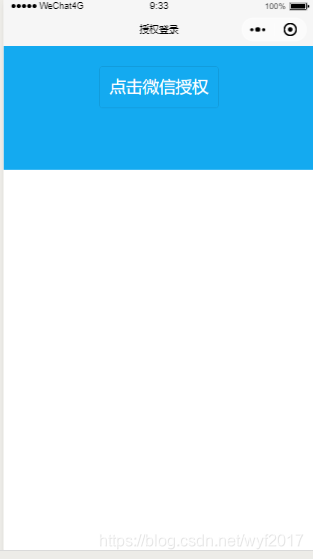
【授權登入效果圖展示】
 點選授權登入切換到這個介面
【解析】
對於現在大多數小程式都需要一個授權登入的功能模組,為什麼呢,因為現在小程式很多功能需要獲取到你的頭像、暱稱等,比如論壇,你釋出自己的評論之後應當顯示你自己的名稱以及頭像,這個週末獲取呢,當然是通過授權登入來實現呀。當我們點選授權之後我們便可以看到控制檯如下資訊
![]()
【程式碼展示】
//login.xml
<view class="userinfo">
  <button wx:if="{{!hasUserInfo && canIUse}}" open-type="getUserInfo" bindgetuserinfo="getUserInfo" class="userinfo-btn" catchtap='onPostTap'> 點選微信授權 </button>
  <block wx:else>
    <image bindtap="bindViewTap" class="userinfo-avatar" src="{{userInfo.avatarUrl}}" background-size="cover"></image>
    <text class="userinfo-nickname">{{userInfo.nickName}}</text>
  </block>
</view>
//login.wxss
.userinfo {
  display: flex;
  flex-direction: column;
  align-items: center;
  background: #14aaf0;
   width: 100%;
  height: 300rpx;
}
.userinfo-btn{
  margin-top: 50rpx;
  background: none !important;
  color: #fff !important;
  font-size: 40rpx;
}
.userinfo-avatar {
  width: 108rpx;
  height: 108rpx;
  margin: 40rpx;
  border-radius: 50%;
}
.userinfo-nickname {
  color: #fff;
}
//login.json
{
  "navigationBarTitleText": "授權登入"
}
//login.js var app = getApp() var userInfo = null; Page({ globalData: { appid: '******', //appid需自己提供 secret: '******', //secret需自己提供 }, data: { userInfo: {}, hasUserInfo: false, canIUse: wx.canIUse('button.open-type.getUserInfo') }, onLoad: function() { var that = this; if (this.globalData.userInfo) { this.setData({ userInfo: app.globalData.userInfo, hasUserInfo: true }) } else if (this.data.canIUse) { // 由於 getUserInfo 是網路請求,可能會在 Page.onLoad 之後才返回 // 所以此處加入 callback 以防止這種情況 this.userInfoReadyCallback = res => { this.setData({ userInfo: res.userInfo, hasUserInfo: true }) } } else { // 在沒有 open-type=getUserInfo 版本的相容處理 wx.getUserInfo({ success: res => { this.globalData.userInfo = res.userInfo this.setData({ userInfo: res.userInfo, hasUserInfo: true }) } }) } //登入憑證校驗。通過 wx.login() 介面獲得臨時登入憑證 code 後傳到開發者伺服器呼叫此介面完成登入流程。 wx.login({ success: function(res) { if (res.code) { console.log("res.code:" + res.code); var d = that.globalData; //這裡儲存了appid、secret、token串 var l = 'https://api.weixin.qq.com/sns/jscode2session?appid=' + d.appid + '&secret=' + d.secret + '&js_code=' + res.code + '&grant_type=authorization_code'; wx.request({ url: l, data: {}, method: 'GET', success: function(res) { var obj = {}; obj.openid = res.data.openid; console.log("openid:" + obj.openid); console.log("session_key:" + res.data.session_key); obj.expires_in = Date.now() + res.data.expires_in; wx.setStorageSync('user', obj); //儲存openid } }); } else { console.log('獲取使用者登入態失敗!' + res.errMsg) } } }); }, getUserInfo: function(e) { console.log(e) this.globalData.userInfo = e.detail.userInfo this.setData({ userInfo: e.detail.userInfo, hasUserInfo: true }) }, onPostTap: function(event) { //授權登入之後實現頁面之間的跳轉 wx.navigateTo({ url: "../welcome/welcome" }) } })
【總結】
以上就是授權登入模組的基本程式碼,程式碼裡面都有相應的註釋,我覺得大家都可以看懂的,有什麼不懂之處可以在下面留言。
